How to Fix Gurgling Pipes: Step-by-Step Homeowner’s Guide to Quiet Drains
Gurgling pipes are a sign of trapped air, partial clogs, or vent blockages that can lead to slow drains and unpleasant odors. To fix this issue, homeowners should inspect plumbing traps, use a plunger for sinks, and snake out stubborn clogs. Additionally, check roof vents for debris or nests, and clear minor obstructions without harsh chemicals. If gurgling persists across multiple fixtures, it may indicate mainline problems that require a professional’s camera inspection or hydro-jetting. Follow the systematic steps outlined below to quiet your drains and prevent future occurrences.
Why Pipes Gurgle and When It Matters
A gurgling sound typically indicates air trapped in the drain line, partial blockages, or venting problems that affect water flow.
It most often occurs at sinks, tubs, toilets, and near the main drain or soil stack where vents or traps are compromised.
While occasional gurgles may signal a minor clog, persistent or worsening noise—especially paired with slow drains, backups, or sewage odors—can indicate a serious blockage or vent failure requiring prompt attention.
What a gurgling sound indicates about your plumbing
Listen for the telltale gurgle: it signals air trapped in the drain system or slow-moving water that can’t vent properly. Such sounds indicate partial blockages, blocked vent stacks, or compromised trap seals allowing air backflow.
Persistent gurgling often precedes backups or sewer gas entry. Homeowners researching how to fix gurgling pipes should assess vents, traps, and drains promptly to prevent escalation.
Common locations where gurgling occurs (sinks, tubs, toilets, main drain)
Gurgling commonly manifests at fixtures where water drains most often—kitchen and bathroom sinks, bathtubs and showers, toilets, and at the building’s main sewer line—because these locations concentrate flow and rely on vents and traps to regulate air.
Sinks and tubs gurgle with slow drainage or partial blockage; toilets when shared vents struggle; mainline gurgling suggests broader venting or obstruction affecting multiple fixtures.
When gurgling signals an emergency vs. a minor issue
Often the sound indicates minor airflow issues from traps or partial clogs, but it can also warn of serious blockages or sewer backups that require immediate action.
Distinguish urgency by frequency, accompanying odors, multiple fixtures affected, slow drains, or sewage odors.
Intermittent gurgles with full drainage suggest traps or vents; persistent, worsening gurgling with backups demands shutting off water and calling a plumber promptly.
Quick Diagnosis: How to Identify the Source of Gurgling
A focused, step-by-step checklist helps pinpoint where a gurgle is coming from, starting with individual fixtures and moving to main drains.
Simple tools and tests — running water, listening with a ruler or stethoscope, and temporarily blocking vents — can reproduce or isolate the sound.
Note concurrent signs such as slow drains, backups, or sewage odors, which indicate more serious blockages or venting failures.
Step-by-step checks to localize the noise
Where does the sound come from, and when does it occur? The homeowner inspects fixtures sequentially: bathroom, kitchen, laundry, then outdoors.
Note timing—during flushing, running water, or idle. Listen at vents, near traps, and at main stack.
Check multiple floors to track vertical propagation. Record locations and times to narrow likely piping sections before targeted repairs or tests.
Tools and simple tests to reproduce or isolate the gurgle
Several basic tools and a handful of simple tests can quickly reproduce or isolate a gurgling sound to a specific fixture or pipe section.
Use a flashlight, adjustable wrench, screwdriver, bucket and a phone to record.
Run fixtures one at a time, listen at vents and traps, plug and release sink stoppers, and compare noise timing with toilet flushes to pinpoint the source.
Signs of related problems to watch for (slow drains, backups, odors)
Many homeowners notice additional clues—slow drains, frequent backups, or sewer-like odors—before a gurgling pipe problem is fully apparent.
These signs indicate vent blockages, partial mainline clogs, or failing traps. Slow sink draining, toilet overflow during showers, and persistent rotten smells warrant prompt inspection.
Note whether issues appear in one fixture or multiple; widespread symptoms suggest main sewer or venting failures needing professional attention.
Immediate DIY Fixes You Can Try Right Now
The homeowner can start with simple, immediate steps such as clearing and inspecting P-traps, using proper plunging techniques on sinks and tubs, and running a plumber’s snake through accessible drains.
If chemical options are considered, instruction on safe use of drain cleaners and enzymatic alternatives is provided to minimize pipe damage.
A basic venting test is also described to determine whether a blocked vent, rather than a local clog, is causing the gurgling.
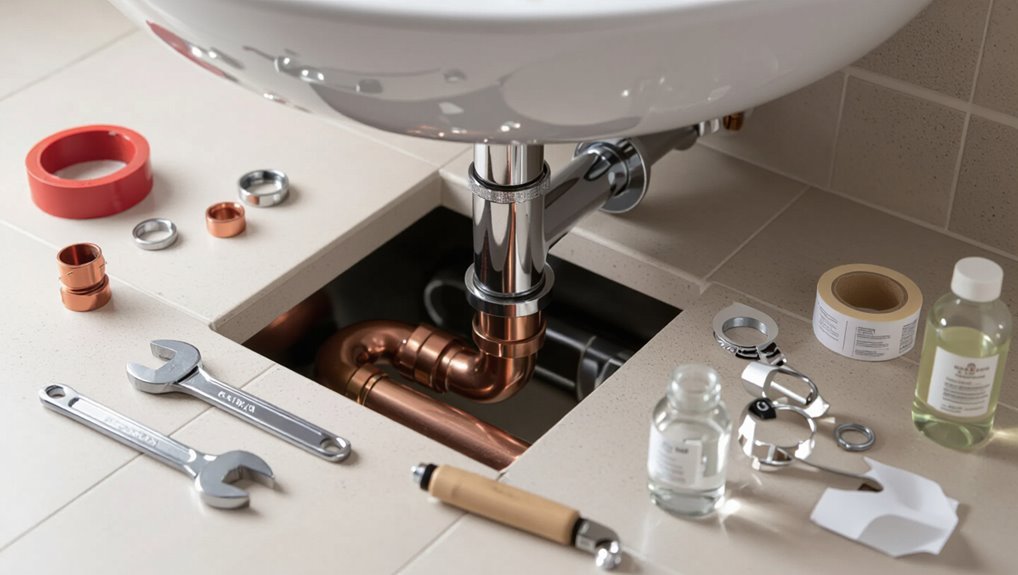
Clearing the trap and checking P-traps
Start by removing and inspecting the P-trap beneath the sink, since accumulated debris or a partial blockage there often causes gurgling.
Empty contents into a bucket, clear sludge and hair, and check washers and slip nuts for leaks.
Reassemble hand-tight, run water to confirm flow and listen for gurgling.
If noise persists, the issue may lie farther down the drain line.
Plunging techniques for sinks and tubs
Grab a plunger designed for the fixture—cup-shaped for sinks, flange-style for tubs and toilets—and position it over the drain to form a tight seal before applying firm, controlled strokes.
Maintain steady pressure, 10–15 vigorous pumps, then break the seal to test flow. Repeat up to three times, clearing splash guards or overflow openings first.
Dry area, run hot water to confirm improvement.
Using a plumber’s snake for basic clogs
Feed a plumber’s snake into the drain to reach and dislodge blockages that plunging couldn’t clear. Rotate the crank while advancing, feel for resistance, then snake through or hook the obstruction. Withdraw slowly, removing debris.
For sinks, remove the stopper to improve access. Clean the snake after use and test flow.
If resistance persists deep in the line, consider professional inspection.
Safe use of drain cleaners and enzymatic alternatives
When chemical drain cleaners are considered, recognize both their short-term effectiveness and potential hazards: harsh caustic or acidic formulas can dissolve organic clogs quickly but may damage pipes, fixtures, and septic systems if misused.
Use protective gear, follow label directions, avoid mixing products, and ventilate.
Prefer enzymatic treatments for routine maintenance: they act slowly, are pipe‑safe, and help biodegrade organic buildup without harsh chemicals.
Venting tests: how to check if a blocked vent is the culprit
How can one tell if a blocked vent is causing gurgling pipes? The homeowner listens for gurgling when fixtures drain, then runs simultaneous water tests: flush toilet while running sink.
If noises intensify, venting is suspect. Inspect roof vent for debris with binoculars or visual check.
Temporarily open adjacent vent (if present) or call a pro to clear stubborn blockages safely.
Step-by-Step Repair Guide for Venting Problems
The section explains how plumbing vents equalize pressure and why a blocked vent leads to slow drains and gurgling.
It outlines safe inspection of roof vents, common obstructions (leaves, nests, ice), and the basic tools and precautions for clearing them.
It also covers when to evaluate adding or upgrading venting, comparing air admittance valves with traditional vent stacks.
How plumbing vents work and why blockage causes gurgling
A single clogged vent can disrupt an entire household drainage system by preventing air from entering the pipes, which forces water to siphon and creates gurgling noises as trapped air moves through traps and drains.
Vents equalize pressure, allow smooth flow, and prevent sewer gas. Blockages — leaves, bird nests, ice — restrict airflow, cause intermittent siphoning, slow drainage and gurgling until cleared.
Inspecting roof vents safely
Before climbing onto the roof, gather the required safety gear—sturdy ladder, nonslip shoes, work gloves, safety glasses, and a harness if the slope is steep—and check weather conditions to avoid wet or windy days.
Using two-person support, approach vents cautiously, walk only on structural areas, and inspect flashing, pipe collars, and vent caps for cracks, rust, or loose seals.
Note any damage for repair.
Clearing vent obstructions (leaves, bird nests, ice) tools and precautions
Begin by assembling the right tools—long-handled brush, telescoping pole, flexible plumber’s snake, ladder stabilizer, work gloves, eye protection, and a small pry bar—then confirm calm weather and secure ladder placement.
Approach vents carefully, remove loose debris, dislodge nests with gentle probing, clear ice only after thawing, and avoid forcing hardware.
Inspect for damage and test airflow; stop and call a pro if unsafe.
When to add or upgrade venting (air admittance valves vs. traditional vents)
When existing vents prove inadequate—frequent gurgling, slow drains, or persistent sewer odors—deciding whether to add vents or upgrade to air admittance valves (AAVs) requires evaluating code restrictions, roof access, and the plumbing system’s layout.
Traditional vents suit full-system balance and exterior roof termination; AAVs work for localized fixtures where codes permit and roof work is impractical.
Prioritize code compliance, serviceability, and compatibility with system trap sizing.
Addressing Sewer Line and Main Drain Issues
When gurgling persists despite vent and trap checks, it may indicate a main sewer or drain blockage—signs include multiple fixtures backing up, slow drains, and sewage odors.
Clearing options range from mechanical snaking to professional hydro-jetting, and a sewer camera inspection is recommended when blockages recur or the cause is unclear.
If roots are found, repair choices include targeted excavation, pipe bursting, or cured-in-place lining depending on damage and budget.
Signs that the main sewer line is causing gurgling
If gurgling persists across multiple drains and intensifies after flushing or heavy water use, the main sewer line may be the source.
Homeowners should look for coordinated symptoms such as slow drainage in several fixtures, sewage odors near floor drains or the cleanout, and wet spots or sinkhole formation in the yard.
Additional signs include bubbling toilets, sewage backup during storms, and unexplained lush patches of grass.
Techniques for clearing mainline clogs (snaking, hydro-jetting)
Addressing mainline clogs requires targeted techniques that remove blockages without damaging the sewer pipe: mechanical snaking and hydro-jetting are the two primary professional methods used to restore flow.
- Snaking: augers cut and pull roots, grease, and solids.
- Hydro-jetting: high-pressure water blasts debris and scale.
- Pros/cons: snaking economical; jetting more thorough.
- Safety: trained operators prevent pipe damage and backups.
When a sewer camera inspection is warranted
How can a sewer camera inspection clarify persistent or recurring mainline problems that snaking or hydro-jetting alone cannot resolve?
A camera pinpoints blockage location, identifies collapsed pipe sections, offsets, intrusions, and non-degradable obstructions, and verifies cleanout access.
It guides targeted repairs, avoids unnecessary excavation, and documents conditions for technicians and homeowners, enabling informed decisions about diagnostics, repairs, or monitoring without assuming root-specific interventions.
Root intrusion and sewer line repair options
A sewer camera’s ability to reveal roots penetrating joints or cracks often determines the next steps for repair, since snaking or jetting only clears immediate obstructions without restoring pipe integrity. Options include mechanical cutting, chemical treatments, pipe lining, spot repairs, or full replacement depending on extent. Costs, disruption, and longevity guide choices.
| Option | When to use |
|---|---|
| Cutting | Minor intrusion |
| Chemical | Surface roots |
| Lining | Multiple small defects |
| Spot repair | Localized damage |
| Replace | Extensive collapse |
Fixes for Specific Fixtures
The guide now turns to fixture-specific fixes that commonly cause gurgling.
Kitchen sinks often gurgle from grease traps or failing garbage disposals, while bathroom sinks and tubs can gurgle when they share a partially blocked drain.
Toilets typically indicate vent or trap problems, and laundry or floor drains may need trap primers or attention to standby drains.
Kitchen sink gurgling grease traps and garbage disposals
Kitchen sink gurgling often stems from clogged grease traps or a malfunctioning garbage disposal that restricts airflow and drainage; addressing these fixtures directly can restore normal flow and reduce odors.
Inspect and clean the trap, removing congealed grease and debris.
Run the disposal with cold water, use enzyme cleaners periodically, check for clogs in trap inlet/outlet, and replace damaged seals or blades as needed.
Bathroom sink and tub gurgling shared drain issues
Often, bathroom sink and tub gurgling indicates a shared drain or venting problem where trapped air forces bubbles back through fixtures.
Homeowners should check for clogs in the common drain, clean pop-up stoppers, and inspect the vent stack for obstructions.
If plunging and snake cleaning fail, temporarily isolate fixtures by capping lines and call a plumber to assess shared trap configuration and vent repairs.
Toilet gurgling vent and trap problems
Why is a toilet gurgling when other fixtures are used?
A gurgling toilet often signals vent obstruction or a compromised trap seal. Blocked venting causes air to be drawn through the bowl; partial trap clogs create pressure imbalances.
Inspect roof vents, clear debris, and check for hair or waste in the trap.
Repair cracked traps or improper venting to restore proper airflow and seal.
Laundry and floor drains trap primers and standby drains
After addressing vent and trap issues that commonly make toilets gurgle, attention should turn to laundry and floor drains, where stagnant traps and failing primers cause odors and intermittent siphoning.
Inspect trap primers, supply lines and check valves; replace faulty primers or install auto-fill devices. Clean debris, guarantee proper slope, and consider a backwater valve or professional evaluation for persistent gurgling or sewage backup.
Preventive Maintenance to Keep Drains Quiet
Preventive maintenance keeps drains clear and reduces gurgling before it starts.
Homeowners should establish regular cleaning routines, avoid pouring grease, coffee grounds, and fibrous food down drains, and install strainers and grease traps where appropriate.
Seasonal checks of vents and outdoor drains, paired with a simple inspection schedule, help catch issues early.
Regular cleaning routines and what to avoid pouring down drains
A simple routine of regular drain cleaning can prevent the slow buildup that leads to gurgling pipes and costly repairs.
Homeowners should flush drains weekly with hot water, use enzyme-based cleaners monthly, and brush accessible trap openings.
Avoid pouring grease, coffee grounds, fibrous vegetable scraps, rice, and harsh chemical drain cleaners down sinks.
Consistent care reduces clogs and preserves plumbing function.
Installing drain strainers and grease management
Many households benefit from simple barriers and habits that keep solids and grease out of drains: metal or silicone strainers catch hair, food scraps, and other debris before it enters trapways, while deliberate grease management—cooling and disposing cooking oil in sealed containers or wiping pans with paper towels—prevents fatty buildup that causes gurgling and slow drainage.
Install properly sized strainers, clean them regularly, and label grease containers.
Seasonal checks for vents and outdoor drains
When seasons change, homeowners should inspect roof vents, attic vent stacks, and exterior drain grates to confirm clear airflow and unobstructed runoff. Leaves, ice, and nesting debris commonly block these outlets and can cause trapped air in plumbing that leads to gurgling.
Clear obstructions, verify vent caps and flashing integrity, and ascertain downspouts direct water away from foundation to prevent backups and air pressure issues.
Recommended inspection schedule for homeowners
Clearing roof vents and outdoor drains is the practical first step before outlining a regular inspection rhythm.
A concise schedule helps homeowners catch the small issues that lead to gurgling before they escalate. Recommend monthly visual checks of visible traps and drains, quarterly vent and cleanout inspections, and annual professional camera inspections of main lines.
Record findings and address abnormalities promptly to prevent recurrence.
When to Call a Professional Plumber
Signs such as persistent gurgling despite basic fixes, multiple affected fixtures, sewage odors, or water backing up indicate the need for a licensed plumber.
The professional will perform a targeted inspection—often including camera diagnostics—explain findings, recommend repairs, and provide an estimate that varies by scope and region.
Homeowners should ask about licensing, warranty, expected timeline, and whether the quote is flat-rate or hourly before hiring.
Red flags that require licensed intervention
Although some gurgling noises can stem from simple blockages, persistent or worsening symptoms often indicate problems beyond routine DIY fixes and warrant a licensed plumber’s assessment.
Immediate intervention is advised for sewage odors, slow drains in multiple fixtures, recurring backups, water leaks or stains, banging pipes, or visible corrosion.
These signs suggest venting, mainline, or structural failures requiring professional diagnosis and repair.
What to expect during a professional inspection and typical costs
A professional inspection typically begins with a systematic assessment of symptoms, fixtures, and visible piping to identify the source of gurgling and any related issues.
Technicians may perform drain camera scans, pressure tests, and vent evaluations, then provide a diagnosis, repair options, and cost estimate.
Typical inspections run $75–$200; corrective work varies widely, from minor repairs to section replacements.
Questions to ask a plumber before hiring
After an inspection outlines causes and potential fixes, homeowners should prepare targeted questions to evaluate a plumber’s experience, approach, and costs before authorizing work.
Ask about licensing, insurance, warranties, references, prior gurgling or venting repairs, diagnostic methods, expected timeline, itemized estimates, additional fees, and permit handling.
Verify communication preferences and obtain written agreements to prevent surprises and guarantee accountability.
Cost Estimates and Options for Common Repairs
Typical price ranges for gurgling-pipe fixes vary widely, with simple DIY remedies often costing under $50.
Professional repairs commonly run from $150 to $800 or more.
Costs depend on factors such as ease of access, required materials, severity of the blockage or damage, and regional labor rates.
Readers are encouraged to compare low-cost DIY options against quoted professional estimates based on those variables.
Typical price ranges for DIY vs. professional fixes
Costs for fixing gurgling pipes vary widely depending on the cause and whether the homeowner tackles the repair or hires a professional. Typical DIY fixes: $0–$100 for plungers, snakes, and drain cleaners; professional service: $75–$500+ for diagnostics and repairs. Choose based on comfort, time, and risk.
| Repair type | DIY range | Pro range |
|---|---|---|
| Minor clog | $0–$50 | $75–$150 |
| Moderate | $20–$100 | $150–$400 |
| Severe | $50–$100 | $300–$500+ |
Cost factors: access, materials, severity, location
Having outlined DIY versus professional price ranges, the next consideration is what drives those numbers: access, materials, severity, and location.
Tight crawlspaces or walls increase labor; premium parts (brass traps, PVC vs. copper) raise material costs; extent of blockage or damage multiplies time and tools; urban labor rates and permit requirements add regional variance.
Itemized estimates clarify trade-offs.
Long-Term Solutions and Upgrades
Long-term fixes focus on durable changes such as re-piping problematic runs, rerouting or modernizing venting, and replacing aging sewer lines.
Options include installing air admittance valves—useful where venting is difficult but with code and maintenance trade-offs—and adopting modern vent alternatives where permitted.
Upgrading sewer lines and adding preventative devices like backflow preventers can reduce future gurgling and protect the system.
Re-piping, rerouting vents, and modern vent alternatives
Consider extensive changes when persistent gurgling traces back to poor pipe layout or blocked vents: re-piping, rerouting vent stacks, or installing modern vent alternatives can resolve underlying flow and pressure issues that temporary fixes cannot.
Professionals assess pipe sizing, slope, material degradation, and vent pathways, proposing targeted re-piping or vent relocation. Long-term upgrades improve drainage reliability, reduce backups, and restore proper air balance throughout the system.
Installing air admittance valves and pros/cons
Many plumbers recommend installing air admittance valves (AAVs) as a targeted solution to gurgling caused by inadequate venting: AAVs admit air to prevent siphoning without roof penetrations.
They’re compact, cost-effective, and easy to retrofit.
Downsides include code restrictions in some areas, mechanical failure potential, and unsuitability for systems requiring positive venting.
Regular inspection and compliant installation mitigate risks.
Upgrading sewer lines and preventive technology (backflow preventers)
After addressing venting issues with air admittance valves, attention often shifts to the condition of the sewer line and the addition of preventive devices like backflow preventers to stop recurring gurgling and more serious backups.
Homeowners assess pipe age, material, and slope; replace collapsed or root-invaded sections; and install backflow preventers or check valves at mains.
Regular inspections and trenchless repairs minimize disruption.
Troubleshooting Checklist and Action Plan
A concise troubleshooting checklist outlines immediate, easy actions to stop gurgling—check vents, clear nearby traps, and run water to confirm flow.
The action plan sequences those steps and notes short-term fixes to try before calling a professional.
Clear criteria are provided for when to monitor the situation and when to escalate to repair or replacement.
A concise step-by-step plan to stop gurgling today
Begin by isolating the source and checking accessible fixtures one by one: listen at sinks, tubs, and toilets while running water and flushing to pinpoint where gurgling occurs.
Then follow this concise action plan to stop gurgling today:
- Clear visible clogs with a plunger or drain snake.
- Run hot water and enzyme cleaner.
- Check vent openings on the roof.
- Tighten loose trap connections and test.
When to monitor and when to escalate to repairs
Once quick fixes have been tried and the immediate gurgling source isolated, assess whether symptoms are intermittent or persistent to decide monitoring vs. repair.
If gurgling is rare, document occurrences, check vents and traps, and monitor for 2–4 weeks.
Escalate immediately for recurrent, worsening, or multi-fixture gurgling, foul odors, backups, or visible leaks; call a licensed plumber for diagnostics and repairs.
Helpful Tools and Products for Homeowners
A concise set of hand tools and proper safety gear forms the foundation for most homeowner plumbing tasks, including gloves, eye protection, adjustable wrenches, and plumber’s tape.
Common useful products such as flange and cup plungers, drain snakes, enzymatic drain cleaners, and vent guards help address gurgling and its causes.
The following section outlines how and when to use each item safely and effectively.
Recommended hand tools and safety gear
For homeowners tackling gurgling pipes, a compact kit of hand tools and safety gear streamlines diagnosis and repair: adjustable wrench, slip-joint pliers, basin wrench, plumbers’ snake or auger, flat-head and Phillips screwdrivers, and a reliable plunger; add plumber’s tape, pipe joint compound, and a small flashlight.
- Work gloves and safety goggles
- Knee pads or a small mat
- Mask for dust and odors
- Flashlight with extra batteries
Useful products (plungers, snakes, enzymatic cleaners, vent guards)
Essential tools and products can quickly distinguish a temporary gurgle from a persistent plumbing issue.
A flange or cup plunger clears simple clogs; a handheld snake or auger reaches deeper blockages.
Enzymatic drain cleaners digest organic buildup safely over time.
Vent guards and odor traps protect roof vents and prevent debris entry.
Select tools sized to fixtures and follow manufacturer instructions.
Case Examples: Common Scenarios and Solutions
The section presents brief case examples to illustrate typical causes and fixes for gurgling pipes.
It covers a single sink that gurgles after an adjacent fixture is used, whole-house gurgling following heavy rainfall, and intermittent noise tied to a partially blocked roof vent.
Each scenario pairs observable symptoms with likely diagnoses and practical remedies.
Scenario 1 Single sink gurgles after using adjacent fixture
Several homeowners notice a single sink gurgles immediately after an adjacent fixture is used, a sign that air is being drawn through the sink’s trap as wastewater flows nearby.
This usually indicates a partial vent blockage, a shared vent imbalance, or improper trap arm slope.
Inspect vent openings, clear minor obstructions, check trap seals, and consult a plumber if vent cleaning or re-piping is required.
Scenario 2 Whole-house gurgling after heavy rainfall
Many homeowners experience whole-house gurgling after heavy rainfall when sewer lines become overwhelmed or stormwater infiltrates the system, causing air to be forced through traps and vents throughout the home.
This typically signals municipal or main-sewer backup, collapsed or clogged lateral lines, or overloaded storm drains.
Recommended responses: cease water use, inspect basement drains, contact municipal sewer authorities, and hire a plumber for camera inspection and clearance or repair.
Scenario 3 Intermittent gurgling linked to roof vent obstruction
When intermittent gurgling occurs only after specific fixtures are used, it often points to a partially blocked roof vent that traps air and releases it sporadically through traps as pressure equalizes.
Inspection involves roof access or a camera to locate debris, nests, or ice.
Clearing the obstruction or installing a vent cap restores airflow, preventing pressure surges and eliminating sporadic gurgling.
Final Checklist Before Calling a Plumber
Before contacting a plumber, the homeowner should note when the gurgling started, which fixtures make the noise, its frequency and any recent plumbing or renovation work.
They should also record steps already taken — such as plunging, running water through traps, or checking vents — to help the technician diagnose the issue quickly.
Clear, concise information and a list of attempted fixes will speed assessment and reduce call-out time.
Information to gather (when it happens, sounds, recent work)
How often the gurgling occurs, what it sounds like, and any recent plumbing work are essential details to collect before contacting a plumber.
Note time of day, frequency, duration, affected fixtures, and whether noises follow toilet flushes, showers, or appliance use.
Record descriptions (bubbling, rattling, deep gurgle), recent repairs or installations, and any visible backups or slow drains to expedite diagnosis.
Steps you should have already tried to help the plumber diagnose quickly
With those observations documented, homeowners should run a brief checklist of simple diagnostics that can clarify the problem for a plumber.
Test multiple drains (sink, tub, toilet), flush toilets, run water to observe gurgles, check for slow drains or backups, inspect cleanout access, remove visible debris from traps, note recent changes, and avoid chemical drain cleaners.
Record results for the technician.
Conclusion
The house exhales a final, theatrical gurgle, like a tiny storm settling into polite silence. Pipes that once sang operas now murmur like contented mice; blocked vents cleared, trap seals restored, and stubborn mainline snarls tamed into obedient waterways. Homeowners can picture triumphantly closed access panels and the quiet victory of normal drains. If any protest remains, the sensible summons of a plumber will hush the last rebellious bubble.