
How to Change a Kitchen Faucet Cartridge: Step-by-Step DIY Guide
To change a kitchen faucet cartridge, start by turning off the water supply. This DIY process involves removing the faucet handles and trim, extracting the old cartridge, cleaning the valve body, and installing a new cartridge that matches the old one, ensuring proper orientation and seals. Basic tools like wrenches, screwdrivers, and pliers are needed. If you notice corroded O-rings or seats, replace those as well. After reassembling, turn the water back on and check for leaks and smooth operation. If you encounter persistent leaks or corroded fittings, it may be best to consult a professional. Follow the detailed step-by-step instructions for a successful replacement.
What Replacing a Kitchen Faucet Cartridge Involves
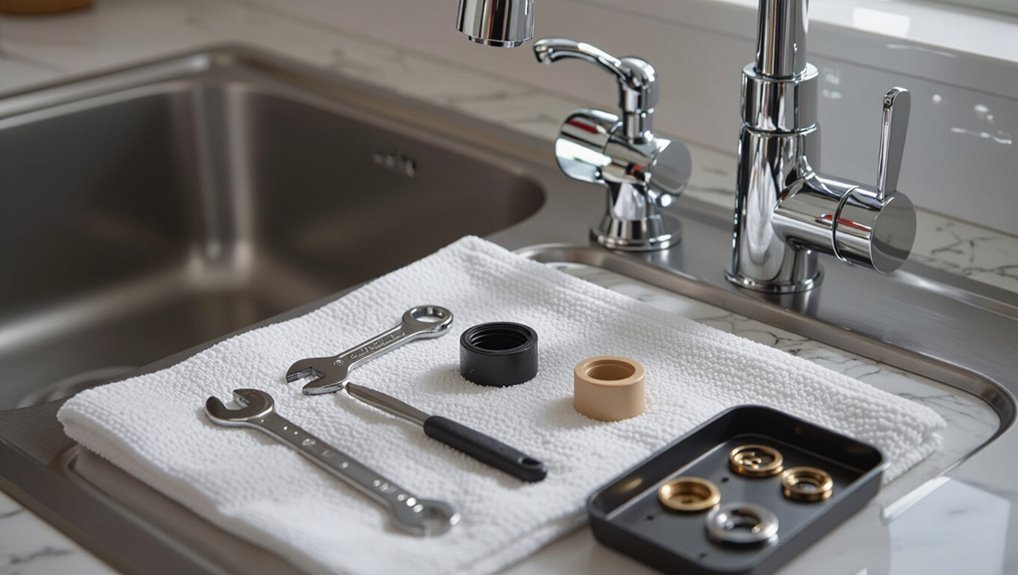
Replacing a kitchen faucet cartridge typically involves shutting off the water, removing handles and trim, extracting the old cartridge, and installing a matching replacement to restore proper flow and stop leaks.
For most homeowners, the job takes 30–90 minutes and requires basic tools and moderate hand skills.
A professional should be called if the setup is nonstandard, corroded parts resist removal, or if soldered/plumbed connections beyond cartridge replacement are involved.
Quick overview of the process and outcomes
Begin by shutting off the water supply and clearing the area under the sink so access is unobstructed.
The procedure for how to change kitchen faucet cartridge typically involves removing handles and trim, extracting the old cartridge, comparing parts, installing the replacement, reassembling components, and testing for leaks.
Expected outcomes are restored valve action, reduced dripping, and improved control of water flow and temperature.
Typical time, difficulty level, and when to call a professional
With the faucet reassembled and basic testing complete, attention turns to how long the job typically takes, how difficult it is, and when a homeowner should hire a pro.
Most cartridge replacements take 30–90 minutes for someone with basic tools and mechanical aptitude. Difficulty is low to moderate.
Call a professional if corrosion, unusual fittings, persistent leaks, or uncertainty about water shutoff or plumbing codes arise.
Signs Your Faucet Cartridge Needs Replacement
Persistent drips, trouble controlling temperature or flow, and visible leaks commonly indicate a failing cartridge.
Distinguishing cartridge problems from worn seals, loose connections, or supply-line issues requires simple tests such as isolating water supply, inspecting O-rings, and observing operation after removing the handle.
Replacement is warranted when symptoms persist after basic repairs or when diagnostic steps point directly to a damaged or clogged cartridge.
Common symptoms (drips, difficulty controlling temperature/flow, leaks)
A leaking faucet, shaky control over temperature or flow, and reduced water pressure are clear indicators that a cartridge may be failing.
Other common symptoms include persistent dripping when the handle is off, sudden surges or drops in flow, difficulty finding a steady temperature, and visible leaks around the base.
These signs warrant inspection and likely cartridge replacement.
How to diagnose cartridge problems vs. other faucet issues
How can one tell when the cartridge is at fault rather than another component?
Persistent drips despite tightened handles, uneven or sudden temperature shifts, and stiff or rough handle movement point to cartridge wear.
Inspect for mineral buildup, check valve seats and O-rings for damage, and isolate by briefly operating supply valves.
If problems persist while other parts appear intact, the cartridge is likely responsible.
When replacement is necessary versus repair
When common fixes—cleaning mineral deposits, replacing O‑rings, or tightening fittings—fail to stop leaks or restore smooth operation, the cartridge should be suspected for replacement.
Persistent dripping, difficulty moving the handle, sputtering or inconsistent flow, and visible cartridge damage indicate wear or internal failure.
If issues recur after repairs or parts are unavailable, replacement is more reliable than repeated patchwork.
Tools and Parts You’ll Need
Before starting, the article lists the essential tools—adjustable wrench, pliers, screwdriver set, and plumber’s grease—needed to remove and install a cartridge.
It then explains common cartridge types (ball, ceramic disc, and cartridge-style) and how to match the replacement by model number, measurements, or a photo.
Finally, it mentions optional supplies and safety items such as plumber’s tape, rags, a bucket, and gloves.
Essential tools list
A concise, organized toolkit speeds the cartridge replacement and reduces surprises.
Essential items guarantee safe, efficient work and prevent unnecessary trips to the store.
- Adjustable wrench (and basin wrench for tight spots)
- Phillips and flathead screwdrivers
- Needle-nose pliers and channel-lock pliers
- Plumber’s grease, replacement O-rings, and a rag for cleanup
Replacement cartridge types and how to identify the right one
Which cartridge matches the faucet model and symptom determines whether the repair will succeed.
Identification relies on manufacturer, handle type, and flow control design. Measure cartridge length and note mounting tabs.
Common types include:
- Ball cartridge (single-handle, older styles)
- Ceramic disc (durable, flat plates)
- Cartridge stem (plastic or brass insert)
- OEM-specific replaceable assemblies
Optional helpful supplies and safety items
Gathering the right tools and safety items streamlines the cartridge replacement and reduces the chance of mishaps.
Recommended optional supplies and safety gear improve efficiency and protect surfaces and hands during work.
- Plumber’s grease and thread seal tape
- Small parts tray or magnetic dish
- Safety glasses and disposable gloves
- Old towels and a basin to catch water
Preparing for the Job
Before any work begins, the water supply should be shut off at the shutoff valves and the faucet opened briefly to relieve residual pressure.
Cabinets and surrounding surfaces should be protected and a small container or magnetic tray placed to catch screws and other parts.
Photographs and brief notes of the faucet assembly and hose connections aid accurate reassembly.
How to shut off water supply and relieve pressure
Locate and close the water supply to the faucet by turning the under-sink shutoff valves clockwise until they stop; if there are no local valves, shut off the home’s main water supply.
Open the faucet to drain remaining water and relieve line pressure. Press and hold handle(s) for several seconds, then close.
Check nearby fixtures to confirm flow has stopped before beginning work.
Protecting cabinets and catching small parts
Several protective layers should be placed beneath the work area to prevent water damage and catch dropped parts. A towel or plastic sheet protects cabinet surfaces; a shallow tray or magnetized dish captures screws, clips, and springs.
Folded cardboard buffers against tools and prevents scratches. Keep a small flashlight and tweezers accessible to retrieve tiny components quickly without enlarging the work mess.
Taking photos and notes for reassembly
When preparing to disassemble the faucet, document each stage with clear photos and concise notes so reassembly is straightforward.
Shot angles should show orientation, connections, and part order. Label parts with tape and numbers, note tool sizes, fastener locations, and sequence of removal.
Store images and notes together for quick reference. Review before reassembly to confirm alignment and prevent mistakes.
Step-by-Step Cartridge Replacement Guide
The replacement procedure proceeds through five concise actions: removing the handle(s), taking off decorative trim and retaining parts, extracting the old cartridge, inspecting and cleaning the valve body and seals, and installing the new cartridge.
Each step requires the right tools and careful handling to avoid damaging components. Following the sequence guarantees a secure, leak-free reassembly.
Step 1 Remove faucet handle(s)
Loosen any decorative caps or set screws, then lift or pivot the handle to expose the retaining fastener so the cartridge can be accessed.
With water shut off, use the correct screwdriver or Allen wrench to remove the handle fastener.
Gently wiggle and lift the handle straight up; if stuck, apply penetrating lubricant and wait briefly.
Place removed parts in a tray for reassembly.
Step 2 Remove decorative trim and retaining parts
Proceed to remove any decorative trim, escutcheons, and retaining clips that cover the cartridge to expose the valve assembly.
Use appropriate tools—small screwdriver, needle-nose pliers, or hex key—matching fasteners. Keep parts organized and note orientation.
Inspect sealing surfaces and O-rings for wear. Clean debris and mineral buildup gently.
Confirm all retaining hardware is set aside for reinstallation.
Step 3 Extract the old cartridge safely
Begin by confirming water supply lines remain shut off and the sink area is dry before attempting cartridge removal.
Using appropriate pliers or a cartridge puller, grasp the cartridge stem or ears firmly.
Apply steady, even upward force while twisting gently if required.
Extract slowly to avoid debris falling into the valve.
Place the old cartridge on a towel for inspection and disposal.
Step 4 Inspect and clean the valve body and seals
With the old cartridge removed and set aside, the valve body and surrounding seals should be inspected for mineral buildup, corrosion, or torn O-rings.
Remove debris with a soft brush and vinegar solution, avoiding abrasives.
Check seat surfaces for pitting and replace any damaged O-rings or rubber seals.
Dry components thoroughly and verify smooth bore and intact threads before proceeding.
Step 5 Install the new cartridge correctly
Install the new cartridge by aligning it precisely with the valve body and seating it evenly to confirm proper operation.
Ensure orientation tabs and notches match reference marks, then press straight down without twisting.
Secure retaining clip or nut to manufacturer torque specifications.
Reconnect any linkage or springs exactly as removed.
Verify smooth movement of the cartridge assembly before proceeding.
Step 6 Reassemble faucet and test for leaks and proper operation
After confirming the cartridge seats correctly and linkage moves smoothly, the technician reassembles the faucet in reverse order of disassembly.
Fasteners are tightened hand‑firm then snugged. Handles, trim, and escutcheon are refitted.
Water supply valves are opened slowly while observing connections. The technician operates the handle through hot and cold positions, checks for drips, and inspects underneath for any signs of leakage.
Step 7 Final adjustments and torque recommendations
Make final fine‑tuning adjustments and verify torque values to guarantee reliable operation and prevent leaks.
After testing, confirm handle alignment and smooth movement.
Tighten retaining nuts and screws to manufacturer torque specs using a calibrated torque wrench; avoid over‑tightening.
Recheck supply connections and aerator.
Monitor for drips during initial use and retorque if minor seepage appears, documenting applied torque values.
Model-Specific Variations and Examples
Different faucet designs follow the same basic cartridge-replacement logic but introduce specific steps and traps that affect timing and parts.
The following quick list highlights the main categories and manufacturer quirks to watch for:
- Single-handle cartridge faucets (common steps and gotchas)
- Dual-handle cartridge-style faucets (differences to note)
- Delta and Moen idiosyncrasies
- Kohler and Pfister variations
Technicians should compare their model to these examples before removing the old cartridge.
Single-handle cartridge faucets (common steps and gotchas)
Begin by identifying the faucet type and locating the hidden retaining components: single-handle cartridge faucets typically share a common disassembly sequence—remove the handle cap and set screw, lift the handle, undo the bonnet or retaining nut, and extract the cartridge—while variations in clip styles, nut sizes, and access methods between brands like Delta, Moen, Kohler, and American Standard require attention to model-specific fasteners and orientation markings.
Inspect seals, O-rings, and mounting clip orientation before replacement.
Dual-handle cartridge-style faucets (differences to note)
Although the basic cartridge-removal steps mirror single-handle models, dual-handle cartridge faucets require attention to paired valve bodies, separate hot and cold cartridges, and interdependent trim alignment.
This means each side must be serviced individually while ensuring both cartridges seat and rotate correctly relative to shared spouts, escutcheons, and any center-body manifold.
Check matching cartridge types, synchronize stem orientation, and test combined flow and temperature balance.
Popular manufacturer quirks (Delta, Moen, Kohler, Pfister)
When servicing cartridge faucets, recognizing manufacturer-specific idiosyncrasies can prevent misfits and repeated disassembly.
Delta uses ball-style cartridges and retaining clips; Moen often employs cartridge stems with unique snap rings and color-coded seals.
Kohler cartridges may require specific alignment tabs and torque.
Pfister favors flat-sided cartridges and proprietary O-rings.
Always confirm part numbers and observe distinct fasteners before removal.
Troubleshooting After Replacement
After replacing a kitchen faucet cartridge, common issues can still arise that require targeted checks.
The technician should inspect seals and seating for leaks, verify supply lines and aerators for flow restrictions, and confirm cartridge alignment for temperature control.
Tighten handles and mounting hardware and listen for air or water hammer noises while isolating components to pinpoint persistent problems.
What to do if the faucet still leaks
If a leak persists following cartridge replacement, systematic troubleshooting narrows the cause and guides corrective steps.
Inspect seals, O-rings and cartridge seating for damage or debris; tighten retaining hardware to spec.
Verify supply line connections and faucet base for hairline cracks.
If leaks continue, revert to manufacturer dimensions, compare replacement part compatibility, or consult a professional plumber to prevent water damage.
No water or low water flow after reassembly
Check supply stops, aerator, and cartridge alignment before assuming a major fault: low or no flow after reassembly usually stems from a closed shutoff valve, a clogged aerator, trapped debris in the cartridge or supply lines, or misalignment that blocks passages.
Verify both shutoffs fully open, remove and clean the aerator, flush supply lines, inspect and reseat the cartridge, and retest flow.
Temperature control problems
Confirm whether the faucet delivers inconsistent or only hot or cold water following cartridge replacement, as this typically indicates issues with cartridge orientation, mixed-hot limit settings, or cross-connection with the supply lines.
Inspect cartridge alignment, verify hot/cold inlet hoses match valves, reset or adjust the temperature stop, and test after each correction.
Replace cartridge if internal diverter or seals remain faulty.
Loose handles or persistent noises
Tighten loose handles and silence persistent noises by systematically isolating their sources after cartridge replacement.
Inspect handle set screws and trim, tightening to manufacturer torque; replace stripped screws or worn splines. Check mounting nuts and deck shims for secure seating.
For noises, verify aerator, supply valve seating, and cartridge alignment; flush lines and replace faulty washers or loose fittings to eliminate vibration and water hammer.
Common Mistakes to Avoid
Common errors during cartridge replacement include forcing parts or over-tightening fasteners, which can crack components or strip threads.
Installing an incorrect replacement cartridge often leads to leaks or poor fitment.
Skipping cleaning and failing to replace seals leaves debris and worn washers that undermine the repair.
Forcing parts or over-tightening
Forcing components or over-tightening fittings can strip threads, crack housings, and deform seals, turning a simple cartridge replacement into a leak-prone repair.
Careful, incremental torque prevents damage; use appropriate tools, apply steady pressure, and stop when parts seat.
If resistance persists, inspect for debris, misalignment, or corrosion.
Replace damaged fasteners rather than forcing them back into service.
Using incorrect replacement cartridges
Select the correct cartridge model before removing the old one to avoid fitment, function, and warranty issues.
Installing an incompatible cartridge can cause leaks, poor water control, or damage to valve seats. Mismatched parts may require rework, void manufacturer support, and increase costs.
Verify model numbers, measure dimensions, and consult manufacturer resources or parts diagrams to guarantee a precise replacement.
Skipping cleaning or seal replacement
After confirming the correct cartridge, attention must turn to the surrounding seals and cleanliness of the valve assembly; skipping these steps is a frequent source of post-installation leaks and premature failure.
Neglecting to clean mineral deposits or replace worn O-rings and gaskets can compromise seating and cause leaks. Proper cleaning and seal replacement guarantee longevity, reliable operation, and prevent repeat disassembly.
Maintenance Tips to Extend Cartridge Life
Practical maintenance can greatly extend a kitchen faucet cartridge’s service life and reduce unexpected failures. Key actions cover cleaning, addressing hard-water effects, choosing the right filtration, and recognizing replacement timing:
- Regular cleaning and mineral buildup prevention
- Water quality solutions and filter recommendations
- Monitor performance and leaks to know when to proactively replace cartridges
- Follow manufacturer maintenance guidelines and use compatible parts
These measures help preserve function and avoid more extensive repairs.
Regular cleaning and mineral buildup prevention
Maintain a routine of gentle cleaning and descaling to prevent mineral buildup that can impede a kitchen faucet cartridge’s movement and shorten its lifespan.
Wipe surfaces weekly with mild soap and a soft cloth.
Use vinegar or a commercial descaler sparingly on affected parts, soaking removable components briefly.
Rinse thoroughly, reassemble carefully, and inspect for wear; repeat as needed to maintain smooth operation.
Water quality solutions and filter recommendations
Because mineral-laden water is a primary cause of cartridge wear, addressing water quality can markedly extend service life.
Install point-of-use filters (sediment, carbon) to reduce particulates and chlorine; consider a small-scale water softener or chelating filter for hard water.
Regularly replace filter cartridges per manufacturer guidelines and flush lines after installation to prevent trapped debris from accelerating cartridge deterioration.
When to proactively replace cartridges
When should a cartridge be replaced before it fails? A proactive replacement schedule every 3–5 years is advised for moderate-use households; sooner with hard water, visible wear, intermittent leaks, reduced flow, or difficulty operating the handle.
Routine inspection every 12 months identifies deterioration. Replacing before failure prevents water damage, preserves valve seats, and avoids emergency plumbing calls.
Cost, Time, and When to Hire a Plumber
A brief cost breakdown outlines parts, tools, and potential replacement expenses for a DIY cartridge swap.
Time estimates vary by experience—novices may need an hour or more while experienced DIYers often finish in 20–40 minutes.
Clear signs to hire a professional include persistent leaks, corroded fittings, unusual water flow, or uncertainty about local plumbing codes.
Typical DIY cost breakdown
Typical DIY replacements for a kitchen faucet cartridge cost between $15 and $60 for the part, plus incidental expenses for basic tools or sealant, and generally take 30–90 minutes for someone with moderate handyperson skills. Costs rise if specialty cartridges or unexpected corrosion appear; hiring a plumber is advised for leaks, complex valves, or lack of confidence.
| Item | Low | High |
|---|---|---|
| Cartridge | $15 | $60 |
| Tools/sealant | $0 | $30 |
| Plumber call | $75 | $250 |
Estimated time by skill level
Estimates from the previous cost breakdown help frame how time varies by skill: beginners, intermediate DIYers, and experienced DIYers usually require different amounts of time and may face different risks.
Beginners often take 1.5–3 hours, stopping to troubleshoot.
Intermediate DIYers typically finish in 45–90 minutes.
Experienced DIYers usually complete the job in 20–45 minutes, assuming standard fittings and no surprises.
Signs it’s time to hire a professional
When persistent leaks, unexplained water damage, or repeated failures occur despite attempted repairs, hiring a licensed plumber becomes the prudent choice; cost and time saved by avoiding escalating damage often outweigh the expense of professional service.
A pro is recommended when complexity, corroded fittings, hidden leaks, or warranty concerns arise.
Expect inspection fees, labor rates, and faster resolution compared with extended DIY attempts.
Reference Diagrams and Visual Aids
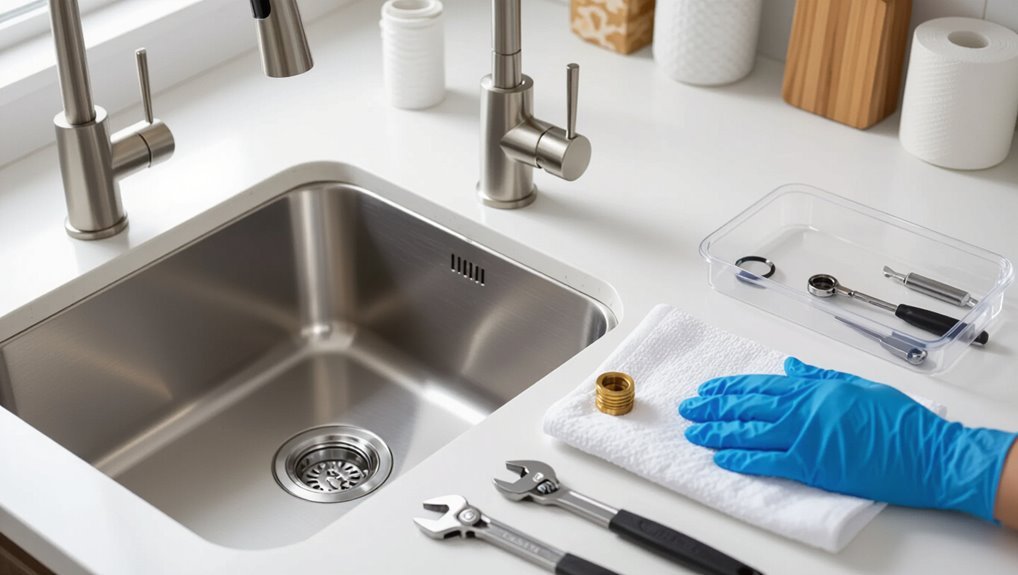
Clear, labeled diagrams of cartridge anatomy help identify seals, springs, and valve stems for accurate replacement.
Supplementary images showing common faucet types and their internal layouts allow readers to match their fixture to the correct removal and reassembly steps.
Together, these visual aids reduce guesswork and prevent improper part selection.
Cartridge anatomy labeled diagram
A labeled diagram of a kitchen faucet cartridge clarifies each component and its function, typically showing the cartridge body, O-rings, seals, ceramic discs or valve stem, inlet ports, retaining clip or nut, and the actuator connection.
Clear labels identify wear-prone parts (O-rings, seals), flow paths through inlet ports, mounting points, and orientation cues for reassembly, aiding diagnostics and part ordering.
Common faucet types and internal layout images
Although faucets vary in appearance, their internal arrangements fall into a few consistent types—ball, cartridge, ceramic-disk, and compression—each shown with simplified reference diagrams that map the handle linkage, valve element, inlet ports, seals, and mounting hardware.
Diagrams emphasize part relationships, common wear points, and fastener locations to aid identification, disassembly sequence, and correct cartridge selection for repair or replacement.
Conclusion
Like a clockmaker restoring a delicate movement, the DIY cartridge replacement returns a faucet to reliable rhythm. Clear signs, correct tools, and patient steps spare costly calls and water waste, while guarding against common missteps. Routine care prolongs life, and recognizing limits prompts professional help before damage deepens. Ultimately, the small, precise effort rescues daily convenience and preserves a household’s quiet functioning, much as a careful hand preserves an heirloom timepiece.
