
How to Extend a Gutter Downspout: Easy DIY Steps to Redirect Water Safely
To extend a gutter downspout effectively and redirect water away from your foundation, follow these straightforward DIY steps. This process will help prevent erosion, basement seepage, and landscaping damage. Begin by measuring the distance needed for water to travel safely away from your home. Choose either a flexible or rigid extension, or an underground pipe, and cut it to the appropriate length. Attach it using an adapter or clamp, then secure it with straps or anchors, ensuring it slopes away from the house. Regularly inspect your extension, especially during seasonal changes, and take precautions against freezing. Basic materials typically cost between $15 and $60, while more complex installations may require professional assistance. Continue reading for detailed guidance and tips.
Why Extend a Gutter Downspout and When It’s Necessary
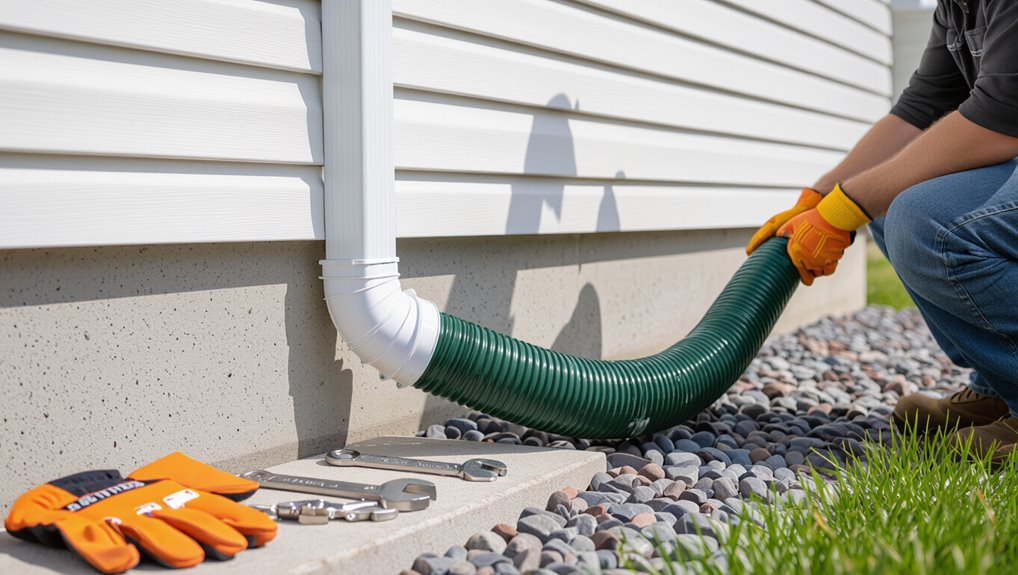
Short downspouts can cause soil erosion, basement seepage, and damaged landscaping by concentrating runoff too close to the structure.
Visible signs that an extension is needed include pooling water near the foundation, soggy spots in the yard after rain, or gutters overflowing during storms.
Extending the downspout directs water away from the foundation and plantings, reducing moisture-related damage and preserving yard grade.
Common problems caused by short downspouts
Allowing roof runoff to pool near a building’s foundation creates several predictable problems that often trace back to inadequately extended downspouts.
Water intrusion, basement flooding, soil erosion, and compromised landscaping follow, while mortar and siding can deteriorate.
Pest attraction and mold growth increase.
A concise DIY approach on how to extend gutter downspout prevents structural damage, reduces maintenance costs, and protects property value.
Signs you need a downspout extension
Visible water pooling near the foundation, damp basement walls, or consistently soggy landscaping are clear indicators that a downspout extension is needed.
Additional signs include soil erosion beside the house, recurring water stains on exterior walls, and overflowing gutters during storms.
If water collects within a few feet of the structure or creates muddy paths away from downspouts, extension installation should be considered.
Benefits of proper water redirection for foundation and landscaping
Directing roof runoff well away from a building prevents water from undermining foundations and preserves landscape features.
Proper redirection reduces soil erosion, limits basement and crawlspace moisture, and prevents hydrostatic pressure that causes cracks.
It protects plant beds from washouts, maintains grading, and preserves hardscapes.
Timely extensions minimize costly repairs, mold risk, and landscape replacement, improving long-term property stability and value.
Quick Answer: Best Ways to Extend a Downspout
A brief comparison separates temporary and permanent downspout extensions by durability and ease of installation.
Practical options range from flexible plastic extenders and splash blocks for quick, low-cost fixes to rigid PVC risers or buried piping for long-term, professional-grade solutions.
Recommended choices depend on budget and skill level, with simple snap-on pieces suited to novices and custom-cut piping or trenching better for experienced DIYers or contractors.
Overview of temporary vs. permanent solutions
When deciding how to extend a gutter downspout, homeowners should weigh temporary options—like flexible pop-up extenders and splash blocks—against permanent solutions such as rigid PVC extensions, buried drain lines, or rerouted downspouts tied into the storm system.
Temporary fixes provide quick, low-cost diversion for runoff but require frequent adjustment and offer limited longevity, while permanent installs demand more upfront work and expense yet deliver durable, low-maintenance control of water away from foundations and landscaping.
Temporary choices suit short-term needs; permanent methods prevent repeated interventions and better protect property over time.
Recommended methods for different budgets and skill levels
Select methods based on budget and skill: low-cost, low-skill options include splash blocks, inexpensive flexible extenders, and pop-up outlets;
moderate budgets with basic DIY ability favor rigid PVC or corrugated downspout extensions cut and fitted with adapters;
higher budgets or limited time/skill point toward hiring a pro to install buried discharge lines, connect to storm drains, or reroute gutter systems for long-term, low-maintenance performance.
Professionals guarantee permits and proper grading.
Tools and Materials Needed
Before beginning an extension project, the homeowner should gather basic tools such as a tape measure, hacksaw or tin snips, drill, screwdriver, and sealant.
Materials vary by method and may include flexible tubing, corrugated or rigid metal/ PVC extensions, splash blocks, or components for underground drain connections.
Safety equipment and preparation supplies—gloves, eye protection, ladder stabilizers, and caulk/cleaning supplies—should be on hand.
Basic tools for DIY downspout extension
Gathering the right tools and materials guarantees a smooth, durable downspout extension installation. Recommended tools include measuring tape, marker, hacksaw or tin snips, drill with bits, screwdriver set, adjustable pliers, level, and caulk gun.
Safety gear—gloves, eye protection, and ladder stabilizer—should be used.
Fasteners, straps, and sealant complete the basic kit for straightforward, secure attachment and alignment.
Materials by method (flexible tubing, rigid extensions, splash blocks, underground drains)
When choosing materials for a downspout extension, the method—flexible tubing, rigid sections, splash blocks, or underground drains—determines the specific items and fittings required.
Flexible systems need corrugated tubing, couplers, and straps. Rigid extensions use aluminum/vinyl elbows, screws, and crimping tools.
Splash blocks require molded concrete or plastic pads. Underground drains need PVC pipe, couplings, catch basins, and gravel for bedding.
Safety equipment and preparation supplies
Wear appropriate personal protective equipment and assemble basic preparation supplies to guarantee a safe, efficient downspout extension project.
Required items include gloves, safety glasses, sturdy footwear, and a dust mask.
Gather a ladder with stabilizer, measuring tape, marker, utility knife, silicone sealant, screws, drill, zip ties, and a tarp or bucket to catch debris while cutting and fastening components.
Step-by-Step: How to Extend a Gutter Downspout Above Ground
The homeowner first measures runoff distance and ground slope to determine required length and drainage direction.
Next, they select a rigid or flexible extension of appropriate size and learn proper attachment methods for each type.
Finally, the installer secures and anchors the extension—using screws, brackets, stakes, or straps—to resist wind and winter forces.
Measure the runoff distance and slope
A simple tape measure and a level are the essential tools for determining how far runoff must travel and what slope the extension requires.
The person measures from the downspout outlet to the desired discharge point, noting elevation change. Calculate slope as rise over run, aiming for at least 1%–2% grade.
Record measurements and mark stake locations for accurate installation.
Choose the correct extension type and length
Select an extension type and length based on soil conditions, discharge distance, and aesthetics to guarantee effective drainage and easy maintenance.
Choose flexible corrugated hose for uneven terrain and temporary fixes; rigid rectangular or round aluminum for durability and clean appearance.
Match length to measured runoff plus slight overlap; allow a gentle downhill grade.
Consider removable segments for winter storage.
How to attach a rigid downspout extension securely
Begin by fitting the rigid extension to the existing downspout to confirm alignment and measure for any cuts or offsets.
Trim as needed, deburr edges, then slide the extension onto the downspout or insert it into the outlet.
Secure with sheet-metal screws or rivets at three points, seal joints with silicone caulk, and fasten to the wall with straps or brackets spaced every 3–4 feet for stability.
How to install a flexible downspout hose
After fitting and securing a rigid extension, attention can shift to installing a flexible downspout hose when ground routing or slight grading adjustments are needed.
Measure required length, cut hose squarely, and attach with an adapter or clamp to the rigid outlet.
Lay hose along desired path, avoiding sharp bends. Anchor with stakes at intervals and guarantee the outlet directs water away from foundations.
Securing and anchoring the extension for winter and wind
Secure the extension with corrosion-resistant straps and ground anchors to prevent movement from wind, ice, and freeze–thaw cycles.
Position anchors every 3–4 feet, fastening straps snugly but allowing slight pipe expansion. Use stainless steel or galvanized hardware and rubber-lined clamps to avoid abrasion.
Inspect anchors seasonally, tighten as needed, and clear surrounding debris or ice to maintain secure drainage and prevent displacement.
Step-by-Step: How to Direct Downspout Underground
When surface runoff must be routed away from foundations or landscaping, the homeowner may choose underground drainage for a cleaner, more permanent solution.
The process begins with planning the trench route and outlet location, followed by trenching, laying pipe, and securely connecting the downspout.
Final steps include backfilling with proper slope verification and restoring the surface to prevent settling and guarantee long-term performance.
When to use underground drainage
If gutters consistently channel water toward foundations, create pooling where landscaping fails to absorb runoff, or local codes prohibit surface discharge, underground drainage becomes the appropriate solution; it routes water away out of sight and prevents erosion, basement leaks, and wet spots in yards.
Use it when surface grading, swales, or extensions won’t fix saturation, when aesthetics demand concealment, or where concentrated flows threaten structures.
Planning the trench route and outlet location
Begin by mapping the most direct, practical trench route from the downspout to the chosen outlet, taking into account property lines, utility locations, landscaping features, and the natural slope for gravity flow.
Identify a safe outlet: storm drain, dry well, or graded discharge point. Mark setbacks, avoid tree roots, plan gentle grade (1%–2%), and confirm local codes and neighbor considerations before digging.
Trenching, laying pipe, and connecting to the downspout
Excavate the trench along the planned route to the required depth and slope, keeping the bottom smooth and free of debris so the pipe lays uniformly at roughly a 1%–2% fall toward the outlet.
Typical depth ranges from 6 to 18 inches depending on frost line and surface use, but must also accommodate any required bedding and cover.
Lay rigid or corrugated drain pipe on bedding, join sections with appropriate couplers or solvent welds, install an adapter to the downspout with a tight boot or elbow, and secure connections with clamps or sealant to prevent leaks.
Backfilling, slope checks, and surface restoration
Once the pipe has been fitted and inspected, backfilling should proceed in layers to protect the conduit, maintain the designed slope, and restore the surface.
Each lift is compacted gently, checking slope with a level or laser to guarantee consistent fall toward the outlet.
Final soil is graded to match surrounding terrain; turf or mulch is replaced and runoff paths are verified for unobstructed flow.
Alternatives and Complementary Solutions
Alternatives to burying a downspout include placing splash blocks or diverters to direct runoff away from foundations.
Rain barrels or larger cisterns can capture water for reuse, reducing discharge volume.
Where available, connecting to existing storm drains or dry wells provides a permanent route for collected water.
Using splash blocks and diverters
Several simple options complement downspout extensions by redirecting water at ground level, particularly splash blocks and diverters that control runoff without extensive digging.
They protect foundations, reduce erosion, and direct flow to safe areas.
Consider:
- Concrete splash blocks to disperse flow.
- Plastic splash blocks for lightweight placement.
- Pop-up diverters for hidden routing.
- Flexible extenders to aim water away.
Installing rain barrels or cisterns
When roof runoff is captured in rain barrels or a larger cistern, homeowners gain a practical way to reduce stormwater leaving the property while storing water for irrigation and nonpotable uses.
Proper installation includes secure downspout diverters, screened inlets to block debris, overflow routing to safe dispersal, and stable foundations.
Regular maintenance prevents mosquitoes and sediment buildup.
Selection depends on capacity and local regulations.
Connecting to existing storm drains or dry wells
After considering on‑site storage like barrels or cisterns, homeowners may route downspouts into municipal storm sewers or subsurface dry wells to manage larger volumes or when storage is impractical.
Connections require permits, proper fittings, and erosion control. Storm sewer ties must meet local codes; dry wells need appropriate sizing, gravel backfill, and overflow provisions.
Professional inspection guarantees compliance and prevents basement backup or groundwater contamination.
Choosing Materials: Pros and Cons
Choosing the right material affects durability, cost, and ease of installation for a downspout extension. Below is a simple visual comparison to frame choices between plastic and metal, and between rigid, flexible, and corrugated options.
| Material Type | Typical Traits |
|---|---|
| Plastic vs. Metal | Plastic: lightweight, inexpensive; Metal: durable, more expensive |
| Rigid Extension | Stable, directs water well, less forgiving on uneven ground |
| Flexible / Corrugated | Flexible: easy to route; Corrugated: flexible but can trap debris |
Comparison of plastic vs. metal extensions
Several common factors—durability, weight, cost, and ease of installation—shape the decision between plastic and metal downspout extensions. Plastic is lightweight, affordable, and corrosion-resistant but less impact-resistant. Metal offers greater strength and longevity, resists crushing, yet can corrode and is heavier. Choice depends on climate, budget, and expected wear.
| Attribute | Note |
|---|---|
| Durability | Metal stronger |
| Weight | Plastic lighter |
| Cost | Plastic cheaper |
| Corrosion | Plastic resists |
| Installation | Both easy |
Rigid extension vs. flexible hose vs. corrugated pipe
Selecting the right downspout extension material hinges on balancing longevity, flexibility, and site conditions. Rigid extensions resist clogging, last longest, and look neat but require precise alignment. Flexible hoses bend around obstacles yet can sag and trap debris. Corrugated pipes suit buried runs and uneven terrain but may clog and degrade faster.
| Material | Best use |
|---|---|
| Rigid | Exposed, long-term |
| Flexible/Corrugated | Obstacles or burial |
Common Installation Mistakes and How to Avoid Them
Common installation errors can undermine an extended downspout’s performance and longevity.
Key issues to check include:
- Improper slope causing standing water
- Poor attachment leading to detachment or leaks
- Inadequate allowance for freezing that blocks flow
- Insufficient drainage capacity for peak runoff
Addressing these prevents water damage and reduces maintenance.
Improper slope and standing water problems
Improper slope in downspout extensions often causes slow drainage and standing water, which can accelerate corrosion, promote mosquito breeding, and overload gutters during heavy rain.
Affected runs should have a continuous slight pitch away from the house (about 1/8–1/4 inch per foot) and clear unobstructed channels.
Regular inspections, occasional regrading, and using rigid extensions prevent pooling and related damage.
Poor attachment leading to detachment or leaks
Even with correct slope, a downspout run can fail if attachments are weak or poorly placed. Loose straps, undersized screws, or distant fastening points allow sway and separation.
Properly spaced brackets, corrosion-resistant fasteners, and secure connections at joints prevent leaks and detachment. Regular inspection and tightening after storms guarantee stability.
Use manufacturers’ recommended hardware and avoid makeshift clamps.
Failing to account for freezing and drainage capacity
Neglecting freeze-thaw conditions and the actual volume of runoff can cause downspouts to clog, split, or fail during heavy storms.
Install slopes and insulated extensions, use larger-diameter pipes for high runoff areas, and provide accessible cleanouts.
Make certain discharge points direct water away from foundations and into permeable surfaces or storm drains.
Regularly inspect before winter and after heavy rain to prevent ice and overflow damage.
Maintenance and Seasonal Considerations
Regular inspections and periodic cleaning of downspout extensions keep water flowing and prevent blockages.
Seasonal steps—such as removing debris in fall and adding heat or insulation in winter—reduce the risk of ice buildup and damage.
Consistent long-term care preserves proper drainage to protect the foundation and nearby landscaping.
How often to inspect and clean extensions
How often extensions should be inspected and cleaned depends on local climate, surrounding foliage, and roof condition.
Monthly checks are advisable during heavy leaf drop and storm seasons; otherwise, inspect quarterly.
Promptly remove debris, check for clogs, joints, and secure fastenings.
After major storms, reinspect for displacement or damage.
Keep records of inspections to track recurring issues and schedule professional cleaning if needed.
Winterizing extensions and preventing ice damage
During colder months, gutter extensions require specific preparation to prevent ice buildup and related damage. Water should be fully drained; temporary extension caps or plugs can prevent trapped moisture.
Slope and anchor extensions to avoid sagging under ice weight. Remove debris before freeze cycles and inspect fasteners for corrosion.
Consider flexible, kink-resistant materials that shed ice and allow easy removal if icing occurs.
Long-term care to protect foundation and landscaping
After winter preparations and ice prevention are addressed, attention shifts to long-term measures that protect the foundation and landscaping from runoff damage.
Regular inspections guarantee extensions remain secure and unobstructed. Maintain proper slope away from the house, extend outlets to stable drainage areas, and use splash blocks or dry wells to disperse flow.
Prune nearby plants and monitor soil moisture to prevent erosion and settling.
Cost Estimates and When to Hire a Professional
Typical material and DIY labor for extending a downspout often ranges from inexpensive plastic elbows and extensions to mid-range metal components and a few hours of homeowner time.
If leaks persist, roofline complexity increases, or safe ladder access is in question, a professional should be contacted.
A qualified contractor will provide a detailed estimate, verify proper slope and secure connections, and guarantee code-compliant discharge away from the foundation.
Typical material and DIY labor cost ranges
Estimate expenses before starting a downspout extension project to decide whether to DIY or hire help.
Typical materials—PVC pipe, elbows, straps, adapters—range $15–$60.
DIY labor time often totals 1–4 hours, valued at opportunity cost or informal rate $20–$60/hour.
Hiring a contractor commonly adds $100–$300 for basic extensions, higher for complex routing or landscape adjustments.
Signs you should call a professional
When should a homeowner call a professional rather than attempt a downspout extension alone?
If the roofline is steep or high, if fascia, siding, or foundation issues exist, or if gutter connections are corroded or hidden, hire a pro.
Also seek professional help when local codes apply, drainage requires grading changes, or previous attempts failed.
Expect clearer cost estimates and liability coverage.
What to expect from a professional installation
A professional assessment clarifies scope, cost, and timeline before work begins.
The contractor provides a written estimate detailing materials, labor, permits, and contingencies.
Typical residential installations range widely; expect a site visit, options for materials, and prioritized fixes.
Hire a professional when roof access, complex grading, drainage alternatives, or permit requirements exceed DIY skill or when warranties and liability protection are needed.
Real-World Examples and Simple Project Scenarios
The section outlines three practical scenarios: a quick, under‑one‑hour temporary extension for short‑term rentals, a yard‑friendly permanent above‑ground extension tailored to garden beds, and a full underground reroute for properties with serious drainage problems.
Each example highlights typical materials, time required, and when to call a professional. Readers are encouraged to compare scenarios to their site conditions before choosing an approach.
Short-term rental solution under 1 hour
Installers can create a temporary downspout extension in under an hour using common materials—flexible corrugated tubing, zip ties, and a splash block—to redirect runoff away from a rental entry or foundation.
This quick fix is easy to attach to an existing downspout outlet, requires no special tools, and can be removed or upgraded once a permanent solution is scheduled.
The setup prevents pooling, protects walkways, and meets short-term tenant needs.
Yard-friendly permanent extension for gardens
Redirects runoff into garden beds can be both functional and attractive when planned as a permanent yard-friendly downspout extension.
Examples include buried corrugated pipe leading to a flower border, decorative rock swale that disperses flow, and a stone-lined dry stream directing excess to a rain garden.
Projects emphasize gentle slope, erosion control, plant placement, and low-maintenance materials suited to local soil.
Full underground reroute for severe drainage issues
Several homeowners facing chronic basement seepage or severe yard erosion opt for a full underground reroute of downspouts, burying rigid or flexible pipe to carry roof runoff away from foundations to appropriate discharge points.
Typical projects include connecting to storm sewers, dry wells, or daylighting outlets.
Proper slope, cleanouts, and durable fittings prevent clogs and allow maintenance; permits and utility checks are advised.
Quick Troubleshooting Guide
A quick troubleshooting guide helps identify and fix common problems after extending a downspout.
Recommended checks include:
- Inspect for water pooling near the foundation.
- Verify the extension remains connected during storms.
- Check for erosion or washout at the outlet.
Prompt action on these items reduces damage and improves performance.
Water pooling near foundation after extension
Check the downspout extension and surrounding grade immediately when water pools near the foundation after installation; pooling indicates the system is not diverting runoff far enough or is obstructed.
Inspect for clogs, collapsed or misaligned pipe, and low spots in landscaping. Adjust slope, extend the outlet, or add splash blocks and gravel trenches.
If persistent, consult a drainage specialist to prevent structural damage.
Extension disconnects during heavy storms
Begin by inspecting the connection points and fasteners when an extension disconnects during heavy storms, since sudden surges in flow, wind, or debris often overwhelm weak joints.
Check for damaged clips, corroded screws, or split fittings.
Reinforce with stainless hardware, hose clamps, or zip ties as interim fixes.
Guarantee proper alignment and consider replacing worn sections to restore a secure, watertight joint.
Erosion or washout at the outlet
If an extension repeatedly disconnects or leaks during storms, the downstream area should next be examined for erosion or washout at the outlet, since concentrated flow can scour soil and undermine landscaping or foundations.
Inspect for exposed roots, gullying, or undermined paving.
Install a splash block, extend the downspout onto hardscaping, or add a gravel-filled trench to dissipate energy and stabilize soil.
Final Checklist Before You Finish the Job
Before wrapping up, a brief checklist verifies the extension performs as designed and is documented.
Key items to verify include slope, securement, and outlet clearance; clean-up and documentation with warranty notes; and triggers for re-evaluation or upgrade.
Suggested quick list for final review:
- Confirm proper slope and secure fastening
- Verify outlet is clear and directed away from foundation
- Complete clean-up, photos, and warranty/receipt filing
- Note any signs or timelines that warrant re-evaluation or upgrades
Slope, securement, and outlet clearance
A final check of the extended downspout focuses on three critical factors: maintaining a consistent slope for positive drainage, guaranteeing secure attachment to the structure to resist wind and water weight, and verifying the outlet clears the foundation and directs water away from the building.
Confirm slope by measuring fall over length, tighten brackets every 3–4 feet, and verify outlet discharges beyond splash or erosion zones.
Clean-up, documentation, and warranty tips
Complete the worksite by removing debris, collecting leftover materials, and cleaning gutters and downspout exteriors so that the area is safe and presentable.
Photograph the installed extension, note measurements, fastener types, and slope for records.
Retain receipts and manufacturer instructions to support warranties.
Explain maintenance intervals and document any adjustments.
Store spare parts and keep warranty timelines accessible for future reference.
When to re-evaluate or upgrade the system
With cleanup and documentation finished, the installer should assess whether the extended downspout meets present and future needs.
Inspect flow capacity, freeze resistance, attachment security, and potential clog points.
Consider landscaping changes, nearby construction, or heavier storms that warrant larger piping, heat tracing, or splash blocks.
If deficiencies appear, plan upgrades or professional consultation before closing the job to prevent costly repairs.
Conclusion
Extending a gutter downspout protects foundations, gardens, and sidewalks by directing water away—so it should never be ignored. Whether using aboveground extenders, splash blocks, or buried piping, homeowners follow clear steps, gather proper materials, and check for local codes. Simple fixes save money, yet professionals step in for complex grading or excavation. Like a silent guide, the extended downspout leads water to safety, turning potential damage into harmless runoff with steady, practical purpose.
