
How to Check for Propane Leaks: Easy Steps to Find and Fix Them Safely
To check for propane leaks, inspect tanks, hoses, fittings, regulators, and appliances for any hissing sounds, frost, dents, or the distinct rotten-egg odor. If you suspect a leak, evacuate people and pets immediately, turn off the gas only if it’s safe to do so, avoid any sparks, and contact emergency services or your propane supplier from a safe distance. Use soapy water to check joints for bubbles or a certified sniffer for detecting low concentrations. Never attempt makeshift repairs. Document your findings and consult a licensed propane technician for pressure testing and repairs. Follow further guidelines for detection tools and safety measures.
How to Tell If You Might Have a Propane Leak
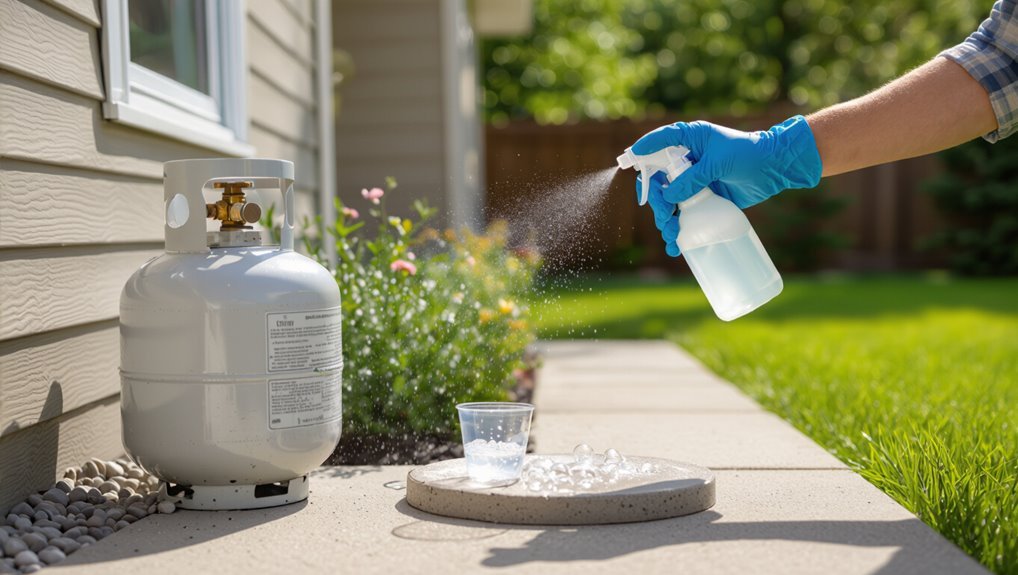
Signs of a propane leak can appear as hissing sounds, the distinct rotten-egg odor added to propane, dead or discolored vegetation near a tank or line, or unexplained frost on fittings.
People and pets exposed to propane may experience headaches, dizziness, nausea, difficulty breathing, or loss of coordination.
Any persistent odor, physical symptoms, or visible leaks should be treated as an emergency and prompt evacuation and professional response are advised.
Common signs and symptoms around the home
A faint, persistent odor resembling rotten eggs, hissing sounds near tanks or fittings, and an unexplained deadening of vegetation are common indicators that propane may be leaking around a home.
Other signs include frost on valves, oily residue at connections, and pilot lights that frequently extinguish.
When learning how to check for propane leaks, inspect fittings visually and use a soap solution to reveal bubbles.
Physical symptoms of propane exposure in people and pets
Visual and audible cues around the home can indicate a leak, but people and pets may show physiological responses that help confirm exposure.
Symptoms include headache, dizziness, nausea, fatigue, breathing difficulty, and loss of coordination.
Pets may appear weak, disoriented, cough, or have vomiting.
These signs suggest inhalation; evaluate occupants promptly and ventilate the area while examining source and severity.
When to treat a smell as an emergency
Treat any unexpected rotten-egg odor of propane indoors as potentially dangerous and assess the situation immediately.
If odor persists, is strong, or coincides with physical symptoms, evacuate occupants and pets, avoid flames or electrical switches, and call emergency services or the propane supplier from a safe location.
Treat outdoors-only faint smells differently but report repeated or unexplained odors for professional inspection.
Immediate Safety Actions if You Suspect a Leak
If a propane leak is suspected, immediate steps include evacuating people and pets, shutting off the gas supply if it can be done safely, and avoiding any action that could create a spark or flame.
Instructions for turning off a propane tank or house gas valve should be followed exactly and only attempted from a safe location upwind of the leak.
Emergency services or the propane supplier should be contacted right away if the leak cannot be controlled or if anyone feels unwell.
Steps to take right away (evacuate, shut off, avoid ignition)
Evacuate the area immediately, shut off the propane supply at the tank or appliance if it can be done safely, and avoid any actions that could create a spark or flame.
Move people upwind and to a safe distance, do not operate electronics, lights, or vehicles, and prevent reentry until professionals declare the scene safe.
Call emergency services from a secure location.
How to shut off a propane tank or gas supply safely
Locate the main shutoff and close it immediately only if it can be done without entering the hazardous area or creating sparks.
Turn propane tank valves clockwise firmly until fully seated; use a wrench if needed on stuck valves.
For indoor gas mains, close the appliance emergency valve or the building service valve.
Do not operate electrical switches, phones, or open flames while shutting off supply.
When to call emergency services or your propane supplier
Call emergency services or the propane supplier immediately when a strong odor of gas is present, when multiple people report symptoms (dizziness, nausea, headache), or when there is visual evidence of a leak such as hissing sounds, frost on a tank, or standing vapor.
The responder will secure the area, assess risk, and either repair, isolate, or advise evacuation.
Follow their instructions and avoid reentry until cleared.
Tools and Materials Needed to Check for Propane Leaks
Practical checks begin with simple household items—soapy water in a spray bottle—to reveal bubbles at leak points.
For greater sensitivity, use certified detection tools such as sniffer detectors or combustible gas meters.
Appropriate personal protective equipment, including gloves and eye protection, should be worn while testing.
Household items that work (soapy water, spray bottle)
A few common household items make an effective DIY propane leak test: a mild dish soap mixed with water in a spray bottle produces a reliable soapy solution for bubble testing, while a clean rag, gloves, and a flashlight help with application and inspection.
Apply solution to joints, valves, and connections; watch for steady bubbles indicating leaks. Dispose of soiled rags safely.
Recommended detection tools (sniffer detectors, combustible gas meters)
Use electronic detectors to complement visual and soap-bubble checks when locating propane leaks. Sniffer detectors quickly sense low concentrations at fittings, valves, and appliance connections.
Combustible gas meters quantify gas levels and trigger alarms when thresholds are exceeded, aiding risk assessment and ventilation decisions. Choose calibrated, propane-sensitive models, follow manufacturer instructions, and verify detector function before and after inspections.
Personal protective equipment to use
After verifying detector function and locating suspected leak points with electronic tools, attention should turn to personal protective equipment.
Inspectors should wear safety goggles, flame-resistant gloves, and long-sleeved, non-synthetic clothing. A particulate respirator or supplied-air respirator may be required in confined or poorly ventilated spaces.
Sturdy, oil-resistant footwear and a headlamp or flashlight complete essential PPE for safe, controlled leak inspection and response.
Step-by-Step Visual and Manual Inspection
A systematic visual and manual inspection begins with a careful look at tanks and cylinders for dents, rust, or other signs of damage.
Hoses, connections, regulators, and valves are then examined and gently moved to reveal cracks, wear, or looseness, followed by checks of appliances, fittings, and pipe joints for corrosion or misalignment.
Seasonal checks and post-transport inspections complete the process to catch issues caused by weather exposure or movement.
Inspecting tanks and cylinders for damage and corrosion
Begin by placing the tank or cylinder on a stable, well-lit surface and visually scanning the entire exterior for dents, deep scratches, bulges, or obvious rust spots that could compromise integrity.
Then run gloved hands over seams, welds, and the collar to feel for pitting or flaking corrosion.
Mark severe damage and remove compromised cylinders from service for professional evaluation or disposal.
Checking hoses, connections, regulators, and valves
Inspect the hoses, connections, regulators, and valves systematically, moving from the tank toward the appliance to confirm no component is overlooked.
Visually check for cracks, bulges, corrosion, loose fittings, or missing clamps.
Manually feel for softened or brittle sections and verify regulators are secure and vents unobstructed.
Tighten fittings with proper tools, replace damaged parts, and mark completed inspections for records.
Inspecting appliances, fittings, and pipe joints
When inspecting appliances, fittings, and pipe joints, the examiner should proceed methodically from the appliance back toward the supply, using both visual and tactile checks to detect cracks, loose connections, corrosion, or gas odor.
Examine burners, seals, flanges, threaded joints, and soldered fittings for wear. Gently wiggle connections, note discoloration or residue, and document any suspect areas for testing or repair.
Seasonal and post-transport checks
After checking appliances, fittings, and pipe joints, attention shifts to seasonal and post-transport inspections that emphasize a systematic visual and manual sweep of the entire propane system.
Technicians scan for corrosion, dents, loose connections, and frost. Valves, regulators, hoses, and tank mounts receive tactile checks and soap-solution testing where needed.
Document findings, tighten or replace defective parts, and retest before reusing equipment.
How to Perform a Soapy Water Leak Test
A simple soapy water test begins by mixing a mild detergent with water and applying it with a spray bottle or brush to fittings, valves, hoses, and regulator connections. Observers should watch for steady bubbling to identify active leaks and note bubble size and persistence to gauge severity.
The method is only a preliminary check—it cannot detect very small leaks or replace proper repairs, and users must avoid open flames, ventilate the area, and keep a safe distance while testing.
Preparing the solution and application method
Mix a mild, sudsy solution by combining liquid dish soap with water at roughly a 1:5 ratio in a spray bottle or brushable container; this creates a stable foam that visibly bubbles at leak sites.
Apply evenly to fittings, valves, hoses and regulator seams using a fine spray or soft brush.
Recoat lightly if foam dissipates; rinse and dry components after testing.
Areas to test and how to interpret bubbles
With the solution applied, attention turns to testing specific components where leaks most commonly occur: cylinder valve connections, regulator outlets, hose fittings, hose length (including near clamps), appliance connectors, and any visible cracks or corrosion on tanks and piping.
Watch for steady stream bubbles indicating a significant leak, intermittent bubbles for small leaks, and no bubbles for secure joints; mark and repair any bubbling areas.
Limitations and safety precautions for the soapy test
Although simple and effective for many situations, the soapy water leak test has clear limitations and safety considerations that must be observed.
It cannot detect very small or slow leaks reliably, may miss leaks under high pressure, and is inappropriate near open flames.
Wear eye protection, avoid sparking tools, ventilate the area, and evacuate if a strong smell of gas persists.
Use professional inspection for doubt.
Using Electronic Detectors to Find Leaks
Handheld propane/sniffer detectors use catalytic sensors or semiconductor sensors to sense hydrocarbons and provide audible or visual alarms.
Proper scanning requires slow, methodical passes with the sensor tip near fittings and adjustable sensitivity to reduce false positives.
Professional-grade meters are recommended for complex systems, high-risk environments, or when quantitative readings are required.
How handheld propane/sniffer detectors work
A portable propane/sniffer detector senses trace concentrations of combustible gases near a suspected leak and converts that chemical signal into an audible or visual alert.
Internal sensors—typically semiconductor, catalytic bead, or infrared—respond to propane molecules and change electrical characteristics.
Onboard electronics interpret sensor output, providing proportional alerts and diagnostic indicators.
Battery power, calibration status, and sensor type determine accuracy and response time.
Proper scanning technique and sensitivity settings
Begin scanning slowly and methodically, keeping the detector inlet close to joints, fittings, valves, and seam lines where propane is most likely to escape.
Move at a steady pace, pausing briefly at suspect areas. Adjust sensitivity to detect faint traces without constant false alarms, lowering sensitivity in high-background zones.
Note increases in readings, mark locations, and recheck after correcting suspected leaks.
When to prefer professional-grade meters
When is it appropriate to choose a professional-grade meter over a consumer detector?
Professionals use meters when sensitivity, calibration, and certification matter: complex leaks, industrial installations, long pipe runs, or regulatory inspections.
Professional meters offer lower detection limits, selectable sensors, data logging, and rugged construction.
They reduce false positives and provide traceable results for repairs, safety reports, and liability protection.
What to Do If a Leak Is Confirmed
If a propane leak is confirmed, the first action is to contain the area and isolate the fuel source while evacuating people and ignition sources.
Decisions about repairing or replacing equipment should be left to a qualified technician who can assess damage and certify safe operation.
Temporary fixes such as tape, clamps, or improvised seals should be avoided because they can fail and create serious safety hazards.
Immediate containment and isolation steps
Shut off the propane supply at the source and move everyone well away from the area to a safe distance; callers should alert emergency services and the propane supplier immediately.
Secure the site by isolating the leak zone, ventilating from a safe distance if outdoors, and preventing ignition sources.
Evacuate adjacent structures, block access, and document conditions for responders without re-entering until cleared.
Repair vs. replace: when to call a qualified technician
How should responsibility for repair be determined once a propane leak is confirmed?
Ownership, appliance age, and certification requirements guide decisions: owners should evaluate warranty status and local codes, but any leak involving fittings, regulators, tanks, or internal lines typically warrants a certified technician.
Only qualified professionals should assess corrosion, replace components, or certify system safety; document actions and obtain a written repair or replacement report.
Temporary fixes to avoid and why they’re unsafe
Why attempt a quick patch?
Temporary fixes — tape, sealants, makeshift clamps, or partial valve turns — can worsen leaks, hide damage, and delay proper repair. They risk fire, explosion, and carbon monoxide buildup.
A confirmed leak requires immediate evacuation, shutting off the supply at the tank, and contacting a qualified technician.
Only certified repairs guarantee safety and compliance.
When to Call a Professional and What to Expect
If a leak is suspected beyond basic homeowner checks, a certified propane technician or licensed HVAC/plumbing professional should be contacted, ideally one with NORA, NPGA, or state-specific gas-certification credentials.
Technicians typically perform leak detection with electronic sniffer tools, pressure and regulator tests, and a full appliance and line inspection.
Expect inspections and minor repairs to be completed within a few hours at modest cost, while more extensive line or tank work can take longer and cost substantially more.
Types of qualified technicians and certifications to look for
Several categories of technicians handle propane systems, and consumers should seek those with specific certifications and experience.
Licensed propane service technicians, certified gas fitters, and licensed HVAC professionals are common.
Look for credentials such as NFPA-compliant training, state or provincial propane licenses, and manufacturer-specific appliance certifications.
Membership in professional associations and valid insurance indicate professionalism and regulatory compliance.
Typical diagnostic procedures professionals use
Call a professional promptly when a persistent rotten-egg odor, hissing sounds near tanks or lines, dead vegetation around fittings, or unexplained appliance failures occur, as trained technicians follow a systematic diagnostic process:
they interview occupants, survey meter and regulator readings, perform pressure and leak-rate tests, inspect fittings, valves and appliances, use calibrated gas detectors and soap tests, isolate sections, and recommend targeted repairs or safe shutoff.
Estimated costs and timelines for repairs and inspections
When a qualified technician is summoned for suspected propane leaks, homeowners can generally expect an initial diagnostic visit to take 30–90 minutes and to cost between $75 and $250 depending on travel and local rates.
Subsequent repairs vary: simple valve or regulator replacements often run $150–$400 and take one to three hours, while complex line repairs or appliance replacements can cost $500–$2,500 and require a day or more.
Preventive Maintenance to Reduce Future Leaks
Preventive maintenance focuses on routine inspections of tanks, piping, and appliances to catch wear, corrosion, or loose fittings before they become leaks.
It also emphasizes correct installation and secure anchoring to prevent movement and stress on connections.
Seasonal precautions—winterizing equipment, safe storage, and careful transport—further reduce the risk of future leaks.
Regular inspection schedule for tanks, lines, and appliances
A routine inspection schedule—monthly visual checks, annual professional evaluations, and prompt follow-ups after extreme weather or equipment changes—helps identify wear, corrosion, and leaks in tanks, lines, and appliances before they escalate.
Inspect fittings, valves, regulators, flexible connectors, and visible piping for damage or residue. Log findings, tag issues, and prioritize repairs.
Replace aging components per manufacturer recommendations.
Proper installation and anchoring practices
Make certain propane tanks, piping, and appliances are installed and anchored according to manufacturer and local code requirements to minimize movement, stress, and corrosion that lead to leaks.
Use approved supports, vibration isolators, and corrosion-resistant materials. Secure flexible hoses and fittings, maintain clearances, and protect exposed connections from physical damage.
Document installations and verify anchoring during inspections to prevent future failures.
Winterizing, storage, and transport precautions
Following secure installation and anchoring, attention turns to winterizing, storage, and transport practices that reduce the risk of future propane leaks.
Tanks should be insulated, valves winterized, and regulators protected from ice.
Store cylinders upright, outdoors, ventilated, and away from ignition sources.
During transport, secure cylinders, cap valves, and avoid enclosed trunks.
Regular inspections and professional servicing guarantee long-term integrity.
Common Mistakes and Unsafe Practices to Avoid
The article warns against common mistakes and unsafe practices that can worsen propane hazards.
Attempting DIY repairs, relying solely on detectors, or dismissing faint odors and minor signs can create a false sense of security and increase risk.
Readers are encouraged to recognize these pitfalls and follow proper procedures or call qualified professionals.
DIY repairs that increase risk
Although well-intentioned, DIY repairs on propane systems often introduce hazards that professional technicians are trained to prevent, such as improper connections, damaged valves, or inadequate leak testing.
Untrained attempts can worsen leaks, void warranties, and bypass safety devices. Incorrectly sized fittings, improper thread sealants, and amateur brazing create ignition and asphyxiation risks, so prompt professional assessment and repair are recommended.
Misusing detectors and false sense of security
Many homeowners rely on propane detectors but misuse and misplacement of these devices can create a dangerous false sense of security.
Detectors require correct placement, power, maintenance, and model suitability for propane. Expired or improperly installed units may not detect leaks.
Relying solely on detectors instead of regular visual inspections, odor checks, and professional servicing increases risk and delays proper response to leaks.
Ignoring minor signs that lead to major hazards
Misplaced confidence in detectors can lead homeowners to overlook small but telling signs of a propane leak. Ignoring faint odors, hissing sounds, dead vegetation, or puddles near tanks compounds risk.
Delaying visual inspections, skipping routine maintenance, and assuming intermittent alerts are false increases chances of accumulation and ignition.
Prompt attention to subtle indications prevents escalation into fires, explosions, or carbon monoxide hazards.
Comparison of Detection Methods and Their Effectiveness
A clear comparison of soapy water, electronic detectors, and professional inspection helps readers choose the most reliable approach for their situation. Each method has distinct sensitivity, cost, and safety implications that merit careful consideration. The table below contrasts basic attributes to provoke thought about risk and responsibility.
| Method | Emotional cue |
|---|---|
| Soapy water — cheap and hands-on | Unease at DIY limits |
| Electronic detectors — convenient and sensitive | Reassurance tempered by false alarms |
| Professional inspection — thorough and costly | Relief mixed with expense |
| Combined approach — layered protection | Confidence through redundancy |
Soapy water vs. electronic detectors vs. professional inspection
Compare three common approaches—soapy water, electronic detectors, and professional inspection—by how reliably they detect leaks, where they work best, and what limitations each carries.
Soapy water is cheap and good for visible fittings but misses small or intermittent leaks.
Electronic detectors offer sensitivity and portability yet require calibration and batteries.
Professional inspection provides thorough assessment and repair recommendations but costs more.
Quick Reference: Emergency Checklist and Contact Information
A concise emergency checklist outlines the immediate actions to take and the key contacts to notify if a propane leak is suspected.
It presents steps in order to secure safety, evacuate if necessary, and minimize ignition sources before calling for help. The list also specifies who to contact for emergency response, the propane supplier, and a certified technician for inspection and repairs.
- Evacuate the area, shut off appliances and gas supply if safe, and avoid creating sparks.
- Call emergency services first, then notify the propane supplier with account details.
- Arrange for a certified technician to perform a leak inspection and repairs before reoccupying the premises.
Immediate actions to take in order
Begin evacuating the area immediately, moving people upwind and away from the building or appliance involved; do not use electronics, open flames, or light switches while leaving.
Shut off the propane supply at the tank valve only if it can be reached safely from outside.
Account for all occupants at a safe distance, keep others clear, and await further instructions without re-entering the premises.
Who to contact (emergency services, propane supplier, certified technician)
Several critical contacts should be notified immediately after evacuating: emergency services, the propane supplier, and a certified propane technician.
Emergency services handle fire, explosions, and medical needs.
The supplier can shut off supply, advise on tank safety, and document the incident.
A certified technician inspects equipment, locates leaks, and performs repairs.
Maintain records of all communications and follow professional guidance before reentering.
Resources and Further Reading
Readers are directed to consult current industry safety standards and local codes for definitive guidelines on propane handling and leak response.
Manufacturer manuals and official guidance for specific appliances and tanks provide model-specific procedures and troubleshooting steps.
Together, these resources offer authoritative references to supplement the checklist and safety measures described earlier.
Industry safety standards and codes
A concise list of relevant industry standards, codes, and regulatory resources helps technicians and property owners verify compliance and follow best practices for propane leak prevention and response.
Include national and local codes, emergency responder guidelines, inspection protocols, certification requirements, and reporting procedures.
Reference authoritative agencies and consensus standards to guarantee legal compliance, consistent safety practices, and up-to-date technical requirements for leak detection, repair, and documentation.
Manufacturer manuals and official guidance
Because equipment-specific details determine safe operation and proper leak-response actions, manufacturers’ manuals and official guidance are primary resources for technicians and property owners.
These documents provide model-specific procedures, approved replacement parts, calibration, troubleshooting, and safety limits.
Consult OEM manuals, appliance labels, and certificating agencies (e.g., NFPA, CSA, ANSI) for authoritative instructions; follow their steps before attempting repairs or contacting licensed professionals.
Conclusion
A neighbor’s barbecue flickers to life across the yard just as a faint chemical scent draws attention to the regulator — a coincidental reminder that danger and normalcy can sit side by side. The reader is left with clear steps, simple tools, and a calm checklist: detect odors, evacuate if needed, test fittings with soapy water, and call professionals. Acting promptly turns coincidence into safety, minimizing risk and restoring everyday routines.

