How to Use Water Weld: Step-by-Step Guide to Repairing Leaks and Seams
Water Weld is a quick and effective two-part epoxy putty designed for waterproof repairs on various surfaces like metal, plastic, and fiberglass. To repair leaks or seams, follow these steps:
- Clean the Surface: Degrease and clean the area thoroughly.
- Roughen the Surface: Slightly sand or roughen the area to enhance adhesion.
- Knead the Putty: Mix equal parts of the resin and hardener until the color is uniform and the mixture feels warm.
- Apply the Putty: Firmly press and shape the putty over the leak or seam, ensuring there are no air pockets.
- Smooth the Finish: Use a tool or your fingers to smooth the surface.
- Cure: Allow it to cure as instructed before testing under low pressure.
For detailed tips and safety precautions tailored to specific scenarios, refer to the following sections.
What Water Weld Is and When to Use It
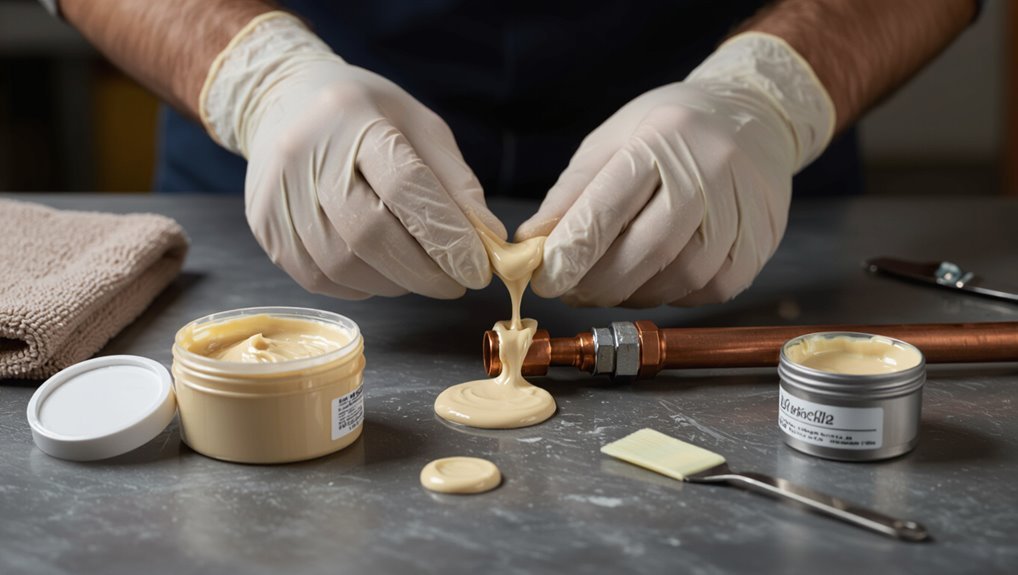
Water Weld is a two-part epoxy putty composed of a resin and hardener that chemically bond when kneaded, forming a durable, waterproof repair compound.
It is commonly used for plumbing leaks, minor automotive and marine repairs, and quick household fixes where molding and adhesion are needed.
Compared with mechanical fasteners or welding, it offers fast, tool-free application and corrosion resistance but has limits on structural strength, heat tolerance, and suitability for high-pressure or load-bearing repairs.
What Water Weld epoxy putty is made of and how it works
A two-part epoxy putty, Water Weld combines a resin and hardener in a malleable stick that cures to a strong, waterproof mass when kneaded and exposed to air.
Its composition typically includes an epoxy base, reactive fillers, and metal or mineral powders that provide structural strength and adhesion.
It sets via chemical polymerization, bonds to many substrates, and instructions explain how to use Water Weld for effective sealing.
Common applications for Water Weld (plumbing, automotive, marine, household)
Epoxy putty like Water Weld excels at quick repairs across plumbing, automotive, marine, and household contexts, offering a waterproof, hard-setting bond that can be molded to fit gaps and rebuild damaged surfaces.
Typical uses include sealing pipe leaks, repairing radiator or fuel-tank cracks, fixing hull breaches or fittings, patching gutters, reinforcing furniture joints, and bonding ceramic, metal, plastic, and glass in temporary or permanent repairs.
Advantages and limitations compared with other repair methods
Compare repair approaches by evaluating strength, cure time, surface compatibility, permanence, and ease of use to decide when this two-part putty is the appropriate choice.
Water Weld offers quick, hand-moldable patching, bonds to many materials, and resists water and oils.
Limitations include lower tensile strength than welding, limited gap-filling for structural loads, and a finite working time before curing.
Quick Checklist: Is Water Weld Right for Your Leak or Seam?
The checklist starts by noting which materials bond well with Water Weld—metals, some plastics, and ceramics—and which do not.
It then assesses the size of the breach and the operating pressure to determine whether a putty repair can hold.
Finally, it prompts consideration of safety and environmental factors, such as exposure to potable water, chemicals, and disposal requirements.
Types of materials compatible with Water Weld
A quick materials check helps determine whether Water Weld is an appropriate fix.
It bonds well to metals (steel, aluminum, copper), many plastics (PVC, ABS, polyethylene when abraded), ceramic, glass and concrete.
Porous materials may require sealing first.
Avoid untreated rubber and flexible silicone surfaces; adhesion is unreliable on oily, dirty, or heavily corroded substrates without proper preparation.
Size and pressure limits for reliable repairs
Size and pressure constraints determine whether Water Weld can provide a reliable, lasting repair: it is best suited for small to moderate leaks—hairline cracks, pinholes, and seams up to roughly 1/8–1/4 inch wide—under low to medium static pressures (typically up to about 40–60 psi depending on substrate and prep).
Repairs larger than that or under high dynamic pressure usually require mechanical patching, replacement, or specialist assessment.
Safety and environmental considerations
Before applying Water Weld, users should confirm that the repair site and surrounding environment pose no safety or environmental hazards that could be exacerbated by epoxy use.
Protective gloves, eye protection, and ventilation are recommended. Avoid use near potable water without appropriate barriers.
Contain and dispose of waste per local regulations. Keep away from children and open flames; follow manufacturer MSDS guidance.
Tools, Materials, and Preparation Needed
For proper application, the user should gather required items—Water Weld putty, nitrile gloves, sandpaper, a solvent or cleaner, and a putty knife—plus optional aids such as clamps, towels, a heat source, and wire brushes.
Surfaces must be cleaned, de-greased, roughened with sandpaper or a wire brush, and dried before applying the putty.
The following steps explain how to prepare the work area and condition the surface for best adhesion.
Required items (Water Weld, gloves, sandpaper, solvent, putty knife)
A short checklist of items guarantees the Water Weld repair proceeds smoothly: required items include the Water Weld epoxy putty, disposable nitrile gloves, medium-grit sandpaper to roughen surfaces, a suitable solvent (e.g., isopropyl alcohol) for cleaning, and a sturdy putty knife for mixing and applying.
Each item supports adhesion, cleanliness, and safe handling for a durable, watertight repair.
Optional aids (clamps, towels, heat source, wire brushes)
Once the basic items are gathered, additional aids can make a Water Weld repair quicker and neater.
Clamps hold parts steady and maintain pressure while the putty cures. Towels absorb moisture and protect surrounding surfaces. A controlled heat source speeds curing on cold materials.
Wire brushes remove loose corrosion or debris from hard-to-reach spots, improving adhesion without replacing primary surface prep tools.
Surface preparation steps before applying putty
Prepare the surface thoroughly to secure strong adhesion and a durable repair: gather basic tools (wire brush, sandpaper, clean rags), a degreaser or isopropyl alcohol, disposable gloves, and any clamps or towels needed to control moisture and position parts.
Clean area of dirt, oil, and loose paint; sand to bright material; wipe with solvent until dry; remove rust; confirm edges fit snugly before applying putty.
Step-by-Step Guide to Repairing Leaks with Water Weld
The procedure begins with evaluating the damage, stopping the flow, and preparing the surface by cleaning and drying it thoroughly.
The putty is then cut, kneaded to activate it, and applied directly over the leak or seam.
Finally, the material is shaped, smoothed, blended, and checked for proper thickness to guarantee a lasting seal.
Step 1 Assess the damage and stop the flow
Begin by locating and evaluating the leak to determine its size, source, and whether any nearby fittings or corrosion contribute to the problem.
The technician then isolates the system, shuts valves or drains pressure to stop flow, and verifies dryness or minimal residual moisture.
Documenting observations—pipe material, joint type, and accessibility—guides selection of repair method and safety precautions before proceeding.
Step 2 Clean and dry the area thoroughly
With the flow stopped and observations recorded, attention turns to preparing the repair surface.
The area must be free of oil, rust, paint, and loose debris; use a wire brush or sandpaper as appropriate.
Rinse thoroughly, then dry completely with a clean cloth, heat gun, or allow air drying.
Verify no moisture remains before proceeding to the putty application step.
Step 3 Cut and knead the putty to activate it
Cut a portion of WaterWeld slightly larger than the damaged area, using a clean knife or scissors to confirm a neat edge.
Remove any paper or wrapping, then knead the putty firmly until color and texture are uniform and warm.
Work quickly; activation occurs through hand heat.
Avoid contaminating the putty with oils or debris to guarantee ideal bonding and handling properties.
Step 4 Apply and shape the putty over the leak or seam
Press the warmed putty firmly onto the leak or seam, molding it to fully cover the damaged area and extend at least ½ inch (12 mm) beyond all edges.
Work quickly to press into crevices, fill voids, and eliminate air pockets.
Shape the material to follow contours and create a continuous bond with surrounding surfaces, ensuring full contact for ideal adhesion and sealing.
Step 5 Smooth, blend, and ensure proper thickness
Smooth the patch so it shifts seamlessly into the surrounding surface while verifying the repaired area’s thickness.
The technician smooths edges with a wet finger or tool, tapering the putty to avoid ridges. They confirm uniform depth—thicker over holes, thinner on flats—maintaining recommended minimum thickness.
Any air pockets are pressed out and excess material removed for a clean, bonded finish.
Step 6 Allow cure time and test the repair
Allow the repaired area to cure undisturbed for the manufacturer’s recommended time, typically several hours to overnight, so the WaterWeld fully hardens and achieves its rated strength before any pressure or stress is applied.
After curing, inspect visually for full adhesion and uniform set.
Perform a low-pressure leak test, then gradually restore normal operating pressure while monitoring for seepage or failure; rework if necessary.
Repair Techniques for Specific Scenarios
The section outlines targeted methods for using Water Weld on common problem areas, from sealing pinholes and hairline cracks in metal pipes to filling larger holes and gouges in plastic plumbing.
It also covers techniques for repairing fiberglass seams and boat joints, performing emergency exterior fixes like roof flashings and gutters, and applying Water Weld on hot surfaces and engine components.
Each scenario highlights surface preparation, product selection, and curing considerations for a durable repair.
Sealing a small pinhole or hairline crack in metal pipes
When addressing a small pinhole or hairline crack in a metal pipe, begin by isolating the section and draining any residual fluid to guarantee a dry, safe surface for adhesion.
Corrosion and loose material must be removed with a wire brush or sandpaper to expose clean metal.
Apply Water Weld per instructions, pressing firmly to fill the defect and smooth edges.
Allow full cure, then pressure-test before restoring service.
Repairing larger holes or gouges in plastic plumbing
Moving from small pinholes in metal to larger damage in plastic plumbing requires different surface prep and reinforcement techniques.
The area must be cleaned, abraded, and dried. Undercut edges and remove loose plastic.
Apply Water Weld in layers, embedding fiberglass or polyester mesh between coats for strength.
Shape and sand after curing; test under low pressure before full restoration.
Fixing seams and joints on fiberglass and boats
Address seams and joints on fiberglass boats with attention to surface prep, reinforcement, and flexible bonding.
Clean, sand, and degrease surfaces; remove old sealant.
Apply Water Weld or compatible epoxy to gaps, embedding fiberglass tape or mat for strength.
Tool to smooth, ensuring full contact and fillet formation.
Allow recommended cure, then sand and topcoat for UV protection and flexibility.
Emergency exterior fixes (roof flashings, gutters)
Although time is often limited during sudden leaks, quick, durable repairs to roof flashings and gutters can prevent water intrusion and structural damage.
Inspect area, clean debris, and roughen surfaces.
Mix and apply Water Weld to seal gaps, laps, and punctures, smoothing edges to shed water.
Allow full cure before exposing to heavy flow.
Reinspect periodically for failures.
Using Water Weld on hot surfaces and engines
Apply caution when using Water Weld on hot surfaces and engines, as high temperatures affect handling, adhesion, and cure time.
Surfaces should cool to manufacturer-recommended temperatures; if cooling isn’t feasible, choose a high-temperature epoxy variant.
Clean and degrease thoroughly, roughen for mechanical grip, and clamp or tape until set.
Monitor bond during initial thermal cycles before returning equipment to full service.
How to Ensure a Durable, Long-Lasting Repair
Ensuring a durable, long-lasting repair begins with proper surface preparation and thoughtful mechanical support to maximize bonding.
Reinforcement using patches, mesh, or additional epoxy layers can distribute load and prevent stress concentration.
Adequate curing time, controlled temperatures, and careful post-cure handling are essential to achieve full strength and longevity.
Best practices for surface bonding and mechanical support
Prepare surfaces thoroughly and combine mechanical reinforcement with proper bonding technique to achieve a durable, long-lasting repair.
The user should clean, dry, and abrade contact areas to promote adhesion.
Apply Water Weld evenly, pressing to eliminate voids.
Maintain recommended cure time and avoid stress during setting.
Where possible, align parts for load distribution and test the bond before returning to full service.
Reinforcing repairs with patches, mesh, or epoxy layers
Reinforce repairs by adding patches, mesh, or epoxy overlays tailored to the load and environment of the damaged part.
Select compatible materials, cut patches to overlap intact substrate, and bond with fresh Water Weld or epoxy.
Use woven or fibreglass mesh for tensile strength, stagger layers for stress distribution, and smooth edges to prevent delamination.
Inspect and retouch compromised areas after initial set.
Curing times, temperature effects, and post-cure handling
Curing time and temperature critically determine the final strength and durability of a Water Weld repair: curing accelerates as temperatures rise within the product’s recommended range and slows or stalls in cold conditions.
Technicians should plan ambient and substrate temperatures accordingly to achieve full chemical crosslinking before subjecting the repair to stress.
Post-cure handling requires avoiding load, moisture, solvents, and abrasion until manufacturer-specified times elapse.
Troubleshooting Common Problems
Common issues with Water Weld are examined by identifying why putty won’t stick, offering surface-prep and mixing remedies.
The text then covers causes of cracking or shrinking after cure and steps to prevent or repair those defects.
Finally, guidance is provided for diagnosing repairs that fail under pressure and deciding whether reinforcement, reapplication, or replacement is needed.
Putty won’t stick causes and solutions
When Water Weld putty fails to adhere, the most frequent causes are surface contamination, improper mixing, or excessive moisture; diagnosing which factor is present directs the corrective action.
Clean surfaces of oil, rust, paint, and detergents; dry thoroughly. Knead until uniform color and workability.
Remove standing water and roughen glossy substrates. Test a small patch before full application to confirm adhesion.
Cracking or shrinking after cure prevention and fixes
If a repair shows surface separation or a noticeable reduction in volume after setting, the likely causes are improper mix ratios, trapped air, excessive application thickness, or moisture exposure during cure.
To prevent cracking or shrinkage, mix precisely, work out air bubbles, apply in thin layers, and allow full dry time in a dry, ventilated area.
For minor cracks, sand and reapply a thin coat.
Repair fails under pressure diagnosis and next steps
Assess the failure by examining the repair under progressively increasing pressure to pinpoint where and why it gives way.
The inspector checks bond edges, substrate cleanliness, and cure completeness. If blistering, gaps, or delamination appear, relieve pressure, remove failed material, re-prepare surfaces, and reapply Water Weld with correct mix and cure time.
Test at planned operating pressure before returning to service.
Safety, Cleanup, and Disposal
The section addresses safety measures, including recommended personal protective equipment and the need for adequate ventilation when working with Water Weld.
It also covers cleanup procedures for tools and removal of uncured putty before it hardens.
Finally, it outlines proper disposal methods for leftover material and empty containers in accordance with local regulations.
Personal protective equipment and ventilation
When preparing to use Water Weld, workers should wear chemical-resistant gloves, eye protection, and long sleeves to prevent skin contact and irritation from dust or uncured compound.
A fitted NIOSH-approved respirator is recommended if mixing or sanding generates airborne particulates.
Confirm work areas have cross-ventilation or local exhaust to limit vapor and dust buildup.
Disposable coveralls and proper waste containment reduce contamination risks.
Cleaning tools and removing uncured putty
After work, contaminated gloves and coveralls should be removed before handling tools to minimize spread of uncured putty.
Use disposable wipes or paper towels to remove excess material, then scrape remaining residue with a plastic or stainless tool.
Clean surfaces with manufacturer-recommended solvent or warm soapy water if compatible.
Dry thoroughly; ventilate area until odors dissipate.
Inspect tools for residual buildup before storage.
Proper disposal of leftover material and containers
Dispose leftover Water Weld and its containers in accordance with local regulations and manufacturer instructions to prevent environmental contamination and accidental exposure.
Uncured putty should be fully cured before disposal; cured material typically can be discarded with household waste where permitted.
Empty containers and contaminated rags should be treated as nonhazardous only if specified; otherwise follow hazardous-waste guidance or take them to an approved disposal facility.
Comparing Water Weld to Alternative Repair Methods
Water Weld is compared to epoxy putty, silicone sealant, and plumber’s tape by evaluating ease of use, durability, and suitability for temporary versus permanent fixes. Cost and time tradeoffs between quick temporary patches and full replacements are summarized to guide choice based on urgency and budget. The following table highlights key contrasts at a glance.
| Method | Typical Strength | Best Use |
|---|---|---|
| Water Weld | High after curing | Rapid, semi-permanent repairs |
| Epoxy putty | Very high | Structural or long-term fixes |
| Silicone sealant / Plumber’s tape | Moderate / Low | Sealing threads or flexible joints |
Epoxy putty vs. silicone sealant vs. plumber’s tape
When choosing a temporary or permanent repair for a leaky pipe or fitting, users should weigh the strengths and limits of epoxy putty, silicone sealant, and plumber’s tape against the specific demands of the job.
Epoxy putty bonds and fills, tolerates pressure, cures rigidly.
Silicone seals gaps, remains flexible but may not adhere under pressure.
Plumber’s tape threads fittings to prevent leaks but won’t fill holes.
Temporary patch vs. permanent replacement cost/time tradeoffs
Evaluating a temporary patch versus a permanent replacement requires balancing immediate cost, labor time, and long-term reliability.
Water Weld provides a fast, low-cost stopgap for small leaks, while full component replacement demands higher upfront expense and more downtime but offers lasting integrity and lower future maintenance risk.
Decision factors include leak severity, access difficulty, expected lifespan, and the total lifecycle cost versus convenience.
Maintenance and When to Replace Instead of Repairing
After a Water Weld repair, the repaired area should be inspected regularly for cracks, soft spots, discoloration, or continued leakage, with attention to adhesion and surrounding material condition.
Routine checks of load-bearing surfaces and joints can reveal signs that the repair is failing or that corrosion or underlying damage persists.
If inspections show extensive structural compromise, repeated failures, or damage beyond the patch’s scope, full replacement should be chosen over further repairs.
Inspecting repaired areas regularly and what to look for
Regular inspections of WaterWeld repairs help guarantee lasting performance and catch failures early.
Inspectors should look for softening, cracks, discoloration, or separation at edges and tack points. Check for continued moisture, new seepage, or loss of adhesion after drying.
Verify surrounding material integrity and that bonded seams remain flexible. Record findings and retest suspect areas promptly to prevent escalation.
Criteria that indicate full replacement is necessary
When damage extends beyond localized seams or patches—such as widespread delamination, structural weakening, recurrent leaks after multiple proper repairs, or substrate corrosion that compromises bonding—a full replacement should be considered to restore integrity and safety.
Indicators include persistent moisture penetration, warped or soft substrates, extensive adhesive failure, large-area material degradation, compromised structural supports, and repeated patch failures despite correct application.
Practical Examples and Use Cases
Practical Examples and Use Cases presents concise scenarios where Water Weld can be applied, helping readers evaluate suitability and best practices.
The section offers targeted examples across home, vehicle, and marine contexts to illustrate common repairs and seasonal factors.
Key points to reflect on include:
- Household leak fix checklist: bathroom, kitchen, attic
- Automotive quick‑fix scenarios
- Marine patch examples and seasonal considerations
- Surface preparation and curing time reminders
- When a temporary patch should become a scheduled replacement
Household leak fix checklist (bathroom, kitchen, attic)
Although small leaks often start unnoticed, a concise checklist guides effective repairs across bathroom, kitchen, and attic settings.
Inspect source, shut water or isolate area, dry surfaces thoroughly, clean and sand surrounding material, mix Water Weld per instructions, apply and shape to seal, allow full cure, test for leaks, tidy tools, and monitor periodically for recurrence or adjacent damage.
Automotive quick-fix scenarios
After addressing household leaks, attention turns to automotive quick fixes where Water Weld can offer timely, temporary repairs.
Technicians may use it to seal radiator cracks, patch heater core weeps, mend oil pan threads, or stop minor coolant leaks until proper service.
Surfaces require cleaning and drying; application is a short-term remedy, not a substitute for thorough mechanical repair.
Marine patch examples and seasonal considerations
When exposed to saltwater and constant vibration, boat hulls, deck fittings, and through-hull fittings demand quick, reliable temporary repairs. Typical marine patches include sealing transducer mounts, repairing gelcoat cracks, and bedding loose hardware.
Apply Water Weld to cleaned, dry areas, shaping to match contours.
Consider seasonal temperature shifts: cure times slow in cold, UV exposure weakens long-term bonds—follow for permanent fixes.
Conclusion
Like a small, dependable boat mending a slow leak under a moonlit sky, Water Weld offers a practical, hands-on fix that bridges metal, plastic, and ceramic when time and access are limited. Used with care and the right prep, it seals seams and calms weeping joints, buying life back for tired fixtures. Yet it is no miracle—occasional replacement or professional attention remains the lighthouse for problems beyond its shore.