
How to Tell If a Yard Hydrant Is Leaking Underground: 7 Easy Tests and Fixes
If you suspect a yard hydrant is leaking underground, look for signs such as soggy ground, persistent wet patches, unexpected spikes in your water bill, or reduced water pressure at the spout. To confirm the leak, start with a visual inspection and a dye test. Then, isolate the hydrant at the meter, conduct a bucket flow check, listen for sounds of leaks using a rod or stethoscope, and perform a pressure-drop test. Additionally, check soil moisture levels and use tracers for hidden leaks. Analyzing these results will help you identify whether the issue is with packing gland seals or requires excavation. Follow these steps for effective detection and repair solutions.
What a Yard Hydrant Is and How It Normally Works
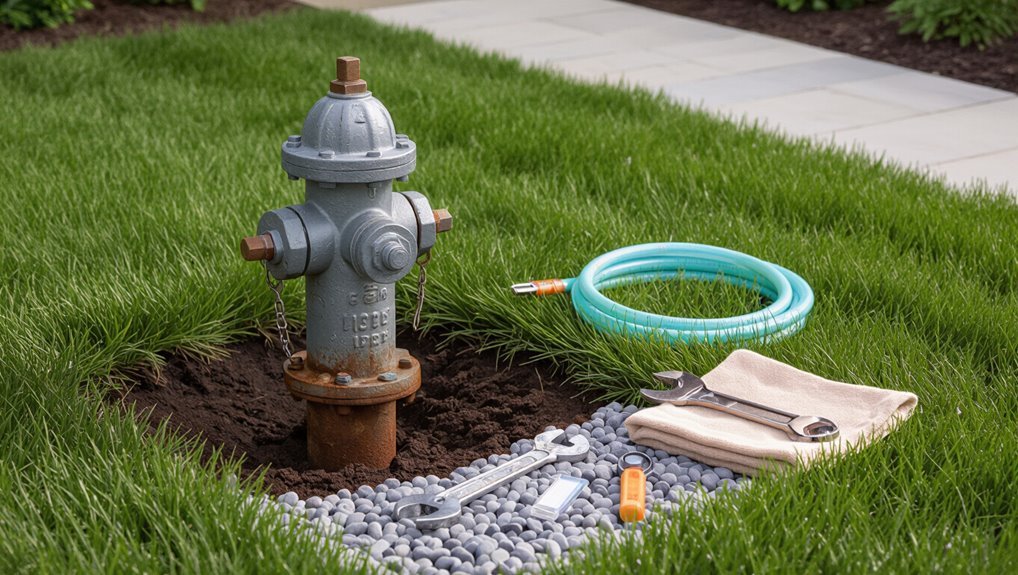
A yard hydrant consists of an above-ground stem, a control valve and handle, and a below-ground riser with a check mechanism that connects to the water supply.
When opened, the valve lifts the internal plunger, allowing water to travel up the riser and out the spout along the defined flow pathway.
Installations vary between frost-free and surface-mounted types and use different ground connections such as direct buried mains, tee connections, or standpipe assemblies.
Basic components of a yard hydrant
Yard hydrants are outdoor water valves mounted above ground and connected to an underground supply, designed to deliver pressurized water without relying on indoor plumbing.
Components include a riser pipe, control valve, stem and handle assembly, packing gland, and frost-proof barrel.
Identifying parts aids inspection and how to tell if a yard hydrant is leaking underground by isolating likely failure points.
Typical operation and water flow pathway
After identifying the main components, understanding how the hydrant operates clarifies where leaks can occur and how water moves from source to spout.
A lever lifts a plunger or valve stem, opening the supply line; water travels up the riser, through the barrel, and exits the spout.
Closing the lever seats the valve to drain the barrel and stop flow, isolating the supply.
Common installation types and ground connections
Many hydrants connect to water supplies in one of three common ways: direct-buried risers, aboveground stub-outs with flexible connectors, or manifolded hookups tied to a buried main.
Each type dictates leak points: welded or threaded joints on risers, hose clamps and swivel fittings on stub-outs, and tee or manifold seals for multi-hydrant systems.
Soil type and frost depth affect vulnerability.
Quick signs that a yard hydrant may be leaking underground
Obvious surface clues like persistent wet patches, soggy ground, or visible leakage at head level often signal an underground problem.
Unexpected increases on the water meter or unexplained spikes in the water bill can corroborate a hidden leak.
Sudden drops in pressure or reduced flow at the hydrant provide a direct operational sign that water is escaping below grade.
Visible surface indicators (wet patches, soggy ground, head-level leaks)
When a yard hydrant is leaking below ground, the first clues often appear on the surface: localized wet patches, persistently soggy soil, or water seeping from the hydrant head itself.
These signs concentrate near the hydrant, may persist despite dry weather, and can form pooling, soft ground, or unusual vegetation.
Inspect the immediate area for fresh dampness, discoloration, or active dripping at the spout.
Water meter and billing clues
If household water use stays unchanged but the meter shows unexplained consumption, a hidden yard hydrant leak is a prime suspect.
Compare meter readings with known usage periods, check for continuous flow on the meter when all fixtures are off, and review recent bills for sudden increases.
Persistent unexplained usage suggests underground loss and warrants targeted inspection or professional leak detection.
Changes in water pressure or flow at the hydrant
How can changes in pressure or flow at a yard hydrant signal an underground leak? Observers note reduced flow, sputtering, or sudden pressure drops when other fixtures run.
Intermittent strong flow followed by weakness suggests air entering pipes from leaks. Consistent low pressure isolated to the hydrant, despite normal household supply, indicates underground loss.
Such anomalies warrant immediate inspection and pressure testing.
7 Tests to Detect an Underground Leak
The following tests offer practical ways to confirm and locate an underground leak from a yard hydrant. Each method targets a different sign—visible evidence, changes in flow or pressure, and audible cues—so using several together improves accuracy.
The next section covers five specific, easy-to-perform checks that homeowners and technicians can use before calling a professional.
- Unease at finding hidden damage
- Frustration over rising water bills
- Relief at pinpointing the problem
Test 1 Visual inspection and dye test
Before any instruments are deployed, a careful visual inspection combined with a dye test provides the simplest initial check for an underground yard hydrant leak.
Inspect around the hydrant for wet soil, depressions, lush vegetation, or soggy spots.
Run the hydrant briefly, apply food coloring at joints and exposed pipe, then watch for colored seepage indicating underground escape paths.
Test 2 Water meter isolation test (shutoff method)
After confirming visible signs or ruling them out with a dye check, attention moves to the water meter isolation test (shutoff method) to pinpoint hidden leaks.
The homeowner closes indoor valves and records the meter. With all fixtures off, any continuing meter movement indicates underground leakage.
Reopen valves sequentially to isolate which branch, then inspect or excavate near the yard hydrant and service line.
Test 3 Sound detection with a listening rod or stethoscope
Several simple tools can reveal underground leaks by amplifying faint flow noises: a listening rod or a stethoscope transfers vibrations from the ground, hydrant, or service fittings to the listener.
The technician probes along the run, joints, and hydrant base while another person briefly opens the valve. Consistent hissing or gurgling pinpoints likely leak locations for targeted excavation or further confirmation.
Test 4 Pressure drop test using a pressure gauge
A pressure drop test provides quantitative confirmation of a suspected underground leak when audible clues from a listening rod are inconclusive.
Attach a calibrated pressure gauge to the hydrant, isolate downstream valves, then pressurize to normal system pressure.
Monitor for steady decline over a defined interval; record starting and ending readings. A measurable drop indicates leakage requiring further localization or excavation.
Test 5 Bucket fill and stopwatch flow-rate comparison
One simple, low‑tech way to confirm a yard hydrant leak is to compare the hydrant’s measured flow rate—collected by filling a calibrated bucket while timing with a stopwatch—to the expected flow based on system pressure and hydrant specifications.
Measure several trials, calculate liters or gallons per minute, and compare to manufacturer curves.
Consistently low flow suggests underground leakage; normal flow directs inspection elsewhere.
Test 6 Soil probe and moisture mapping around the hydrant
If flow-rate testing indicates possible leakage or leaves uncertainty, soil probing and moisture mapping provide a direct assessment of the ground surrounding the hydrant for signs of subsurface water escape.
Technicians probe systematically around the frost collar and service line, noting soft spots, cooler damp areas, or saturated layers.
Moisture meters and mapping reveal leak patterns, guiding excavation or targeted repairs without unnecessary disturbance.
Test 7 Dye or smoke injection into the line for tracing
Inject dye or smoke into the yard hydrant line to trace underground leaks and pinpoint escape routes. A non-toxic tracer dye or visible smoke is introduced under low pressure while observers inspect surface soil, vents, or nearby catch basins for emergence.
This method reveals otherwise hidden breaks, confirms flow direction, and helps locate excavation spots. Verify safe, approved tracers and follow local regulations.
How to Interpret Test Results and Diagnose Leak Type
Test results should be used to differentiate visible, above-ground leaks from concealed, underground ones based on where water appears and how pressure changes.
Further analysis narrows the source to pipe joints, the pipe body, or the valve seat by correlating leak location with symptom patterns and test readings.
Finally, leak rate and system pressure findings determine severity and urgency, guiding whether immediate shutdown and professional repair are required.
Distinguishing above-ground vs underground leaks
How can one tell whether a yard hydrant leak is above ground or below?
Visual cues (wet base, dripping stem, loose fittings) point to above-ground faults.
Persistent soggy patches, sinkage, or unexplained pressure loss with no visible drips indicate underground leaks.
Pressure testing while isolating the above-ground assembly and inspecting surrounding soil moisture confirms subterranean breaches versus exposed component failures.
Identifying pipe joint vs pipe body vs valve seat leaks
After distinguishing whether a leak is above ground or below, pinpointing whether water escapes at a pipe joint, through the pipe body, or past the valve seat requires interpreting specific test outcomes and observations.
Continuous wetness at fittings and dye-traced flow implicate joints. Bubbling or wet soil away from fittings suggests pipe body cracks. Persistent drips from the stem or through the hydrant indicate valve seat failure.
Assessing leak severity and urgency
When interpreting results, technicians prioritize leak rate, location, and frequency to judge urgency and next steps.
Rapid, visible flow or saturation near foundations indicates immediate shutdown and excavation.
Slow weeps along fittings suggest localized repair or replacement.
Intermittent leaks tied to pressure cycles point to valve-seat or freeze-loop faults.
Documented measurements guide repair scope, parts, and contractor response timeframe.
DIY Fixes for Common Yard Hydrant Leaks
Common DIY repairs target the above-ground stem or packing, including tightening or replacing worn seals to stop drips.
Replacing the nozzle or bonnet gasket and tightening accessible fittings can resolve many persistent leaks without professional help.
For active leaks in the field, temporary measures—such as hose clamps, rubber patches, or shutoff valves—can control flow until a permanent repair is made.
Repairing a leaking above-ground stem or packing
Identify the problem first: a steady drip from the hydrant’s above-ground stem or wetness around the packing nut indicates worn packing or a failing stem seal.
To repair, shut water, remove handle and bonnet, loosen packing nut, extract old packing, install new PTFE or hemp packing evenly, tighten nut, reassemble and test.
Replace stem if damage or persistent leak remains.
Replacing the hydrant nozzle or bonnet gasket
Start by confirming the source of the leak at the spout or bonnet area before disassembly: a weeping nozzle or water seeping around the bonnet gasket typically means the nozzle O-ring or bonnet gasket has failed and can be replaced without excavating the hydrant.
Drain and shut off water, remove nozzle or bonnet, replace O-ring/gasket with correct size, reassemble, test for leaks and retighten as needed.
Tightening or replacing fittings at accessible joints
If replacing a nozzle O-ring or bonnet gasket does not stop seepage, attention should turn to the fittings at exposed joints along the hydrant’s riser and supply line.
Inspect unions, couplings, and compression fittings for looseness or corrosion.
Tighten connections with appropriate wrenches; replace damaged washers, ferrules, or threaded fittings.
Re-test for leaks and monitor periodically for recurrence.
Temporary field fixes to stop active leaks
When a yard hydrant is actively leaking and immediate repair parts or a plumber are unavailable, temporary field fixes can slow or stop water loss long enough to make a proper repair.
Apply waterproof tape or pipe repair tape tightly over the leak, use a rubber patch and hose clamp for larger pinholes, or compress with a C-clamp and rubber gasket.
Monitor until permanent repair.
When You Need Professional Repair or Replacement
When visible ground collapse, persistent saturation, or evidence of buried damage appears, a trench or excavation may be necessary to access and repair the problem.
Cases involving extensive corrosion, repeated failures, or poorly routed lines often require pipe replacement or rerouting rather than simple parts repair.
Homeowners can expect professional leak detection to include pressure testing and locating equipment, followed by estimates that vary with labor, materials, excavation depth, and local rates.
Signs a trench or excavation is required
Although minor leaks can often be fixed at the surface, certain visible and performance indicators clearly point to the need for a trench or excavation and professional intervention.
Persistent wet spots, sinking or heaving ground, softened soil, repeated patching failures, and water pooling despite valve closure indicate underground damage.
Unexplained pressure loss or gurgling sounds when nearby lines run also justify digging and professional assessment.
Scenarios that require pipe replacement or rerouting
If visible damage, recurrent failures, or shifting ground compromise a yard hydrant’s underground piping, professional replacement or rerouting becomes necessary.
Scenarios include widespread corrosion, crushed or collapsed lines, multiple joint failures, persistent freeze damage, or routes crossing new foundations, driveways, or utility conflicts.
Temporary repairs won’t restore reliability; a licensed contractor evaluates materials, selects new alignment or pipe type, and guarantees code-compliant reinstatement.
What to expect from a professional leak detection service
Expect a professional leak detection service to begin with a thorough assessment that combines visual inspection, pressure testing, and electronic or acoustic locating tools to pinpoint hidden leaks and evaluate the extent of underground damage.
Technicians typically document findings, mark leak locations, recommend targeted repairs or replacement options, and explain required permits, timelines, and necessary site restoration before commencing work.
Cost factors and ballpark pricing considerations
When considering professional repair or replacement of a leaking yard hydrant, several key cost drivers determine the final bill: labor, parts, excavation, permit needs, and regional rates. Typical ballpark ranges vary by damage and location.
| Cost Item | Typical Range | Notes |
|---|---|---|
| Diagnostic | $50–$200 | Service call |
| Repair | $100–$400 | Parts/labor |
| Replacement | $300–$900 | New hydrant, install |
| Excavation | $150–$600 | Depth/soil impact |
Preventive Maintenance to Avoid Future Underground Leaks
Preventive maintenance reduces the likelihood of underground leaks through seasonal winterizing and reliable freeze protection.
A concise inspection checklist—covering valve operation, packing, and visible pipe runs—helps catch wear before it becomes a leak.
Emphasizing proper installation practices, including correct depth, materials, and slope, further minimizes long-term risk.
Seasonal winterizing and freeze protection
How can routine winterizing and freeze protection extend a yard hydrant’s service life and reduce the risk of costly underground leaks?
Proper winterizing drains residual water, insulates vulnerable sections, and uses frost-proof fittings to prevent pipe rupture.
Seasonal measures include removing hoses, installing heat tape or insulation, and ensuring slopes and drainage direct water away.
Consistent winter care minimizes freeze-related stresses and underground failures.
Regular inspection checklist for yard hydrants
Although often overlooked, a concise regular inspection checklist is essential to catch minor issues before they become costly underground leaks. It prioritizes visible components, functional tests, and surrounding site conditions so maintenance can be systematic and efficient.
A brief routine reduces surprises: check for drips, test shutoff smoothness, and inspect frost and sediment signs.
- Notice small persistent dampness—worry.
- Hear unusual gurgles—alert.
- See ground settling—act.
Proper installation best practices to reduce leak risk
Guarantee correct placement and assembly from the start to minimize the chance of future underground leaks: selecting frost-resistant hydrants, setting the bury depth to manufacturer specs, using durable fittings and proper pipe bedding, and installing a clear shutoff accessible above the frost line all reduce stress points that lead to leaks.
Proper joint sealing, pressure testing, and routing to avoid heavy loads guarantee longevity and easier maintenance.
Safety, Environmental, and Regulatory Considerations
Before any repair work begins, the article notes that safe excavation and pre-marking of buried utilities are essential to prevent injury and service disruption.
It also highlights measures to minimize water waste and limit soil erosion when isolating or replacing a leaking hydrant.
Finally, the piece reminds readers to check local codes and obtain any required permits to guarantee compliant and responsible work.
Safe excavation practices and utility locating
When preparing to excavate around a yard hydrant, operators must prioritize utility locating and safe digging procedures to prevent damage, injury, and regulatory violations.
Call 811 or local utility locators, obtain clearance, and mark all underground lines.
Use hand tools near markings, trench shields where required, and follow local permit and notification rules.
Document actions and restore disturbed areas per regulations.
Minimizing water waste and soil erosion impacts
Although a leaking yard hydrant may seem minor, unchecked loss of water can quickly waste significant volumes and accelerate soil erosion around the fixture, creating safety hazards and regulatory exposure.
Prompt containment and repair reduce resource loss, prevent undermining of foundations and walkways, and limit sediment runoff.
Temporary measures—shutoffs, berms, absorbent barriers—minimize immediate impacts while scheduling permanent fixes.
Continuous monitoring guarantees effectiveness.
Local codes and permits for hydrant repair or replacement
Because outdoor plumbing can intersect with public utilities, environmental protections, and safety codes, property owners should verify local regulations and obtain any required permits prior to repairing or replacing a yard hydrant.
Failure to comply can result in fines, halted work, or liability for contamination.
Contact municipal building or water departments for permit requirements, inspection schedules, backflow prevention standards, and approved contractors.
Tools and Materials Checklist for Testing and Repairs
A concise inventory of tools, parts, and protective gear helps guarantee accurate diagnosis and efficient repairs of a leaking yard hydrant.
Professionals and DIYers should confirm they have diagnostic tools, common replacement components, and proper PPE before beginning work. Preparing supplies in advance reduces delays and limits environmental or safety risks.
- The urgency of a missing part mid-repair
- The relief of having the right safety gear on hand
- The frustration avoided by testing with proper tools
Essential diagnostic tools
Several basic tools and a few specialty items are required to diagnose and repair a yard hydrant reliably.
Essential diagnostic tools include a pressure gauge, leak detection dye or food coloring, a soil probe or metal rod, adjustable wrench set, screwdriver assortment, bucket, and flashlight.
A portable water meter, soapy water in a spray bottle, and hand auger improve accuracy when locating underground leaks.
Common repair parts and replacement components
Common replacement components for yard hydrants include packing kits, valve stems, upper shafts, washers, and frost collars, plus O-rings, hose bibs, and replacement bolts to address common wear points.
Additional useful items are replacement spindles, seat assemblies, gland nuts, and pipe nipples.
Select parts matched to the hydrant model and brass or stainless materials for durability and corrosion resistance.
Recommended PPE and excavation supplies
After listing replacement parts, attention shifts to personal protection and the excavation supplies needed for safe testing and repairs.
Recommended PPE includes safety glasses, nitrile or leather gloves, steel-toe boots, high-visibility vest, and a hard hat for deeper digs.
Essential excavation supplies: shovel, trowel, hand saw, spray paint or flags, tubing for dewatering, tarp, and a sturdy bucket for soil removal.
Step-by-Step Guide: From Detection to Resolution
The procedure begins with safety: shut off the main supply and relieve pressure before any inspection.
Next, the technician runs the three quick tests in sequence—visual leak check, pressure/flow test, and valve-seat inspection—to pinpoint the fault.
Based on findings, they decide between an immediate DIY fix or calling a pro, then confirm the repair holds and restore the site.
Prioritize safety and shut off water
Before attempting repairs, anyone addressing a leaking yard hydrant should prioritize safety by immediately shutting off the water supply and isolating the affected line; this prevents further flooding, reduces pressure-driven leaks, and minimizes the risk of slips or electrical hazards if water reaches equipment.
Confirm the shutoff at the main valve, drain residual pressure, wear protective gear, and mark the area to warn others before proceeding.
Perform the top 3 quick tests in order
With the supply shut off and the area secured, attention shifts to three quick tests that identify where a yard hydrant is leaking and whether a simple fix will suffice.
First, listen at the riser for running water.
Second, inspect visible joints and the hydrant stem for dripping.
Third, perform a pressure drop check at the shutoff to confirm underground leakage.
Choose immediate DIY action vs scheduling a pro
After the quick tests, decide whether a homeowner can address the problem immediately or should call a professional based on damage location, required tools, skill level, and risk to the water supply or property.
If visible, shallow leaks and simple packing or hose-replacement suit DIYers.
For deep breaks, contaminated lines, unclear sources, or when excavation, permits, or heavy equipment are needed, schedule a licensed plumber or utility contractor to avoid injury and further damage.
Verify repair success and restore site
Once a decision is made to repair the yard hydrant—whether by the homeowner or a professional—the next step is to confirm the fix holds and to restore the site.
Test for leaks under pressure, observe for steady flow, and recheck after 24–48 hours.
Backfill carefully, compact soil, replace sod or gravel, and document the repair date and parts for future reference.
Real-world Examples and Short Case Scenarios
Three brief cases illustrate common outcomes: a small leak detected by a meter test and resolved by replacing the packing, a major underground failure that required full pipe replacement, and a false alarm where surface runoff was mistaken for a hydrant leak.
Each scenario highlights different diagnostic clues, repair scopes, and cost implications. Readers can compare signs and responses to better judge their own situation.
Case 1 Small leak found by meter test and fixed with packing replacement
A homeowner noticed an unexplained rise in the water bill and performed a meter test, which indicated a slow but steady leak at the yard hydrant.
Removing the bonnet and replacing the packing gland stopped the seepage and restored normal meter readings.
Inspection showed corroded, hardened packing and a slightly worn spindle.
Replacing packing, reassembling, and testing confirmed no further flow and corrected the meter.
Case 2 Major underground leak requiring pipe replacement
While a simple packing replacement resolved the prior example, more severe failures can originate below grade and demand full pipe replacement.
A homeowner noticed sudden pressure loss and wet, sinking ground near the hydrant. Excavation revealed a corroded lateral with multiple fractures.
The entire damaged section was replaced, backfilled with gravel, and tested for integrity, restoring normal flow and stopping soil erosion.
Case 3 False alarm: surface runoff mistaken for a hydrant leak
Although initial signs suggested a leaking yard hydrant, careful inspection revealed that runoff from a nearby downspout had pooled at the hydrant base after heavy rain, creating the appearance of a leak.
The homeowner rerouted the downspout and improved grading; surface water stopped accumulating.
Pressure and flow tests confirmed the hydrant and underground pipe were intact, avoiding unnecessary excavation and repair costs.
Conclusion
Like the silent leak beneath a ship’s hull, a hidden yard hydrant can undermine steadiness before it is seen. The reader is reminded that careful tests, patient observation, and methodical repairs restore order, much as a lighthouse steadies vessels in fog. By following the outlined diagnostics, safety steps, and fixes, one mitigates environmental harm and expense, reclaiming control of water’s path and ensuring the yard hydrant serves as designed.

