How to Insulate Adapter on Vent Pipes: Simple Steps to Prevent Condensation and Heat Loss
To insulate a vent pipe adapter effectively, wrap the exposed collar with vapor-resistant insulation. This prevents condensation, reduces heat loss, and minimizes the risk of freezing. Start by identifying the pipe material and measuring its diameter and exposed length. Clean and dry the surface, then use closed-cell foam or mineral wool with a vapor barrier for metal pipes, or elastomeric foam for PVC pipes. Seal seams with foil or HVAC tape and secure everything with ties. Proper sizing and sealing enhance efficiency and longevity. Follow the detailed steps and tips for best results.
What Insulating a Vent Pipe Adapter Means and Why It Matters
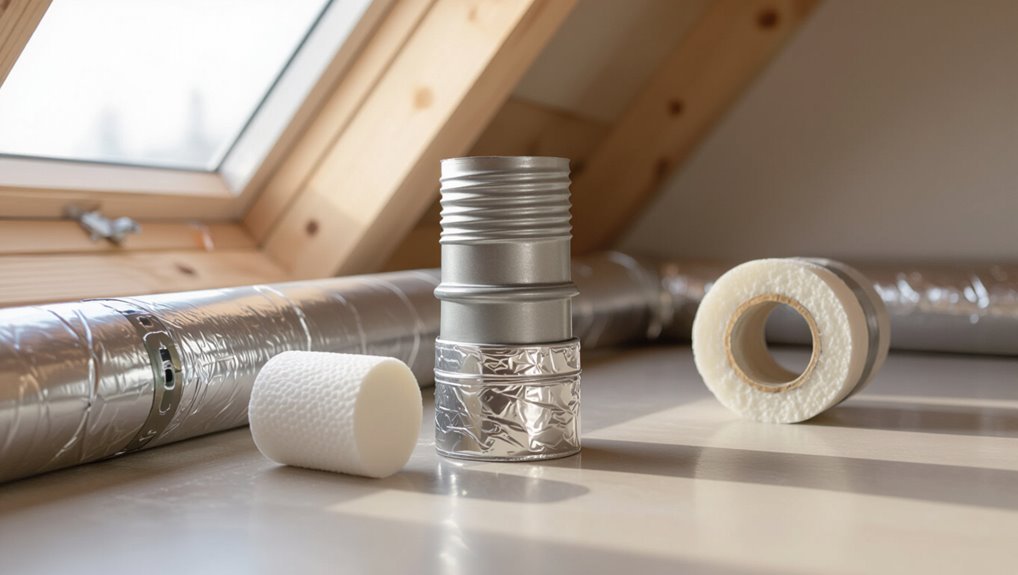
Insulating a vent pipe adapter involves adding a thermal barrier around the fitting to reduce heat transfer and prevent surface cooling that causes condensation.
Left uninsulated, adapters can collect moisture, freeze in cold weather, create noise from temperature-driven airflow changes, and accelerate corrosion and energy losses.
Proper insulation prevents rust, improves system efficiency, and prolongs the adapter’s service life.
How condensation and heat loss occur in vent pipe adapters
Moisture forms inside vent pipe adapters when warm, humid air from the building meets the colder metal of the adapter, causing water vapor to condense on the inner surfaces.
That condensed water and the cooler walls also increase heat transfer between the vented air and the outside, resulting in both dripping and accelerated heat loss.
Explaining how to insulate adapter on vent pipes prevents this by adding a thermal barrier.
Common problems caused by uninsulated adapters (condensation, freezing, noise, energy waste)
Many vent pipe adapters left without insulation exhibit a predictable set of problems: interior condensation that drips or pools, frozen blockages in cold weather, amplified noise from air or steam flow, and unnecessary heat loss that drives up energy use.
Left unaddressed, these issues cause corrosion, obstructed vents, louder plumbing or HVAC operation, and increased maintenance frequency, complicating system reliability and occupant comfort.
Benefits of insulating adapters (prevents rust, improves efficiency, extends lifespan)
Adding insulation to a vent pipe adapter reduces corrosion, limits heat loss, and slows material fatigue, producing measurable improvements in system performance.
Insulation prevents condensation-driven rust, maintains ideal flue temperatures for efficient draft, reduces energy consumption, and minimizes thermal cycling that accelerates wear.
Consequently, maintenance frequency declines, component lifespan increases, and overall system reliability and safety are enhanced, delivering clear operational and cost benefits.
Types of Vent Pipes and Adapters Compatible with Insulation
Vent pipes and adapters come in a range of materials—PVC and ABS plastics, cast iron, and steel—each with different insulation needs and temperature limits.
Both flexible and rigid adapters or interchange fittings are commonly used, and their shapes affect which insulation types and installation methods are appropriate.
Before selecting insulation, the material and exact pipe diameter should be identified to guarantee compatibility and proper fit.
PVC and ABS vent pipes
Plastic plumbing, specifically PVC and ABS, requires insulation approaches tailored to their chemical composition and thermal expansion characteristics.
Lightweight foam sleeves or closed-cell elastomeric foam work well, secured with compatible adhesive or tape to avoid solvent reactions.
Allow expansion gaps and avoid heat sources; paintable, UV-resistant coverings protect outdoor runs.
Make certain fittings and adapters receive continuous coverage to prevent condensation and thermal bridging.
Cast iron and steel vent pipes
Several common cast iron and steel vent pipes require insulation methods that account for heavier weight, thermal conductivity, and corrosion susceptibility.
Insulation must allow for expansion, attach securely to heavier sections, and prevent moisture trapping that accelerates rust.
Recommended materials include closed-cell foam sleeves with corrosion-inhibiting tape or mineral wool with vapor barriers.
Fastening uses stainless straps and sealed joints to maintain integrity and drainage.
Flexible vs. rigid adapters and transition fittings
When connecting different sections or materials, installers must choose between flexible and rigid adapters based on movement tolerance, sealing requirements, and insulation compatibility.
Flexible adapters accommodate vibration and thermal expansion but complicate continuous insulation runs; they require compressible or wrap-around insulation.
Rigid connection fittings provide stable, smooth surfaces for sheath-type insulation and easier sealing but allow less movement, necessitating careful joint sealing and support.
Identifying material and size before choosing insulation
Before selecting insulation, installers must identify the vent pipe material and exact outer diameter, because compatibility, thermal performance, and attachment methods vary considerably between metal, PVC, ABS, and cast-iron, and between nominal and actual dimensions.
Measure OD, note wall thickness and fittings, and check temperature/chemical limits.
Match insulation type, thickness, and fastening (clamps, adhesive, tape) to material and size.
Materials and Tools Needed
Recommended insulation options include foam sleeves, rubber insulation, fiberglass, and pipe wrap chosen for pipe size and exposure.
Proper sealing requires foil or HVAC tape and silicone caulk to prevent air and moisture ingress.
Essential tools and safety gear consist of a utility knife, measuring tape, zip ties or adhesive, gloves, eye protection, and a dust mask.
Recommended insulation materials (foam sleeves, rubber insulation, fiberglass, pipe wrap)
Select insulation based on pipe material, exposure, and budget:
Closed-cell foam sleeves offer easy, moisture-resistant coverage for most indoor vent pipes.
Rubber insulation provides superior flexibility and thermal performance for irregular runs or colder environments.
Fiberglass with a vapor barrier suits high-temperature or attic applications where fire resistance matters.
Adhesive-backed pipe wrap is a versatile, low-cost option for short sections or repairs.
Choose thickness and R-value accordingly.
Sealants and tapes (foil tape, HVAC tape, silicone caulk)
Prepare a small set of sealants and tapes to finish insulated vent pipes:
- foil tape for sealing seams on foil-faced insulation and metal ducts,
- HVAC (cloth-backed) tape for durable joints and external repairs,
- silicone caulk for gaps, joints, and sealing around pipe penetrations.
Choose weatherproof, temperature-rated products; apply tape smoothly to avoid wrinkles and guarantee full adhesion.
Caulk responsibly for airtight, watertight seals.
Tools required (utility knife, measuring tape, zip ties, adhesive)
With sealants and tapes on hand, attention turns to the basic tools needed to measure, cut, fasten, and secure insulation around vent pipes.
A sharp utility knife guarantees clean cuts; a measuring tape provides accurate lengths; zip ties or stainless steel clamps hold insulation snugly; compatible adhesive or construction glue seals joints.
These tools streamline installation and improve longevity.
Safety gear (gloves, eye protection, dust mask)
A few basic pieces of personal protective equipment are essential when insulating vent pipes.
Gloves protect hands from sharp edges, adhesive, and insulation fibers. Eye protection prevents debris or adhesive splatter from causing injury.
A dust mask or respirator reduces inhalation of fiberglass, dust, and airborne particles.
Use properly fitted, rated gear and replace damaged items to maintain safety and hygiene.
Step-by-Step Guide to Insulate a Vent Pipe Adapter
Before beginning, the adapter and surrounding area should be inspected for damage or leaks and the adapter dimensions measured to choose appropriately sized insulation.
The surface must be cleaned, dried, and any corrosion removed to guarantee good adhesion.
Finally, the insulation is cut and fitted around the adapter and all seams and joints are sealed to prevent air and moisture infiltration.
Inspecting the adapter and surrounding area for damage or leaks
Begin by closely examining the vent pipe adapter and the immediate area for signs of damage, corrosion, loose seals, or active leaks.
Note rust, cracks, warped fittings, or water stains on surrounding materials. Test for dampness and odor. Document locations and severity.
Identify deteriorated sealant or gaps needing repair before insulation. Prioritize safety and plan corrective actions accordingly.
Measuring adapter dimensions and selecting correct insulation size
Several clear measurements determine the correct insulation for a vent pipe adapter: outer diameter of the pipe, diameter and shape of the adapter collar, and length of the exposed section to be covered.
Measure diameters with calipers or a tape, note any irregular contours, then choose insulation with matching internal circumference and adequate wall thickness.
Allow extra length for overlaps and seals.
Preparing the surface (cleaning, drying, removing corrosion)
A clean, dry surface guarantees insulation adheres properly and performs as designed.
The installer removes dust, grease, and loose paint with a brush and cloth, then wipes with a suitable solvent.
Corrosion is wire-brushed to bright metal; flaky rust is scraped away.
After cleaning, the pipe is allowed to fully dry.
Any remaining residues are wiped before insulation installation.
Cutting and fitting insulation around the adapter
Measure twice and cut once: the installer marks the insulation to fit the adapter’s contours, accounting for seam overlap and the thickness of any vapor barrier.
Using a sharp utility knife and straightedge, precise cuts follow those marks. Pieces are test-fitted, trimmed for snug contact around flanges and bends, and positioned to maintain continuous thermal coverage without compressing the insulation material.
Sealing seams and joints to prevent air and moisture infiltration
Begin by aligning all cut edges and overlapping seams so the insulation forms a continuous, snug shell over the adapter; this guarantees gaps are minimized before any sealant is applied.
Apply a compatible vapor-retarder sealant and press seams closed, smoothing bead lines. Seal around irregular fittings and threaded connections.
Allow cure time per manufacturer instructions and inspect for continuous coverage to prevent air and moisture ingress.
Securing insulation with ties or tape and checking for gaps
Once the sealant has cured, secure the insulation with ties or tape at regular intervals to maintain a snug fit and prevent shifting during thermal cycles.
Verify fasteners are compatible with insulation material and corrosion-resistant.
Inspect for gaps or compression, paying special attention to changes and seams.
Fill any voids with additional insulation or compatible sealant, then retighten ties to restore uniform coverage and protection.
Special steps for adapters near roof penetrations or attic spaces
Near roof penetrations and in attic spaces, special attention is required to prevent moisture intrusion and thermal bridging around vent pipe adapters; this involves selecting vapor-compatible materials, maintaining clearance from combustibles, and creating a continuous insulation and air barrier that follows the adapter’s profile.
Inspect flashing and roof jack, use closed-cell foam or foil-faced insulation, seal seams with compatible tape, and allow service access.
Techniques for Common Scenarios
Practical techniques vary by environment, so approaches for cold climates, humid basements, tight spaces, and multi-pipe stacks are addressed separately.
For freezing conditions, the focus is on continuous thermal barriers and sealing joints, while humid spaces require vapor control and drainage considerations.
Tight access and combined fittings demand flexible materials and careful layering to maintain coverage and serviceability.
Insulating adapters in cold climates to prevent freezing
Preventing vent pipe adapters from freezing in cold climates requires targeted insulation strategies that account for adapter shape, material shifts, and exposure to wind and moisture.
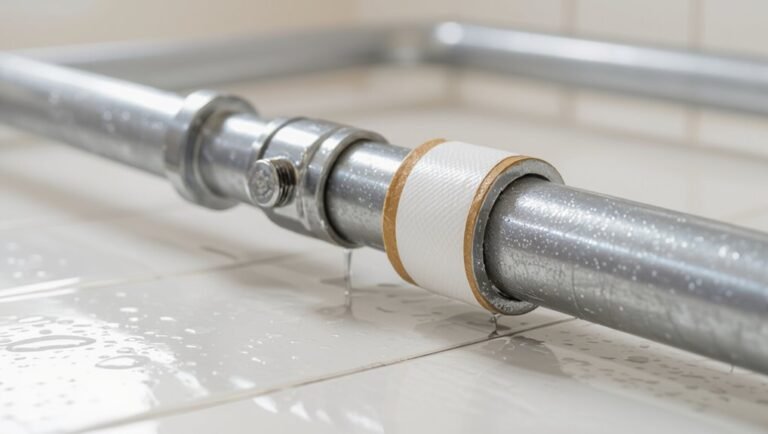
Use closed-cell foam or neoprene jackets sized to fit irregular adapters, seal joints with self-fusing tape, and add a thin weatherproof outer layer.
Guarantee continuous coverage, secure against wind, and verify clearances to prevent heat trapping or moisture ingress.
Dealing with adapters in humid basements to control condensation
In humid basements, condensation on vent pipe adapters can lead to corrosion, mold, and dripping if not addressed with targeted insulation and moisture control.
Solutions include applying closed-cell foam sleeves tightly to adapters, sealing seams with waterproof tape, and adding a thin vapor barrier.
Improve ventilation and use a dehumidifier to lower ambient dew point.
Inspect regularly for leaks and mold growth.
Working in tight spaces or behind fixtures
Accessing and insulating vent pipes in cramped spaces or behind fixtures requires careful planning and compact materials to avoid damaging nearby finishes or plumbing.
Use flexible foam sleeves, slit-and-wrap tape-backed insulation, or thin closed-cell strips. Measure clearance, trim insulation for tight bends, secure with low-profile fasteners or adhesive, and protect finishes with cardboard shields.
Test for fit and adjust before sealing joints.
Insulating multi-pipe stacks and combined fittings
Work through multi-pipe stacks and combined fittings by treating the assembly as an integrated system rather than separate runs: map pipe paths, identify common junctions, and choose insulation profiles that accommodate varying diameters and offsets.
Fit pre-slit sections or custom-cut wraps, seal seams with appropriate tape and mastic, maintain service access, and secure insulation to prevent sagging.
Account for thermal expansion and condensate drainage.
Materials Comparison and Selection Guide
A concise comparison of common insulation materials helps determine the best choice by weighing performance, cost, installation effort, and longevity. The following table summarizes key attributes to guide selection. Readers can then match material strengths to project priorities.
| Material | Strengths | Trade-offs |
|---|---|---|
| Fiberglass wrap | Good thermal performance | Can irritate skin; needs vapor barrier |
| Foam pipe insulation | Easy install; moisture resistant | Limited high-temp use |
| Rubber (closed-cell) | Durable; flexible | Higher cost |
| Reflective tape/foil | Adds radiant barrier | Effectiveness depends on proper installation |
Performance, cost, ease of installation, and durability comparison
Durability, efficiency, cost, and installability vary widely among common vent-pipe insulation materials, so selecting the right option requires balancing performance with budget and expected lifespan.
Closed-cell foam offers high R-value, moisture resistance, and longevity but costs more.
Fiberglass is cheaper and effective but needs vapor barrier and careful fitting.
Rubber is flexible, easy to install, and durable, mid-range in price.
Maintenance and Inspection After Insulation
Routine inspections should be performed at least twice a year and after severe weather, focusing on signs of moisture, compression, gaps at seams and around adapters, and any insulation deterioration.
Damaged or compressed sections should be repaired promptly with compatible materials and secure fasteners to restore thermal and moisture barriers.
If repairs are frequent, insulation is degraded across long runs, or adapters show cracking or corrosion, full replacement of the insulation or the adapter is recommended.
How often to check insulation and what to look for
How often should vent pipe insulation be inspected depends on climate, roof exposure, and material type: generally inspect twice a year—once in spring and once in fall—and after any severe storm or roof work.
During inspections, check for moisture, mold, compression, UV degradation, gaps at adapters and joints, loosened fasteners, and sealant failures.
Document findings and schedule corrective action when issues are found.
Repairing damaged or compressed insulation
Repair damaged or compressed vent pipe insulation promptly to restore thermal performance and prevent moisture intrusion; small tears, crushed sections, or separated seams should be identified, measured, and documented before repair.
Use compatible patch materials, adhesive-backed tape, or replacement insulation sections sized to overlap existing coverage.
Confirm seams are sealed, fasten securely, and verify vapor barrier integrity.
Reinspect repaired areas after thermal cycles.
When to replace insulation or the adapter itself
When should insulation or the adapter be replaced rather than patched?
The installer inspects for persistent moisture, mold, crushed or missing insulation, corroded or cracked adapters, and recurring leaks.
If damage compromises thermal performance, sealing integrity, or structural safety, full replacement is recommended.
Temporary patches suit minor tears; otherwise replacing components prevents energy loss, odors, and future failures.
Mistakes to Avoid When Insulating Vent Pipe Adapters
Mistakes when insulating vent pipe adapters can compromise performance and safety, so common errors merit clear identification.
Key issues include:
- Incorrect sizing or leaving gaps
- Using non-compatible adhesives or tapes
- Covering vents or access points that require airflow
- Ignoring local codes and manufacturer instructions.
Awareness of these points helps guarantee durable, code-compliant insulation.
Incorrect sizing or leaving gaps
Incorrectly sized insulation or gaps around vent pipe adapters compromise thermal performance and can lead to condensation, heat loss, or even code violations.
Install snug-fitting material sized to adapter dimensions, ensuring continuous coverage without compression. Seal seams and joints to prevent air infiltration.
Verify fit after fastening and trim excess to maintain R-value. Regular inspections detect settling or voids before damage occurs.
Using non-compatible adhesives or tapes
After guaranteeing a snug, continuous fit for insulation around vent pipe adapters, attention must turn to the adhesives and tapes used to secure seams and joints.
Using incompatible, non-temperature-rated, or solvent-based products can degrade insulation, melt plastics, or fail under moisture.
Select vapor-resistant, HVAC-approved tapes and adhesives specified for the insulation material and local codes to guarantee durable seals without chemical damage or premature failure.
Covering vents or access points that require airflow
When insulating around vent pipe adapters, care must be taken not to cover vents or access points that require airflow or service access, as doing so can restrict combustion air, impede ventilation, or block inspection and maintenance openings.
Install insulation to preserve clearances, route materials away from louvers and access panels, and use removable or hinged covers where temporary sealing is needed for weatherproofing or pest exclusion.
Ignoring local codes and manufacturer instructions
While insulating vent pipe adapters, failing to follow local codes and the manufacturer’s instructions can create safety hazards, void warranties, and lead to costly rework.
Contractors and homeowners should consult applicable codes and product manuals before selecting materials, adhesives, or clearances.
Ignoring required ventilation, firestop details, or temperature limits risks noncompliance, reduced performance, liability, and the need for corrective demolition and replacement.
Cost Estimate and Time Required
Typical material and tool costs for insulating vent pipes — including foam sleeves, tape, sealant, and basic hand tools — are summarized to help set a budget.
A concise breakdown distinguishes inexpensive DIY purchases from higher-grade materials a contractor might use.
Estimated time is compared for a homeowner’s weekend project versus a professional installation appointment.
Typical material costs and tools breakdown
A concise cost estimate helps homeowners plan the vent pipe insulation job: common materials—foam pipe sleeves, fiberglass wrap, heat-shrink insulation, silicone sealant, and foil tape—generally range from $10 to $60 total depending on pipe diameter and length.
While basic tools such as a utility knife, measuring tape, gloves, and a heat gun (if using shrink-wrap) can add $20 to $100 if not already owned.
Typical breakdown: materials $10–60; sealants/tape $5–15; optional heat-shrink $10–30; tools $0–100.
Estimated project time for DIY vs. professional installation
After outlining material and tool costs, time estimation frames the scope of work and overall budget.
A DIY installer typically spends 1–3 hours per adapter including measuring, cutting, fitting, and sealing. A professional completes the same in 30–60 minutes per adapter but adds travel and setup time.
Labor rates and complexity (access, multiple stacks) determine final cost and scheduling.
When to Call a Professional
If insulation reveals damp, sagging, cracked, or corroded vent pipes, this may indicate structural or venting problems that exceed a simple DIY fix.
Such issues, along with persistent backdrafts, unusual odors, or leaks into living spaces, warrant assessment by a licensed plumber or HVAC technician.
Professionals should also be called when local codes, complex roof penetrations, or mechanical venting systems are involved.
Signs of structural or venting problems beyond insulation
When should a homeowner move beyond DIY insulation and call a professional?
Persistent dampness, sagging or cracked vent stacks, recurring frost on pipes despite insulation, unusual odors or sewer gas, and water stains on ceilings or walls indicate issues beyond insulation.
Visible roof or flashing damage around vents, loud airflow noises, or backdrafting warrant inspection to prevent structural harm and hazardous ventilation failures.
Situations requiring licensed plumbers or HVAC technicians
Who should be called when a vent problem goes beyond a homeowner’s skillset?
Licensed plumbers or HVAC technicians should be contacted for gas leaks, persistent backdrafts, mold from moisture intrusion, cracked or collapsed vents, complex roof or chimney penetrations, noncompliant venting systems, or failed mechanical exhausts.
Professionals assess code compliance, perform safe repairs, replace damaged sections, and verify proper airflow to prevent hazards and inefficiencies.
Quick Checklist Before You Start
Before beginning work on vent pipe insulation, confirm the site, tools, and safety measures are in order:
- Inspect pipe condition, joints, and adapters for leaks or corrosion.
- Verify required insulation type, size, and adhesive or tape compatibility.
- Guarantee personal protective equipment, ladder stability, and ventilation.
- Have sealants, fasteners, and cleanup materials readily available.
Conclusion
Like sealing a small leak in a ship’s hull, insulating a vent pipe adapter shores up comfort and efficiency unseen. Proper insulation thwarts condensation, saves heat, and prolongs system life, echoing the quiet prudence of routine maintenance. Whether using foam, wrap, or clamp-on sleeves, attention to fit, seal, and code keeps performance steady. When uncertainty arises, calling a professional prevents costly mistakes, preserving safety and the home’s quiet well-being.