How to Cut Stainless Steel Tubing Safely: Tools, Techniques, and Expert Tips
To cut stainless steel tubing safely, use the appropriate tools and precautions. Start by wearing eye, hand, and hearing protection. Secure the tubing in padded clamps, and choose tools based on wall thickness: tube cutters for thin walls and carbide blades or cold saws for thicker sections. Apply cutting fluid to reduce friction, control heat with intermittent feeds, and always deburr cuts to avoid corrosion and injury. Maintain your blades, manage swarf responsibly, and adhere to workplace safety procedures. For detailed techniques and troubleshooting, further information is available.
Overview of Cutting Stainless Steel Tubing Safely
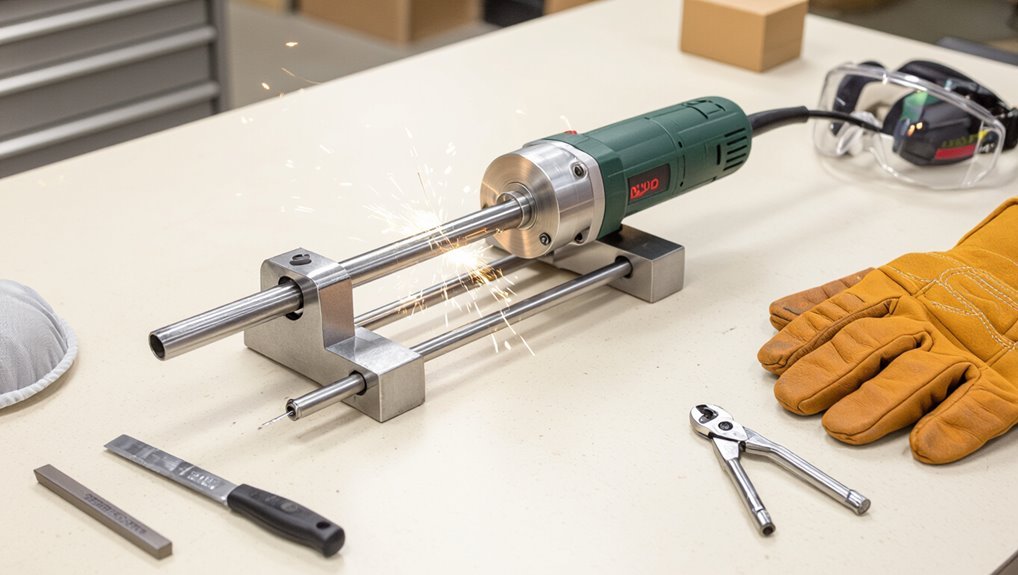
Proper cutting techniques preserve the integrity, corrosion resistance, and dimensional accuracy of stainless steel tubing while reducing the risk of workpiece damage and operator injury.
Different grades and wall thicknesses—such as thin-walled 304 tubing versus heavier 316 or duplex varieties—affect tool choice, cutting speed, and the need for coolant or specialized blades.
Understanding these factors informs safe, effective cutting methods and helps prevent costly rework.
Why proper cutting techniques matter for stainless steel tubing
Because stainless steel combines strength, corrosion resistance, and heat retention, cutting it demands specific techniques to preserve material integrity and secure safety.
Proper methods reduce workhardening, burrs, and heat-affected zones, minimizing structural weakness and corrosion risk.
Correct technique also protects operators from sparks and sharp edges.
Clear procedures, appropriate tools, and consistent practices guarantee reliable joints, safe handling, and long-term performance when learning how to cut stainless steel tubing.
Types of stainless steel tubing and how they affect cutting
Having established why correct cutting methods preserve material integrity and operator safety, attention shifts to how tubing types influence those methods.
Stainless grades (304, 316, duplex) vary hardness and work-hardening; wall thickness, OD, and whether tubing is drawn, welded, or annealed affect blade choice, cutting speed, and coolant needs.
Matching technique prevents burring, heat tint, and tool wear.
Quick Safety Checklist Before You Start
Before beginning, the operator guarantees appropriate PPE is worn, including eye protection, gloves, and hearing protection.
The work area is checked for good ventilation, stable lighting, and clear access to tools and fire suppression.
The tubing is firmly secured in a vise or clamp to prevent movement during cutting.
Personal protective equipment (PPE) required
When preparing to cut stainless steel tubing, workers should verify a short checklist of essential PPE to prevent injury from sharp edges, flying chips, and hot surfaces.
Required items include ANSI-rated safety goggles or a face shield, cut-resistant gloves, ear protection for power tools, a flame-resistant apron or long sleeves, and steel-toe footwear.
Respiratory protection may be needed for dust or fume exposure.
Workspace setup and ventilation
A clear, well-ventilated workspace reduces risks from sparks, chips, and airborne fumes; verify that the cutting area is free of clutter, flammable materials are removed, and workpieces are secured to a stable surface.
Confirm mechanical or natural ventilation directs fumes away from the operator, position local extraction if available, keep fire extinguisher accessible, maintain adequate lighting, and mark safe walkways to prevent accidental contact.
Securing tubing and preventing movement
With ventilation confirmed and the area cleared, attention shifts to securing the tubing to prevent movement during cutting.
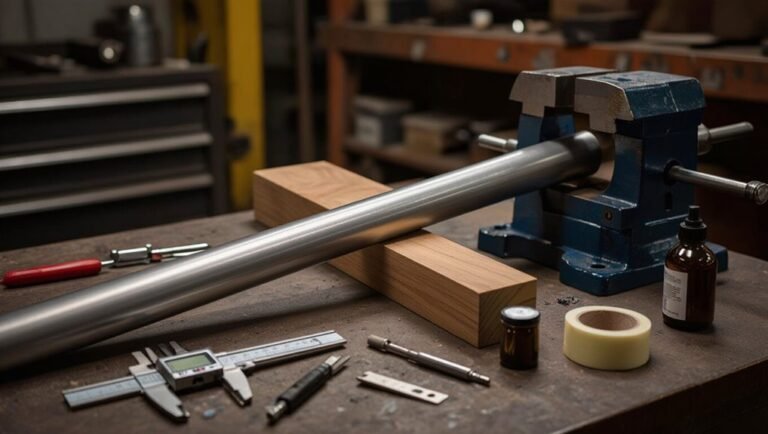
The tubing should be clamped in a padded vise or supported by pipe clamps and stands to avoid crushing.
Use backup supports for long lengths, position clamps outside the cut line, and verify stability before starting.
Recheck after repositioning tools.
Tools for Cutting Stainless Steel Tubing
A clear understanding of available tools helps guarantee safe, accurate cuts in stainless steel tubing.
Hand tools (tube cutters, hacksaws, files), power tools (angle grinders, chop saws, band saws, reciprocating saws), and specialty equipment (tubing notchers, carbide-tipped blades, cold saws) each suit different tasks and tube sizes.
Selection also depends on cutting consumables (abrasive discs, cutting wheels, lubricants) and tubing diameter and wall thickness.
Hand tools: tube cutters, hacksaws, and files
Several common hand tools—tube cutters, hacksaws, and files—offer reliable options for cutting stainless steel tubing where power tools are impractical or access is limited.
Tube cutters produce clean, square cuts on thin-walled tubing using successive pressure.
Hacksaws with bi-metal blades handle thicker walls; use steady strokes and clamping.
Files deburr and square ends; use safe clamping and wear gloves and eye protection.
Power tools: angle grinders, chop saws, band saws, and reciprocating saws
When hand tools reach their limits in wall thickness, access, or production speed, power tools provide the force and consistency needed for stainless steel tubing work.
Angle grinders with appropriate discs offer versatility for trimming and beveling; chop saws deliver fast square cuts; band saws guarantee accurate, cooled cuts for thicker sections; reciprocating saws suit demolition or awkward positions, all requiring secure clamping and PPE.
Specialty tools: tubing notchers, carbide-tipped blades, and cold saws
Specialty tools bridge the gap between general-purpose power equipment and precision stainless steel tubing work, providing tailored solutions for notching, high-speed cutting, and burr-free finishes.
Tubing notchers produce clean saddle cuts for joints. Carbide-tipped blades maintain edge life and cut quickly with minimal heat.
Cold saws deliver exact, square cuts with low thermal distortion and consistent repeatability for production or critical-fit applications.
Cutting consumables: abrasive discs, cutting wheels, and lubricants
After outlining the specialized machines that shape and finish stainless tubing, attention shifts to the consumables that actually perform the cut: abrasive discs, cutting wheels, and lubricants.
Choose discs rated for stainless to resist glazing and heat. Thin cutting wheels reduce material loss; reinforced wheels improve safety.
Apply cutting oil or coolant to minimize heat, prevent work hardening, extend consumable life, and produce cleaner edges.
Tool selection guide by tubing diameter and wall thickness
Tool selection depends primarily on tubing diameter and wall thickness because these dimensions dictate cutting speed, blade type, and fixturing requirements. Practitioners match tools: tubing cutters for thin small-diameter, band saws or pipe cutters for medium, and abrasive saws or plasma for thick or large. Proper fixturing and coolant extend blade life and guarantee square cuts.
| Diameter | Recommended tool |
|---|---|
| <10 mm thin wall | Tubing cutter |
| 10–25 mm | Band saw |
| 25–50 mm thick wall | Abrasive saw |
| >50 mm | Plasma/pipe saw |
Step-by-Step Cutting Methods
The following section outlines practical, step-by-step methods for cutting stainless steel tubing, from small-diameter tube cutters and manual hacksaw techniques to medium-duty angle grinder use.
It also covers procedures for chop saws and cold saws when precision and thicker wall sections are required, plus band saw best practices for long runs and repetitive cuts.
Each method emphasizes setup, blade or wheel selection, clamping, and safe operation.
Using a tube cutter (small diameter, thin wall)
Begin by securing the small-diameter, thin-walled stainless steel tube in a vise or clamp with soft jaws to prevent deformation. The tube cutter method relies on steady alignment, controlled pressure, and incremental rotations to produce a square, burr-minimized cut.
- Position cutter wheel at mark, tighten lightly.
- Rotate full turns, increasing pressure each few rotations.
- Stop when the wheel severs tube cleanly.
- Deburr inside edge with a fine reamer or file.
Cutting with a hacksaw (manual method)
Use a hacksaw when access or tube diameter prevents a cutter from seating properly; this manual method relies on steady, square strokes, proper blade selection, and secure clamping to produce a straight cut with minimal burrs.
- Secure tube in a vise with padding to avoid distortion.
- Mark cutline and use a guide square.
- Use a bi-metal blade, 18–24 TPI, cut on forward strokes.
- Deburr with a file and Scotch-Brite pad.
Using an angle grinder safely (medium-duty)
When a hacksaw is impractical for medium‑thickness stainless tubing or faster cuts are required, an angle grinder offers a practical alternative if operated with appropriate precautions.
The operator secures the tube, selects a thin stainless‑rated cutting disc, and maintains steady, controlled passes to avoid overheating and warping.
Deburr and cool the cut immediately.
- Secure tube
- Use stainless disc
- Steady passes, minimal pressure
- Cool and deburr
Chop saw and cold saw procedure for precision cuts (thicker tubing)
For precision cuts on thicker stainless steel tubing, a chop saw or cold saw provides cleaner, faster, and more repeatable results than handheld tools when operated with proper setup and safety.
- Secure tubing with a clamp or vise and set accurate stops.
- Use a carbide-tipped or abrasive wheel rated for stainless.
- Engage cut at full speed, applying steady feed without forcing.
- Deburr, inspect, and cool workpiece before handling.
Band saw best practices for long runs and repetitive cuts
After completing precision cuts with a chop or cold saw, attention shifts to band saws for long runs and repetitive cuts where speed and consistency matter.
Operators set blade tooth pitch for stainless, use coolant, verify fixed stops, and feed at steady rates to prevent workhardening and blade wander.
- Choose bi-metal blade with fine pitch
- Use steady coolant flow
- Employ adjustable stop fixtures
- Maintain consistent feed rate
Cutting inside a frame or installed tubing (tight spaces)
Accessing and cutting stainless steel tubing already installed within a frame demands compact tools, secure bracing, and deliberate sequencing to avoid distortion, injury, or weld contamination.
Use miniature reciprocating saws, abrasive cutoff wheels, or tubing cutters sized for clearance.
Clamp or support adjacent structure, mark cut, protect surrounding surfaces with sacrificial plates, and cut slowly.
Deburr and clean immediately to prevent contamination.
Preparing the Tubing for Cutting
Before cutting, measurements are taken and marks laid out precisely to guarantee accurate lengths and square ends.
The tube is then clamped and supported with padded fixtures or vices to prevent movement and avoid surface marring.
Appropriate cutting fluids are applied and cooling maintained to limit heat buildup and reduce work hardening during the cut.
Measuring, marking, and layout techniques
Accurate measuring, precise marking, and a clear layout are essential to guarantee clean cuts and proper fit when preparing stainless steel tubing for cutting.
Measure twice, note wall thickness and allowance for fittings. Use fine-tip permanent markers, scribe lines, or transfer punches for consistent reference points.
Establish datum ends and mark cut orientation. Verify measurements against assembly drawings before proceeding.
Clamping, supporting, and protecting the tubing during cut
Clamp the tubing securely in a suitable vise or fixture to prevent movement and vibration during cutting.
Support long runs with stands or roller supports to maintain alignment.
Protect the tube surface with soft jaws, leather, or tape to avoid marring.
Ascertain the clamping pressure is firm but even, avoiding distortion.
Verify the marked line remains visible and accessible for the cutter.
Using cutting fluids and cooling to reduce heat and work hardening
Apply appropriate cutting fluids and active cooling to minimize heat buildup and reduce the risk of work hardening when preparing stainless steel tubing for cutting.
Use oil-based or specialized coolant compatible with stainless grades, applying continuously at the cut zone.
Intermittent cutting with pauses, reduced feed rates, and external air or liquid cooling further prevent tempering, extend tool life, and produce cleaner, burr-free edges.
Post-Cut Finishing and Inspection
After cutting, the workpiece should be checked and finished to guarantee safe use and longevity.
Internal and external edges require careful deburring, followed by controlled grinding and polishing to restore corrosion resistance and appearance.
A final inspection must assess for heat-affected zones, cracks, or deformation before service.
Deburring internal and external edges safely
Remove sharp burrs and feather the edges to guarantee safe handling and proper fit when deburring stainless steel tubing.
Use carbide or diamond-tipped internal deburrers for bore edges and rotating brushes or handfiles for external lips.
Work incrementally, inspect frequently, and remove minimal material to preserve dimensions.
Wear cut-resistant gloves and eye protection; secure the tube to prevent movement during deburring.
Grinding and polishing for corrosion resistance and appearance
Finish grinding and polishing to restore corrosion resistance and improve appearance by eliminating work-hardened layers, heat tint, and surface scratches that compromise the passive chromium oxide film on stainless steel tubing.
Use successive abrasive grits, non-ferrous wheels, and light pressure to avoid embedding contamination.
Clean with suitable solvents, passivate if required, and handle with clean gloves to prevent fingerprints and recontamination.
Inspecting for heat-affected zones, cracks, or deformation
Inspecting the freshly cut stainless steel tubing for heat-affected zones, cracks, or deformation begins with a systematic visual and tactile examination to detect color changes, surface discontinuities, or dimensional distortion that indicate compromised integrity.
Use magnification and dye-penetrant or magnetic particle tests where applicable, measure against original dimensions, check radii and wall thickness, and document findings for repair, rework, or rejection.
Common Problems and How to Avoid Them
Common issues when cutting stainless steel tubing include collapse or distortion of the tube, excessive heat and resultant work hardening, and the formation of burrs, slag, or sharp edges.
Proper support, appropriate cutting speed and tooling, and thorough deburring are key to prevention.
Attention to setup and blade condition also addresses uneven or crooked cuts.
Preventing tube collapse and distortion during cutting
Preventing tube collapse and distortion during cutting requires controlling pressure, support, and heat to preserve the tube’s roundness and wall integrity.
Use proper clamping with padded jaws, backer bars, or mandrels to support internal walls. Align blades to minimize deflection and advance cutting slowly to reduce pinch.
For thin-walled tubing, consider sacrificial inserts or rolling cutters designed to maintain shape without crushing.
Avoiding excessive heat and work hardening
Supporting the tube to prevent collapse also helps reduce friction and heat buildup, but additional steps are needed to avoid excessive heat and work hardening that can compromise stainless steel’s toughness and corrosion resistance.
Use sharp cutting tools, slower feed rates, and frequent short cuts rather than prolonged contact.
Apply light cutting fluid and allow cooling intervals; avoid excessive tool pressure and high spindle speeds.
Managing burrs, slag, and sharp edges
Deburr edges and remove slag promptly to eliminate jagged metal that can cause cuts, impede fittings, and trap corrosion-promoting contaminants.
Use a proper deburring tool, file, or fine flap wheel; work lightly to preserve tube geometry.
Inspect interiors and exteriors for burs, then clean with solvent.
Wear cut-resistant gloves and eye protection.
Final inspection guarantees smooth mating surfaces and reliable seals.
Troubleshooting uneven or crooked cuts
After removing burrs and inspecting fittings, attention turns to achieving straight, even cuts—because crooked ends undermine seals and alignment.
Verify tube clamping, blade sharpness, and guide alignment. Use a proper tube cutter or mitre saw with steady feed.
Mark cut lines clearly and support the tube to prevent vibration. Re-cut only after correcting setup; straighten slight deflection with light filing.
Comparison of Cutting Methods by Criteria
A concise comparison of cutting methods evaluates speed, precision, cost, and safety to guide appropriate tool selection.
Each method’s trade-offs are summarized and matched to common scenarios such as workshop fabrication, field repairs, and precision assemblies.
Recommended approaches prioritize the safest efficient option that meets the required accuracy and budget.
Speed, precision, cost, and safety comparison
Several common cutting methods—hacksawing, abrasive cutoff wheels, tubing cutters, band saws, and plasma or laser systems—differ markedly in speed, precision, cost, and safety, so selecting the appropriate technique requires balancing those four criteria against the job’s scale and tolerances. Methods vary: manual cuts are low cost but slow; powered saws increase speed; lasers maximize precision and cost.
| Method | Speed | Precision |
|---|---|---|
| Hacksaw | Low | Low |
| Laser/plasma | High | High |
| Tubing cutter | Medium | Medium |
Best method recommendations for common scenarios
Match cutting method to the task by weighing speed, precision, cost, and safety against tube size and required finish.
For thin tubing and tight budgets, a tube cutter or hacksaw fits small jobs.
For precise, burr-free ends, use a carbide wheel cutter or abrasive cutoff with coolant.
For large or production runs, prefer band saws or cold saws with proper fixturing and PPE.
Expert Tips and Advanced Techniques
The section outlines advanced practices for cutting stainless tubing, emphasizing methods to minimize heat transfer and preserve corrosion resistance.
It contrasts strategies for thin-walled versus thick-walled tubing, addresses specific techniques for common grades like 304 and 316, and highlights when material properties or tolerances make outsourcing to a professional fabricator the safer choice.
Practical tips and decision criteria follow to guide tool selection and process control.
Minimizing heat transfer and maintaining corrosion resistance
Limit heat conduction into surrounding material and preserve the passive oxide layer by selecting cutting methods and parameters that minimize thermal input and surface disruption; low-speed abrasive wheels, chilled cutting fluids, and intermittent cutting cycles reduce localized heating, while post-cut passivation restores corrosion resistance if any oxide damage occurs.
Operators should avoid excessive contact pressure, use sharp tooling, and clean immediately to prevent contamination and corrosion initiation.
Cutting thin-walled versus thick-walled tubing strategies
Different wall thicknesses demand distinct cutting approaches: thin-walled tubing requires methods that prevent deformation and burr formation, while thick-walled tubing necessitates higher cutting forces and attention to heat dissipation.
For thin walls, use sharp blades, minimal clamping pressure, and backing supports; employ low-feed cutting and deburring.
For thick walls, select rigid fixturing, progressive cuts, coolant or intermittent cutting to control heat and tool wear.
Techniques for stainless steel grades (304 vs 316)
Recognize that 304 and 316 stainless steels respond differently to cutting due to composition and work-hardening behavior: 316 contains molybdenum for improved corrosion resistance but is slightly tougher and more prone to work hardening, while 304 is more ductile and generally easier to shear.
Use slower feed, sharper carbide or CBN tooling, frequent coolant, and lighter passes on 316; deburr and inspect heat-affected zones.
When to outsource to a professional fabricator
When should a job be handed to a professional fabricator?
Complex bends, tight tolerances, structural or pressure-rated assemblies, sanitary finishes, or specialty alloys require professional equipment and certification.
Outsource when cost of error, safety risk, or time constraints exceed DIY benefits.
Professionals guarantee proper joint integrity, welding standards, passivation, and documentation, reducing rework and liability.
Tools Maintenance and Safety Inspections
Attention to blades, discs, and storage practices directly affects cutting quality and operator safety.
A concise replacement schedule and proper storage methods reduce risk and maintain performance.
A regular inspection checklist paired with brief safe-operation reminders guarantees tools remain serviceable and hazards are minimized.
Blade and disc selection, storage, and replacement intervals
Select blades and discs rated for stainless steel that match the cutter and the tubing’s wall thickness, grain direction, and alloy; using the correct abrasive grit, bond, and diameter reduces cutting time, heat buildup, and wheel wear.
Store abrasives dry, flat, and away from impact. Mark installation dates; replace discs when worn beyond manufacturer limits, cracked, glazed, or after significant vibration, typically per usage hours.
Regular tool inspection checklist and safe operation reminders
A concise, regularly applied inspection checklist guarantees cutting tools and accessories remain safe and effective.
Inspect blades, discs, guards, clamps, and power cords for wear, cracks, and secure fittings.
Verify coolant, lubrication, and alignment.
Confirm PPE availability and condition.
Test emergency stops and guards before use.
Record findings, tag defective items, and remove from service until repaired or replaced to prevent accidents.
Useful Accessories and Consumables
Practical accessories such as clamps, vises, protective wraps, and tube supports secure tubing and prevent marring during cutting.
Recommended consumables include cutting lubricants and anti-seize to reduce heat and galling, plus protective coatings for finished edges.
The next section will outline selection criteria and proper use for each item.
Clamps, vises, protective wraps, and tube supports
Several simple accessories greatly improve safety and cut quality when working with stainless steel tubing: clamps and vises secure the workpiece, protective wraps shield finishes and cutting tools, and dedicated tube supports prevent distortion and vibration.
- Soft-jawed vises to prevent marring.
- Pipe clamps for quick, repeatable positioning.
- Protective tape or sleeves to protect finishes.
- Roller or V-block supports to stabilize long runs.
Recommended lubricants, anti-seize, and protective coatings
Clamping and proper support minimize movement and surface damage, but lubricants and anti-seize compounds address metal-to-metal interaction at the cut and threaded joints.
Use cutting oil or spindle oil for saws and reamers to reduce heat and burrs.
Apply nickel- or copper-based anti-seize on threads to prevent galling.
Finish with clear corrosion-inhibiting lacquer or silicone protectant for storage and exposure.
Final Safety Reminders and Legal/Environmental Considerations
The writer emphasizes proper disposal of metal swarf and spent abrasive materials to prevent environmental contamination and injury.
They note that used materials should be collected, contained, and recycled or discarded according to local waste regulations.
Attention is also drawn to adhering to workplace safety standards and any applicable permits or reporting requirements.
Proper disposal of metal swarf and used abrasive materials
Dispose of metal swarf and used abrasive materials in accordance with local regulations and facility policies to minimize environmental impact and workplace hazards.
Collect swarf in labeled, puncture‑resistant containers; separate ferrous, nonferrous, and contaminated residues for recycling or hazardous waste streams.
Store abrasives in sealed bins to prevent dust release.
Arrange licensed disposal or recycling, document transfers, and train staff on proper handling and spill response.
Compliance with workplace safety standards and local regulations
Adhere to applicable workplace safety standards and local regulations when cutting stainless steel tubing to guarantee legal compliance and reduce risk.
The operator must document permits, training, and equipment certifications, maintain Material Safety Data Sheets, and follow emission, waste, and noise controls.
Inspections and incident reporting procedures should be implemented.
Noncompliance penalties and environmental liabilities necessitate proactive audits and corrective actions.
Conclusion
Proper cutting of stainless steel tubing combines skill, the right tools, and strict safety practices. With workplace accidents from metalworking accounting for approximately 20% of all machining injuries, adherence to protective gear and correct methods materially reduces risk. Regular maintenance, careful measurement, and choice of cutting technique preserve material integrity and operator safety. Observing environmental and legal disposal rules completes responsible practice, ensuring efficient results while protecting people and the workplace.