How to Clean Stainless Steel Kitchen Sinks: Simple Steps for a Spotless, Scratch-Free Shine
To clean your stainless steel kitchen sink and keep it spotless and scratch-free, follow these simple steps: Start by removing debris and rinsing the sink with warm water. Next, apply mild dish soap and use a soft sponge to degrease the surface. For stains and mineral deposits, create a paste with baking soda and use occasional white vinegar, scrubbing gently along the grain. Rinse thoroughly and dry with a microfiber cloth to avoid water spots. Consistently following this routine will not only preserve the finish of your sink but also minimize bacteria buildup. More detailed tips are provided below.
Why Proper Cleaning Matters for Stainless Steel Sinks
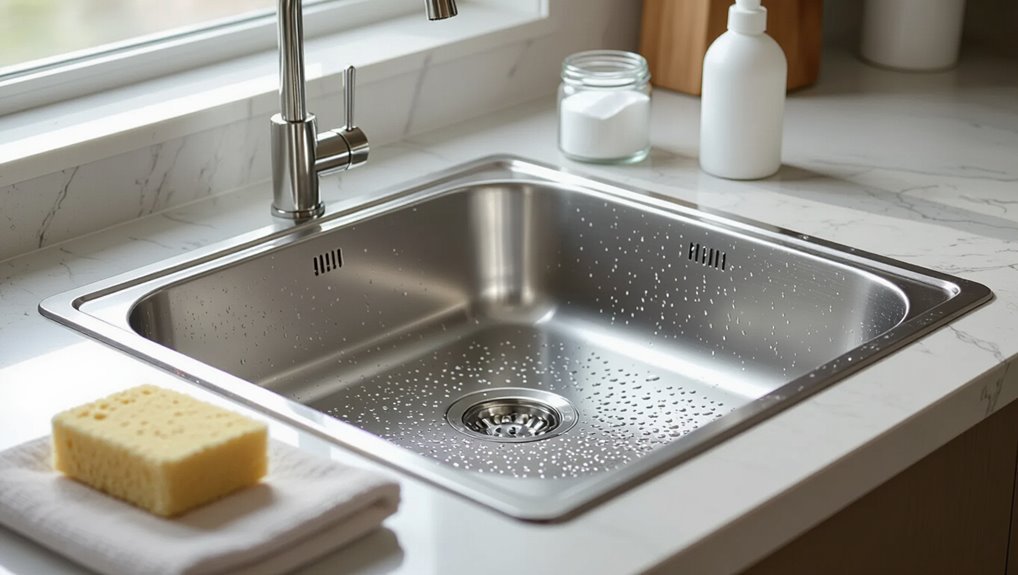
Proper cleaning of stainless steel sinks reduces bacteria and foodborne contaminants, supporting kitchen hygiene.
It also helps preserve the sink’s finish and resist corrosion by removing residues that accelerate wear.
Common causes of stains, scratches, and dullness—hard water deposits, acidic or abrasive cleaners, and abrasive scrubbing—are consequently important to address.
Health and hygiene benefits
Many microorganisms, food residues, and chemical contaminants can accumulate on stainless steel sinks, so regular cleaning reduces infection risk, cross-contamination, and allergen exposure in the kitchen.
Proper sanitation when learning how to clean stainless steel kitchen sinks prevents bacterial biofilms, reduces odors, and protects vulnerable household members.
Routine disinfection and drying minimize pathogen survival, supporting overall kitchen hygiene and safer food preparation.
Preserving finish and preventing corrosion
Maintain the sink’s protective sheen by using appropriate cleaning methods and products that prevent scratches, stains, and chemical damage.
Regular gentle cleaning removes deposits that trap moisture and salts, reducing corrosion risk.
Drying after use prevents water spots and mineral buildup.
Periodic application of a nonabrasive polish restores luster and adds a thin protective layer, extending finish life and resisting rust.
Common causes of stains, scratches, and dullness
Stains, scratches, and dullness on stainless steel sinks arise from a few predictable sources: mineral deposits from hard water, acidic or chloride-containing cleaners that etch the surface, abrasive pads that abrade the grain, and prolonged contact with wet food residues or iron particles that promote localized corrosion.
Neglect, standing water, and harsh detergents accelerate discoloration and micro-scratching, reducing luster and encouraging pitting without timely, proper cleaning.
Quick Answer: Best Way to Clean a Stainless Steel Sink
A practical one-minute routine for daily sink maintenance keeps stainless steel looking clean and prevents buildup.
It uses simple materials—mild dish soap, a soft sponge or cloth, and a quick rinse and dry—to remove food residue and water spots.
For immediate deeper cleaning, recommended cleaners include a baking soda paste or a non-abrasive commercial stainless cleaner applied gently with a soft pad.
One-minute routine for daily maintenance
Wiping the basin and rim each evening keeps a stainless steel sink looking fresh with minimal effort: a soft cloth or sponge and a dab of mild dish soap remove light residues, followed by a quick rinse and a dry with a microfiber towel to prevent water spots and mineral buildup.
Empty the drain, check for crumbs, and polish brief streaks along the grain for consistent sheen.
Recommended materials and cleaners for immediate use
After the nightly wipe-down, gathering a few simple tools makes a quick deep-clean effective.
Recommended items include soft microfiber cloths, a non-abrasive sponge, a nylon brush for crevices, mild dish soap, baking soda for gentle abrasion, white vinegar for mineral deposits, and a stainless-steel cleaner or olive oil for final polish.
Avoid steel wool and bleach to prevent scratches and corrosion.
What You Need: Tools and Safe Cleaning Products
A basic kit for stainless steel sink care includes microfiber cloths, a soft sponge, and a nylon brush for crevices.
Safe cleaners are simple: mild dish soap, baking soda for gentle abrasion, and diluted white vinegar for mineral spots.
Commercial stainless cleaners or polishes are reserved for persistent stains or restoring sheen.
Strong acids, bleach, steel wool, and abrasive powders that can scratch or discolor the finish should be avoided.
Essential tools and cloths (microfiber, soft sponge, nylon brush)
Gathering the right tools guarantees safe, efficient cleaning of a stainless steel sink: a lint-free microfiber cloth for drying and polishing, a soft non-abrasive sponge for routine washing, and a nylon-bristled brush for scrubbing around the drain and seams without scratching the surface.
Additional useful items include a soft toothbrush for crevices, a rubber sink mat to protect against impacts, and a squeegee for quick water removal.
Safe household cleaners (dish soap, baking soda, white vinegar)
With the proper tools at hand, attention turns to mild, readily available cleaners that remove grime without damaging stainless steel.
Dish soap mixed with warm water handles daily grease; baking soda forms a gentle abrasive paste for stains and light scuffs; white vinegar dissolves mineral deposits and restores shine when diluted.
Rinse thoroughly and dry with microfiber to prevent water spots and streaks.
When to use commercial stainless steel cleaners or polishes
When are commercial stainless steel cleaners or polishes justified instead of household remedies? They are appropriate for persistent water spots, mineral buildup, light etching, or restoring a dulled finish after abrasive damage.
Professionals or owners seeking a protective, long-lasting sheen may prefer formulated polishes. Always follow manufacturer instructions and test on an inconspicuous area before full application to guarantee compatibility.
Products and ingredients to avoid
After considering when specialty cleaners are warranted, attention turns to what should be avoided to protect stainless steel surfaces.
Harsh acids (bleach, muriatic), abrasive powders, steel wool, and chlorine-based cleaners cause corrosion and scratches.
Avoid ammonia with bleach (toxic gases) and prolonged contact with salt or citric concentrates.
Use mild detergents, baking soda sparingly, and soft cloths instead.
Step-by-Step Deep Cleaning Process for a Spotless, Scratch-Free Sink
The deep cleaning sequence begins with clearing and rinsing the sink, then removing trapped debris and food particles.
Next, degreasing and sanitizing with dish soap and warm water prepares surfaces for stain and mineral deposit treatment using baking soda and vinegar.
The process finishes with buffing and polishing along the grain to restore a scratch-free shine.
Step 1 Clear and rinse the sink
Clear the sink of dishes, utensils, and any removable accessories, then rinse thoroughly with warm water to remove loose debris and surface grime.
Inspect the basin, faucet, and drain for remaining residue.
Use a soft cloth or sponge to loosen light film, working with the grain of the stainless steel.
Confirm water temperature is warm, not scalding, to protect finishes.
Step 2 Remove debris and food particles
With the basin emptied and rinsed, attention shifts to removing stuck-on debris and food particles that can trap odors or cause stains.
Using a soft nylon brush or sponge, loosen residue from corners, seams, and the drain.
Lift and inspect the drain strainer, discard trapped scraps, and wipe away pulp or adhesive.
Rinse thoroughly, confirming no fragments remain to harbor bacteria.
Step 3 Degrease and sanitize with dish soap and warm water
Begin by filling a bowl with warm water and a few drops of mild dish soap.
Then work the soapy solution across the sink with a soft sponge or nylon brush to dissolve grease and loosen residue.
Rinse surfaces frequently, paying corners and around the drain.
Wring the sponge to avoid excess water.
Finish by drying with a microfiber cloth to prevent water spots and bacteria growth.
Step 4 Remove stains and mineral deposits with baking soda and vinegar
Sprinkle a layer of baking soda over the damp sink, focusing on stained areas and mineral buildup.
Then pour or spray white vinegar to create a gentle fizz that lifts deposits without scratching the steel.
Allow reaction for a few minutes, scrub gently with a soft brush or non-abrasive pad, rinse thoroughly with warm water, and dry to prevent new mineral spots.
Step 5 Buffing and polishing to restore shine (grain direction technique)
Polish the sink along the grain to lift fine scratches and restore a uniform sheen.
Using a soft microfiber cloth or non-abrasive pad, apply a small amount of stainless steel polish or olive oil.
Work in straight, consistent strokes following the grain. Buff lightly until reflections appear even.
Avoid circular motions or excessive pressure to prevent new scratches and streaks.
Step 6 Rinse thoroughly and dry to prevent water spots
Rinse the entire sink thoroughly with warm water to remove all polishing residue, cleaning agents, and loosened debris.
Using a handheld sprayer or a cup, guarantee edges, faucet base, and drain receive full rinsing.
Immediately dry with a clean microfiber or soft cotton towel, wiping along the grain to prevent streaks.
Final inspection confirms no spots, residue, or water trapped in seams.
How to Remove Specific Problems
The guide next addresses targeted solutions for common sink issues: stubborn stains from tea, coffee, or tomato; hard water deposits and lime scale; rust and metal transfer; and scratch reduction and repair.
Each problem is matched with safe, practical methods and appropriate products.
Clear steps and precautions are provided to restore appearance without damaging the stainless steel.
Tough stains and discoloration (tea, coffee, tomato)
Addressing stubborn stains from tea, coffee, and tomato requires targeted treatments because their tannins and acids bond differently to stainless steel than everyday grime.
Lightly scrub with baking soda paste, rinse, then apply white vinegar for a short dwell to lift pigments.
For persistent marks, use a diluted oxygen bleach soak, rinse thoroughly, and polish with a soft cloth following the grain.
Hard water deposits and lime scale
Many sinks develop chalky white rings and cloudy spots when hard water minerals build up around faucets and drain edges.
Vinegar-soaked paper towels or cloth applied for 10–15 minutes dissolve lime scale; rinse and buff with a soft cloth.
For persistent deposits, use a diluted citric acid solution, then neutralize with water.
Avoid abrasive pads to prevent scratching stainless steel surfaces.
Rust spots and metal transfer
Occasional rust spots and grayish streaks from metal utensils can mar stainless steel sinks but are removable with targeted care.
Treat rust with a paste of baking soda and diluted white vinegar, gently rubbing with a soft cloth until stains lift.
For metal transfer, use a nonabrasive cleaner or a mild cream cleanser.
Rinse thoroughly and dry to prevent recurrence.
Scratches: minimization and repair techniques
Small hairline scratches and deeper gouges both detract from a sink’s appearance but can often be reduced or blended with the right approach.
For fine scratches, use non-abrasive stainless steel polish or a paste of baking soda and water, rubbing with the grain.
For deeper scratches, gently sand with fine-grit wet sandpaper along the grain, then polish and protect with oil or commercial stainless sealer.
Preventive Care and Daily Habits to Keep the Sink Shiny
A concise routine preserves stainless steel luster with minimal effort. Daily wiping and thorough drying prevent water spots and mineral buildup, while a simple weekly maintenance schedule removes light grime before it hardens.
Clear do’s and don’ts—such as using nonabrasive cleaners and avoiding steel wool—help prevent scratches and long-term damage.
Daily wiping and drying routine
Wipe and dry the stainless steel sink after each use to prevent water spots, mineral buildup, and surface dulling.
Use a soft microfiber cloth or sponge, moving with the grain to avoid scratches. Pay attention to faucet bases, seams, and corners.
For persistent droplets, buff gently until fully dry. Consistent drying preserves finish and reduces the need for deeper cleaning.
Weekly maintenance schedule
Regularly scheduling a brief weekly maintenance session keeps a stainless steel sink looking its best and prevents buildup from becoming stubborn.
Once weekly, debris is removed, drains are flushed, and surfaces are cleaned with a mild, nonabrasive cleaner. Fixtures and edges receive focused attention.
Rinsing and drying follow to avoid water spots. Periodic inspections catch early mineral stains or residue for prompt treatment.
Do’s and don’ts to avoid scratches and damage
Protect stainless steel by adopting simple daily habits that minimize scratches and corrosion: use soft cloths or nonabrasive sponges, avoid steel wool and harsh scouring pads, and place a protective grid or mat when setting down heavy pots.
Routine rinsing and drying prevents mineral buildup and spotting.
- Don’t use abrasive cleaners.
- Rinse after acidic spills.
- Dry to prevent watermarks.
- Use sink guards.
Comparison of Cleaning Methods and Products
A concise comparison helps readers choose between home remedies and commercial cleaners, and between abrasive and non-abrasive tools. The following table summarizes effectiveness, safety, and cost to guide practical decisions. Readers can use this overview to balance results with surface protection and budget.
| Method/Tool | Effectiveness | Safety/Cost |
|---|---|---|
| Home remedies | Moderate for stains and routine cleaning | Generally safe, low cost |
| Commercial cleaners | High for stubborn stains | Varies; some require precautions, moderate to high cost |
Home remedies vs. commercial cleaners
Home cooks often weigh homemade solutions against store-bought cleaners when choosing how to maintain a stainless steel sink.
Homemade options—vinegar, baking soda, lemon—are inexpensive, readily available and gentle for routine cleaning.
Commercial cleaners offer targeted stains removal, residue-free finishes and formulation consistency.
Choice depends on stain severity, convenience and sensitivity to chemicals; testing on an inconspicuous area is recommended before full use.
Abrasive vs. non-abrasive tools
Compare abrasive and non-abrasive tools by their effect on stainless steel surfaces and stain removal efficacy.
Abrasive pads and powders remove tough grime and rust but risk scratching finish and dulling brushed patterns.
Non-abrasive cloths, sponges, and gentle cleaners preserve surface integrity while lifting light stains and water spots; they require more effort and repeat applications for stubborn deposits.
Effectiveness, safety, and cost overview
Because cleaning needs vary by soil type and finish, choosing a method hinges on balancing effectiveness, safety for the stainless surface, and cost.
Home remedies (vinegar, baking soda) are low-cost and gentle but limited on heavy stains.
Commercial cleaners offer stronger results; some contain abrasives or harsh chemicals that risk scratching or dulling finishes.
Microfiber and non-abrasive pads provide safe, affordable daily maintenance.
Safety Considerations and Environmental Tips
Attention to safe handling and correct mixing of household cleaners prevents harmful reactions and accidental exposure.
Consideration of eco-friendly alternatives, such as vinegar, baking soda, and biodegradable detergents, reduces environmental impact without sacrificing effectiveness.
Proper disposal of cleaning residues and rinses guarantees contaminants do not enter drains or waterways.
Safe handling and mixing of household cleaners
Handle household cleaners with caution, keeping products in their original containers, sealed when not in use, and stored out of reach of children and pets.
Read labels and follow instructions; wear gloves and eye protection when recommended.
Never mix bleach with ammonia, acids, or other cleaners.
Ventilate the area during use and dispose of products per local regulations to prevent harm and accidental reactions.
Eco-friendly cleaning alternatives
Many common sink-cleaning tasks can be accomplished using simple, low-toxicity ingredients such as baking soda, white vinegar, lemon juice, and mild cast‑ile soap.
These alternatives reduce chemical exposure and wastewater impact while protecting stainless steel when used correctly. Microfiber cloths and soft brushes minimize scratches.
Concentrated products should be diluted per instructions to lower resource use and energy for rinsing, preserving safety and environment.
Proper disposal of cleaning residues
After using low‑toxicity ingredients or diluted cleaners, proper disposal of the resulting residues helps protect plumbing, septic systems, and local waterways.
Rinse small, diluteable residues with plenty of water down the sink. Collect concentrated residues, oily waste, or non-biodegradable materials for hazardous-waste or municipal disposal.
Avoid pouring bleach mixtures, solvents, or large volumes of detergent down drains; follow local regulations and label instructions.
Troubleshooting Common Cleaning Mistakes
Readers may encounter streaking after cleaning, which often results from residue or improper drying and can be corrected by rinsing thoroughly and buffing with a microfiber cloth.
Care should be taken to use nonabrasive cleaners and follow the grain to prevent worsening scratches or damaging the finish.
If deep scratches, pitting, or extensive discoloration persist, a professional refinisher can assess whether restoration or replacement is necessary.
Why the sink looks streaky after cleaning and how to fix it
A streaky finish often results from residues left by cleaners, hard water minerals, or improper drying techniques, which refract light and make the surface appear blotchy rather than uniformly polished.
To fix it, rinse thoroughly with warm water, wipe with a microfiber cloth following the grain, remove mineral spots with diluted vinegar, then dry and buff immediately to restore an even, reflective sheen.
How to avoid worsening scratches or finish damage
Prevent scratching or dulling the sink by choosing appropriate tools and techniques: use soft sponges or microfiber cloths, avoid steel wool and harsh scouring pads, scrub gently with the grain, test any abrasive cleaner on a hidden area first, and rinse thoroughly to remove grit that can act like sandpaper.
Use diluted cleaners, avoid bleach on decorative finishes, dry surfaces to prevent water spotting and mineral etching.
When to call a professional refinisher
If damage persists after careful cleaning—deep scratches, widespread dulling, or visible corrosion that home remedies cannot reverse—it is time to consult a professional refinisher.
A pro assesses metal thickness, evaluates pitting or etching, and recommends repair, buffing, or reconditioning.
Professional services restore uniform finish, prevent further damage, and advise on maintenance to avoid repeat issues beyond what DIY methods can safely correct.
Final Maintenance Checklist for a Long-Lasting Shine
When the cleaning routine is complete, a brief final maintenance checklist guarantees the stainless steel sink retains its shine and resists stains and water spots.
Follow simple habits to protect finish and prevent buildup.
- Rinse and dry after use.
- Wipe with a microfiber cloth along the grain.
- Apply a light polish monthly.
- Avoid abrasive cleaners and steel wool.
Conclusion
Consistent, gentle care keeps a stainless steel sink gleaming like a quiet mirror in the kitchen. Following the outlined steps and using nonabrasive tools prevents scratches and preserves the finish, while targeted treatments remove stains, rust, and mineral buildup. Environmentally safe products and simple routines extend the sink’s life and save effort over time. With regular attention and the right techniques, a spotless, scratch-free shine becomes an easy, lasting habit.