How to Use a Vise Grip: Step-by-Step Guide for Locking, Adjusting, and Removing Jammed Fasteners
A vise grip is an essential tool for clamping, holding, and extracting stubborn fasteners. To effectively use a vise grip, start by selecting the appropriate jaw type and inspecting both the tool and the fastener. Adjust the screw for a snug fit, align the jaws on flat surfaces, and squeeze the handles until the lock engages. If you encounter rusted or rounded heads, apply steady, controlled torque, and consider using penetrating oil or heat to assist. To release the vise grip, simply use the lever. Follow these steps for detailed guidance and troubleshooting.
What a Vise Grip Is and When to Use One
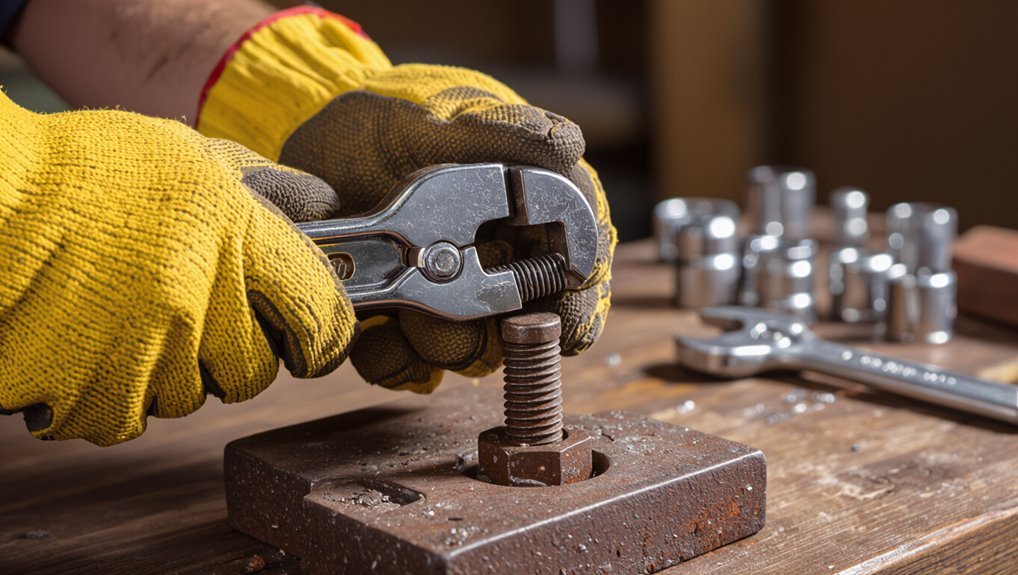
A vise grip is a locking plier composed of adjustable jaws, a locking mechanism, and a release lever that secures objects with consistent pressure.
It is commonly used for clamping workpieces, holding parts steady, or extracting stripped or jammed fasteners.
Variations such as straight-jaw, curved-jaw, and long-nose models differ in jaw shape, reach, and designated tasks.
Definition and basic components of a vise grip
Vise grips are locking pliers designed to clamp and hold objects firmly without continuous hand pressure. Their main parts include curved or straight jaws, an adjustable screw for setting jaw width, a release lever, and a locking mechanism that maintains grip under torque.
The tool’s components—handles, jaw teeth, adjustment screw, and lever—define operation and inform how to use a vise grip safely and effectively.
Common applications: locking, clamping, removing jammed fasteners
Having outlined the tool’s parts and operation, attention turns to the common tasks where locking pliers prove most useful.
They lock onto irregular shapes for hands-free holding, clamp workpieces for welding or gluing, and grip rounded or corroded fasteners to apply torque.
Their quick-release and adjustable jaw pressure enable controlled force, reducing slippage and protecting surfaces when removing seized bolts or stubborn hardware.
Types of vise grips and how they differ
Different styles of locking pliers suit distinct tasks, from heavy-duty C-clamp models that hold thick materials to needle-nose variants for reaching narrow spaces.
Each type offers specific jaw shapes, clamping force, and release mechanisms tailored to jobs. Choose by reach, grip profile, and adjustability.
- Standard locking pliers
- Needle-nose locking pliers
- C-clamp locking pliers
- Welding locking pliers
- Quick-release locking pliers
Quick Overview: How a Vise Grip Works
A vise grip operates through a locking mechanism that clamps the jaws in place after the handle is squeezed and the adjusting screw sets the jaw spacing.
Jaw geometry and tooth pattern determine how securely the tool bites into different materials and how forces are distributed.
Built-in safety features and the quick-release lever let the user disengage the lock reliably and prevent accidental pinching.
Mechanism of locking pliers and adjusting screw
Locking pliers operate on a compound-lever and over-center mechanism: squeezing the handles multiplies force through linked levers, closing the jaws until an internal toggle snaps past its center and locks them firmly in place.
An adjusting screw at the handle end sets jaw preload and travel; turning it alters jaw gap and clamping pressure, enabling fine tuning for varying workpiece thicknesses and required bite.
How jaw geometry and teeth affect grip strength
Moving from the way the toggle and adjusting screw set clamping force, jaw shape and tooth profile determine how that force is distributed and resisted at the workpiece interface.
Flat, curved, or pipe jaws concentrate pressure differently; wider surfaces reduce indentation. Sharp, deep teeth bite into soft metals and prevent slip, while shallow or serrated patterns suit hardened fasteners.
Material hardness and alignment further influence hold strength.
Safety features and release mechanisms
Engage the release lever and safety features to control clamping and prevent accidental disengagement: most Vise-Grip designs combine an over-center toggle with a spring-loaded release lever and an adjustment screw, while secondary safety notches or detents on some models catch the mechanism if the primary release is depressed partially.
These elements allow controlled unlatching, fine pressure adjustment, and safer handling when working with tight or damaged fasteners.
Preparing to Use a Vise Grip
Before using a vise grip, the user selects the appropriate size and style for the job to guarantee proper clamping and access.
The tool and workpiece are inspected for damage, burrs, or debris that could compromise grip or safety.
Necessary personal protective equipment is donned and the workspace cleared and arranged for secure, unobstructed operation.
Choosing the right size and style for the task
Selecting the correct size and style of vise grip guarantees a secure hold and prevents damage to the workpiece.
The user should match tool size to fastener, choose jaw type for material, prefer locking pliers with wire-cutters when needed, and select long-nose for reach.
Consider grip strength, adjustability, and ease of release.
- Match size to fastener
- Choose jaw type
- Prefer additional features
- Select reach
- Check adjustability
Inspecting the tool and workpiece for damage or debris
After choosing the appropriate size and style, the user should inspect both the vise grip and the workpiece for damage, wear, or debris that could compromise the grip.
Perform a quick, focused check and address issues before clamping:
- Examine jaws for nicks, deformation, or missing teeth
- Check adjustment mechanisms for smooth operation
- Remove rust, oil, or metal shavings
- Verify handles and release lever integrity
- Confirm workpiece surface is clean and flat
Required personal protective equipment and workspace setup
Personal protective equipment and a tidy workspace reduce injury risk and improve clamping effectiveness: safety glasses to shield eyes from flying debris, gloves with good grip and cut resistance when handling sharp or hot stock, and closed-toe footwear to protect feet from dropped tools or material.
- Clear clutter and secure lighting
- Stable bench and vise mounting
- Keep adjustable tools organized
- Remove flammable materials
- Guarantee adequate ventilation
Step-by-Step: Locking a Vise Grip on a Fastener
The user positions the jaws to maximize contact with the fastener, ensuring teeth align with flats rather than rounded surfaces.
They turn the adjustment screw for an initial snug fit, then squeeze the handles firmly until the tool locks while controlling applied pressure.
Finally, the user checks the grip and gives a gentle test twist to confirm the lock before applying full torque.
Positioning the jaws for maximum contact
Align the jaws so their serrations engage as much of the fastener’s flat surface as possible, minimizing gaps and preventing slippage.
The tool is centered on the flats, not corners, with parallel jaw faces contacting evenly. Minor rotation of the grip aligns teeth with tool geometry; check for full contact around the perimeter.
Proper positioning distributes force, reducing rounding and improving control.
Adjusting the screw for initial fit
After confirming the jaws sit squarely on the fastener’s flats, attention turns to the adjustment screw to set the initial grip.
The operator rotates the screw clockwise until slight resistance is felt, then backs off a quarter turn to prevent overcompression.
Visual and tactile checks guarantee the jaws contact evenly without deforming the fastener.
The tool is now primed for controlled locking.
Squeezing the handles to lock technique and pressure control
Squeeze the handles firmly and evenly until the ratchet clicks, indicating the jaws have locked onto the fastener; maintain steady, controlled pressure to prevent sudden shifts or slippage.
The operator should use wrist alignment and gradual force, avoiding jerks. Observe jaw seating and listen for the click. Release only after confirming stability.
Do not over-tighten, which can damage the fastener or tool.
Checking and testing the lock before applying torque
Test the grip before applying torque by gently tugging the tool and rotating the fastener a fraction to confirm the jaws are fully seated and the ratchet engaged.
Then inspect alignment, verify no slippage, and listen for clicks indicating the locking mechanism.
If movement or misalignment occurs, release and reposition.
Only then apply steady torque, monitoring for gradual shift or slippage to avoid rounding the fastener.
Step-by-Step: Using a Vise Grip to Turn or Remove Fasteners
The procedure outlines safe techniques for applying torque with a vise grip to loosen bolts, nuts, and damaged or rounded fasteners without slipping.
It explains when and how to use extensions, cheater bars, or controlled heat to add force while minimizing breakage or injury.
It also covers combining a vise grip with penetrating oil and tapping to free stubborn threads.
Applying torque safely to loosen bolts, nuts, and rounded fasteners
Begin by positioning the vise grip so its jaws fully engage the fastener. Then apply steady, controlled torque to break corrosion or seize without slipping.
The operator maintains wrist alignment, uses body weight—never sudden jerks—and checks grip periodically. If resistance eases, continue slowly; if jaws slip or deform the head, stop and reassess.
Protect surrounding surfaces and wear eye protection.
Using extensions, cheater bars, and heat safely when extra force is needed
When additional leverage is required, the operator evaluates safer options—extensions, cheater bars, or controlled heat—choosing the method that matches the fastener, surrounding materials, and available tools; extensions fit solid sockets or handles, cheater bars multiply torque but risk component damage, and heat (torch or induction) expands seized threads.
PPE, clearances, and gradual force application prevent slips, fractures, or fire; testing progress avoids overapplication.
Combining a vise grip with penetrating oil and tapping techniques
Apply penetrating oil, let it soak, then secure the vise grip and use measured taps to loosen seized fasteners. A snug grip prevents slippage while oil migrates into threads.
Tap the fastener head with a hammer to break corrosion, then attempt steady turning. Reapply oil and repeat tapping if needed.
Work progressively to avoid rounding, overheating, or damaging surrounding parts.
Step-by-Step: Removing a Jammed Fastener with a Vise Grip
Before attempting removal, the technician evaluates why the fastener is jammed—rust, a sheared shaft, or a stripped head—to determine the best approach.
The fastener is then prepared by cleaning, applying a penetrant, or applying controlled heat to loosen corrosion.
If vise grips can’t get purchase or the head is too damaged, the operator moves to extractor bits, weld-on tabs, or other specialized methods.
Assessing why the fastener is jammed (rust, shear, stripped head)
Diagnose the cause of the jammed fastener to choose the right removal method: rust-bound bolts often respond to penetrating oil and heat.
Sheared studs require extraction tools or welding a new gripping surface.
Stripped heads call for locking pliers, rotary cutting, or screw extractors.
Inspect visible damage, thread condition, and surrounding corrosion.
Match tools and tactics to the identified failure to minimize further damage.
Preparing the fastener (cleaning, applying penetrant, heating)
Clean the area around the fastener to remove dirt, grease, and loose corrosion so that penetrating oil and heat can reach metal-to-metal contact.
- Wipe debris with a wire brush or rag.
- Apply penetrating oil; let it dwell per product instructions.
- Tap the fastener lightly to help penetration.
- Use controlled heat (propane/heat gun) to expand metal.
- Allow cooling cycles; reapply penetrant if necessary before attempting extraction.
Techniques for extracting seized or rounded fasteners with vise grips
Clamp the vise grip securely around the bolt head or nut, ensuring the jaws bite fully into clean metal to maximize torque transfer and minimize slipping.
Use steady, increasing leverage, tapping the handle gently to break initial resistance.
Rock the fastener back and forth, repositioning the grip deeper as edges deform.
Combine with controlled heat or penetrating oil previously applied to aid gradual extraction.
When to switch to alternative extraction tools (extractors, weld-on tabs)
If repeated attempts with the vise grip only round edges or the fastener barely budges, it’s time to contemplate alternative extraction methods.
The technician assesses thread condition, material access, and tool availability.
Use bolt extractors for stripped heads, left-handed drill bits when drilling is viable, or weld-on tabs for solid purchase when welding is safe.
Switch when continuing risks further damage or safety.
Adjusting and Releasing a Vise Grip
Attention to jaw tension, release technique, and routine upkeep of the adjustment screw and release lever guarantees reliable performance and safety.
Users should fine-tune the jaw tension for consistent gripping across repeated tasks and employ a controlled release to prevent sudden slippage or injury.
Regular inspection and light lubrication of the adjustment screw and release lever prolongs tool life and preserves precise operation.
Fine-tuning the jaw tension for repeated use
Several small adjustments to the screw mechanism will establish consistent jaw tension for repeated grips.
The user tests tension on scrap material, turning the adjustment screw incrementally until jaws close firmly without deforming the workpiece. Marking the screw position or noting turns guarantees repeatability.
Periodic checks compensate for wear; light lubrication preserves smooth adjustment and prevents sudden binding.
Proper release technique to avoid sudden slippage or injury
After setting a repeatable jaw tension, attention turns to releasing the vise grip without causing sudden slippage or injury.
The operator should stabilize the workpiece, position hands clear of pinch points, and disengage the release lever smoothly while maintaining slight counterpressure. Controlled opening prevents abrupt loss of grip.
If resistance persists, pause and reassess grip, repositioning before repeating the controlled release.
Maintaining adjustment screw and release lever
While the adjustment screw and release lever are small, their condition determines the tool’s reliability; routine inspection and light lubrication keep threads moving freely and the lever action crisp.
Periodically remove debris, check for stripped threads or bent parts, and replace worn components.
Use penetrating oil on seized screws, apply a drop of light machine oil to the pivot, and test function before each job.
Common Problems and How to Avoid Them
Common problems with vise grips include slipping, marring, or rounding of the workpiece, tool damage from wear or misuse, and mistakes that can cause personal injury.
Each issue has clear warning signs and straightforward mitigation strategies, such as using protective pads, inspecting teeth and mechanisms, and following safe handling procedures.
Addressing these points early reduces damage and keeps work areas safer.
Slipping, marring, or rounding the workpiece and mitigation strategies
Slippage, surface marring, and rounded corners are frequent issues when using a vise grip, especially on soft or finished materials. They occur when excessive clamping force, improper jaw contact, or worn jaws concentrate pressure in small areas.
- Use protective pads (leather, rubber, or soft-jaw inserts)
- Adjust clamp pressure to minimal effective force
- Align jaws for full contact
- Clean contact surfaces
- Replace or recondition jaws when grip is uneven
Tool damage and wear signs to watch for
Several visible and mechanical signs indicate a vise grip is wearing or damaged, including jaw deformation, chipped or rounded teeth, loose pivot points, bent handles, and impaired locking mechanisms.
Other indicators include uneven clamping pressure, slipping under load, excessive play in adjustments, rust or corrosion at contact surfaces, and difficulty engaging or releasing the lock.
Replace or service tools showing these defects promptly.
Mistakes that lead to injury and how to prevent them
When users neglect proper grip alignment, maintenance, or appropriate tool selection, vise grips can cause cuts, pinches, or crushed fingers from sudden release or slippage.
Preventive measures focus on technique, inspection, and PPE, plus cautious force application.
- Inspect jaws and adjustment before use
- Wear gloves and eye protection
- Use correct size and type
- Release slowly, controlling tension
- Keep hands clear of pinch points
Maintenance, Storage, and Safety Checks
Routine upkeep extends a vise grip’s service life through cleaning, lubrication, and rust prevention.
A brief pre-use inspection checklist helps identify worn jaws, loose fasteners, or compromised locking action.
Secure storage and proper transport minimize damage and reduce the risk of accidents.
Cleaning, lubrication, and rust prevention for longevity
A small, consistent maintenance routine keeps a vise grip functioning smoothly and prevents corrosion from compromising its jaws and mechanisms.
Routine care preserves grip, prevents seizing, and extends tool life:
- Wipe jaws and body after use to remove debris and moisture.
- Apply light machine oil to pivot and screw threads.
- Use penetrating oil on rust spots; brush gently.
- Store dry, preferably in a sealed case.
- Replace worn parts promptly.
Periodic inspection checklist before use
After cleaning, lubrication, and rust prevention have been performed, a brief inspection should be carried out before each use to confirm safe operation.
Visual and functional checks reduce failure risk.
- Check jaws for wear, nicks, and alignment.
- Test locking mechanism for firm engagement and release.
- Inspect adjustment screw for smooth travel.
- Confirm handle integrity and no bends.
- Verify absence of excessive rust or debris.
Safe storage and transport tips
One effective practice is to store vise grips in a designated, dry toolbox or on a pegboard with individual hooks to prevent contact damage and corrosion.
Tools should be cleaned, lightly oiled, and secured with jaws closed to protect adjustments.
For transport, use padded cases or tool rolls, separate heavy items to avoid impact, and lock or tag suspiciously worn grips to prevent accidental use.
Comparing Vise Grips to Other Tools for Fastener Work
When selecting a tool for fastener work, the vise grip is preferred for locked clamping on rounded or damaged heads where steady pressure is required. It is less suited than an adjustable wrench for precise flats or than pliers for quick, light gripping, and it complements extractor tools when fasteners are seized or broken. The table below highlights typical strengths and ideal uses to guide selection.
| Tool | Strengths | Ideal Use |
|---|---|---|
| Vise Grip | Strong locked clamping | Rounded/damaged heads, long holds |
| Adjustable Wrench | Precise jaw fit on flats | Properly sized nuts/bolts |
| Extractor Tools | Remove broken/seized fasteners | Stripped or sheared studs |
When to choose vise grips over adjustable wrenches, pliers, or extractor tools
Many repair scenarios call for a locking plier because it combines sustained clamping force with hands-free operation, making it preferable to an adjustable wrench, slip-joint pliers, or a dedicated extractor when a fastener is rounded, stubborn, or needs steady torque without continual grip pressure.
Choose vise grips when:
- Fastener shape is damaged
- Space limits wrench use
- One-hand operation required
- Controlled torque needed
- Extractor risks further damage
Practical Use Scenarios and Step-by-Step Examples
The section presents three practical scenarios with concise step-by-step sequences.
First, it covers removing a rusted bolt from an automotive part using penetrating oil, progressive loosening, and controlled torque.
Next, it outlines methods for securing thin sheet metal without deformation and for emergency roadside removal of a stripped lug nut.
Example 1: Removing a rusted bolt from automotive part step sequence
Begin by positioning the vise grip on the corroded bolt head so its jaws fully engage the flats or rounded surface; this provides a secure clamping force that prevents slipping while torque is applied.
Apply penetrating oil, wait, then lock the grip.
Turn steadily counterclockwise, tapping the head if needed to break corrosion.
If the bolt rounds, increase grip or use heat before attempting extraction.
Example 2: Holding thin sheet metal without deformation step sequence
Clamp a pair of vise grips across the sheet metal near the work area, aligning the jaws so pressure distributes on a flat or padded surface to prevent marring.
Adjust lock tension to a light setting, then secure. Reposition clamps as needed to support edges and avoid bending.
Use multiple clamps for longer panels, checking alignment frequently and releasing slowly to prevent spring-back.
Example 3: Emergency roadside use to remove a stripped lug nut step sequence
When a lug nut is rounded off on the roadside and standard sockets slip, a vise grip can provide the extra bite needed to turn it:
The person parks safely, applies parking brake, and loosens adjacent nuts slightly.
They clamp the vise grip onto the stripped nut’s outer edge, set the locking mechanism firmly, then turn counterclockwise with steady force.
Once free, they replace or tighten properly.
Quick Troubleshooting Guide
A brief troubleshooting guide covers the most common vise grip issues and recommended responses.
- Vise grip won’t lock securely: check jaw condition, adjust tension screw, replace worn parts.
- Fastener still won’t budge: try penetrating oil, heat, or use a larger tool; escalate to impact methods or seek professional help.
- Tool release stuck: tap the release, apply lubricant, or use pliers with caution for a safe release.
Problem: Vise grip won’t lock securely probable causes and fixes
Inspect the tool and workpiece systematically to determine why the vise grip fails to lock securely.
Common causes include worn teeth, damaged jaws, bent or corroded linkage, weak return spring, incorrect jaw alignment, or improper adjustment screw setting.
Fixes: replace or recondition jaws, straighten linkage, clean and lubricate moving parts, tighten or replace springs, and readjust the screw for proper clamping pressure.
Problem: Fastener still won’t budge escalation steps
Apply escalating force and technique methodically if the vise grip holds but the fastener refuses to move; proceed from less invasive to more aggressive measures to avoid damage.
Try penetrating oil and dwell time, tap the fastener to break corrosion, increase leverage with a cheater bar, apply controlled heat to expand metal, use impact tools cautiously, and finish with extraction tools or drill-out when threads are irreparably seized.
Problem: Tool release stuck safe release methods
When escalating from methods to free a stubborn fastener, attention must also turn to situations where the vise-grip itself will not release.
Assess cause: debris, corrosion, bent parts, or overloaded spring.
Apply penetrating oil to pivot and latch, tap gently to free seized parts, and work the release lever with incremental force.
If stuck persists, clamp soft-jaw pliers and back off slowly; replace tool if damaged.
Best Practices and Pro Tips for Efficient Use
The section outlines professional techniques for extending jaw life and preventing surface damage through correct clamping pressure and maintenance.
It also covers recommended accessories and complementary tools that improve control and safety.
Finally, it identifies situations where a vise grip is inappropriate and suggests safer alternatives.
Techniques pros use to increase grip life and prevent damage
Pros extend a vise grip’s service life and prevent damage by matching clamp force and technique to the task: use the lowest effective pressure, seat jaws fully on the workpiece, choose the correct jaw type, protect delicate surfaces with soft inserts, and release and store the tool clean and lightly lubricated.
- Inspect and clean after use
- Lightly oil pivot and screw
- Use correct jaw engagement depth
- Replace worn jaws promptly
- Avoid excessive leverage or hammering
Recommended accessories and complementary tools
Following proper care and jaw seating, a few accessories and complementary tools make a vise grip more versatile and kinder to workpieces.
Recommended items protect surfaces, improve leverage, and speed tasks:
- Soft jaw covers (rubber or leather)
- Protective tape or pipe sleeves
- Adapter jaws for odd shapes
- Small cheater bar or long-handle pliers for leverage
- Needle files or wire brush for cleaning contact points
Situations to avoid using a vise grip and safer alternatives
Many situations call for alternatives to a vise grip to prevent damage, slippage, or unsafe force application.
Avoid using vise grips on soft, plated, or precision parts, stripped fasteners, or where torque control is critical.
Choose proper sockets, adjustable wrenches, torque wrenches, locking pliers with protective jaws, or extraction tools.
For electrical work, prefer insulated tools and clamp-style crimpers.
Conclusion
In a quiet workshop, the vise grip closes around a stubborn bolt as if remembering every hand that’s tried before; coincidence, tools and timing converging. The user steps back, feeling the familiar click of success and an unexpected warmth—small victory amid ordinary chores. This tool, reliably precise, turns resistance into motion, and in that motion lies a brief, shared satisfaction: a fixed problem freed, a routine transformed into something quietly triumphant.