How to Fix Low Pressure Water in House: 12 Proven DIY Solutions
If you’re experiencing low water pressure in your home, there are several common causes and effective DIY solutions. Issues may arise from municipal supply problems, partially closed main valves, clogged fixtures, corroded pipes, faulty pressure regulators, or hidden leaks. To quickly address these concerns, you can measure the pressure at a hose bib, clean aerators and showerheads, adjust the main shutoff, flush your water heater, inspect for leaks, and adjust or replace the pressure regulator or tank. Most fixes require simple tools, and detailed steps for each solution are provided to help you restore your water pressure efficiently.
What Causes Low Water Pressure in a House
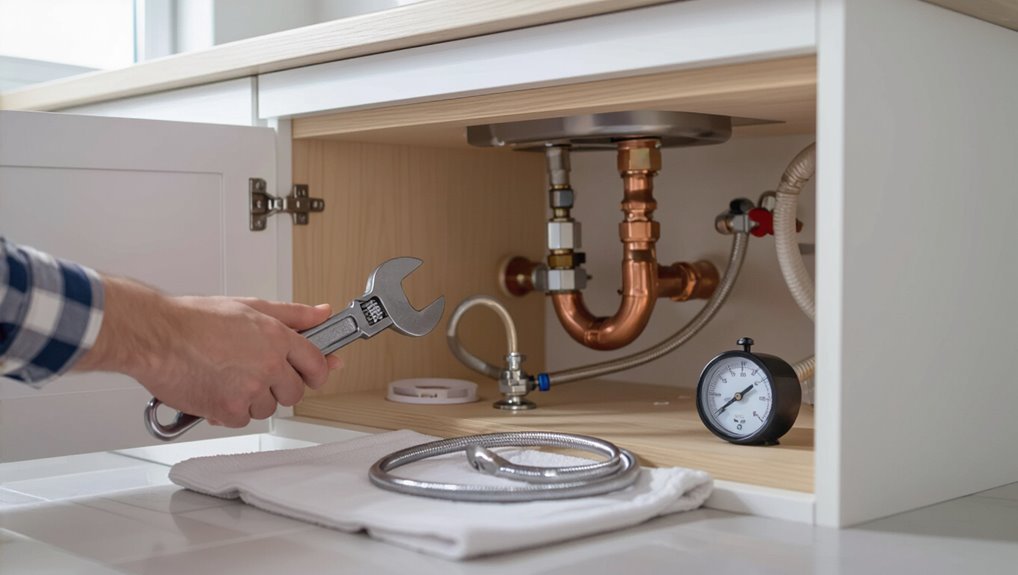
Low water pressure in a house can stem from issues with the municipal supply, a partially closed main shutoff valve or water meter problems, or blockages and corrosion in the home’s pipes.
A malfunctioning pressure regulator (PRV) or pressure-reducing valve may also lower flow, as can clogged faucets, aerators, and showerheads.
Identifying which of these causes is present guides the appropriate repair or adjustment.
Common municipal supply issues
When municipal water systems experience problems—such as aging mains, peak-demand strain, scheduled maintenance, or emergency repairs—household pressure can drop noticeably.
Utility-side leaks, hydrant flushing, or main replacements reduce supply pressure intermittently.
Residents seeking how to fix low pressure water in house should first confirm system-wide advisories, report issues to the utility, and document times and patterns to support diagnosis and prompt municipal response.
Problems with the main shutoff valve or water meter
After checking with the utility, homeowners should next inspect components where the public supply connects to the property: the main shutoff valve and the water meter.
Restricted or partially closed main valves, seized stems, leaking meter fittings, or internal meter defects can reduce flow.
Visual inspection, cycling the valve, and temporarily bypassing or replacing a faulty meter (with utility coordination) diagnose and resolve connection-point pressure losses.
Clogged or corroded household pipes
Clogging and corrosion inside household pipes commonly reduce flow by narrowing the effective diameter and roughening interior surfaces.
Mineral scale, rust, sediment, and biofilm accumulate over time, restricting volume and increasing friction. Older galvanized steel and iron pipes are especially prone to buildup.
Symptoms include weak showers, slow faucet flow, and uneven pressure between fixtures.
Diagnosis uses visual inspection, flow tests, and pipe sampling; remediation often requires descaling or replacement.
Faulty pressure regulator (PRV) or pressure-reducing valve
If a home’s pressure-reducing valve (PRV) malfunctions or loses its factory setting, the result can be consistently low or fluctuating water pressure throughout the system.
A faulty PRV, often located where the main supply enters, can stick, leak, or be improperly adjusted.
Symptoms include variable pressure at multiple fixtures; inspection, adjustment, or replacement of the PRV usually restores normal flow.
Clogged faucets, aerators, and showerheads
Mineral deposits and debris commonly build up in faucet aerators and showerheads, restricting flow and producing weak or uneven streams at individual fixtures.
Routine removal and soaking in vinegar or a descaling solution restores passages. Screens and flow restrictors should be inspected, cleaned, or replaced.
Sediment from local supply or aging fixtures often causes localized pressure loss, resolved without plumbing alterations when addressed promptly.
Leaks and hidden pipe bursts
Leaks and hidden pipe bursts often cause sudden or gradual drops in household water pressure by allowing water to escape the system before it reaches fixtures.
Undetected leaks—behind walls, under floors, or in basements—reduce flow and waste water. Signs include damp spots, unexplained meter movement, or discolored water.
Prompt inspection, isolation of affected sections, and timely repair or pipe replacement restore pressure and prevent damage.
Well pump or pressure tank problems (for private wells)
Inspecting the well pump and pressure tank is a crucial step when private well systems deliver weak or inconsistent water flow.
Check for pressure switch failure, waterlogged tanks, damaged diaphragms, or leaks causing short cycling. Measure cut-in/cut-out pressures and listen for long pump runs.
Repair or replace faulty components, bleed air pockets, and consult a well technician for electrical or deep-pump issues beyond basic DIY.
Seasonal and temperature-related factors
Problems with well pumps and pressure tanks are not the only sources of low water pressure; seasonal and temperature-related factors can also reduce flow in both private and municipal systems.
Freezing temperatures constrict pipes and valves or cause partial ice blockages.
Drought lowers groundwater and municipal supply capacity.
Increased seasonal demand stresses distribution systems.
Thermal expansion or contraction can loosen fittings, producing leaks and pressure loss.
Quick Checks to Diagnose Low Water Pressure
A few quick checks can help pinpoint low water pressure sources before calling a professional.
Measure pressure with a gauge at an outdoor hose bib, test fixtures throughout the house, and isolate the home’s plumbing from the municipal supply to see if the issue is internal or external.
Also inspect for visible leaks or water stains and remove or clean faucet aerators and showerheads that may be restricting flow.
How to measure water pressure with a gauge
Measure water pressure with a pressure gauge to get an objective baseline before troubleshooting.
Attach a threaded gauge to a hose bib or laundry spigot after shutting off nearby faucets. Open the valve fully and read steady PSI; typical municipal supply ranges 40–60 PSI.
Record readings, note fluctuations and time of day. Compare to expected values to guide next diagnostic steps.
Testing pressure at multiple fixtures
With a baseline PSI established at an outdoor spigot, the next step is to check pressure at several indoor fixtures to determine whether low pressure is isolated or system-wide.
Measure at kitchen sink, bathroom sink, shower, and washing machine supply using the gauge or a flow test.
Record readings, note time-of-day variations, and compare results to identify localized clogs, fixture valves, or widespread supply issues.
Isolating house plumbing from municipal supply
Several simple steps can determine whether low pressure originates inside the house or from the municipal supply.
First, locate and shut the main shutoff valve to isolate internal plumbing; observe street-side pressure if accessible.
Next, open an outdoor hose bib or nearest inlet before the meter.
If pressure remains low upstream, contact the water utility; if normal, investigate internal components.
Checking for visible leaks and water stains
Inspect the visible plumbing and walls for signs of leaks or water stains, since these often reveal the source of pressure loss.
Examine exposed pipes, fittings, ceilings, baseboards and under-sink cabinets for discoloration, peeling paint, dampness or mineral buildup.
Note active drips, pooling, or soft spots in drywall.
Document locations and approximate severity to prioritize repairs or professional assessment.
Inspecting faucet aerators and showerheads
A quick check of faucet aerators and showerheads often identifies simple obstructions that reduce flow; mineral deposits, sediment, or trapped debris can clog screens and restrict pressure at the fixture.
Remove, inspect, and soak parts in vinegar to dissolve scale, then brush and rinse. Replace damaged screens or cartridges.
Reassemble securely and test each fixture for restored flow before further diagnostics.
Checking the main shutoff and PRV settings
After cleaning aerators and showerheads, the next quick check is at the source: confirm the main shutoff valve is fully open and examine the pressure-reducing valve (PRV) if the home has one.
Verify PRV pressure with a gauge, adjust per manufacturer instructions if low, and inspect for leaks or corrosion.
Replace a faulty PRV to restore proper household water pressure.
12 DIY Fixes for Low Water Pressure
A set of straightforward DIY steps can often restore household water pressure without calling a plumber.
The following items address common causes like clogged fixtures, mineral buildup, valve settings, and pressure regulation. Each fix is simple to try with basic tools and a little time.
- Clean or replace faucet aerators and showerheads
- Clear mineral buildup with vinegar or descaling solutions
- Tighten or fully open the main shutoff valve
- Adjust or replace the pressure regulator (PRV)
1. Clean or replace faucet aerators and showerheads
Removeable aerators and showerheads are common culprits for weak flow, as mineral deposits and debris restrict outlets and reduce pressure at fixtures.
Inspect, unscrew, and visually check screens and internal parts. Rinse or replace clogged elements and reassemble using plumber’s tape if needed.
Test flow afterward; replacing worn or damaged aerators and showerheads often restores fixture performance quickly and affordably.
2. Clear mineral buildup with vinegar or descaling solutions
If cleaning or replacing aerators and showerheads did not restore satisfactory flow, mineral buildup further upstream or inside fixtures can be dissolved using household vinegar or commercial descalers.
Soak removable parts in vinegar for several hours, rinse and scrub with a soft brush.
For fixed fixtures, apply descaler per instructions, flush thoroughly, and repeat if deposits persist.
Use gloves and ventilate.
3. Tighten or fully open the main shutoff valve
Locate the main shutoff valve—typically near the water meter, where the supply enters the house—and check whether it is fully open; a partially closed or corroded valve can greatly reduce flow.
If stiff, use an adjustable wrench to gently turn the stem clockwise to close, counterclockwise to open.
Inspect for leaks or corrosion, lubricate packing nut, and replace valve if damaged.
4. Adjust or replace the pressure regulator (PRV)
Check the pressure-reducing valve (PRV) near the main supply line, since a misadjusted or failing PRV is a common cause of low, inconsistent household water pressure.
Inspect for leaks, corrosion, or stuck internal parts.
Adjust the screw to raise pressure within safe limits, or replace the PRV if it won’t hold setting.
Test pressure after repair and secure fittings.
5. Flush sediment from water heater and hot-water lines
Begin by shutting off the water supply and power (or gas) to the water heater.
Then attach a hose to the drain valve and direct it to a safe drain or outside area.
Open the valve and flush until clear water flows, briefly opening hot taps upstairs to purge lines.
Close the valve, refill, restore power, and check for normal hot-water pressure.
6. Repair minor leaks and replace damaged pipe sections
Repairing small leaks and replacing short damaged pipe sections can restore pressure quickly without a full re-pipe.
The homeowner locates leaks, shuts water, cuts out corroded or cracked segments, and installs matching replacement pipe with proper fittings and sealant.
After restoring water and checking joints, pressure improves.
For complex joints or extensive corrosion, consult a plumber to avoid repeat failures.
7. Replace or clean clogged supply lines and shutoff valves
Inspecting and addressing clogged supply lines and shutoff valves often restores pressure at fixtures without replacing whole pipes.
Homeowners should shut off water, disconnect flexible lines to check debris and corrosion, and clean or replace aerators, supply hoses, and angle stops.
Use a brush, vinegar soak, or new parts if mineral buildup or damaged seats are found.
Test flow before fully reassembling.
8. Service or recharge a well pressure tank and inspect the well pump
Check the well pressure tank and pump for proper operation, since a faulty tank bladder or a failing pump commonly causes fluctuating or low household water pressure.
Verify tank air charge with a tire gauge, depressurize before adjusting, and recharge to the correct cut-in pressure.
Inspect pump wiring, pressure switch contacts, and for leaks.
Replace worn components or call a professional if motor failure is suspected.
9. Install or replace a pressure booster pump
Install a pressure booster pump to raise and stabilize household water pressure when supply or pump output is insufficient.
The homeowner should select appropriate capacity and pressure settings, mount near main supply, install check valve and pressure switch, wire to dedicated circuit, and set correct cut-in/cut-out pressures.
Regularly inspect for leaks, vibration, and air charge; follow manufacturer safety and warranty guidelines.
10. Upgrade old corroded piping (copper/galvanized to PEX or copper)
If a booster pump and other fixes fail to restore satisfactory flow, attention should turn to the supply piping itself: aging copper or galvanized lines can become severely corroded or scaled, restricting flow and lowering pressure throughout the house.
Replacing problematic sections with PEX or new copper restores diameter and reduces friction.
Assess layout, budget, and local code; consider DIY only if confident with soldering or crimping.
11. Insulate pipes and protect against freezing
Insulating exposed supply pipes and protecting them from freezing preserves flow capacity and prevents pressure loss caused by partial or complete ice blockages.
Apply foam sleeves, heat tape, or insulation wraps to vulnerable runs in unheated spaces. Seal gaps, add pipe collars where lines enter walls, and maintain steady ambient temperature.
Regularly inspect insulation integrity and replace damaged sections to guarantee reliable winter performance and consistent pressure.
12. Coordinate with municipal provider for supply-side fixes
After securing and insulating vulnerable pipes to prevent internal blockages, attention should shift outward to the municipal supply when low pressure persists.
The homeowner should contact the water utility to report issues, request pressure tests, and confirm scheduled maintenance or outages.
Coordinate meter and main-line inspections, document findings, and pursue repairs or compensatory measures if service deficiencies are identified.
Step-by-Step Procedures for Key DIY Repairs
The following procedures provide concise, practical steps for common DIY fixes that often restore household water pressure.
Each item focuses on a specific task—cleaning aerators and showerheads, checking and adjusting a PRV, using a pressure gauge for diagnosis, locating and temporarily repairing small leaks, and flushing a water heater to remove sediment.
Clear, safety-minded instructions follow to help homeowners perform these tasks effectively.
- Clean faucet aerators and showerheads to remove mineral buildup.
- Test and adjust the pressure regulator (PRV) to correct system pressure.
- Use a pressure gauge to diagnose pressure drops and identify problem areas.
- Locate small leaks and apply temporary repairs, and flush the water heater to clear sediment.
How to clean a faucet aerator and showerhead
Start by turning off the water supply and gathering basic tools—pliers, a cloth, a small brush, and white vinegar—to prepare for removing and descaling faucet aerators and showerheads.
Unscrew aerator, inspect screens, soak parts in vinegar 30–60 minutes, brush debris, rinse, reassemble.
For showerheads, remove, soak entire head, scrub nozzles with brush or pin, rinse, reinstall, test for improved flow.
How to test and adjust a pressure regulator (PRV)
Locate the pressure regulator (PRV) near the main water shutoff and meter, then prepare a pressure gauge, adjustable wrench, and safety glasses before testing.
Close downstream valves, relieve line pressure, and attach the gauge to a hose bib.
Slowly open supply, observe steady pressure, then adjust the PRV screw clockwise to increase or counterclockwise to decrease.
Recheck, secure cap, and restore service.
How to use a pressure gauge to diagnose issues
Begin by connecting a reliable pressure gauge to a hose bib or dedicated test port and ensuring all downstream fixtures are closed so readings reflect system pressure rather than local fixture demand.
Record static pressure, then open a nearby faucet and note pressure under flow.
Compare values to expected range (40–60 psi).
Large drop indicates supply restriction or failing PRV; steady low suggests mains or regulator issue.
How to locate and temporarily fix a small leak
Tracing a small leak requires systematic inspection and measured intervention to prevent water damage while a permanent repair is arranged.
The homeowner isolates the supply, checks visible joints, valves, and fittings, dries surfaces, and uses a towel or dye to locate seepage.
For a temporary fix, apply plumbing tape, a rubber patch with hose clamps, or an epoxy putty; monitor and schedule permanent repair.
How to flush a water heater to remove sediment
Flushing a water heater removes accumulated sediment that reduces efficiency, causes noise, and can shorten tank life.
The process involves shutting off power or gas, supplying cold-water isolation, draining the tank, and flushing until the discharge runs clear.
Then reopen cold-water supply, purge remaining debris, close drain, restore power or gas, and check for leaks and normal heating performance.
How to inspect and service a well pressure tank
Inspecting and servicing a well pressure tank guarantees consistent water pressure and prevents pump short-cycling by verifying tank integrity, pressure settings, and the condition of the bladder or diaphragm.
Shut power to pump, relieve system pressure, check tank for rust, dents, or leaks.
Test air charge with a tire gauge at tank valve, adjust to cut-in pressure minus 2 psi, replace bladder if faulty.
When to Call a Professional
Persistent low pressure despite basic fixes, cloudy or discolored water, or signs of major leaks are indicators that a licensed plumber should be called.
Work involving gas lines, main shutoff valves, structural access, or required permits carries safety and legal risks best handled by a professional.
Homeowners should also weigh typical cost and time estimates for repairs like pressure regulator replacement, mainline cleaning, or service-line replacement when deciding to hire help.
Signs that require licensed plumber intervention
Several clear warning signs indicate the need for a licensed plumber: sudden, widespread drops in pressure, water that is discolored, foul-smelling, or contains sediment, visible leaks inside walls or ceilings, and unexplained spikes in the water bill.
Additional indicators include persistent localized low pressure after basic checks, repeated short-cycling of pumps, bubbling or gurgling noises, and water meter activity when all fixtures are off.
Safety risks and permit-related work
Any work that exposes pressurized pipes, gas lines, electrical components, or structural elements requires a licensed professional.
Professionals assess collapse, flooding, contamination, electrocution, and fire risks, and guarantee code compliance.
Permit-required tasks—main line alterations, meter relocation, sewer connections, and gas changes—demand inspections.
Homeowners should stop and call licensed trades when work exceeds simple fixture adjustments or involves concealed systems and legal approvals.
Cost and time estimates for common professional fixes
When homeowners decide to call a professional for low water pressure, understanding typical cost ranges and timeframes helps set expectations and plan appropriately.
Minor repairs (valve adjustments, aerator replacement) typically cost $50–$200 and take 30–90 minutes.
Pipe repairs or repiping run $500–$5,000+ and require hours to days.
Well pump or pressure tank service usually costs $300–$2,500 and may need a day.
Comparison of Solutions by Cost, Difficulty, and Effectiveness
The following table summarizes common fixes by cost, difficulty, and effectiveness, with concise labels to guide choice. Readers can scan the columns to balance budget, skill level, and expected results when selecting a solution. Use the table rows to compare specific fixes and pick the option that best fits the household’s priorities.
| Solution | Cost | Difficulty |
|---|---|---|
| Replace aerators/clean valves — High effectiveness | Low | Easy |
| Fix leaks/replace pipes — Very high effectiveness | High | Hard |
| Adjust pressure regulator/call pro — Medium effectiveness | Medium | Moderate |
Short explanation of table columns and how to use it
A brief legend clarifies each column: Cost indicates typical outlay (Low, Medium, High).
Difficulty rates the skill and time required (Easy, Moderate, Advanced).
Effectiveness estimates expected improvement in water pressure (Minor, Moderate, Major).
Readers should scan rows to match budget, skill level, and desired outcome; prioritize High Effectiveness within acceptable Cost and Difficulty.
Use the table to shortlist practical, appropriate fixes.
Preventive Maintenance to Keep Water Pressure Optimal
A concise preventive plan helps maintain steady household water pressure by outlining a routine inspection checklist with suggested frequencies.
Seasonal tasks, targeted water treatment to prevent mineral buildup, and clear criteria for replacing aging pipes and fixtures should be included.
Together these measures reduce unexpected drops in pressure and extend plumbing system life.
Routine inspection checklist and frequency
Routine inspections provide a structured way to catch early signs of declining water pressure before they become costly repairs.
Inspect main shutoff, pressure regulator, meter, visible supply lines and fittings monthly; check faucets, showerheads, and aerators quarterly; test pressure with a gauge biannually; monitor for leaks, corrosion, or sediment buildup; document findings and schedule repairs or cleaning promptly to maintain ideal flow.
Seasonal maintenance tasks
Inspect seasonal systems and components at set intervals to prevent pressure loss caused by temperature changes, debris, or wear.
Winterize exposed pipes and check insulation; spring-clean external filters, screens, and vents; inspect valves, pressure tanks, and backflow preventers after storms; clear gutters and downspouts that affect foundation-fed lines.
Document actions and schedule repairs before peak usage to maintain consistent pressure year-round.
Water treatment options to reduce mineral buildup
Several effective water treatment options exist to reduce mineral buildup and preserve water pressure in household plumbing.
Whole-house water softeners exchange calcium and magnesium for sodium or potassium, preventing scale.
Magnetic or electronic descalers offer chemical-free mitigation with mixed results.
Acid neutralizers and phosphate feeders target specific chemistry.
Regular filter changes and professional water testing optimize system selection and performance to maintain flow.
When to replace aging plumbing components
Replace aging plumbing components when signs of wear begin to affect water flow and reliability: persistent low pressure, frequent leaks, discolored water, or visible corrosion indicate parts have outlived their useful service life and should be evaluated.
A checklist prioritizes failing valves, old galvanized pipes, worn pump seals, and clogged aerators.
Timely replacement restores pressure, prevents damage, and reduces costly emergency repairs.
Tools and Materials Needed for DIY Water Pressure Repairs
A concise toolkit and the right replacement parts make most water pressure repairs manageable for a homeowner. The section outlines essential hand tools, when to rent or buy specialized equipment, and which replacement parts are commonly needed.
Examples and brief guidance follow to help choose tools and materials cost-effectively.
- Adjustable wrench, pipe wrench, pliers, screwdriver set
- Pressure gauge, pipe cutter, plumbing torch (rent vs. buy guidance)
- Replacement parts: washers, O-rings, pressure-reducing valve cartridges, faucet cartridges
- Materials: PTFE tape, pipe sealant, appropriate pipe fittings
Basic tools every homeowner should have
Basic hand tools and a few specialty items make most DIY water-pressure fixes manageable for a homeowner.
Essential items include adjustable wrenches, pipe wrenches, pliers, screwdrivers, a hacksaw, plumber’s tape, and assorted sealants.
A small basin, flashlight, tape measure, and a basic socket set are useful.
A magnetic level and bucket complete a compact, versatile kit for common repairs.
Specialized equipment and when to rent or buy
When tackling more complex pressure problems, homeowners should distinguish between tools worth purchasing and specialized equipment better rented for occasional use.
Purchase durable basics: adjustable wrenches, pipe cutters, pressure gauges.
Rent larger, infrequently used items: hydro-jetters, drain cameras, pipe thawers, or heavy-duty augers.
Renting reduces cost, storage, and maintenance; buying pays off for frequent or long-term projects.
Recommended replacement parts and materials
After deciding which tools to buy or rent, the next step is selecting replacement parts and consumable materials tailored to the job.
Essential items include pressure-reducing valves, new faucet cartridges, aerators, hose bib washers, pipe sealant tape, PTFE tape, compression fittings, copper or PEX pipe sections, isolation valves, and replacement strainers.
Choose compatible sizes, corrosion-resistant materials, and quality brands for longevity.
Troubleshooting Scenarios and Solutions
The troubleshooting section presents common low-pressure scenarios and clear remedies to guide repairs.
It covers hot-only low pressure with likely causes and fixes, compares steps for a single fixture versus whole-house issues, and outlines an intermittent-pressure diagnostic flowchart.
It also lists immediate checks homeowners should perform after municipal work or storms.
Low pressure only on hot water: likely causes and fixes
If only the hot taps deliver weak flow while cold water remains strong, the issue most often lies within the hot side of the plumbing system—commonly a faulty water heater, a partially closed valve, or buildup and corrosion in hot-water pipes, fixtures, or the heater’s internal components.
Inspect and fully open valves, flush the water heater, check the dip tube and heater filters, and descale fixtures or replace corroded sections.
Low pressure in one fixture vs. whole house: targeted steps
Where is the problem concentrated: a single sink, shower, or the entire house?
If one fixture, inspect aerators, showerheads, supply valves, and flexible lines; clear debris or replace parts.
If multiple fixtures or whole house show low pressure, check main shutoff, pressure regulator, and incoming supply; contact utility if supply issue persists.
Document findings before replacing major components.
Intermittent low pressure: diagnostic flowchart
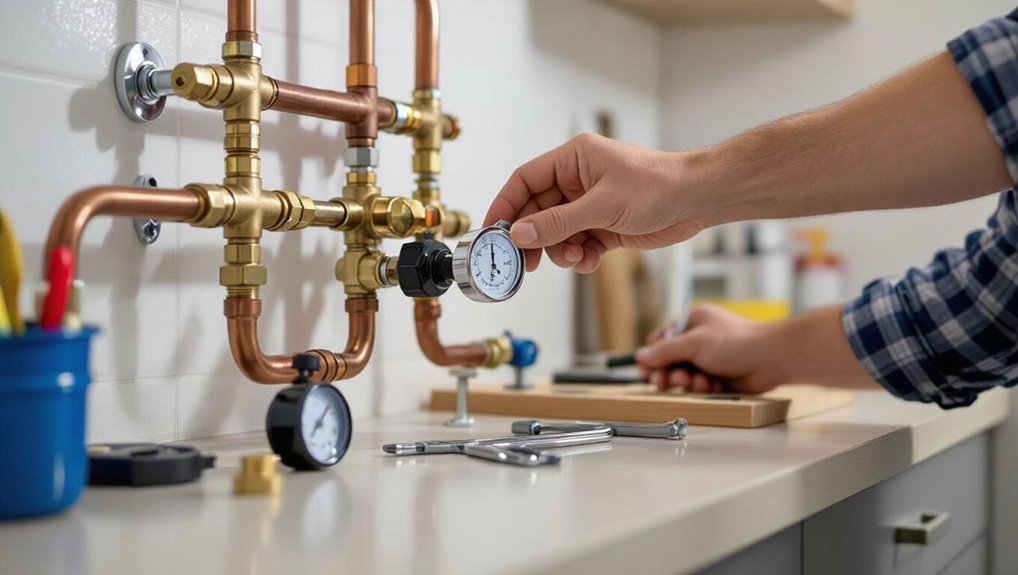
Although intermittent low water pressure can feel random, it usually follows identifiable patterns that guide diagnosis.
A concise flowchart: note timing (time of day, appliance use), check multiple fixtures, inspect pressure regulator and main valve, test for municipal influence, examine pump/tank if present, and watch for temperature-linked issues.
Document findings, then prioritize fixes: valves, filters, regulator, or plumber for complex mains.
Low pressure after municipal work or storms: immediate checks
Episodes of low pressure that follow municipal work or storms often present differently than intermittent household issues and call for a distinct, rapid checklist.
Check neighbors to confirm area-wide issues, inspect main shutoff and pressure-reducing valves for partial closure, look for visible water main breaks or hydrant work, flush taps to clear air/debris, and contact the utility if problems persist or if contamination is suspected.
Final Checklist Before Finishing Repairs
A final checklist confirms that water pressure has been restored at each fixture and that valves operate smoothly.
It also includes a thorough inspection for any new leaks and verification that shutoff and pressure-regulating valves function correctly.
Finally, changes should be documented and a follow-up maintenance appointment scheduled to monitor system performance.
Verifying pressure at all fixtures
How should one confirm that repairs have fully resolved low pressure? The person systematically tests each fixture: run hot and cold taps, showerheads, and outdoor spigots, noting flow and pressure consistency.
Use a pressure gauge where available and compare readings to expected values. Document any anomalies, repeat tests under different conditions, and verify satisfactory performance before declaring repairs complete.
Checking for new leaks and proper valve operation
Inspect all accessible pipes, fittings, valves, and joints for signs of dripping, wetness, corrosion, or new stains that indicate leaks, paying particular attention to areas disturbed during repairs.
Operate shutoff and isolation valves fully to confirm smooth movement and proper seating. Note any stiffness, wobble, or seepage.
Tighten loose connections, replace faulty valves or seals, and retest pressure and flow before completion.
Documenting changes and scheduling follow-up maintenance
Record all repairs, parts replaced, valve adjustments, and test results in a concise log before declaring the job complete.
Include dates, serial numbers, photos, and any pressure readings. Note warranty details and sources for replacement parts.
Schedule follow-up checks (48 hours, two weeks, three months) and set reminders.
Provide the homeowner with the log and recommended maintenance steps for future reference.
Conclusion
Concluding the investigation into low house water pressure, the guide confirms common causes—clogs, leaks, and valve issues—while testing the theory that municipal supply is often blamed incorrectly. DIY fixes restore flow in most cases; stubborn problems usually trace to hidden leaks or main-line restrictions. For curious homeowners, experimenting with simple diagnostics often reveals the true culprit, saving time and money, yet persistent or complex failures warrant professional inspection to guarantee lasting resolution.