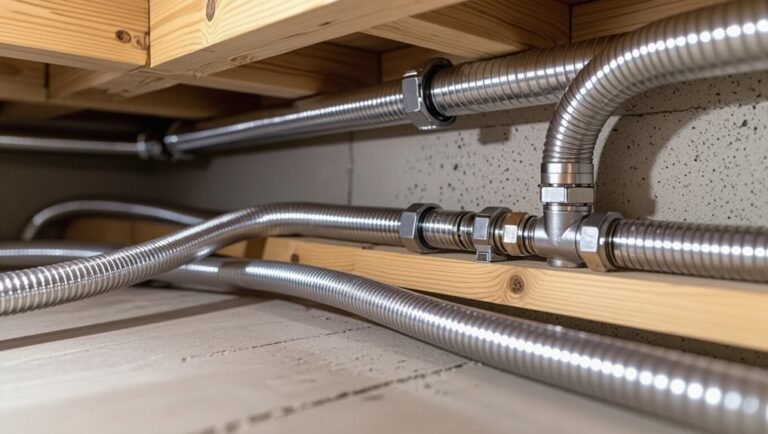
How to Sleeve a Sewer Pipe: Step-by-Step Repair Guide for Cracked or Leaking Lines
Sleeving a sewer pipe involves inserting a protective liner into the existing pipe to repair cracks and prevent leaks, all without the need for extensive excavation. This efficient method starts with a camera inspection to assess the damage, followed by cleaning the pipe. Next, a resin-saturated or slip liner is measured, prepared, and inserted into position. The liner is then inflated or winched into place and cured using steam, hot water, or ambient methods. Finally, a thorough inspection checks for leaks. Ensure you wear proper PPE, monitor the process, and document any warranties. For detailed steps, methods, and troubleshooting, continue reading.
What “Sleeving a Sewer Pipe” Means and When It’s Appropriate
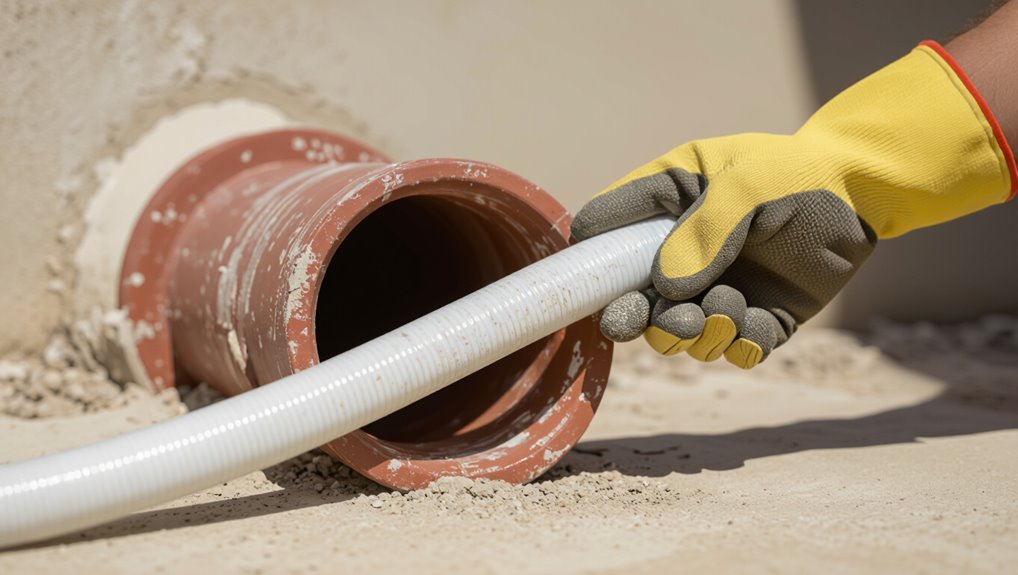
Sleeving a sewer pipe refers to inserting a protective liner or pipe within an existing line to restore structural integrity and stop leaks without full replacement.
Cracks and leaks often result from ground movement, corrosion, root intrusion, or age-related deterioration.
Sleeving is appropriate when damage is localized, pipes remain largely aligned, and costs or access constraints make full replacement impractical; widespread collapse or severely offset joints typically require replacement.
Definition of sewer pipe sleeving
Pipe sleeving is the process of inserting a protective liner or conduit into an existing sewer pipeline to restore structural integrity, seal leaks, or provide a durable new flow surface without full pipe replacement.
The definition clarifies methods, materials, and objectives for how to sleeve a sewer pipe, emphasizing minimally invasive rehabilitation suitable when joints, cracks, or corrosion impair performance but full replacement is unnecessary.
Common causes of cracked or leaking sewer lines
When existing liners or conduits are proposed to restore a sewer’s function, understanding why lines crack or leak helps determine whether sleeving is appropriate.
Common causes include corrosion of metal pipes, root intrusion through joints, ground movement or settling, freeze–thaw cycles, improper bedding or installation, and chemical attack or abrasion from wastewater solids.
Age and material degradation also contribute over time.
Signs you need to sleeve a sewer pipe vs. replace it
Several clear indicators help determine whether lining an existing sewer or replacing it outright is the better course of action.
Lining suits continuous cracks, minor corrosion, good access, and pipes with maintained alignment where structural collapse is unlikely.
Replacement is required for severe root intrusion, crushed sections, extensive bellied runs, repeated failures, or dimensions incompatible with lining.
Inspection camera findings guide the decision.
Overview of Sleeving Methods and Materials
The section outlines common sleeving approaches—CIPP, spiral-wound, slip lining and fiberglass sleeves—and compares core materials such as resin-impregnated liners, HDPE, PVC and fiberglass.
Each method and material is summarized with attention to durability, installation complexity and suitability for different defect types.
Brief pros-and-cons of sleeving versus full pipe replacement are then presented to guide selection based on condition, budget and service life expectations.
Types of sleeves: cured-in-place pipe (CIPP), spiral wound, slip lining, fiberglass sleeves
Sleeving a sewer pipe can be accomplished using several distinct methods—cured-in-place pipe (CIPP), spiral wound, slip lining, and fiberglass sleeves—each suited to different pipe conditions and performance requirements.
CIPP creates a seamless resin-saturated liner.
Spiral wound inserts rebuild diameter with interlocking plastic.
Slip lining inserts a smaller pipe inside the old one.
Fiberglass sleeves offer rigid, corrosion-resistant reinforcement for localized defects.
Materials comparison: resin-impregnated liner, HDPE, PVC, fiberglass
Material choice for sewer pipe sleeves hinges on trade-offs among flexibility, strength, chemical resistance, and installation constraints. Resin-impregnated liners conform to irregularities and cure in place. HDPE offers seamless, chemical-resistant retrofit. PVC provides rigid, cost-effective slip-lining. Fiberglass balances strength and thin profiles for tight spaces.
| Material | Key trait |
|---|---|
| Resin-impregnated | Conformable |
| HDPE | Seamless |
| PVC | Rigid |
| Fiberglass | Thin, strong |
Pros and cons of sleeving versus full pipe replacement
Cost-benefit analysis guides the choice between sleeving and full pipe replacement, balancing upfront expense, disruption, and long-term performance. Sleeving minimizes excavation, reduces cost and downtime, and suits many cracks; replacement offers full renewal for severe damage. Decision depends on condition, longevity expectations, and budget.
| Option | Emotion | Outcome |
|---|---|---|
| Sleeve | Relief | Quick fix |
| Replace | Resolve | Lasting repair |
| Hybrid | Hesitation | Compromise |
Tools, Materials, and Safety Equipment Required
The next section lists the specific tools needed, from cutting and measuring implements to power drivers and inspection lights.
It also itemizes consumables and replacement parts such as sleeves, sealants, couplings, and fasteners.
Finally, it covers required safety gear and site-preparation steps, including PPE, ventilation, and containment procedures.
Essential tools checklist
Several essential items are required before beginning a sewer pipe sleeving project: specific hand and power tools, the correct sleeve materials and adhesives, and proper personal protective equipment to guarantee safety and a lasting repair.
Tools should enable access, cleaning, cutting, and accurate placement. Typical essentials include:
- Inspection camera and drain auger
- Angle grinder and reciprocating saw
- Torque wrench and pipe clamps
Consumables and materials checklist
Before starting the sleeving process, guarantee all consumables and materials are assembled and match pipe specifications, because using incorrect adhesives, liners, or fasteners compromises the seal and longevity of the repair.
Items should be inspected for expiration, compatibility, and quantity.
Typical checklist includes:
- Epoxy or resin formulated for sewer use
- Correct-diameter liner sleeve
- Corrosion-resistant clamps and fasteners
Safety gear and site preparation
Proper personal protective equipment and a well-prepared work area are essential to minimize hazards and guarantee a successful sleeving operation.
Operators should use nitrile gloves, chemical-resistant suits, eye protection, respirators, and steel-toe boots.
Secure ventilation, lighting, and barriers to prevent contamination and unauthorized access.
Prepare spill kits, lockout/tagout power sources, and clear workspace of trip hazards before beginning inspection and insertion procedures.
Step-by-Step Guide to Sleeving a Sewer Pipe (Slip Lining / CIPP Hybrid)
The procedure begins with a thorough inspection and diagnosis to pinpoint the damaged reach and determine access points such as cleanouts or excavation and camera entry.
Next, the existing pipe is cleaned and prepared—typically by high-pressure jetting and root cutting. Then the sleeve is measured and cut to the required length.
Finally, the sleeve is installed using slip-lining or CIPP inversion techniques appropriate to the site conditions.
Initial inspection and diagnosis
A thorough initial inspection and precise diagnosis set the foundation for any successful sewer pipe sleeving project.
Technicians assess symptoms, review service history, and identify failure patterns. Noninvasive tests—pressure checks, flow monitoring, and smoke testing—quantify leaks and blockages.
Findings determine suitability for slip lining or CIPP hybrid, scope of repair, required materials, and contingency planning before intervention.
Locating and accessing the damaged section (cleanouts, excavation, camera inspection)
Several key access points—cleanouts, inspection ports, and strategically placed excavations—give technicians the means to pinpoint and reach the damaged section for sleeving.
Technicians use camera inspection through cleanouts to map damage, measure distances, and choose insertion points.
When surface access is required, targeted excavation minimizes disruption.
Permit checks, utility locates, and soil stability assessments precede any open work to guarantee safety.
Cleaning and preparing the existing pipe (jetting, root cutting)
After damage is located and access established via cleanouts or excavation, attention turns to preparing the host pipe for sleeve insertion.
High-pressure jetting removes silt, grease, and loose scale; mechanical root cutters and saws clear intrusions.
Debris is vacuumed out, and a camera inspection verifies cleanliness and identifies deteriorated sections requiring additional repair before proceeding with sleeve installation.
Measuring and cutting the sleeve to length
Measurement begins by confirming the exact internal length of the host pipe segment to be sleeved, from prepared entry to prepared exit points, using the camera survey data and physical measurements taken at cleanouts or excavations.
The sleeve is then marked allowing for end seals, junction fittings, and insertion tolerances.
Cutting uses appropriate tools for material, deburring edges, and rechecking length before sealing or transport.
Inserting the sleeve (techniques for slip lining and CIPP inversion)
Begin by aligning the prepared sleeve at the host pipe entry and verify orientation and access for the chosen installation method.
For slip lining, push or pull the rigid liner through with winches and lubricants, monitoring for hang-ups.
For CIPP inversion, secure the resin-saturated tube, invert with air or water pressure, maintain constant inflation and temperature until cure, then cool before removing equipment.
Sealing and joining sleeve ends to existing pipe
Guarantee a watertight shift where the new sleeve meets the existing host pipe by preparing both ends, selecting compatible seals or joint systems, and following a consistent sequence of dry fitting, surface cleaning, sealing material application, mechanical restraint installation, and testing.
Inspect host pipe ends, trim sleeve accurately, apply primer if required, seat gaskets or adhesive, torque clamps to spec, backfill voids with grout, and pressure-test the connection.
Curing process for resin-based liners (steam, hot water, ambient cure)
With the sleeve sealed and joints verified, attention turns to curing the resin-based liner—a step that sets the liner’s structural properties and determines service readiness.
Choice among steam, hot water, or ambient cure depends on resin, host pipe material, and site constraints. Controlled temperature, pressure, and duration guarantee full polymerization.
Monitoring logs and safety protocols mitigate risks and confirm curing parameters.
Post-cure inspection with CCTV camera
Inspectors deploy a CCTV camera system to verify the liner’s cure, structural integrity, and joint seals before returning the sewer to service.
The camera records continuous footage evaluating wrinkles, voids, and delamination along the liner. Operators note defects, measure invert alignment, and document distances to problem areas.
A formal report with time-stamped stills guides any targeted repairs or acceptance by the owner.
Reinstating laterals and connections
Reestablishing laterals and connections requires precision to restore flow paths and prevent infiltration after lining.
Technicians locate each lateral using CCTV and sondes, then carefully cut the cured liner with robotic cutters or hot knives to reopen junctions.
Seals are inspected and edged to guarantee smooth flow and watertight interfaces.
Final CCTV verification confirms alignment, patency, and absence of damage.
Backfilling and restoring the surface
After verifying lateral reconnections and confirming liner integrity via CCTV, crews proceed to backfill and restore the surface.
Controlled layered compaction replaces excavated material, using specified backfill, sand, and aggregate to protect the liner and prevent settlement.
Surface reinstatement follows original material—soil, turf, asphalt, or concrete—with compaction testing and final inspection to guarantee stability, grade, and compliance with specifications.
Common Problems During Sleeving and How to Fix Them
Common problems during sleeving include sleeve wrinkles, misalignment, blockages, and liners that fail to fully cure or remain soft.
Technicians also commonly encounter poor lateral reconnections and must manage roots, scale, and offset joints to restore flow and integrity.
Addressing each issue requires specific inspection, remediation, and quality-control steps to guarantee a durable repair.
Sleeve wrinkles, misalignment, or blockages
When wrinkles, misalignment, or blockages occur during sewer pipe sleeving, they compromise flow and joint integrity and must be addressed promptly.
Identifying the defect type—surface folds in the liner, axial displacement, or intruding debris—dictates the corrective method, which can range from localized smoothing and repositioning to mechanical clearing or replacement.
Technicians inspect with CCTV, smooth or re-inflate liners, clear obstructions, and, if persistent, cut out and reseat the sleeve.
Incomplete cure or soft liner
Incomplete cure or a soft liner reduces structural integrity and can lead to sagging, joint failure, or infiltration if not corrected promptly.
Technicians should verify resin mix, temperature, and cure time; apply additional heat or extend cure period when safe.
Remove and replace severely undercured sections.
Conduct post-cure inspection and pressure or visual testing to confirm stiffness and proper bonding before backfilling or returning line to service.
Poor lateral reconnections
Undercured or soft liner sections can mask or worsen problems at lateral reconnections, where improper alignment or resin application compromises flow and sealing.
Technicians must inspect junctions with CCTV before and after lining, verify correct liner orientation, and guarantee resin fully covers lateral sockets.
Use targeted patching or local cure-in-place sleeves to restore seals and prevent leaks without disturbing intact mainline repairs.
Managing roots, scale, and offset joints
Addressing roots, scale, and offset joints requires targeted cleaning, accurate diagnosis, and appropriate repair selection to guarantee a sleeve bonds correctly and maintains flow.
Mechanical root cutting and herbicidal treatments remove intrusions; high-pressure water or chemical descalers clear mineral build-up.
For offsets, realignment or segmented patching precedes sleeving.
Inspect with CCTV, verify adhesion tests, and document repairs for future monitoring.
Cost, Timeframe, and When to Call a Professional
Typical cost differences between DIY sleeving and hiring a professional are presented, along with estimated timelines for common methods such as push-in sleeves, cured-in-place, and replacement.
Timeframes range from a few hours for simple repairs to several days for trenchless or replacement work depending on access and extent of damage.
Clear indicators for hiring a licensed plumber or contractor—persistent leaks, structural collapse, multiple failures, or permit requirements—are highlighted.
Typical cost range for DIY vs professional sleeving
Costs for sleeving a sewer pipe vary widely depending on method, materials, and whether the homeowner does the work or hires a pro. DIY kits typically range $150–$800; professional trenchless sleeving runs $1,200–$6,000 depending on length and access. Professionals add inspection, warranty, and labor that justify higher costs.
| Option | Typical cost |
|---|---|
| DIY kit | $150–$800 |
| Professional | $1,200–$6,000 |
Estimated project timelines by method
When choosing a sleeving method for a sewer pipe, homeowners should weigh both dollar outlay and time on site:
DIY epoxy or patch kits often take a few hours to a day for prep, cure, and testing, while professional trenchless lining or cured-in-place pipe (CIPP) jobs typically require 1–3 days including inspection and setup.
Materials procurement, access complexity, and permits can extend schedules.
Indicators that require hiring a licensed plumber or contractor
Longer schedules, complex access, or unexpected permit delays often signal that a homeowner should consider professional help; beyond time and money, certain conditions make DIY sleeving unsuitable.
Severe root intrusion, collapsed pipe segments, hazardous materials, multiple lateral connections, recurring backups, or unclear property lines all warrant licensed plumbers or contractors.
Professionals assess cost, obtain permits, coordinate inspections, and guarantee code-compliant, durable repairs.
Long-Term Maintenance and Warranty Considerations
The expected lifespan of a properly sleeved sewer pipe, often measured in decades, depends on material, soil conditions, and installation quality.
Owners should adopt a routine inspection schedule—annual visual checks and camera inspections every 3–5 years—and follow simple prevention tips such as avoiding chemical drain cleaners and limiting root intrusion.
Clear warranty terms should be requested in writing, specifying coverage length, transferability, exclusions, and required maintenance to keep the warranty valid.
Expected lifespan of sleeved pipes
Although material choice and installation quality strongly influence longevity, sleeved sewer pipes typically last several decades under normal conditions.
Expected service life varies: cured-in-place liners often exceed 30–50 years, polyethylene sleeves can match or surpass that when properly fused, and service life shortens with aggressive soils, chemical exposure, or exceptional mechanical stress.
Warranties and documented installation records clarify projected lifespan.
Routine inspection schedule and prevention tips
Given the variability in expected service life, a defined routine inspection schedule helps protect warranty coverage and extend performance.
Inspections should be periodic, condition-focused, and recorded. Preventive actions reduce failures and document care.
- Annual camera inspection of sleeved sections
- Post-storm or heavy-use visual checks
- Prompt cleaning of roots/debris to prevent abrasion
Warranty terms and documentation to request
When pursuing sleeve repairs, owners should obtain clear, written warranty terms that specify coverage duration, excluded causes (such as root intrusion, chemical damage, or ground movement), performance guarantees, and procedures for claim submission and remediation.
The documentation should include scope, start and end dates, transferability, repair response times, required maintenance to preserve validity, inspection records, contractor credentials, and a signed service agreement detailing remedies, limits, and dispute resolution.
Case Examples and Before/After Scenarios
The section presents two contrasting case examples to illustrate practical outcomes of pipe sleeving.
The first example covers a small-diameter residential repair, describing the problem, chosen sleeve method, and measurable improvements.
The second example examines a large-diameter municipal or commercial installation, focusing on project scale, logistical challenges, and post-sleeving performance.
Small-diameter residential repair example
One common scenario involves a homeowner facing repeated blockages and leaks in a 3- to 4-inch clay sewer lateral, where traditional dig-and-replace would be disruptive and costly.
A cured-in-place sleeve was installed via access point, restoring structural integrity and sealing root intrusions.
Post-repair flow improved, backups stopped, and landscaping remained intact.
Inspection camera confirmed a continuous, smooth interior lining.
Large-diameter municipal or commercial example
Illustrating a municipal-scale CIPP sleeve installation, a mid-sized city replaced a failing 36-inch vitrified clay trunk line beneath a downtown arterial without major roadway closures by using a sectional inversion method launched from two existing access shafts.
Inspection, targeted cleaning, and resin-saturated tubing insertion restored structural integrity and flow.
Post-install CCTV confirmed uniform liner cure, eliminated infiltration, and extended service life by decades with minimal community disruption.
Quick Troubleshooting Checklist and Safety Reminders
Start by pausing work and evaluating the installation area for obvious issues—visible leaks, misaligned fittings, or material damage—before proceeding.
The technician confirms hazards, documents findings, and selects PPE.
Quick checklist follows:
- Verify containment and odor control, confirm lineup and sleeve fit.
- Inspect cure times and resin saturation; reapply if voids present.
- Ascertain ventilation, lockout/tagout, and emergency access.
Conclusion
Sleeving sewer spares struggling systems: skillful, swift sleuthing secures sturdy solutions. When worn, weeping, or cracked conduits challenge confidence, careful choice of method—slip-lining or cured-in-place—calms concern. Thoughtful tools, tested techniques, and tidy testing turn trouble into triumph; temporary tweaks transform into trustworthy, tight seals. Yet savvy scrutiny signals when specialists should step in. Regular routine review and rapid repairs retain reliability, restoring resilient, long-lasting runoff routes.