How to Use a Sump Pump: Step-by-Step Guide for Installation, Operation, and Maintenance
A sump pump is essential for preventing flooding, dampness, and mold in your home by collecting groundwater and expelling it away from your foundation. To choose the right pump, consider options like submersible, pedestal, or backup models based on your specific needs, such as pit depth and flow rate. For installation, prepare the site, install a basin, set the pump on gravel, connect discharge piping with a check valve, and wire it to a GFCI circuit. Regular maintenance is crucial: inspect the pump, clean the basin, and test backups to ensure reliability. This guide offers detailed steps for installation, maintenance, and troubleshooting.
What a sump pump does and when you need one
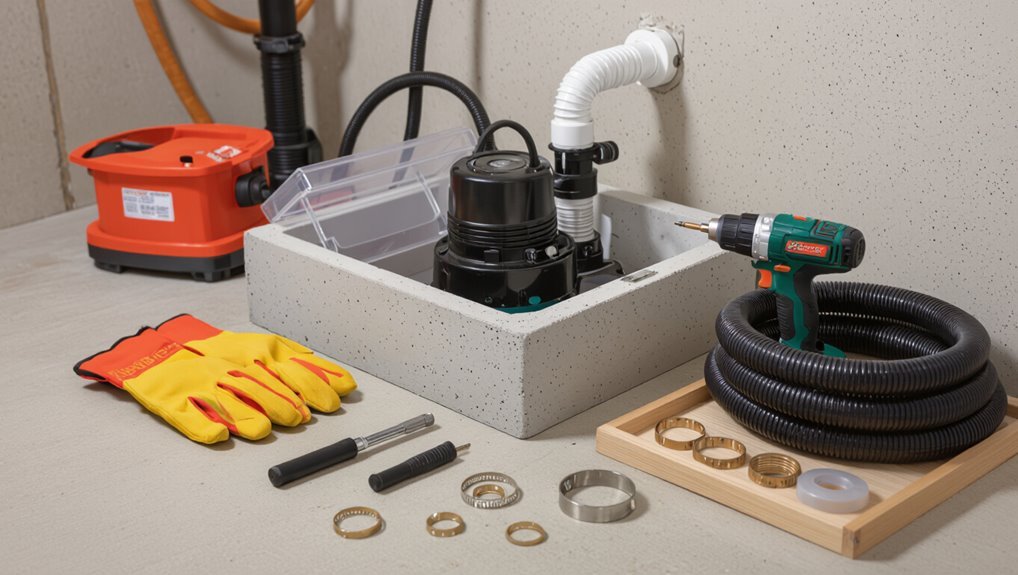
A sump pump removes accumulating groundwater from basements and crawl spaces to prevent flooding, dampness, and structural damage.
Indicators that a home needs one include previous basement water, a high water table, poor grading, or frequent heavy rain.
Different pump types—submersible, pedestal, and battery- or water-powered backups—suit varying installation spaces, water volumes, and reliability requirements.
How sump pumps protect basements and crawl spaces
When groundwater or surface runoff accumulates around a home’s foundation, a sump pump activates to collect and expel the water before it seeps into basements or crawl spaces.
Proper placement and discharge routing prevent standing water, reduce humidity, and limit mold and structural damage.
Homeowners learning how to use a sump pump guarantee continuous drainage, protecting finished spaces, stored items, and foundation integrity.
Signs you need a sump pump installation
Recognizing indicators that a sump pump is needed helps homeowners decide when to add one to their drainage systems.
Persistent basement dampness, recurrent minor flooding, visible groundwater seepage, high water table or soggy yard, frequent heavy rains, and malfunctioning or absent existing drainage systems signal need.
Chronic mold growth or musty odors and valuable stored items in low areas also justify installation.
Types of sump pumps and which situations they suit
Sump pumps move groundwater away from a home’s foundation to prevent flooding and dampness, and selecting the right type depends on the property’s water volume, power availability, and installation constraints. Submersible units suit deep pits and high flow; pedestal pumps fit shallow pits and easy service; battery backup guarantees operation during outages.
| Type | Best for |
|---|---|
| Submersible | High flow, deep pits |
| Pedestal | Shallow pits, easy access |
| Backup | Power outages, intermittent use |
Choosing the right sump pump for your home
Selecting an appropriate sump pump requires comparing primary and backup options or combined systems to guarantee continuous protection.
The choice between submersible and pedestal models should weigh space, noise, and maintenance trade-offs, while key specs—GPH, head, horsepower, and float type—determine performance for the basement’s conditions.
Power and discharge logistics, including electrical supply, battery backup, and generator compatibility, must also be planned to keep the system operational during outages.
Primary vs. backup pumps and combination systems
Choosing between a primary pump, a backup unit, or a combined system hinges on the home’s flood risk, power reliability, and homeowner tolerance for maintenance and cost.
A primary pump handles routine drainage. Backup systems—battery, water-powered, or generator-linked—activate during outages.
Combination units merge functions for redundancy. Selection should weigh expected water volume, installation complexity, monitoring features, and long-term reliability.
Submersible vs. pedestal pumps: pros and cons
After weighing primary versus backup and combination options, homeowners must also decide between submersible and pedestal designs, as each offers distinct trade-offs in performance, durability, and installation. Submersible pumps sit in the pit, are quieter, and resist clogging; pedestal pumps are simpler, cooler-running, and easier to service but occupy more space.
| Submersible | Pedestal |
|---|---|
| Quiet | Simple |
| Enclosed motor | Easier access |
| Higher cost | Lower cost |
| Better for deep pits | Better for shallow pits |
Key specifications to compare (GPH, head, horsepower, float type)
Several clear specifications determine a sump pump’s suitability for a home: gallons per hour (GPH), maximum head, motor horsepower, and float switch type.
GPH indicates flow at zero head; head denotes lift capacity and affects actual flow. Horsepower reflects sustained performance and durability.
Float switch options—vertical, tethered, electronic—impact reliability, activation points, and resistance to jamming, guiding appropriate selection.
Power and discharge considerations (electrical, battery backup, generator)
Evaluate power and discharge options to guarantee a sump pump keeps the basement dry during routine use and power outages.
The homeowner should confirm electrical circuit capacity, GFCI protection, and proper wiring.
Battery backup systems provide hours of operation; inverter selection and battery maintenance matter.
Portable or standby generators require safe transfer switches and adequate wattage.
Discharge piping must prevent backflow and freeze.
Tools and materials required before installation
A clear checklist of tools and materials guarantees a smooth sump pump installation: a correctly sized pump and basin, PVC discharge pipe and fittings, a check valve, a reliable power source or GFCI outlet, concrete or gravel for bedding, sealant or waterproof caulk, hose clamps, a utility knife, pipe primer and cement, basic hand tools (screwdriver, wrench, tape measure), and appropriate safety gear such as gloves and eye protection.
- Pump and basin
- PVC pipe, fittings, check valve
- Sealant, primer, cement, clamps
- Basic hand and safety gear
Preparing the installation site
The installer assesses the basement or crawlspace to identify the ideal pit location, considering natural water flow paths and the position of utilities.
They measure and mark the required pit dimensions and depth to accommodate the pump and basin.
Finally, the installer verifies local codes and any permitting requirements before excavation begins.
Locating the optimal pit position relative to water flow and utilities
Proper placement of the sump pit hinges on balancing efficient water capture with safe clearances from existing utilities and structural elements.
The installer should position the pit at the lowest practical point where drainage converges, maintain clearance from sewer, gas, electrical lines and foundation footings, avoid load-bearing walls and appliance paths, and guarantee access for discharge piping and future maintenance without obstructing service routes.
Measuring and marking the pit size and depth
Before any excavation begins, the installer measures and marks the pit to match the pump manufacturer’s recommended diameter plus clearance for the liner and gravel.
This also sets the depth below the basement floor to accommodate the pump base, float, and at least 2–3 inches of gravel underlay.
Measurements are transferred with a square and chalk, verified from multiple reference points, and outlined for consistent digging.
Checking local codes and permitting requirements
One step is to review local building codes and permitting requirements to guarantee the sump pump installation complies with zoning, plumbing, and electrical regulations.
The installer should contact the municipal building department, obtain necessary permits, and confirm inspection schedules.
Verify discharge restrictions, backflow prevention, and GFCI outlet mandates.
Document approvals and keep copies for contractors and future inspections.
Step-by-step sump pump installation
The installation proceeds through a sequence of focused tasks beginning with excavating the hole and forming the sump basin.
Next steps include fitting the pit liner on a gravel base, setting and anchoring the pump, and attaching the discharge pipe and check valve.
Finally, the basin is sealed and backfilled to restore the surrounding substrate.
Excavating and creating the sump basin
Begin by locating the lowest point in the basement where water naturally collects and mark a square or circle large enough for the chosen basin; accurate placement guarantees effective drainage and prevents future floor cracks.
Use a concrete saw or jackhammer to cut and remove slab to required depth. Excavate soil to accommodate basin height, slope sides for stability, and remove debris before liner and gravel installation.
Installing the pit liner and gravel base
Place the prefabricated pit liner into the excavated hole, ensuring its top rim sits flush with or slightly below the finished floor level to prevent migration and allow proper drainage.
Level the liner, backfill around its exterior with compacted soil, then add a 2–4 inch layer of clean, coarse gravel to the basin bottom.
Tamp gravel evenly to create a stable, permeable bedding layer.
Placing and securing the pump in the basin
With the basin prepared and gravel tamped to a level, attention shifts to positioning the pump so it sits squarely and functions reliably.
The pump is lowered vertically onto the gravel, ensuring the base contacts evenly. Small adjustments center the unit and prevent rocking.
If required, use anti-vibration pads or a concrete ring for stability.
Verify the pump is upright and immobile before proceeding.
Connecting the discharge pipe and check valve
Once the pump is stable, the installer attaches the discharge piping and a check valve to direct expelled water away and prevent backflow into the basin.
Pipe sizing matches pump capacity; fittings are solvent-welded or threaded per material.
The check valve is oriented correctly, secured with clamps or unions, and tested by briefly activating the pump to confirm one-way flow and leak-free joints before proceeding.
Sealing and backfilling around the basin
After confirming the discharge connections and check valve are secure, the installer prepares the basin for sealing and backfilling by cleaning the rim and surrounding trench of loose debris and standing water.
The installer applies an approved non-shrinking hydraulic cement or silicone sealant around the basin lip, backfills with washed stone for drainage, then tamped clean fill to grade, ensuring stability and proper slope away from the basin.
Electrical hookup and grounding best practices
Having sealed the basin and backfilled to grade, attention turns to the electrical hookup and grounding to guarantee safe, reliable pump operation.
The pump should be connected to a dedicated GFCI-protected circuit, using appropriately rated cable and a weatherproof receptacle mounted above flood level.
Grounding must follow local code: attach the pump ground to the household grounding system and inspect all connections for tightness and corrosion.
Installing a battery backup or secondary pump
Consider adding a battery backup or a secondary (standby) pump to protect against power failures and primary pump malfunctions.
Install the backup in its own basin or mount above the primary with a dedicated check valve and discharge line.
Connect a correctly sized battery, charger, and alarm, test automatic switchover, and schedule regular battery and operation checks to guarantee reliability during outages.
How to operate your sump pump safely
Before regular use, a concise startup checklist and a functional test confirm the pump, float switch, and automatic activation are working correctly.
The operator should verify float switch movement, confirm discharge routing and freeze protection, and guarantee backup power or battery protocols are in place for outages.
Routine checks and a clear plan for backup operation reduce the risk of failure and water damage.
Initial startup checklist and functional test
A concise initial startup checklist and functional test assures the sump pump operates safely and reliably:
confirm power connection and GFCI integrity,
verify discharge piping and check valves are secure and unobstructed,
make certain the basin is clean and debris-free,
inspect seals and cords for damage,
set float or control to recommended positions,
and run a brief manual cycle while monitoring for leaks, vibration, overheating, and proper discharge flow.
Testing float switches and automatic activation
Properly testing float switches and verifying automatic activation guarantees the sump pump responds reliably during high water events.
Inspect float for free movement, clear debris, and ascertain correct mounting.
Simulate rising water manually or with controlled pour to observe switch engagement and pump start.
Confirm pump shuts off at lower float position.
Repeat tests periodically and after maintenance to ascertain consistent automatic operation.
Managing discharge routing and freeze protection
After confirming automatic activation, attention should turn to where the pump sends water and how that discharge is protected from freezing.
Discharge piping must slope away, use check valves to prevent backflow, and extend beyond the foundation to safe drainage.
In cold climates, insulate exposed piping, add heat tape rated for outdoor use, and guarantee outlets remain clear of ice and debris.
Power outage protocols and backup operation
Prepare for power failures by establishing clear protocols and reliable backup systems that maintain sump pump operation during outages.
Specify primary and secondary power sources, test battery backups and generators regularly, and install automatic transfer switches.
Train occupants on manual pump activation and safe generator use.
Schedule routine inspections, replace batteries per manufacturer guidelines, and document procedures to guarantee uninterrupted, compliant sump pump performance.
Routine maintenance and seasonal checks
Routine maintenance and seasonal checks keep a sump pump reliable and prevent failures during critical weather. Key tasks include visual inspections, cleaning, and testing of mechanical and backup systems:
- Weekly/monthly quick checks and clearing debris
- Quarterly/annual detailed inspections and service
- Clean pump, basin, and intake screen as needed
- Test check valve, discharge piping, and backup battery schedule
Consistent adherence to this checklist reduces emergency repairs and extends equipment life.
Weekly and monthly maintenance tasks
Perform weekly and monthly checks to verify the sump pump and its components remain operational and to catch small issues before they escalate.
Inspect the basin for debris, test pump operation by pouring water into the pit, verify float switch movement and unobstructed discharge pipe, confirm the check valve is functional, clear nearby drains, and ascertain the power connection and backup battery (if present) show no warning indicators.
Quarterly and annual inspections
Quarterly and annual inspections focus on deeper checks and seasonal adjustments that go beyond basic weekly tasks, ensuring the sump pump system remains reliable over time.
Inspect electrical connections, test alarm and backup power, verify float and switch operation under load, check discharge line integrity and valves for leaks or ice vulnerability, review basin access and pit drainage, and log findings for trend monitoring and corrective action.
Cleaning the pump, basin, and intake screen
After completing electrical and operational checks, attention turns to physical cleaning of the pump, basin, and intake screen to prevent clogs and mechanical wear.
Remove power, lift the pump, clear debris and sediment from the basin, and inspect the float for obstruction.
Rinse or brush the intake screen, remove mineral buildup, and reassemble.
Verify secure seating and proper free movement before restoring power.
Testing the check valve and discharge piping
A clear check valve and unobstructed discharge piping are essential to prevent backflow, reduce pump cycling, and verify water is carried safely away from the foundation.
Inspect fittings and joints for leaks, listen for rattling that indicates debris, and run the pump to confirm one-way flow.
Remove blockages, tighten or replace worn connectors, and make sure exterior outlets slope away from the house.
Battery maintenance and replacement schedule for backups
With discharge lines confirmed clear and check valves operating properly, attention turns to backup power: the battery that keeps a sump pump running during outages requires regular inspection and a planned replacement schedule.
The battery should be checked monthly for charge level, corrosion, and secure connections. Load-test annually; replace every three to five years or sooner if capacity fades, sensors fail, or physical damage appears.
Troubleshooting common sump pump problems
When a sump pump fails to start, runs nonstop, cycles frequently, becomes noisy, or has a frozen or clogged discharge line, straightforward diagnostics and targeted fixes usually resolve the issue.
The discussion proceeds through step-by-step checks for power, float and switch function, and obstructions.
Then it describes common causes and corrective actions for continuous running and short-cycling.
It finishes with noise troubleshooting and practical methods to clear or prevent frozen and clogged discharge lines.
Pump won’t turn on: diagnosis steps
Begin by confirming basic power and switch status before assuming mechanical failure.
Check the outlet, circuit breaker, and any GFCI reset.
Inspect the float or level sensor for obstruction or binding.
Verify pump wiring and connections for corrosion or loose terminals.
Test the motor with a known-good power source or multimeter.
Replace faulty switches, fuses, or sensors as indicated.
Pump runs continuously: causes and fixes
Investigate continuous sump pump operation promptly, as nonstop running can indicate electrical faults, a stuck or misadjusted float or level sensor, a clogged or leaking discharge line, or an oversized pit relative to pump cycle settings.
Inspect float movement, test the switch, check power connections, clear or repair discharge piping, verify check valve function, and confirm correct pump sizing and control settings to restore normal intermittent operation.
Pump cycles frequently (short-cycling) and remedies
Frequent on/off cycling—short‑cycling—shortens a sump pump’s lifespan and can leave a basement vulnerable to water damage if not corrected.
Short cycles often result from an oversized pump, a small sump pit, float switch restriction, or rapid inflow from intermittent sources.
Remedies include installing a larger pit or basinet, adjusting or replacing the float switch, adding a controller or check valve, and matching pump capacity to inflow.
Noisy pump symptoms and solutions
Many homeowners notice several distinct noises—grinding, rattling, humming, or high‑pitched squeals—that indicate specific sump pump issues. Recognizing the sound helps narrow causes such as worn bearings, debris in the impeller, motor strain, loose mounting, or air in the discharge line and guides targeted remedies.
Inspect and clean the impeller, tighten mounts, check motor bearings, verify electrical supply, and replace failing components promptly to prevent escalation.
Frozen or clogged discharge line fixes
After addressing noises that point to mechanical wear or debris, attention should shift to the discharge line, where freezing or clogging can render a perfectly functional sump pump unable to move water out of the pit.
Inspect the external pipe for ice, clear obstructions with a plumber’s snake, thaw frozen sections with a heat gun or warm water, and add slope or insulation to prevent recurrence.
Upgrades, accessories, and long-term considerations
Consideration of upgrades and accessories can improve performance and safety, from automatic water alarms and smart monitoring to water-tight covers that address radon and soil gas entry.
Selecting corrosion-resistant materials or protective coatings extends service life and reduces maintenance.
Guidance on when to repair versus replace the pump helps prioritize investment and avoid unexpected failures.
Automatic water alarm systems and smart monitoring
While a reliable sump pump prevents most basement flooding, integrating automatic water alarms and smart monitoring provides an essential layer of early warning and remote oversight.
Battery-backed alarms, Wi-Fi-enabled sensors, and float-switch notifications alert homeowners to rising water, pump failure, or power loss.
Remote apps log events, send push or email alerts, and integrate with home automation for proactive responses and routine status checks.
Installing a water-tight cover and radon/soil gas concerns
Beyond alarms and remote monitoring, attention turns to physical safeguards that protect the sump basin and the home’s air quality.
A water-tight cover limits evaporation, debris entry, odors, and insect access while preventing accidental falls.
Properly sealed covers reduce soil gas and radon pathways; installers should guarantee gasketed lids, sealed pipe penetrations, and, if needed, coordinate with radon mitigation professionals for testing and active venting.
Choosing corrosion-resistant materials and coatings
Durability is a primary concern when selecting materials and coatings for a sump pump system because prolonged exposure to moisture, minerals, and sewage can accelerate degradation.
Choose stainless steel or coated cast iron for housings, non-corrosive fasteners, and epoxy or polyurethane paints for external surfaces.
Use sacrificial anodes in aggressive environments and inspect coatings periodically to prevent pitting, leaks, and premature component failure.
When to replace vs. repair your sump pump
Evaluating whether to repair or replace a sump pump hinges on age, performance, cost of repairs, and the consequences of failure.
Systems older than 7–10 years, those that require frequent fixes, or pumps suffering from persistent motor, impeller, or corrosion problems typically warrant replacement.
In contrast, isolated, inexpensive issues (float switch misalignment, clogged discharge, or minor seal leaks) are often cost-effective to repair.
Annual inspection, testing, and budgeting for replacement guarantee reliable protection.
Cost estimates and lifetime expectations
Typical upfront and ongoing costs are summarized below to frame realistic budgeting, while expected lifespans and common shortening factors are noted for maintenance planning. The table gives a concise cost breakdown and lifespan ranges to compare options. Regular inspection and avoiding dry runs or grit ingestion are key to reaching the upper end of projected service life.
| Item | Typical Cost Range | Expected Lifespan |
|---|---|---|
| Sump pump unit (submersible/ pedestal) | $80–$600 | 5–15 years |
| Installation (labor + materials) | $150–$800 | N/A |
| Accessories (battery backup, alarm) | $100–$600 | 3–10 years |
Typical installation cost breakdown
A homeowner planning a sump pump installation can expect costs to vary by equipment quality, labor rates, and site complexity.
Basic systems typically run $800–$1,500, mid-range installs $1,500–$3,000, and high-end or backup-equipped setups $3,000–$6,000 or more.
Typical breakdown: pump $150–$800, basin and fittings $100–$300, discharge piping $50–$200, check valve $20–$80, electrical and labor $400–$2,500.
Expected lifespan and factors that shorten it
When properly selected and maintained, a residential sump pump generally lasts between 5 and 15 years, with most standard submersible units averaging about 7–10 years.
Pedestal models often reach the upper end of that range.
Lifespan shortens with continuous heavy duty cycling, poor installation, debris-clogged intakes, corrosive water, power outages without backup, and inadequate maintenance or infrequent testing.
Safety warnings, codes, and environmental considerations
The section addresses critical safety and regulatory issues associated with sump pump use.
It covers electrical precautions including GFCI protection, proper routing and disposal of discharged water in accordance with local codes, and measures to prevent backflow and cross‑connection contamination.
Readers are encouraged to follow manufacturer instructions and consult local authorities or a licensed electrician when uncertainties arise.
Electrical safety and GFCI requirements
Because sump pump installations involve water and electricity in close proximity, strict adherence to electrical safety and local code—especially ground-fault circuit interrupter (GFCI) protection—is essential to prevent shock, electrocution, and equipment damage.
Installers must use GFCI-protected circuits, proper grounding, weatherproof outlets, and conduit where required. Qualified electricians should perform wiring, verify circuit capacity, label circuits, and test GFCI functionality regularly to guarantee ongoing safety.
Proper disposal of wastewater and local regulations
Address proper wastewater disposal and compliance with local regulations to prevent contamination, sewer backups, fines, and potential damage to municipal systems.
Users should verify local ordinances regarding discharge locations, permitted contaminants, and required permits.
Directing sump pump outflow to storm drains, sanitary sewers, or neighbors may be prohibited.
Follow municipal codes, record permits, and consult authorities to guarantee environmentally safe, lawful wastewater handling.
Preventing backflow and cross-connection contamination
When a sump pump discharges into household plumbing or nearby drains, safeguards must be installed to prevent backflow and cross-connection contamination that can introduce sewage, chemicals, or groundwater into potable lines or municipal systems.
Install backflow preventers, air gaps, and check valves per local code; test and maintain them regularly.
Consult utilities for approved connections and disposal methods to avoid fines and public-health risks.
Conclusion
To sum up, the homeowner can prevent basement floods by selecting, installing, and maintaining a sump pump according to this guide. Regular checks and timely repairs keep the system reliable, while proper sizing, backup power, and float-switch tests guarantee readiness for storms that feel as though the sky itself is pouring into the cellar. Following codes, safety precautions, and environmental best practices prolongs equipment life and reduces long-term costs.