
How to Replace Toilet Tank Seal: Step-by-Step Repair Guide for a Leak-Free Flush
To effectively replace a worn toilet tank seal and eliminate leaks, follow these straightforward steps: First, turn off the water supply and flush the toilet to empty the tank. Next, disconnect the supply line and carefully remove the tank from the bowl. Replace the old gasket and any corroded bolts, ensuring to clean all mating surfaces. Position the new rubber tank-to-bowl gasket with the lip facing up, then lower and align the tank. Tighten the bolts evenly to secure it in place, reconnect the supply line, and test for leaks. Additional steps for adjustments, troubleshooting, and maintenance tips are also provided.
What Causes a Leaky Toilet Tank Seal
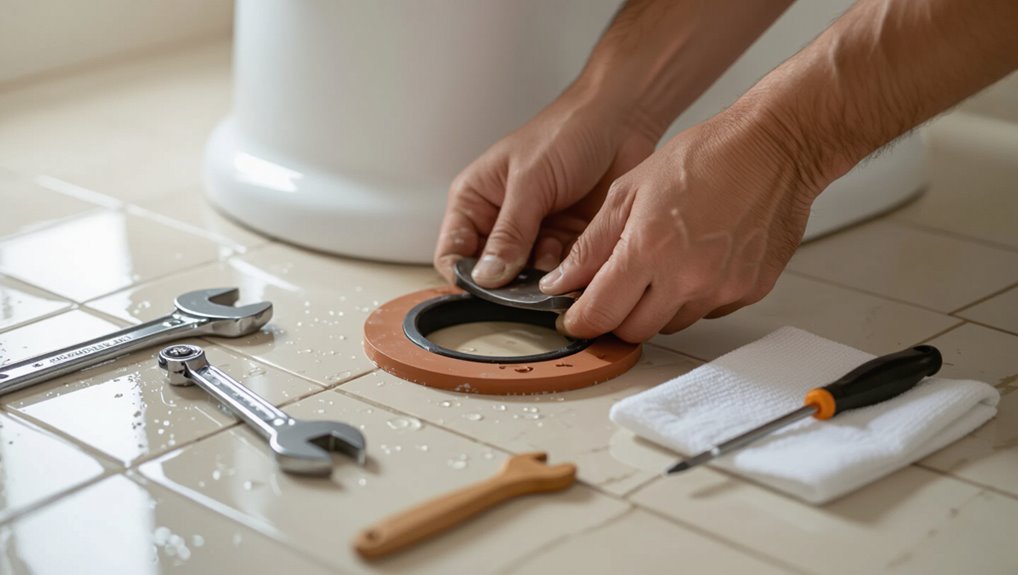
Common failure modes of tank-to-bowl gaskets include material degradation, compression set, and improper installation that allow water to bypass the seal.
Visible symptoms such as pooling at the base, dampness between tank and bowl, or a constantly running fill valve often indicate a failing tank seal.
Simple diagnostic checks—drying the area, adding food coloring to the tank, and observing for colored water outside the tank—help confirm the leak source.
Common failure modes of tank-to-bowl gaskets
Leaks at the tank-to-bowl gasket usually stem from a handful of predictable failures: gasket deterioration from age or chemical exposure, improper installation or alignment, overtightened or corroded tank bolts that warp the seal, and cracks or surface irregularities on the mating flanges.
Other common modes include compressed or flattened rubber, shrinkage from heat, and mineral buildup; these issues are central when learning how to replace toilet tank seal.
Symptoms that indicate a failing tank seal
Those failure modes produce predictable signs that signal a failing tank-to-bowl gasket.
Water pooling at the base of the tank, damp cabinet or floor, persistent dripping between tank and bowl, stained porcelain or mineral deposits, and worsening leakage after flushes are typical.
Users may notice reduced flush efficiency or constant refilling sound when the seal allows water escape into the bowl or surrounding area.
How to confirm the leak source (diagnostic checks)
How can one be certain the tank-to-bowl gasket is the culprit rather than another source?
Inspect for water under the tank after flushing, dry area, then observe repeat appearance.
Check bolts and washers for corrosion, tighten slightly.
Apply food coloring to tank; if colored water appears in bowl without flushing, the flapper leaks.
If water collects at tank base, gasket likely failing—confirm by removing tank.
Tools and Materials You’ll Need
A concise list of tools and materials helps guarantee the tank seal replacement proceeds smoothly.
Essential tools include adjustable pliers, a screwdriver, and a utility knife, while recommended replacement parts are a rubber flange gasket or foam seal and any corroded tank-to-bowl bolts and washers.
Optional items that can speed the job or improve results are a bucket, cleaning brush, plumber’s grease, and replacement bolts with rubber or neoprene washers.
Required tools for replacing a tank seal
Several basic tools and materials are needed to replace a toilet tank seal safely and effectively.
Required items include an adjustable wrench, pliers, screwdriver (flat and Phillips), bucket, sponge or rags, utility knife, and silicone or plumber’s grease for lubrication.
A small brush or abrasive pad helps clean mating surfaces.
Gloves and safety glasses protect hands and eyes during disassembly and cleanup.
Recommended replacement parts and seal types
With the tools on hand, attention turns to selecting the correct replacement parts and seal types to guarantee a watertight fit and reliable operation.
Recommended parts include a new tank-to-bowl rubber gasket, tank bolts with washers and nuts (stainless or brass), a flapper compatible with the flush valve, and a fill valve seal kit.
Choose OEM or high-quality universal components sized to the toilet model.
Optional items that make the job easier
Many homeowners find that keeping a few optional items on hand—such as a basin wrench for hard-to-reach nuts, a putty knife for scraping old sealant, plumber’s tape, a small hand pump or wet/dry vac to remove residual water, and a set of silicone lubricant or seal conditioner—speeds the job and reduces frustration.
- Extra washers and bolts
- Bucket and rags
- Flashlight or headlamp
- Mild cleaner and brush
Safety Precautions and Preparatory Steps
Before beginning the seal replacement, the water supply should be shut off at the valve and the tank flushed to relieve pressure.
Surfaces and flooring around the toilet should be protected with towels or a waterproof drop cloth to catch spills and prevent damage.
If the repair involves corroded bolts, cracked porcelain, unclear leaks, or the person lacks confidence, a professional plumber should be contacted.
How to shut off water and relieve tank pressure
A few simple steps guarantee the toilet is safe to work on: locate and turn the shutoff valve at the wall or floor behind the toilet to stop the water supply, then flush the toilet to empty most of the tank.
Hold the handle down until flow stops.
Open the tank lid carefully, sponge remaining water into a bucket, and disconnect supply line if needed.
Protecting bathroom surfaces and flooring
Protective coverings and careful placement of tools prevent damage to tile, vinyl, and grout while working on a toilet tank.
Lay down a waterproof drop cloth or cardboard, secure edges with low-residue tape, and use rubber or felt pads under the tank and tools.
Keep mop and towels nearby for spills, clear the area of toiletries, and maintain stable footing to avoid slips and scratches.
When to call a professional instead of DIY
When should a homeowner stop and call a professional?
If leaks persist after seal replacement, if water damage, mold, or structural rot is present, or if plumbing connections and bolts are corroded or stripped, a licensed plumber should be contacted.
Also seek help for unclear diagnosis, gas line proximity, or lack of proper tools and confidence; professionals prevent worsening damage and guarantee code compliance.
Step-by-Step Guide to Replace a Toilet Tank Seal
The procedure begins with shutting off the water supply and emptying the tank before disconnecting the supply line and lifting the tank from the bowl.
Once removed, the old tank-to-bowl gasket and mounting bolts are taken off and inspected for wear.
After cleaning the mating surfaces and checking for cracks or warping, a new tank seal and gasket are installed correctly before reassembly.
Step 1 Turn off water and empty the tank
Shut off the toilet’s water supply at the shutoff valve located near the base, then flush to drain most of the tank; hold down the handle to remove as much remaining water as possible.
Use a sponge or towel to soak up residual water inside the tank and wring into a bucket.
Place towels around the base to catch drips and prevent floor damage before proceeding.
Step 2 Disconnect water supply and remove tank from bowl
Disconnect the water supply line at the shutoff valve and detach the fill-line from the tank’s bottom coupling.
Place a bucket or towel beneath to catch residual water.
Loosen and remove the nuts securing the tank to the bowl, supporting the tank to prevent tipping.
Lift the tank straight up and set it on a padded surface.
Inspect for stability before proceeding.
Step 3 Remove old tank-to-bowl gasket and inspect mounting bolts
With the tank removed and set on a padded surface, attention turns to the gasket and mounting hardware beneath.
The old rubber gasket is pried away, discarded, and the flange inspected for residue.
Mounting bolts and washers are examined for corrosion, stripped threads, or mineral buildup; rusted or damaged bolts are noted for replacement.
Remaining debris is removed to reveal intact fastener holes.
Step 4 Clean mating surfaces and check for cracks or warping
Begin by thoroughly cleaning the mating surfaces of both the tank and bowl using a soft scraper or putty knife to remove old gasket residue, mineral deposits, and sealant.
Then wipe them with a damp cloth and mild cleaner to guarantee a dry, debris-free finish.
Inspect both surfaces for hairline cracks, chips, or warping; any irregularity can prevent a proper seal and may require tank or bowl replacement.
Step 5 Install new tank seal and gasket correctly
Carefully position the new rubber tank-to-bowl gasket over the flush valve opening, ensuring the wider lip faces upward toward the tank interior and the gasket sits flush against the bowl rim; then lower the tank straight down onto the bowl so the gasket remains centered and the bolt holes align.
Install the fill-valve gasket and any tank-to-bowl washers, confirm proper seating, and remove excess sealant if applied.
Step 6 Reinstall tank, torque bolts evenly, and reconnect supply
After the tank is lowered and the gasket is seated, the next phase is to secure the tank to the bowl and restore the water supply.
Align tank bolt holes, insert bolts with washers, and tighten nuts incrementally, alternating sides to apply even torque. Avoid over-tightening to prevent cracking.
Reattach the water supply line to the fill valve and hand-tighten, then snug with a wrench.
Step 7 Refill tank, adjust water level, and test for leaks
Turn the water supply back on slowly to let the tank fill and observe the fill valve, float, and overflow tube as the water rises.
Adjust the float or fill-valve screw to set the water level to the marked line or 1 inch below the overflow.
Check around the tank-to-bowl gasket and bolts for drips.
Flush several times and recheck for steady, dry seals.
How to Handle Related Components During Replacement
The technician should inspect tank bolts and washers for corrosion or wear and replace them if they show damage.
Attention should be given to the flush and fill valves as well, replacing worn units to guarantee a reliable seal and proper operation.
When reinstalling, seal around bolt shanks and tighten nuts evenly but not excessively to prevent cracks and leaks.
Inspecting and replacing tank bolts and washers
Inspecting the tank bolts and washers helps guarantee a reliable seal and prevent future leaks; start by draining the tank and removing any remaining water to clearly see corrosion, mineral buildup, or cracked rubber.
Remove bolts, inspect for rusted threads, replace corroded bolts and crushed or hardened rubber washers. Use stainless bolts, new neoprene washers, and tighten evenly to compress the gasket without overtightening.
When to replace the flush valve or fill valve
After bolts and washers are addressed, attention should shift to the flush valve and fill valve to determine whether they, too, require replacement.
The flush valve needs replacement if it leaks around the seat, shows cracks, or the flapper won’t seal.
Replace the fill valve if refilling is slow, noisy, overfilling, or the float fails.
Prioritize worn, corroded, or age-compromised units.
Sealing around bolt shanks and avoiding overtightening
Carefully seat rubber or neoprene washers around each bolt shank before tightening to prevent leaks and protect the porcelain; these gaskets compress to form a watertight barrier between the tank and bowl and must lie flat with no folds or gaps.
Tighten nuts evenly by alternating sides, stopping when snug; use hand tools with short turns to avoid cracking porcelain or distorting seals.
Troubleshooting After Replacement
After replacing the tank seal, attention should turn to remaining issues such as persistent leaks beneath the tank, a wobbling tank, or bolts that continually loosen.
Inspect the seal seating, bolt washers, and flange connections to pinpoint the source of any ongoing seepage.
For intermittent or slow leaks, recommend pressure and dye tests and recheck connections after the tank has been refilled and settled.
If leaking persists under the tank
If a leak appears beneath the tank even after replacing the seal, inspect the tank-to-bowl connection, mounting bolts, and gasket alignment to identify the source.
Persistent seepage often stems from loose bolts, an improperly seated gasket, cracks in the tank or bowl, or corrosion that prevents a watertight fit.
Verify bolt tightness, replace a damaged gasket, test for hairline cracks, and clean corroded surfaces before retesting.
If tank wobbles or bolts keep loosening
Check for loose hardware and alignment when the tank rocks or bolts repeatedly back off, as these symptoms indicate either uneven seating, stripped threads, or vibration transfer from the flush mechanism.
Tighten nuts evenly with a washer beneath, replace damaged bolts or nylon inserts, shim or reseat the tank to guarantee even contact, and add thread locker or rubber gaskets to reduce loosening from vibration.
Diagnosing intermittent or slow leaks
When intermittent or slow leaks appear following a tank seal replacement, systematic troubleshooting narrows the source by observing when and where water accumulates, measuring loss rates, and isolating components to distinguish seepage from condensation or supply-line issues.
Inspect bolts, gasket seating, and tank-to-bowl flange for hairline drips; perform dye tests, monitor overnight water meter readings, and temporarily shut off supply to identify internal versus external origins.
Comparisons and Selection Guide for Tank Seals
Selection between rubber and foam gaskets, universal kits versus model-specific seals, and the trade-off between price and lifespan determines the best choice for a given toilet. The following table summarizes key differences to guide a practical selection. Consider fit first, then durability and long-term cost when choosing a seal.
| Feature | Rubber Gasket | Foam Gasket |
|---|---|---|
| Durability | High | Moderate |
| Fit Accuracy | Depends on model | Often more forgiving |
| Typical Cost | Moderate–High | Low–Moderate |
Rubber vs. foam gaskets: durability and fit
Although both rubber and foam gaskets perform the basic task of sealing the joint between tank and bowl, they differ in materials, longevity, and how well they conform to imperfect surfaces.
Rubber gaskets resist compression set and chemicals, offering longer service life but requiring precise seating.
Foam gaskets compress easily to fill gaps, simplifying installation but degrading faster and needing periodic replacement in heavier-use toilets.
Universal kits vs. model-specific seals
Deciding between universal kits and model-specific seals hinges on compatibility, ease of installation, and long-term reliability: universal kits offer broad fit and convenience for varying tank-to-bowl configurations, while model-specific seals are engineered to match a particular toilet’s dimensions and port designs for a more precise seal.
Universal kits suit uncertain or multiple toilets; model-specific parts minimize adjustment and reduce the need for modification during installation.
Price vs. lifespan considerations
When balancing price against lifespan for toilet tank seals, buyers should treat cost as an upfront indicator rather than the sole metric of value.
Higher-priced seals often use durable materials and resist degradation, reducing replacement frequency.
Budget options may save initially but require more maintenance.
Selection should weigh material quality, warranty, compatibility, and expected lifespan to minimize total ownership cost.
Common Mistakes to Avoid When Replacing a Tank Seal
A brief overview highlights frequent errors that compromise tank seals and fixtures.
- Over-tightening bolts and cracking the porcelain
- Reusing old seals or damaged hardware
- Ignoring warped tanks or misaligned bowls
- Skipping inspection of mounting bolts and gaskets
Awareness of these points helps prevent leaks and costly repairs.
Over-tightening bolts and cracking the porcelain
Over-tightening the tank bolts risks cracking the porcelain and turning a simple seal replacement into a costly repair.
Technicians should tighten nuts evenly and stop when bolts are snug, not wrench-tight. Use hand tools with measured pressure or a torque-limiting driver.
Inspect for hairline fractures afterward; replace the tank if cracks appear to prevent catastrophic leaks and structural failure.
Reusing old seals or damaged hardware
Discard old seals and damaged hardware rather than reusing them, because worn rubber and corroded metal compromise the new seal’s effectiveness.
Reusing parts risks persistent leaks, uneven compression, and accelerated failure. Replace gaskets, bolts, and washers with new, compatible components.
Inspect tank-to-bowl surfaces and fasteners; corrosion or deformation warrants replacement to guarantee a reliable, watertight connection and avoid repeat repairs.
Ignoring warped tanks or misaligned bowls
Failing to address a warped tank or a misaligned bowl often turns a new seal into a temporary fix rather than a lasting repair.
Overlooking structural misalignment allows leaks to recur despite a fresh gasket. Inspect mating surfaces, check for cracks or unevenness, and correct alignment or replace distorted components before sealing.
Proper fit guarantees durable watertight performance and avoids repeat disassembly.
Maintenance Tips to Prevent Future Leaks
A regular inspection schedule helps catch wear before it becomes a leak; checks should include visible cracks, mineral buildup, and softening around the seal.
Attention to water quality, such as hardness and chlorine levels, can indicate whether deposits or chemical degradation are accelerating seal failure.
Small adjustments—tightening bolts to manufacturer torque, replacing worn washers, and flushing out sediment—can noticeably extend seal life.
Periodic inspection schedule and what to look for
Establishing a regular inspection schedule helps catch tank-seal problems early and prevents costly water damage.
Monthly visual checks for dampness, mineral buildup, or warped gasket edges are recommended.
Quarterly tests of flush and refill cycles reveal slow leaks or flapper misseating.
After any repair, inspect fittings and bolts for corrosion and hand-tighten as needed.
Record findings and dates for trend tracking.
Water quality and its effect on seals
Regular inspections will also indicate if water quality is contributing to seal wear; hard water deposits, high mineral content, and corrosive pH accelerate gasket degradation and cause brittle or swollen rubber.
Mineral buildup, chlorine, and acidity shorten seal lifespan and promote leaks. Testing water hardness and reviewing municipal reports help identify risks.
Replacing seals more often in affected systems limits unexpected failures and maintains reliable performance.
Simple adjustments to prolong seal life
Perform simple, periodic adjustments to extend the life of toilet tank seals: tightening loose tank-to-bowl bolts, ensuring the fill valve is set to prevent overfilling, and aligning the flapper so it seats evenly.
Additionally, inspect and replace worn washers, clean mineral buildup around seal surfaces, lubricate rubber parts with compatible silicone grease, and verify stable tank mounting to minimize stress and prevent premature seal failure.
Cost and Time Estimates for DIY vs. Professional Service
Typical parts like a new tank-to-bowl gasket, bolts, and a few basic tools often cost $10–$40, with a DIY job taking about 30–90 minutes for someone moderately handy.
Labor and call-out fees can make professional service $100–$250, which may be more cost-effective if the repair is complex, the toilet is corroded, or time is limited.
The next section compares tool lists and time estimates to help decide when to DIY versus hire a plumber.
Typical parts cost and tools needed
A quick breakdown of parts and tools helps homeowners decide whether to tackle a toilet tank seal replacement or hire a pro.
Typical parts: tank-to-bowl gasket, flush valve seal, bolts, washers, and new flapper — $10–30.
Basic tools: adjustable wrench, screwdriver, utility knife, bucket, sponge, and pliers.
Optional: silicone sealant and replacement bolts for corroded fittings.
Estimated time for DIY replacement
Most DIY toilet tank seal replacements take 30 minutes to 2 hours, depending on the homeowner’s experience and the condition of existing parts.
Simple jobs with accessible bolts and intact fittings are near the lower end, while corroded hardware or unexpected seal damage can extend the task.
Average users should allocate 1–1.5 hours, allowing extra time for parts removal, cleanup, and testing for leaks.
When professional repair is more cost-effective
When corrosion, complex tank-to-bowl connections, or inaccessible bolts are present, hiring a professional often proves more cost-effective than a DIY attempt.
Trade-offs include labor costs but reduced risk of repeated repairs, water damage, and longer downtime.
Professionals typically complete sealed replacement in 1–2 hours, with service fees varying by region.
For older fixtures, replacement or refurbishment may justify the added expense.
Visual Guide and Reference Images
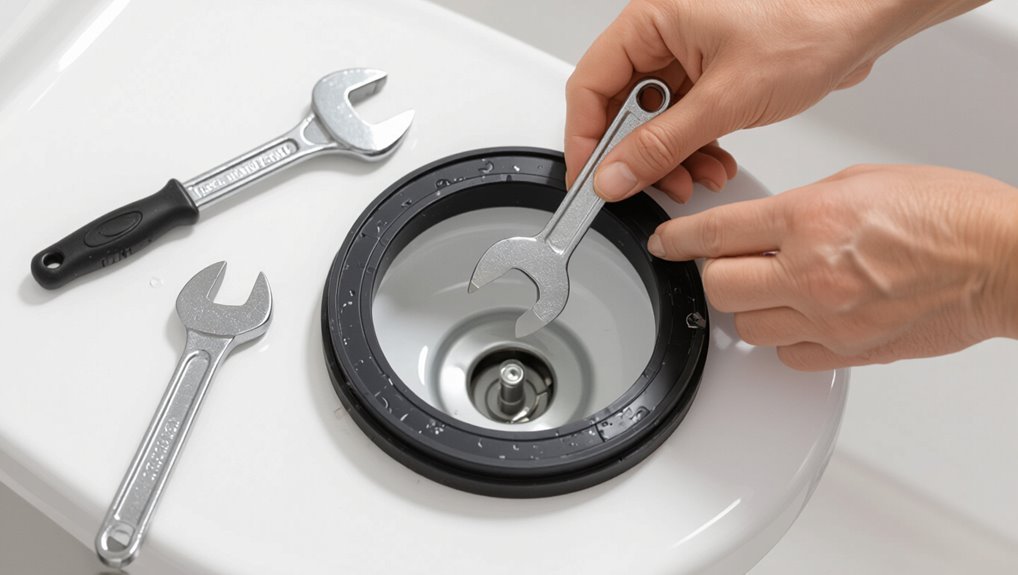
Although photos cannot replace hands-on practice, clear images and labeled diagrams make each step of replacing a toilet tank seal easier to follow.
A concise image set should show tools, shutoff valve, tank removal, old seal removal, new seal alignment, and bolt reinstallation.
Close-ups of worn seals and common error examples aid recognition.
Use high-resolution, well-lit photos with brief captions.
Conclusion
Routine persistence meets sudden relief: the small, stubborn seat of a toilet tank seal—once ignored—yields to deliberate, simple steps, turning drips into silence. Skilled care and basic tools contrast with months of wasted water; caution opposes haste; patience defeats corrosion. By replacing the seal, the bathroom regains quiet order and the owner reclaims control over a neglected nuisance, proving that modest repairs can quietly restore comfort and respect for everyday systems.
