How to Install a Toilet Flush System: Step-by-Step Guide for DIY Success
To install a toilet flush system successfully, start by shutting off the water supply and draining the tank. Next, remove the old valve assembly and install a compatible flush valve, flapper, and seals, ensuring everything is properly aligned and secured. Reconnect the refill tube, gradually restore the water supply, and check for leaks. Finally, adjust the fill height and flapper chain for optimal flushing performance. Most gravity or dual-flush kits require only simple tools, and following these steps will help you make any necessary adjustments and troubleshoot effectively.
Overview of Toilet Flush Systems and When to Replace or Install One
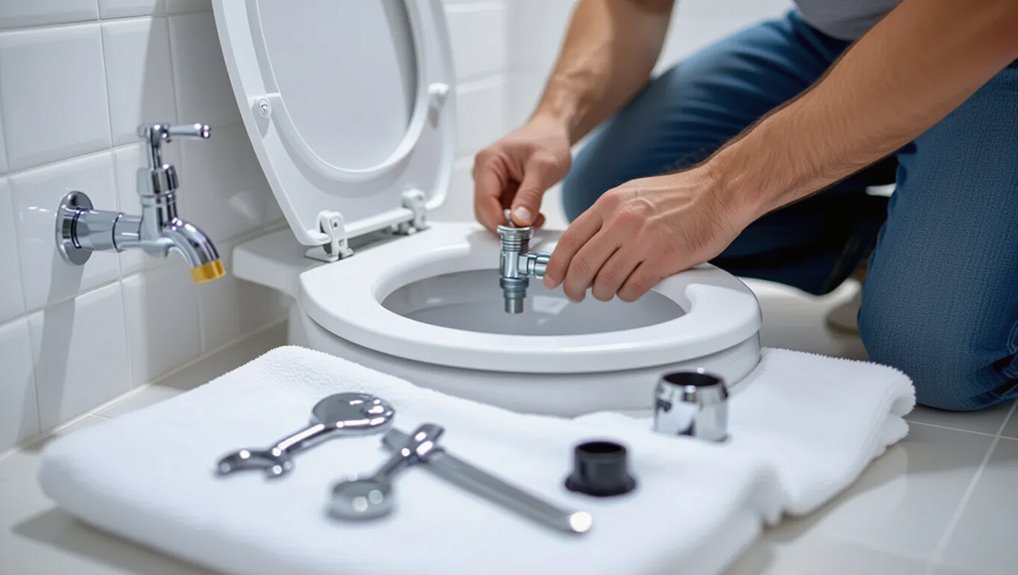
A concise overview compares common flush systems—gravity, pressure-assisted, dual-flush, and concealed cisterns—highlighting how each operates and their typical applications.
Indicators that a system needs replacement or new parts include persistent leaks, weak or incomplete flushes, loud operation, or frequent repairs.
Before beginning work, the necessary tools, compatible replacement parts, and basic safety precautions such as shutting off water and protecting surrounding finishes should be identified.
Types of toilet flush systems (gravity, pressure-assisted, dual-flush, concealed cisterns)
Toilets employ several flushing methods—gravity, pressure-assisted, dual-flush, and concealed cisterns—each designed for different performance, noise, space, and water-use priorities.
The guide explains how to install a toilet flush system and choose based on needs. Considerations include maintenance, noise, and efficiency.
- Gravity: simple, quiet, common
- Pressure-assisted: powerful, noisy
- Dual/concealed: water-saving, space-saving
Signs you need a new flush system or replacement parts
After comparing gravity, pressure-assisted, dual-flush, and concealed systems for performance, noise, and water use, homeowners often face the practical question of when repair will suffice and when replacement is warranted.
Persistent running, weak or incomplete flushes, frequent clogs, leaking at the base or tank, obsolete parts unobtainable, or escalating water bills indicate replacement; intermittent malfunctions or single-component failure suggest targeted repairs.
Required tools, materials, and safety precautions
Because installing or replacing a toilet flush system involves water, tools, and sometimes confined spaces, careful preparation is vital:
Vital tools include an adjustable wrench, screwdriver set, and pliers. Necessary materials include a replacement flush valve or fill valve, new flapper, and seals.
Safety precautions: shut off water, wear gloves, and guarantee ventilation.
- Tools: wrench, screwdrivers, pliers
- Materials: valves, flapper, seals
- Safety: shut water, gloves, ventilate
Choosing the Right Flush System for Your Toilet
Selecting a flush system requires checking compatibility with the existing bowl and tank to guarantee proper fit and function.
Performance should be compared across flush power, water consumption, and operational noise to balance effectiveness and efficiency.
Budget ranges and reputable brands guide choices between basic replacements and higher-end, water-saving models.
Compatibility with existing toilet bowl and tank
Assess whether the new flush system matches the toilet’s bowl shape, mounting style, and tank dimensions before purchase.
Verify inlet and outlet locations, bolt spacing, and flush valve size against existing fittings.
Confirm tank depth and lid clearance for actuator mechanisms.
Check gasket and flange compatibility to prevent leaks.
Consult model specifications or manufacturer support when dimensions differ.
Comparing performance, water usage, and noise
After confirming physical compatibility with the bowl and tank, attention turns to how different flush systems perform in everyday use. Evaluate flushing power, water per flush, and operational noise. Dual-flush often saves water; pressure-assisted increases force; gravity systems are quieter. Compare metrics:
| System | Water/Flush | Noise |
|---|---|---|
| Dual-flush | Low/High | Moderate |
| Pressure-assisted | Moderate | Loud |
Budget ranges and brand considerations
Consider budget and brand reputation as linked factors that shape long-term satisfaction and total cost of ownership. Choices span economy, midrange, and premium tiers; warranty, parts availability, and service matter.
Evaluate user reviews and professional endorsements. Balance upfront price with expected durability and water savings.
- Economy: basic function, limited warranty
- Midrange: better parts, decent support
- Premium: top performance, long warranty
Preparing for Installation
Before beginning work, the water supply should be shut off and the tank fully drained to prevent spills.
The area around the toilet must be cleared and the floor protected with a drop cloth or cardboard.
The tank, bowl, and mounting hardware should be inspected for cracks, corrosion, or worn parts that could affect the new flush system.
Turning off water and draining the tank
Shut off the toilet’s water supply by closing the shutoff valve located on the wall or floor behind the toilet; turn it clockwise until it stops.
Flush to empty most water, then hold the handle to remove remaining flow.
Use a sponge or towel to soak residual water from the tank and transfer it to a bucket.
Inspect inside for leaks or damage before proceeding.
Clearing the workspace and protecting flooring
Clear the area around the toilet of linens, toiletries, and loose objects.
Then move any nearby rugs or mats out of the room to prevent accidental staining or tripping.
Lay down contractor-grade paper or a waterproof drop cloth over the floor; secure edges with low-tack tape.
Place a small container for removed hardware and use protective gloves and knee pads to limit damage and injury.
Inspecting tank, bowl, and mounting hardware for damage
Begin by visually and manually examining the tank, bowl, and mounting hardware for cracks, chips, corrosion, or warping that could compromise seals or structural integrity.
Check bolt holes, flange surface, and gasket seating areas for wear.
Test metal parts for rust or stripped threads.
Replace damaged ceramics, bolts, or seals before proceeding to guarantee a reliable, leak-free installation and safe mounting.
Step-by-Step: Installing a Replacement Flush Valve and Flapper (Gravity System)
With the tank lid removed and remaining water drained, the person begins by detaching the water supply and lifting out the old flush valve assembly.
The new flush valve and seal are seated and tightened to the tank, followed by reconnecting the refill tube and securing the flapper to its seat.
Final adjustments include trimming or repositioning the chain to guarantee proper flapper lift and a reliable flush.
Removing the tank lid and old components
The homeowner removes the tank lid carefully and sets it on a soft surface to prevent chips, then inspects the interior to identify the flush valve, flapper, fill valve, and connecting hardware before proceeding.
They note component types and wear, disconnect the chain from the flush lever, unhook the flapper, and loosen retaining nuts or clips to free the old flush valve assembly for removal.
Draining remaining water and detaching water supply
After the old flush valve assembly is loosened and removed, any remaining water in the tank must be drained and the water supply detached to prevent spills and make installation safe.
The valve is closed at the shutoff, excess water flushed out, and remaining tank water soaked up with a sponge.
The supply line coupling is loosened and disconnected, then capped or positioned away from work.
Removing the old flush valve assembly
Begin by loosening the remaining nuts and clips that secure the old flush valve assembly to the tank.
Then lift the assembly straight up to clear the tank opening.
Inspect the tank interior for mineral buildup, broken plastic, or residual sealant.
Remove the old flapper and retain any mounting hardware if reusable.
Clean mating surfaces thoroughly and discard damaged components for proper replacement.
Installing the new flush valve and seal
Install the new flush valve assembly by lowering it into the tank opening so the flange seats evenly and the rubber seal aligns with the tank base; verify the valve sits squarely and that any gasket surfaces are clean and dry before tightening the mounting nut to hand-tight plus a quarter turn.
Inspect for proper seal compression, snug but not over-torqued; trim excess seal if specified and test for wobble.
Reattaching refill tube, flapper/seat, and chain length adjustment
With the new flush valve secured and checked for wobble, attention turns to reconnecting the refill tube, seating the flapper, and setting the chain length to confirm reliable flushing and refill operation.
Clip the refill tube to the overflow pipe; make certain it directs water into the bowl.
Seat the flapper squarely on its valve seat.
Adjust chain slack so the flapper lifts fully without binding.
Reconnecting water supply and testing for proper flush and refill
Turn the water supply back on slowly and observe the tank as it refills, watching for steady flow into the refill tube and a watertight seal at the base of the flush valve.
Flush once or twice to confirm full evacuation and immediate refill.
Inspect for leaks around the supply connection, tank bolts, and valve seat.
Tighten fittings if minor seepage appears; retest.
Adjusting water level and valve settings for optimal performance
Before making fine adjustments, the technician confirms the tank has refilled and that the flapper seats properly; then they set the water level and valve controls to achieve a full, efficient flush without overflow.
They adjust the fill valve height or float, test flush volume, trim or reposition the refill tube, and fine-tune valve clearance so seal integrity and refill cutoff prevent siphoning or continuous flow.
Step-by-Step: Upgrading to a Dual-Flush Conversion Kit
Before beginning a dual-flush conversion, the tank should be inspected for compatibility and a kit selected that fits the toilet model.
The existing handle and mechanism are removed, then the new actuator, buttons, or handle assembly is installed according to the kit instructions.
Finally, the flush volumes are calibrated and the system is tested for proper operation and leaks.
Assessing tank compatibility and selecting a kit
When evaluating a toilet for a dual‑flush conversion, the key concerns are tank depth, flush valve type, and available mounting space; these determine whether a universal kit will fit or a model-specific kit is required.
Inspect inlet placement, overflow tube clearance, and handle orientation. Confirm kit compatibility with valve diameter and cistern design.
Choose a kit rated for materials (plastic/ceramic) and verified by manufacturer specifications.
Removing existing flush handle and mechanism
Begin by shutting off the water supply and draining the tank to prevent spills; this creates a dry, safe work area for removing the existing handle and internal mechanism.
Disconnect the lift chain or rod from the handle. Unscrew the exterior retaining nut and remove the handle.
Extract and discard the old flapper, flush valve, and fill valve components as required, keeping surfaces clean for inspection.
Installing actuator, buttons, or handle assembly
Install the actuator and button assembly by aligning the conversion kit components with the tank’s mounting holes and securing them according to the manufacturer’s layout.
Insert gaskets to prevent leaks, fit the actuator rod to the flush valve or lever, and tighten retaining nuts evenly.
Verify buttons operate smoothly without binding and reinstall any decorative caps or trim per instructions.
Calibrating dual-flush volumes and leak testing
With the actuator and button assembly secured, attention turns to setting the dual-flush volumes and confirming a watertight system.
The technician adjusts the fill valve and float to achieve recommended litre volumes for full and partial flushes.
He tests each flush multiple times, inspects seals and connections for drips, tightens fittings as needed, and performs a dye test to detect slow leaks before finalizing installation.
Step-by-Step: Installing a Pressure-Assisted or Concealed Cistern System
The section outlines the specific tools and precautions required for pressure-assisted units and concealed cistern frames, including torque wrenches, pressure gauges, and mounting brackets.
It covers safe removal of an old tank, preparing and reinforcing mounting points, and correctly fixing and sealing the concealed frame and tank.
Finally, it explains plumbing connections and inlet valve setup, pressure adjustment, commissioning checks, and practical soundproofing measures.
Specialized tools and considerations for pressure-assisted units
One important distinction for pressure-assisted toilets is that they require specific tools and safety precautions beyond those for gravity-flush models.
Installers need a torque wrench, pressure-rated fittings, isolation valves, and non-marring plumbing tools.
Use PPE for high-pressure components, follow manufacturer torque and torque-angle specs, and verify compatibility with waste outlets.
Leak testing under operating pressure is essential before finishing.
Removing old tank (if replacing) and preparing mounting points
Begin by draining and disconnecting the old tank to reduce weight and prevent spills: shut off the water supply, flush to empty the bowl and tank, and disconnect the supply line and any tank-to-bowl bolts.
Remove the tank, inspect flange and wall studs, and clean mounting surfaces.
Repair or replace damaged flange, studs, or wall backing.
Mark and clear mounting points for the new cistern.
Mounting and securing a concealed cistern frame and tank
After the old tank and mounting points have been cleared and inspected, attention shifts to positioning the concealed cistern frame and tank within the wall or stud bay.
The frame is leveled, plumbed, and temporarily secured. Anchor points are marked, then bolted to studs or masonry with appropriate fixings.
Protective shrouds and access panels are fitted; alignment with the wall-hung pan and flush plate opening is confirmed.
Plumbing connections, inlet valves, and pressure adjustments
Once the cistern frame is secured and aligned, the focus shifts to making the water and waste connections and setting the inlet valve to the correct pressure.
Install supply line with appropriate fittings and isolation valve, secure waste outlet to soil pipe with watertight seal, connect inlet valve, adjust pressure per manufacturer specs, test for leaks, and verify fill/flush cycles before finishing wall and fixture installation.
Commissioning and soundproofing tips
Commissioning a pressure-assisted or concealed cistern requires systematic checks and measured soundproofing to guarantee reliable operation and minimal noise transmission.
Test fills, flush cycles, leak detection, and pressure verification under load. Adjust inlet and flush valves for correct timing.
Isolate vibrations with neoprene pads, acoustic foam, or mineral wool around the cistern and chase.
Document settings and retest after 24 hours.
Common Problems During and After Installation and How to Fix Them
Common issues after fitting a flush system include leaks at the tank-to-bowl connection, weak or incomplete flushes, a constantly running toilet, and handle or actuator problems.
Each fault has straightforward diagnostics—check seals and bolts for leaks, inspect fill and flush valves for flow and seating, verify flapper or diaphragm operation for continuous running, and test linkage and fastenings for binding or looseness.
Simple fixes often restore function: reseating or replacing gaskets, clearing or adjusting valves, replacing worn parts, and tightening or realigning linkages.
Leaks at tank-to-bowl connection and how to reseal
Leaks at the tank-to-bowl connection are a frequent cause of water damage and should be addressed promptly to prevent worsening problems.
Inspect for dampness, tighten mounting bolts evenly, and replace a compressed or misaligned rubber gasket. Use new washers and nylon bolts if corroded.
Refill and observe for leaks. If persistent, reseat the tank or consult a professional to avoid structural damage.
Weak or incomplete flush causes and remedies
Diagnose weak or incomplete flushes by checking water level, flapper function, and rim feed holes, since inadequate volume or restricted flow are the usual culprits; guarantee the tank fills to the marked waterline, the flapper seals and lifts fully, and the rim jets and siphon jet are clear of mineral buildup or debris.
Adjust fill valve, replace worn flapper, clear or drill clogged rim jets, and verify trapway unobstructed.
Constant running toilet troubleshooting
Address constant running by systematically isolating the source: inspect the flapper or flush valve seal, check the fill valve and float adjustment, examine the overflow tube height, and look for misaligned or damaged components installed during the job.
Replace worn seals, reseat or adjust the flapper, calibrate the float or replace the fill valve, and correct overflow tube position to stop continuous flow.
Handle or actuator binding and loosening issues
After resolving continuous flow issues, attention should turn to the handle or actuator, since binding or loosening can prevent reliable flushing.
Inspect linkage for misalignment, bent rods, or worn clips. Tighten mounting nut if loose; add a thin washer to reduce play. Lubricate pivot points with silicone grease.
Replace corroded or damaged parts. Test multiple flushes and adjust chain length for proper travel.
Maintenance and Longevity Tips
A simple routine inspection schedule helps catch wear early; inspectors should check the flapper, fill valve, seals, and mounting hardware at least twice a year.
Mineral buildup can be removed with mild acid solutions or descalers applied carefully to avoid degrading rubber and plastic parts.
Finally, guidance on when to repair versus replace components—repair small leaks or worn seals, replace valves or tanks showing persistent faults or corrosion—maximizes service life and prevents repeated failures.
Routine inspection schedule and parts to check
Regular monthly checks keep a toilet flush system functioning and prevent small issues from becoming leaks or costly repairs.
Inspections should follow a simple schedule and target common wear points to guarantee reliable operation and early detection of failures.
- Check flapper seal and chain tension.
- Inspect fill valve for slow fill or drift.
- Examine tank bolts, gasket, and handle linkage for corrosion.
How to clean mineral buildup without damaging parts
Soften mineral deposits gently to protect valves and seals by using mild, nonabrasive cleaners and targeted mechanical removal.
Apply vinegar or a phosphoric-based descaler sparingly, allow brief dwell time, then rinse thoroughly.
Use soft brushes, plastic scrapers, or toothbrushes for buildup; avoid steel wool and harsh acids.
Inspect rubber and plastic parts after cleaning and lubricate seals with manufacturer-approved silicone grease.
When to repair versus replace components
Decide whether to repair or replace components by weighing cost, age, reliability, and the impact on toilet performance.
Inspect flappers, fill valves, seals, and handles for wear, leaks, or recurring issues.
Repair small, inexpensive parts if service life remains; replace when failures recur, parts are obsolete, or repairs approach replacement cost.
Prioritize long-term reliability and water efficiency.
Cost, Time Estimate, and When to Call a Professional
Typical DIY installations of a flush mechanism take 30 minutes to 2 hours depending on whether it’s a simple flapper replacement or a full tank rebuild.
Parts generally range from $10–$100, while professional labor can add $75–$250 or more for complex jobs.
A plumber should be called for persistent leaks, damaged tanks or bowls, altered plumbing layouts, or when unfamiliarity with local codes could risk improper installation.
Typical DIY time by project type
When evaluating a toilet flush system project, consider cost, time, and complexity together to determine whether it’s a straightforward DIY job or requires professional help.
Simple flush valve replacements typically take 30–60 minutes.
Installing a new flush mechanism or dual-flush conversion requires 1–2 hours.
Full tank replacement or addressing corroded bolts and leaks can take 2–4 hours; call a pro if complications arise.
Estimated parts and labor cost ranges
Costs for toilet flush system projects vary by the scope of work and the quality of parts: Typical DIY replacements cost $20–$100 for parts and 1–2 hours of labor; hiring a pro ranges $150–$350 including parts and travel. Consider professional help for uncertain diagnoses or repeated failures.
| Item | Typical Range |
|---|---|
| DIY parts | $20–$100 |
| Pro total | $150–$350 |
| Time | 1–2 hours |
| When to call | Recurrent issues, leaks |
Complex situations that require a plumber
After reviewing typical cost and time ranges for DIY versus professional toilet flush repairs, homeowners should recognize situations that exceed simple part swaps and basic adjustments.
Complex cases—hidden leaks, cracked bowls, corroded supply lines, recurring clogs from sewer issues, or failed flange seals—usually require a plumber.
Expect higher costs and multi-hour or multi-day timelines; call a professional when safety, structural damage, or persistent failure exists.
Helpful Safety and Environmental Considerations
The homeowner should be reminded to shut off the water supply and drain the tank before starting to prevent leaks and water damage.
Attention to water-saving settings and applicable local regulations can reduce utility bills and guarantee code compliance.
Old valves, fill mechanisms, and packaging should be discarded or recycled according to local waste rules to minimize environmental impact.
Preventing water damage and proper shutoff procedures
When undertaking any toilet flush system work, shutting off the water supply and isolating the fixture are essential to prevent flooding and minimize damage; a single overlooked valve can turn a minor repair into a major cleanup.
Locate and test the shutoff valve, drain the tank, use towels or a bucket to catch residual water, cap supply lines, and verify no leaks before finishing.
Water-saving settings and local regulations for toilets
Having shut off and isolated the fixture to prevent water damage, attention should turn to water-saving settings and local regulations that affect toilet selection and installation.
Verify local codes for maximum gallons per flush, required dual-flush or high-efficiency models, and any rebate programs.
Configure flush valve settings and adjust fill valves to meet efficiency standards while ensuring reliable trapway clearing and preventing leaks.
Proper disposal and recycling of old components
Dispose of old toilet parts responsibly to reduce environmental harm and comply with local waste rules.
The homeowner should sort components—plastic, metal, porcelain—and identify recyclable items versus hazardous materials like old seals or chemical residues.
Contact local recycling centers or hazardous-waste facilities for guidance.
Consider donating reusable tanks or bowls to building reuse programs.
- Separate materials by type
- Use certified disposal facilities
- Donate usable parts
Conclusion
Proper installation and timely upgrades keep toilets efficient and leak-free, saving water and money. Studies show replacing older toilets or installing dual-flush systems can cut household toilet water use by up to 30%, underscoring the environmental and cost benefits of thoughtful maintenance. Homeowners who follow manufacturer steps and simple troubleshooting avoid common issues; however, complex problems or persistent leaks warrant professional help to guarantee longevity, safety, and peak performance.