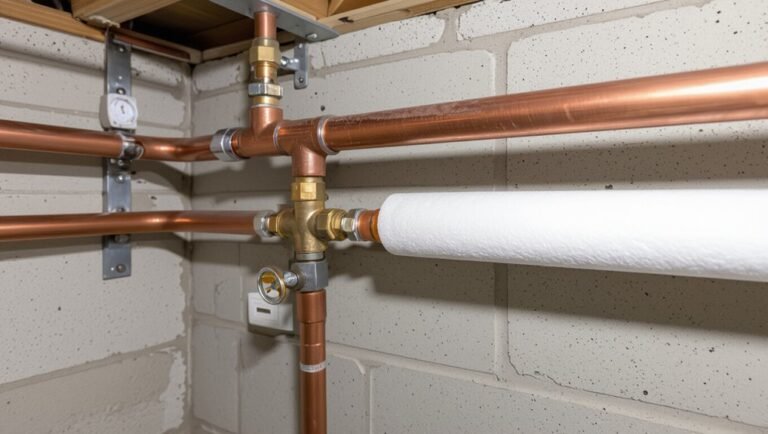
How Does a Whole House Water Filter Work? A Simple Guide to Filtration Stages and Benefits
A whole house water filter works by treating all water entering your home at the main supply, ensuring that your pipes, appliances, and fixtures are protected from contaminants. The filtration process typically involves several stages: first, a sediment pre-filter removes sand and rust; next, carbon media eliminates chlorine and odors; then, catalytic carbon or KDF helps control byproducts and microbes; finally, specialty media or softening addresses issues like iron, sulfur, or hardness. These systems are designed based on household flow requirements and need regular media replacement. Read on for a detailed breakdown of each filtration stage, types of systems available, and maintenance tips.
What Whole House Water Filters Do and Who Needs Them
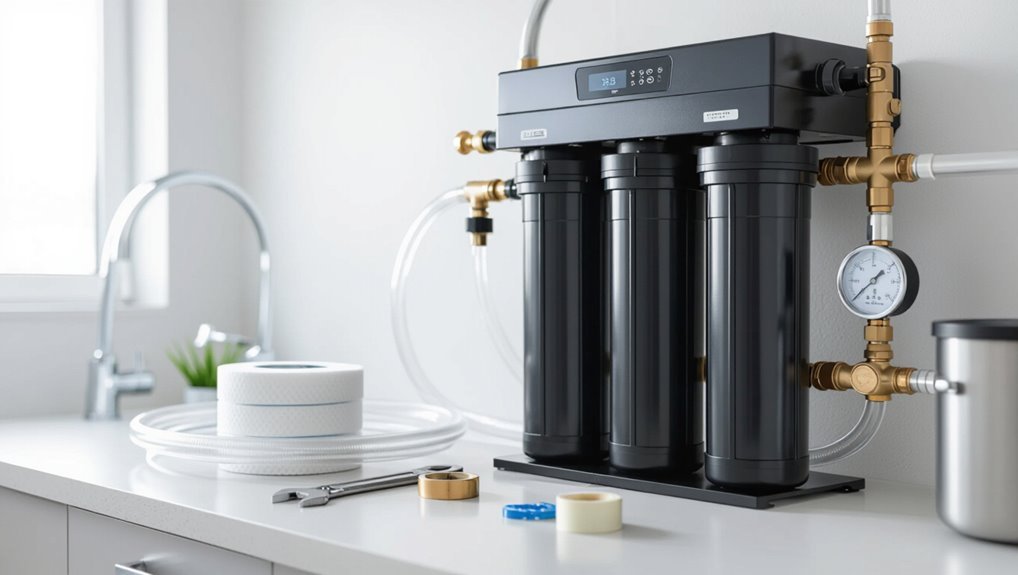
Whole house water filters remove sediments, chlorine, and other contaminants at the point where water enters the home, protecting plumbing and improving water quality for all fixtures.
Homeowners often install them when they detect staining, odors, reduced water flow, or when well water testing shows contaminants.
They provide broader coverage than point-of-use filters, which treat water at a single fixture rather than throughout the entire house.
Common reasons to install a whole house filter
Why install a whole house filter? Homeowners seek clearer, safer water for drinking, cooking, bathing, and appliances.
Common reasons include removing sediment, chlorine, odors, and scale; protecting plumbing and water-using appliances; addressing specific contaminants like iron or sulfur; and improving overall water taste and safety.
Understanding how does a whole house water filter work helps choose appropriate systems for local water issues.
Signs your home’s water needs whole-house filtration
After recognizing common motivations for installing a whole-house filter—like removing sediment, chlorine, or iron—homeowners can watch for specific signs that indicate whole-home treatment is needed.
These include persistent discoloration, metallic or chemical tastes and odors, frequent appliance clogs or staining, low water pressure from buildup, and recurring skin or hair irritation after bathing.
Testing confirms contaminants and guides appropriate system selection.
Comparison to point-of-use filters
How do whole-house systems compare to point-of-use (POU) filters in purpose and scope? Whole-house filters treat all incoming water for broad issues—sediment, chlorine, hardness—protecting plumbing and appliances. POU filters target specific taps for taste or contaminants. Choice depends on budget, water quality, and needs: extensive protection versus localized polishing.
| Whole-House | Point-of-Use |
|---|---|
| Whole-home coverage | Single-tap focus |
| Protects plumbing | Improves drinking water |
| Higher upfront cost | Lower initial cost |
| Reduces maintenance | Easier DIY replacement |
Quick Overview How Whole House Water Filtration Works
A whole house water filtration system passes incoming municipal or well water through one or more media stages that remove sediment, chlorine, and specific contaminants by mechanical, chemical, or adsorptive action.
Systems are typically installed at the main supply line and arranged in a sequence—pre-filter, primary treatment (carbon, ion exchange, or specialty media), and post-filter or softener—so water flows from coarse to fine treatment before distribution.
This layout guarantees consistent protection for all fixtures and appliances throughout the home.
Short, direct explanation of the filtration process
Water enters the home through the main supply line and passes sequentially through filter stages that remove particles, chemicals, and microorganisms based on media and pore size.
Sediment traps large debris, carbon adsorbs chlorine and organics, specialty media target iron or hardness, and fine membranes exclude bacteria and cysts.
Treated water then proceeds to plumbing, delivering safer, better-tasting water.
Typical system layout and flow path
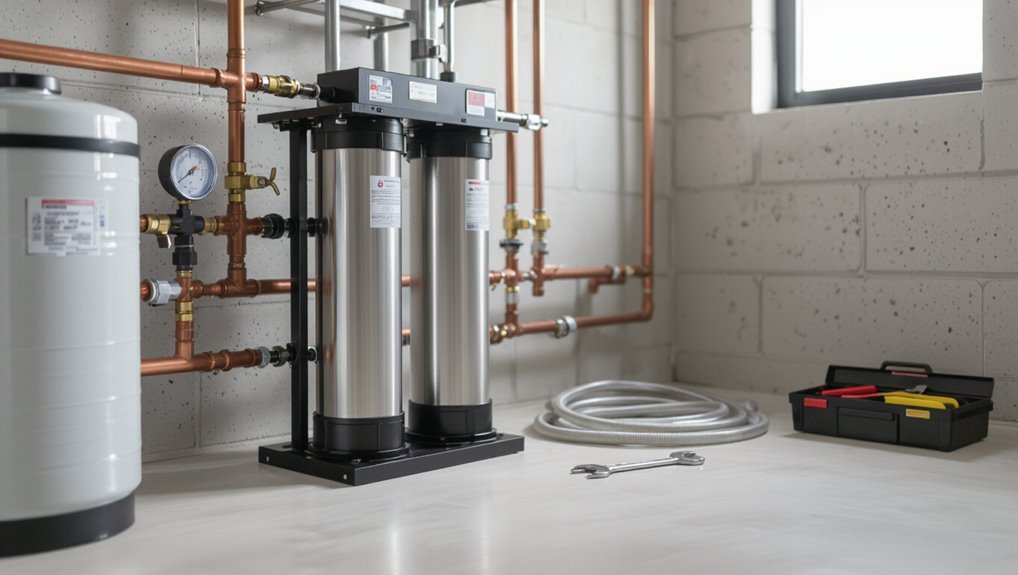
Most whole-house filtration systems are installed at the main supply entry and route flow through a sequence of components—typically a sediment pre-filter, carbon or specialty media tanks, optional softener or chemical treatment, and finally a polishing filter or UV unit—before distributing treated water to the home’s plumbing.
Piping, bypass valves, pressure gauges, and shutoffs allow service and flow control. Orientation follows inlet→treatment→outlet, minimizing pressure loss.
Filtration Stages Explained Stage-by-Stage Breakdown
The article outlines the typical sequence of whole-house filtration stages, beginning with a sediment pre-filter and progressing through carbon-based adsorption, catalytic carbon/KDF for chlorine and byproduct control, softening/ion exchange where applied, and specialty media for iron, manganese, and sulfur.
Each stage is described with its primary purpose and common media types. This stage-by-stage breakdown clarifies how different contaminants are targeted at specific points in the system.
Stage 1 Sediment pre-filter: purpose and media
A coarse pre-filter sits at the entry point of a whole-house system to trap sand, rust, silt, and other suspended particles before they reach finer stages or household plumbing.
It protects downstream components, preserves flow rate, and reduces maintenance.
Common media include pleated polyester, spun polypropylene cartridges, or wound string filters with varying micron ratings to capture progressively smaller debris.
Stage 2 Carbon filtration: activated carbon types and targets
Carbon filtration occupies the second stage, using activated carbon to adsorb chlorine, volatile organic compounds (VOCs), taste- and odor-causing chemicals, and certain pesticides from the water stream.
Granular activated carbon (GAC) offers high flow and surface area; powdered activated carbon (PAC) provides rapid contact time.
Extruded/carbon block media combine filtration and adsorption, improving particulate removal and contact efficiency for targeted contaminant reduction.
Stage 3 Catalytic carbon, KDF, and chlorine byproduct control
While designed to follow traditional activated carbon, stage three employs catalytic carbon and KDF media to tackle chlorine byproducts and stubborn chloramines that resist standard adsorption.
Using redox reactions and enhanced catalytic surfaces, it breaks down disinfectant residuals and inhibits microbial growth.
This stage reduces THMs and chloramine taste/odor, controls scale-corroding metals, and provides a secondary defense against biofilm formation before finer polishing.
Stage 4 Water softening and ion exchange (where used)
Stage four introduces water-softening media or ion-exchange resins to remove hardness ions—primarily calcium and magnesium—by exchanging them for sodium or potassium ions, preventing scale buildup and improving soap performance.
This stage is common in areas with hard groundwater or well water. It extends appliance life, reduces spotting and scaling, and lowers detergent use; periodic regeneration or salt refill is required for continued effectiveness.
Stage 5 Specialized media for iron, manganese, and sulfur
Targeted media address iron, manganese, and hydrogen sulfide by using specialized oxidizing, catalytic, or adsorption materials that convert, precipitate, or trap these contaminants for removal.
These beds—manganese greensand, catalytic carbon, or birm-like media—promote oxidation and filtration, forming removable particulates.
Periodic backwashing and regeneration maintain capacity; correct pH and aeration optimize performance for reliable reduction of staining, taste, and odor issues.
Stage 6 UV disinfection and chemical-free pathogen control
After particulate and chemical concerns like iron, manganese, and sulfur have been converted or removed, ultraviolet disinfection provides a final, chemical-free barrier against bacteria, viruses, and protozoa.
UV systems expose flowing water to germicidal wavelengths that disable microbial DNA/RNA, preventing replication.
They require proper lamp intensity, contact time, and maintenance checks for fouling or bulb aging to guarantee consistent pathogen control.
Stage 7 Final polishing and post-filters
The final polishing and post-filters serve as the system’s last line of refinement, removing residual tastes, odors, fine particulates, and any trace contaminants that escaped earlier stages.
Typically composed of activated carbon, ultrafine sediment, or specialty media, these elements stabilize water quality, protect appliances, and guarantee pleasant sensory characteristics.
They require periodic replacement to maintain low-pressure loss and consistent polishing performance.
How Different Contaminants Are Removed
Different contaminants require different treatment methods, from mechanical capture of particulates and turbidity to chemical adsorption or catalytic media for chlorine, chloramines, and VOCs.
Targeted options address specific concerns—ion exchange or reverse osmosis and targeted media for heavy metals, mineral exchange for hardness versus dedicated softening systems, and UV or chlorination for microbial control.
The next section compares these approaches, their effectiveness, and typical installation points in a whole-house system.
Particulates and turbidity
Particulates and turbidity refer to the solid particles and cloudiness suspended in water, ranging from coarse sand and silt to microscopic organic debris.
Mechanical filtration—sediment filters, cartridges, and depth media—captures particles by size exclusion and entrapment. Multiple stages remove progressively finer matter, protecting downstream equipment and improving clarity.
Periodic backwashing or cartridge replacement restores flow and filtration efficiency.
Chlorine, chloramines, and VOCs
Many whole-house systems employ activated carbon and catalytic carbon media to remove chlorine, chloramines, and a range of volatile organic compounds (VOCs) through adsorption and chemical reaction; these media trap organics and neutralize disinfectants, improving taste and odor.
Oxidation followed by carbon contact or catalytic surfaces breaks chloramines. Proper contact time, media grade, and periodic replacement guarantee sustained VOC and disinfectant removal without addressing metals.
Heavy metals (lead, arsenic, cadmium) and treatment options
Heavy metals such as lead, arsenic, and cadmium pose distinct challenges for whole-house filtration because they exist primarily as dissolved ions or tightly bound particulates that do not respond to carbon adsorption used for organics.
Effective treatments include ion exchange, reverse osmosis, and specialized media (iron oxide, activated alumina) or coagulation/filtration to remove particulates.
System selection depends on contaminant speciation, concentrations, and flow requirements.
Hardness minerals (calcium, magnesium) versus softening
Beyond metals removal, whole-house systems also address dissolved minerals that cause water hardness—primarily calcium and magnesium—which behave differently in treatment processes.
These ions resist simple filtration; ion-exchange softeners replace them with sodium or potassium, preventing scale.
Chelation and template-assisted crystallization reduce deposition without adding salt.
Selection depends on water chemistry, household needs, maintenance, and environmental considerations.
Microbial contaminants and UV efficacy
Frequently, whole-house systems must contend with microbial contaminants—bacteria, viruses, protozoa, and their spores—that differ fundamentally from chemical and particulate pollutants in size, resilience, and treatment requirements.
Mechanical filtration and adsorption remove larger organisms and cysts; chlorine or ozone provide residual disinfection.
Ultraviolet (UV) light effectively inactivates microbes without chemicals but requires clear water and proper dose to guarantee reliable log reductions.
Types of Whole House Filter Systems and How They Compare
Different whole-house systems balance filtration, softening, and disinfection according to water quality and household needs. A concise comparison highlights single- versus multi-stage designs, media versus cartridge approaches, salt-based softeners versus salt-free conditioners, and combined units that pair filters, softeners, and UV. The table below summarizes key trade-offs for quick reference.
| System Type | Typical Strengths and Trade-offs |
|---|---|
| Single-stage vs Multi-stage | Single-stage is simpler/cheaper but less thorough; multi-stage targets multiple contaminants with higher cost and maintenance. |
| Media-based vs Cartridge-based | Media systems handle high flow and large volumes; cartridge systems offer ease of replacement and finer filtration options. |
| Salt-based vs Salt-free conditioning | Salt-based softeners remove hardness effectively but require regeneration and salt; salt-free conditioners reduce scaling without salt or wastewater. |
| Combination (filter + softener + UV) | Combines filtration, softening, and disinfection for broad protection at higher upfront cost and complexity. |
Single-stage vs multi-stage systems
Choosing between single-stage and multi-stage whole house filters hinges on the specific contaminants present and the desired balance of simplicity, cost, and performance.
Single-stage units offer straightforward sediment or carbon filtration, lower upfront cost, and easier maintenance but limited contaminant range.
Multi-stage systems combine sediment, activated carbon, catalytic media, or specialty cartridges to target a broader spectrum, improving water quality at higher complexity and expense.
Media-based vs cartridge-based systems
After weighing single- versus multi-stage arrangements, attention turns to the form factor that holds the filtration media: media-based tanks or cartridge-based housings.
Media tanks use large beds of granular media for long life and backwashable regeneration, suitable for sediment, carbon, or specialty media.
Cartridge housings offer compact, easily replaced filter elements for targeted removal and simpler maintenance but require more frequent changeouts.
Salt-based water softeners vs salt-free conditioners
Compare salt-based water softeners and salt-free conditioners by their mechanisms and outcomes:
Salt-based units use ion exchange to remove hardness minerals (replacing calcium and magnesium with sodium or potassium) and require periodic regeneration with brine, producing softened water that prevents scale and improves soap performance.
Salt-free conditioners employ template-assisted crystallization or sequestration to alter mineral behavior without removing ions, reducing scale buildup without adding sodium and with lower maintenance but offering variable effectiveness depending on water hardness and chemistry.
Salt-based systems reliably eliminate hardness; salt-free options lower scaling risk without creating soft water.
Combination systems (filter + softener + UV)
Having weighed the trade-offs between salt-based softeners and salt-free conditioners, the discussion moves to integrated systems that combine particulate and chemical filtration, water softening, and ultraviolet disinfection in a single whole-house setup.
These combination units streamline plumbing, reduce footprint, and offer extensive contaminant control—sediment, chlorine, scale, and microbes—though they require higher upfront cost, coordinated maintenance, and professional sizing for peak effectiveness.
Sizing, Flow Rate, and Installation Considerations
Sizing and flow rate determine whether a whole house filter can meet peak household demand and maintain adequate pressure.
Proper selection requires calculating peak GPM, matching filter and tank capacities to typical water usage, and noting preferred installation points and plumbing needs.
Homeowners should weigh DIY installation against professional services for code compliance, warranty preservation, and complexity.
Calculating required flow rate (GPM) for your household
How many gallons per minute (GPM) a whole-house filter must handle depends on simultaneous fixture use and peak demand patterns; calculating required flow rate begins by listing all fixtures (showers, faucets, appliances, irrigation) and assigning each its typical flow value.
Then summing flows for realistic peak scenarios rather than assuming all fixtures run at once. Compare calculated peak GPM to filter manufacturer specifications and allow safety margin.
Sizing filters and tanks based on water usage
After estimating peak GPM from likely simultaneous fixtures, the next step is to match filter and tank capacity to both peak flow and daily water usage patterns.
Select filter cartridges rated for that GPM with margin for pressure drop.
Choose storage or softener tanks sized for regeneration and reserve volume based on household daily gallons.
Confirm manufacturer capacity ratings and maintenance intervals.
Typical installation points and plumbing requirements
One common approach places the whole-house filter at the main water line entry to protect all downstream fixtures, with secondary point-of-use filters installed at sensitive outlets like kitchens or ice makers.
Placement requires accessible shutoff valves, bypass loops for maintenance, and pressure-rated fittings.
Pipe size and flow rate compatibility guarantee adequate household pressure.
Consider sediment pre-filters, backflow prevention, and local plumbing codes for compliance.
DIY vs professional installation pros and cons
When weighing DIY against professional installation, homeowners should focus on correct sizing, maintaining required flow rates, and meeting installation standards that affect system performance and longevity.
DIY can reduce upfront cost and allow customization but risks improper sizing, leaks, warranty voids, and inadequate flow.
Professional installation guarantees correct pipe sizing, ideal bypass and pressure management, compliance, and reliable warranties, at higher expense.
Maintenance, Lifespan, and Operating Costs
Maintenance needs vary by filter media—sediment cartridges typically require replacement every 3–12 months, carbon and catalytic media every 6–24 months, and specialty media (softening, KDF, RO) according to manufacturer schedules.
Visible pressure drop, taste or odor return, and reduced flow are common indicators that service or cartridge changes are needed. Straightforward troubleshooting (check prefilters, inspect housings, and verify bypass valves) can often restore performance.
Comparing initial costs, routine replacement expenses, and expected lifespans enables a clear estimate of long-term operating costs for different system types.
Filter replacement schedule by media/type
A whole-house filtration system’s replacement schedule depends primarily on the media type, water quality, and household water use. Different media—sediment cartridges, activated carbon, catalytic carbon, KDF, ion-exchange resin, and specialty media like greensand or UV lamps—have distinct lifespans and cost profiles that determine when and how often they must be serviced or replaced.
- Sediment: 3–12 months
- Carbon: 6–24 months
- KDF/catalytic: 1–5 years
- Ion-exchange: 6–24 months (softening capacity)
- Greensand/UV: media 3–7 years; lamps annually
Indicators of required maintenance and troubleshooting steps
Because signs of decline often appear before complete failure, homeowners should monitor specific indicators—reduced flow rate, pressure drops, unusual tastes or odors, discoloration, and increased frequency of clogs or backwashing—to determine when service is needed.
Technicians recommend scheduled inspections, pressure gauge checks, and periodic water testing.
Troubleshooting includes cleaning pre-filters, backwashing or regenerating systems, replacing exhausted media, and verifying valve and pump function.
Estimated lifetime and long-term costs comparison
Lifespan and long-term costs for whole-house water filtration systems vary by technology, usage, and water quality: Estimated lifespans influence replacement and operating budgets; upfront versus ongoing expenses differ across sediment, carbon, softening, and reverse osmosis systems. Owners should compare filter longevity, media replacement frequency, energy use, and maintenance to project total cost of ownership.
| Component | Typical lifespan |
|---|---|
| Sediment filter | 3–12 months |
| Carbon cartridge | 6–12 months |
| Water softener resin | 10–15 years |
| RO membrane | 2–5 years |
| UV lamp | 9–12 months |
Performance Testing and Certification
Before and after installation testing provides objective data on contaminants removed and helps verify system performance.
Consumers should check for relevant certifications such as NSF/ANSI standards that match the filter’s claimed reductions.
Lab reports and certification documents must be read critically, comparing test conditions, detection limits, and flow rates to real-world expectations.
How to test water before and after installation
How should water quality be verified prior to and after installing a whole-house filter?
Baseline testing identifies contaminants, pH, hardness, and turbidity using laboratory analysis or certified DIY kits.
Post-installation sampling repeats tests at the same locations and flow conditions.
Compare results to baseline and local standards to confirm reduction goals.
Maintain records and schedule periodic retesting for performance monitoring.
Relevant certifications to look for (NSF/ANSI standards)
Why does certification matter?
Independent NSF/ANSI certification confirms a whole-house filter meets standardized contaminant reduction, structural integrity, and material safety criteria.
Consumers should look for relevant standards—NSF/ANSI 42, 53, 58, 61, 372—matching claimed contaminant removals and lead-free construction.
Certification guarantees third-party verification rather than manufacturer-only claims, aiding informed, reliable system selection.
Interpreting lab results and performance claims
What does a certified test report actually prove about a whole-house filter’s performance? It documents specific contaminant reductions under defined conditions, flow rates, and media life.
Users should compare test parameters to real-world supply water, note challenge concentrations, and review third-party lab accreditation.
Performance claims without standardized testing may mislead; certification and transparent reports enable informed, comparable choices.
Common Problems and How to Avoid Them
Common operational issues include pressure drop and reduced flow from clogged or undersized units, which can be corrected by proper sizing, routine backwashing, and cartridge replacement.
Channeling, biomass growth, and media depletion are prevented through regular maintenance, disinfection when needed, and using media with appropriate lifespan and warranties.
To avoid costly errors, selection and installation should follow water testing results, manufacturer guidelines, and professional plumbing standards.
Pressure drop and flow reduction causes and fixes
Reduced water pressure or a noticeable drop in flow often signals issues within a whole house filter system, typically caused by clogged cartridges, improperly sized filters, pressure regulator malfunctions, or bypass valve misconfiguration.
Technicians recommend inspecting cartridges, replacing or upsizing media, verifying regulator settings, flushing housings, and ensuring bypass valves are correctly positioned.
Routine maintenance and correct sizing restore reliable flow and prevent recurrence.
Channeling, biomass growth, and media depletion prevention
Channeling, biomass growth, and media depletion are distinct but related failure modes in whole house filters that undermine filtration efficiency and system longevity.
Preventive measures include uniform flow distribution, periodic backwashing or air scouring, maintaining appropriate contact time and residual disinfectant, routine media inspection and replenishment schedules, and controlling nutrient inputs and temperature.
Early detection via pressure and turbidity monitoring reduces risk and service costs.
Mistakes during selection and installation to avoid
Avoiding selection and installation errors begins with matching system capacity and media type to actual water quality and household demand; undersized units, incorrect media choices, and poor placement often cause premature failure and poor water quality.
Typical mistakes and preventive steps:
- Ignoring water test results
- Choosing wrong media for contaminants
- Skipping pre-filtration
- Improper flow rate sizing
- Poorly placed bypass or drain connections
Practical Tips for Choosing the Right System
Selecting a whole house filter should start with matching system features to the specific contaminants and flow rates found in the local water supply.
Consider both upfront costs and lifetime value, including filter replacements, maintenance, and energy use.
Prospective buyers are advised to ask manufacturers and installers about certifications, warranty coverage, maintenance requirements, and expected long‑term operating costs.
Matching system features to local water quality
Because local water chemistry and contaminants vary widely, choosing a whole-house filter begins with matching system capabilities to the specific issues present in the supply.
Identify measured contaminants (sediment, chlorine, iron, hardness, bacteria, VOCs) and select technologies accordingly: sediment prefilters, activated carbon, water softeners, KDF, UV or RO for specific needs.
Verify flow rate, certifications, and maintenance requirements.
Budgeting: upfront vs lifetime value
One critical consideration is weighing upfront cost against lifetime value: a lower purchase price can mean higher long-term expenses from frequent filter replacements, increased maintenance, or reduced efficiency.
Calculate total cost of ownership by adding installation, replacement filters, energy, and anticipated service.
Prioritize systems with transparent replacement schedules and warranty coverage; compare projected five- to ten-year costs to select the most cost-effective option.
Questions to ask manufacturers and installers
What should be asked before committing to a whole-house water filter? Manufacturers and installers should be queried about performance, certifications, maintenance, and warranty.
Essential questions include:
- Contaminant reduction verified and by which labs?
- Required cartridge replacement schedule and costs?
- Installation complexity and plumber qualifications?
- Warranty terms and service response time?
- System compatibility with water pressure and flow?
Case Examples and Real-World Scenarios
Typical municipal supply issues—chlorine taste, sediment, and occasional lead concerns—are addressed with point-of-entry carbon and sediment filters.
Well water challenges such as iron, sulfur, and bacterial risks call for combinations of sediment prefilters, oxidation/filtration, and UV or chlorination as recommended.
For older homes, retrofit examples show how compact multi-stage housings and bypass valves can be installed to minimize plumbing changes while improving overall water quality.
Typical municipal water solution scenario
When municipal supply contains chlorine, low levels of sediment, and occasional trace metals, a whole-house filtration system is often configured with a sediment prefilter, an activated carbon tank for chemical adsorption, and a final polishing filter to protect fixtures and appliances.
This layered approach reduces taste and odor issues, prevents sediment buildup in pipes, and extends the life of water-using equipment while maintaining compliance with local water quality guidelines.
Supplemental corrosion control or softening may be added based on distribution chemistry and appliance needs.
Well water challenges and recommended system configurations
How do homeowners on private wells address the distinct mix of microbiological risks, high mineral content, and fluctuating turbidity that municipal systems rarely encounter?
They begin with source testing, then deploy staged systems: sediment prefiltration, carbon for organics and taste, water softening or anti-scale for hardness, and UV or chlorination for pathogens.
System sizing and backups reflect flow variability and maintenance capacity.
Retrofit example for older homes
Older homes on private wells often pose retrofit challenges that build on the earlier emphasis on testing and staged treatment: limited space, legacy plumbing, variable flow rates, and aging fixtures require customized layouts.
A typical solution locates a compact sediment/activated carbon combo near the pressure tank, adds a softener or iron filter downstream, and uses flexible piping and isolation valves for service access.
Final Checklist Before Buying or Installing
Before committing to a whole house water filter, the buyer should confirm pre-installation water testing results and keep clear documentation of contaminant levels and plumbing conditions.
They should verify required certifications, warranty terms, and any service agreements to guarantee compliance and long-term support.
Finally, an installation readiness checklist—including space, shutoff access, and necessary fittings—should be reviewed to avoid delays or unexpected costs.
Pre-installation water testing and documentation
Because water quality varies widely even within the same neighborhood, a concise pre-installation testing and documentation checklist guarantees the chosen whole-house filter matches actual contaminants and system needs.
The checklist includes thorough lab or DIY tests (microbial, hardness, iron, chlorine, VOCs, pH), flow rate and pressure measurements, existing plumbing materials, prior treatment records, and photographed installation points to inform sizing, media selection, and maintenance planning.
Required certifications, warranties, and service agreements
Certification logos, warranty terms, and service contracts together define the purchaser’s protections and the installer’s obligations, so a final pre-purchase checklist should verify each element.
Confirm NSF/ANSI standards relevant to claimed contaminant reductions, local plumbing approvals, clear warranty duration and exclusions, documented maintenance responsibilities, response times for service, transferability, and written service agreements specifying parts, labor, and replacement schedules.
Installation readiness checklist
When preparing to purchase or install a whole-house water filter, the buyer should run through a concise, itemized readiness checklist that verifies site suitability, required permits, plumbing compatibility, and scheduled maintenance resources.
A final pre-install review confirms measurements, access, budget, and installer availability.
- Measure inlet/outlet locations
- Check local permit needs
- Verify pipe materials and sizes
- Guarantee drainage and bypass space
- Confirm maintenance access and tools
Conclusion
Sunlight through a kitchen window catches a stream of water arcing from a tap, each droplet splitting light like stages in a filter; coincidence aligns: sediment settles where carbon beds trap odors, softeners trade hardness for sheen, and UV clears the last shadow. Together these processes, invisible yet sequential, purify household supply. Homeowners thus see filtration not as magic but as engineered layers—coincident parts forming a deliberate whole that protects health, appliances, and peace of mind.