How to Secure a Freestanding Tub: 7 Proven Methods to Prevent Movement and Leaks
To secure a freestanding tub and prevent movement and leaks, consider these seven proven methods: adjustable feet, specialized floor brackets, through-bolts, adhesive or silicone bedding, built subframes or platforms, joist reinforcement, and wall-stud blocking. These solutions address issues like floor deflection and poor leveling. Before starting, ensure you shut off the water, protect your tub’s finish, and verify the drain alignment. Regular inspections are essential for catching any early signs of movement or seal failure. Continue reading for detailed step-by-step methods, materials needed, and practical troubleshooting tips.
Why freestanding tubs move and why movement causes leaks
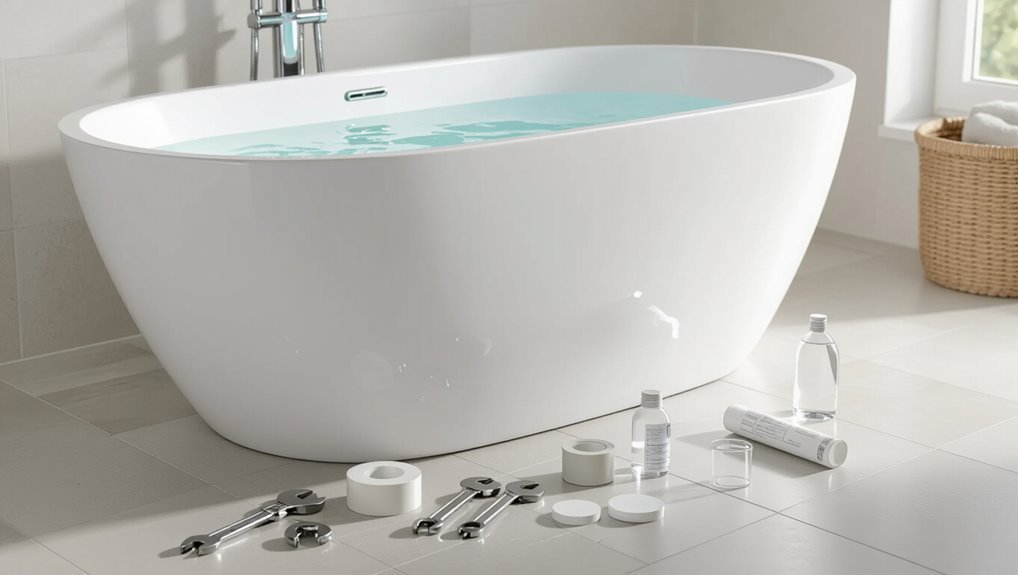
Freestanding tubs often shift due to floor deflection, uneven subflooring, or improper installation that fails to secure the base.
That movement transfers stress to seals and plumbing connections, causing seal failure and leaks over time.
Creaking, visible gaps at the tub base, wobble when stepped into, or damp spots on the floor are common signs the tub is shifting or leaking.
Common causes of tub movement (floor deflection, improper installation, uneven subfloor)
A tub that shifts under load usually reflects problems in the supporting structure or installation rather than the fixture itself.
Common causes include floor deflection from undersized joists, improper installation that fails to anchor or level the unit, and uneven subfloor or inadequate underlayment.
Addressing these root issues is essential when researching how to secure freestanding tub installations and prevent ongoing movement.
How movement leads to seal failure and plumbing stress
Movement transfers loads and torques from the tub to its seals and connections, gradually loosening caulk joints and stressing threaded fittings.
Repeated deflection and micro-movement abrade sealant, create gaps, and fatigue plumbing threads and soldered joints.
Vibrations accelerate wear, allowing water intrusion.
Over time pressure cycles force fittings to deform or loosen, producing leaks and potential water damage if not corrected.
Signs your freestanding tub is shifting or leaking
Signs that a tub is shifting often begin subtly but escalate as seals and fittings degrade from repeated load transfer.
Small gaps at the drain, loose trim, uneven floor contact, or wobble during use indicate movement.
Persistent moisture, staining, or soft flooring beneath the tub signals slow leaks.
Squeaks, shifted caulking lines, and rising water bills corroborate plumbing stress and warrant inspection.
Immediate safety and preparation steps before securing a tub
Before any fastening begins, the water supply should be shut off and exposed fixtures or nearby finishes protected to prevent accidental damage.
The floor structure, drain alignment, and overall tub condition must be inspected to confirm a stable, level base and correct plumbing fit.
Finally, a concise checklist of required tools and materials should be assembled so the securing process proceeds safely and efficiently.
Turn off water supply and protect finishes
Shut off the water at the main valve and drain the lines to eliminate pressure and prevent accidental flow while securing the tub.
Then cap supply lines or close localized shutoffs.
Remove fixtures if needed and cover exposed fittings with tape.
Protect tub surfaces and surrounding finishes with soft cloths, cardboard, or drop cloths to prevent scratches, chips, and debris during installation.
Inspect floor structure, drain alignment, and tub condition
A careful inspection of the installation area guarantees the tub will sit securely and drain correctly.
The inspector verifies floor framing for rot, deflection, and adequate joist support; checks subfloor flatness and level; confirms drain assembly alignment with tub outlet and proper flange seating; examines tub for cracks, warped rims, or loose feet; documents any repairs or reinforcements needed before final placement.
Required tools and materials checklist
Several essential tools and materials are required to secure a freestanding tub safely: a concise checklist guarantees safety and readiness before work begins.
Protective gear, accurate measuring tools, and suitable fasteners minimize errors and damage.
- Protective gloves, safety glasses, and knee pads
- Tape measure, level, and adjustable wrench
- Silicone sealant, mounting brackets, and rust‑resistant screws
Method 1 Secure with adjustable support feet or leveling brackets
The first method outlines using adjustable support feet or leveling brackets to stabilize a freestanding tub, noting when feet are preferable to shims based on floor irregularity and load distribution.
It then summarizes a clear installation sequence—measure, set and level each foot, and tighten to secure—while highlighting pros, cons, and common pitfalls such as over-tightening or failing to recheck level after final adjustments.
Practical comparisons and troubleshooting tips follow to help choose the correct approach for a given floor and tub type.
When to use support feet vs. shims
When tub installation requires height adjustment or long-term stability on an uneven subfloor, support feet are preferable because they provide continuous, adjustable bearing across multiple points.
Shims suit minor, localized gaps or temporary leveling before a more permanent solution.
Use support feet for heavy tubs, soft subfloors, or uneven areas spanning several joists.
Reserve shims for small, accessible voids or interim fixes.
Step-by-step installation of adjustable feet (measure, level, tighten)
Begin by positioning the tub roughly where it will sit and marking the approximate locations of the adjustable feet on the subfloor; accurate measurements at this stage prevent excessive repositioning later.
Then install brackets, adjust feet to roughly support height, and fine-level each corner before tightening lock nuts.
Finally test stability and recheck level after securing.
- Install brackets at marks
- Adjust feet incrementally
- Tighten and retest
Pros, cons, and common pitfalls
Having completed initial placement and leveling, attention turns to evaluating the benefits, drawbacks, and typical mistakes associated with securing a freestanding tub with adjustable support feet or leveling brackets. Advantages include adjustability and minimal floor work; downsides involve limited lateral stability and corrosion risk. Common errors: uneven adjustment, overtightening, and neglecting periodic checks.
| Benefit | Drawback | Pitfall |
|---|---|---|
| Easy leveling | Limited lateral support | Uneven feet |
| Minimal floor alteration | Corrosion potential | Overtightening |
| Reversible | Visible hardware | No maintenance |
Method 2 Anchor tub to floor with specialized brackets or flanges
Method 2 outlines using specialized floor anchors or flange kits selected to match the tub base material and mounting profile.
It covers correct anchor placement to maintain existing waterproofing and avoid penetrating membrane seams.
Finally, it specifies the recommended fastening sequence and torque limits to guarantee secure attachment without distorting the tub.
Types of floor anchors and compatible tub bases
Anchoring a freestanding tub requires selecting hardware that matches both the tub’s base design and the subfloor material; common options include screw-down flanges, L-shaped brackets, and adhesive-mounted plates.
Screw flanges suit solid bases and wood or concrete subfloors; L-brackets fit narrow rims or pedestal feet; adhesive plates work where drilling is limited.
Stainless steel or corrosion-resistant finishes are recommended for longevity.
Proper placement to avoid undermining waterproofing
After choosing brackets or flanges that match the tub base and subfloor, attention must turn to exact placement so waterproofing is not compromised.
Brackets should sit outside sealed membrane margins, aligned with structural framing to transfer loads.
Maintain clearances for membrane laps and alteration strips, avoid penetrating waterproof layers near seams, and plan access for future repairs without disturbing primary waterproofing.
Fastening sequence and torque recommendations
Begin the fastening sequence by dry-fitting brackets or flanges and verifying alignment with marked framing points and membrane clearances.
Then tighten fasteners incrementally in a crisscross pattern, alternating sides to maintain even seating. Use a calibrated torque driver; follow manufacturer torque specs (commonly 20–40 in·lb).
Recheck level and sealant compression, then perform a final torque pass to confirm secure, leak-free attachment.
Method 3 Use adhesive or construction-grade silicone and bedding compound
Selection of an adhesive or mortar should match the tub material and substrate, favoring construction-grade silicone or polymer-modified bedding compounds rated for moisture and load.
The chosen product must be applied to form a continuous, cushioned bed that supports the tub evenly and prevents point loads, using consistent bead size and tool smoothing to eliminate voids.
Allow manufacturers’ specified drying and curing times before use, and schedule periodic inspections for bond integrity, cracking, or moisture intrusion.
Choosing the right adhesive or mortar for tub material
Choose an adhesive system that matches the tub material and substrate, because proper bonding prevents movement, water intrusion, and surface damage.
For acrylic or fiberglass, use flexible marine-grade adhesives or polyurethane; for cast iron or stone, select non-sag epoxy or cementitious bedding compatible with weight and thermal movement.
Verify manufacturer recommendations, cure times, and waterproof ratings to guarantee durable, load-bearing adhesion.
Application technique to create a stable, cushioned base
To create a stable, cushioned base using adhesive or construction-grade silicone with a bedding compound, apply a continuous bead of the recommended sealant around the tub perimeter where it will contact the floor.
Then lay a thin, even layer of bedding compound—such as non-sag mortar or vinylester paste—under the tub’s load-bearing areas to distribute weight and damp vibration.
- Press tub gently to seat compound
- Remove excess sealant promptly
- Confirm full contact under feet
Drying time, curing, and long-term inspection tips
Allow adequate time for the sealant and bedding compound to set undisturbed: most construction-grade silicones reach surface tack within 30–60 minutes but require 24–48 hours for initial cure and up to 7 days for full strength depending on product, temperature, and humidity.
After curing, inspect joints monthly for gaps, compression, or mold; reapply sealant where deterioration appears and document maintenance dates for warranty and longevity.
Method 4 Install a subframe or platform beneath the tub
Method 4 examines installing a subframe or platform beneath a freestanding tub, comparing wood and metal framing options and the load calculations that determine sizing and reinforcement.
The section outlines step-by-step construction of a ventilated, waterproofed platform and highlights proper integration of the tub drain and removable access panels for future maintenance.
Practical notes on materials, fasteners, and common pitfalls guide selection and installation.
Wood vs. metal subframe designs and load calculations
Which subframe material best balances strength, cost, and ease of installation depends on the tub type and floor structure. Comparative factors guide choice: wood is accessible and isolates vibration; metal offers thinner, stiffer framing and longevity. Engineers calculate dead plus live loads, apply safety factors, and size members accordingly.
| Material | Pros | Typical use |
|---|---|---|
| Wood | Affordable | Residential |
| Metal | Durable | Luxury |
Building a ventilated, waterproofed platform step-by-step
Begin by laying out the platform footprint and ventilation plan to guarantee the subframe will shed moisture and support the tub’s weight.
Assemble treated joists on adjustable piers, maintain 1/4–1/2 inch ventilation gaps, and slope the top slightly toward perimeter vents.
Sheath with marine-grade plywood, apply waterproof membrane and seal seams.
Anchor tub to framed points and allow air circulation beneath.
Integrating drains and access panels for maintenance
Installers should plan and position drains and access panels before closing the subframe to guarantee straightforward maintenance and leak detection.
The subframe must allow unobstructed access to trap, supply shutoffs, and overflow connections.
Removable panels, labeled and sealed, should align with service zones.
Use rigid supports and flexible couplings to prevent stress on fittings while maintaining a waterproof cavity and clear inspection path.
Method 5 Reinforce the bathroom floor and joists
The floor’s load capacity should be evaluated for signs of sagging or deflection before placing a freestanding tub.
Strengthening measures include sistering joists, adding blocking between joists, and installing a plywood underlayment to distribute weight.
A structural professional should be consulted if existing framing shows significant movement, undersized members, or uncertainty about safe loads.
Assessing floor load capacity and signs of sagging
A thorough evaluation of the bathroom subfloor and supporting joists determines whether they can safely carry the concentrated weight of a filled freestanding tub and occupant.
Inspect for visible deflection, soft spots, unevenness, or gaps at seams. Measure joist span, size, and spacing against load tables.
Check for water damage, rot, or insect activity. Note any bouncy or creaking areas needing professional assessment.
Sistering joists, adding blocking, and using plywood underlayment
Reinforce the floor by sistering joists, inserting blocking, and fitting a plywood underlayment to distribute and carry the concentrated load of a filled freestanding tub.
Sister new lumber to existing joists across the span, nail or bolt securely, and add blocking between joists near the tub footprint to prevent twisting.
Install exterior-grade plywood underlayment glued and screwed to create a stiff, continuous load-bearing surface.
When to call a structural pro
After completing sistering, blocking, and plywood underlayment, homeowners should recognize situations where a structural professional is required.
A structural pro is needed if joists are severely rotted, deflection persists under load, span calculations exceed code limits, or subfloor attachments are compromised.
They assess load paths, recommend acceptable reinforcement, obtain permits, and guarantee work conforms to structural and safety standards, preventing future failure and liability.
Method 6 Secure tub to wall studs with cleats or blocking (for tubs near walls)
When a freestanding tub sits near a wall, securing it to studs with cleats or blocking provides discreet lateral support.
Careful stud location and blocking installation prevents damage to hidden plumbing while cleats or brackets are attached in ways that protect the tub’s finish.
Use appropriate fasteners and corrosion-resistant hardware—stainless steel screws or bolts with washers and marine-grade anchors—to guarantee a durable, rust-free connection.
Locating studs and installing blocking without damaging plumbing
Locating studs and adding blocking requires careful planning to avoid hidden plumbing runs. The installer should start by scanning the wall with a magnetic or electronic stud finder, marking stud centers, and confirming positions with small exploratory drill holes placed where cavities are least likely to contain pipes.
After locating safe zones, install solid blocking between studs at appropriate tub height, fastening with long screws into stud faces and avoiding pipe locations.
Attaching cleats or brackets while preserving tub finish
With safe stud locations and blocking in place, attention turns to fastening the tub to those supports while protecting the exposed finish.
Install cleats or brackets padded with thin nonabrasive material, align to avoid contact with trim, and support weight evenly.
Use temporary shims to maintain gap, tighten gradually, and verify tub remains plumb.
Remove protective padding only after final seating and inspection.
Recommended fasteners and corrosion-resistant hardware
Why choose corrosion-resistant fasteners for securing a freestanding tub near a wall?
Corrosion-resistant fasteners—stainless steel (AISI 316), brass, or hot-dip galvanized anchors—ensure long-term strength and prevent staining.
Use stainless lag bolts or structural screws into studs with matching washers and neoprene or EPDM isolation pads.
Avoid plain steel; apply thread-locking sealant for moisture protection and periodic inspection.
Method 7 Vibration-damping and movement-control accessories
Method 7 addresses vibration damping and movement control using accessories such as anti-slip mats, rubber pads, and isolation mounts placed beneath the tub to reduce noise and shifting.
Water-resistant sealant strips at contact points further prevent micro-movements and protect finishes.
These damping products are most effective when used in combination with mechanical anchors for a secure, long-lasting installation.
Anti-slip mats, rubber pads, and isolation mounts
Reduce movement and noise by installing anti-slip mats, rubber pads, or isolation mounts beneath a freestanding tub; these vibration-damping and movement-control accessories create a grippy, cushioned interface that resists sliding, absorbs shock from foot traffic, and compensates for minor floor irregularities.
Choose durable, non-marking materials sized to contact points, confirm compatibility with flooring, and periodically inspect for compression or wear to maintain effectiveness.
Using water-resistant sealant strips at contact points
After placing anti-slip pads or isolation mounts, adding water-resistant sealant strips at the tub’s contact points provides an extra layer of protection against movement and moisture.
These adhesive strips compress to fill gaps, damp vibrations, and resist water intrusion. They should be selected for compatibility with floor and tub materials, cut to fit contact areas, and pressed firmly to guarantee continuous sealing without interfering with proper tub seating.
Combining damping solutions with mechanical anchors
Combine vibration-damping materials with mechanical anchors to address both movement and the forces that cause it: damping elements absorb and dissipate kinetic energy while anchors limit macroscopic displacement, creating a complementary system that improves long-term stability.
Install compliant pads or isolators at contact points, then secure discreet anchors to floor joists or subfloor.
Verify alignment, torque, and material compatibility to prevent stress concentrations and wear.
Drain and plumbing strategies to prevent leaks when tub moves
Attention to the drain and plumbing connections reduces leak risk when a freestanding tub shifts.
Flexible drain connections and slip-joint fittings accommodate small movements, while a properly sealed drain flange and overflow prevent water ingress.
After securing the tub, a pressure and visual leak test confirms integrity before finishing.
Flexible drain connections and slip-joint fittings
Install flexible drain connections and slip-joint fittings to accommodate slight movement of a freestanding tub without stressing seals or rigid piping.
Use high-quality, corrosion-resistant materials and properly sized hoses to maintain alignment.
Verify slip joints are hand-tightened with accessible locknuts for adjustments.
Support piping to prevent sagging, allow a small service loop, and test for leaks after simulated movement to confirm integrity.
Properly sealing the drain flange and overflow
Following the use of flexible drain connections and slip-joint fittings to allow slight movement, attention turns to sealing the drain flange and overflow to prevent leaks when the tub shifts.
A compressible gasket or plumber’s putty under the flange, paired with a silicone sealant around the overflow plate and tailpiece, accommodates movement while maintaining a watertight barrier.
Tighten fittings to manufacturer torque specs.
Testing for leaks after securing the tub
Begin testing the drain and overflow by filling the tub to several inches above the overflow and observing all joints, flanges, and fittings for any signs of moisture or seepage.
Document findings, note slow drips, and inspect beneath the tub for pooling.
Repeat after applying sealant or tightening connections to confirm integrity.
- Check visible fittings
- Monitor concealed traps
- Reinspect after movement
Maintenance, inspection schedule, and troubleshooting movement issues
Regular maintenance should include scheduled checks of the tub’s level, grout and seal integrity, and the tightness of any mounting hardware.
Observable signs such as new gaps, shifting, or recurring leaks indicate a previously secured tub may need rework.
Minor movement can sometimes be corrected with tightening or seal repair, while persistent instability typically requires full reinstallation.
Routine checks: level, grout/seal integrity, and hardware tightness
Inspect the tub and surrounding finishes on a predictable schedule to catch minor issues before they become costly: check that the tub remains level, examine grout and sealant for cracks or gaps, and verify that mounting hardware and faucets are secure.
Note any shifts, moisture stains, or softened grout. Tighten loose fasteners, reapply sealant where needed, and document findings with date-stamped notes or photos.
Signs that a previously secured tub needs rework
Routine checks will catch many issues early, but a previously secure freestanding tub can still show signs that rework is needed.
Indicators include new or widening gaps at the base, persistent rocking or shifting despite tightened fittings, recurring water stains on surrounding flooring, grout or sealant deterioration, unusual noises during use, and increased drainage or plumbing movement.
Schedule inspections every six months.
Quick fixes vs. full reinstallation scenarios
When should a quick fix suffice and when is a full reinstallation unavoidable?
Routine inspections identify loose feet, minor sealant gaps, or isolated plumbing flex issues; these respond to tightening, re-caulking, or hose replacement.
Persistent rocking, structural damage, warped subfloor, chronic leaks, or repeated repairs indicate full reinstallation.
A scheduled inspection every 6–12 months detects early problems and guides appropriate remediation.
Cost ranges, DIY vs. professional installation, and when to hire a pro
Estimated costs for common securing methods are presented alongside typical DIY time and skill requirements to help homeowners compare options.
The section outlines which tasks are reasonable for a competent DIYer, with time estimates and necessary tools, and which situations usually justify hiring a professional.
It also lists key questions to ask contractors and how to verify warranties and insurance before committing.
Estimated costs for each securing method
Costs for securing a freestanding tub vary widely by method, materials, and labor: simple anti-slip pads or adhesive anchors can run under $50 for a DIYer, bathtub mounting brackets and plywood supports typically cost $75–$300 in parts, and adjustable floor-mounted brackets or custom framing often reach $300–$1,200 plus labor.
| Method | Typical cost |
|---|---|
| Anti-slip/adhesive | <$50 |
| Mounting brackets/supports | $75–$300 |
| Floor brackets/custom framing | $300–$1,200+ |
Skill level required and time estimates for DIY
Having outlined typical price ranges for securing options, the next consideration is the skill level and time required for each approach.
Basic anchor kits suit handy homeowners: moderate tools, 1–3 hours.
Reinforced pads or framing need carpentry/plumbing skills, 4–8 hours.
Full plumbing relocation or custom supports require licensed pros, variable days.
Hire a pro for structural, waterproofing, or code-related work.
Questions to ask contractors and checking warranties
When interviewing contractors, what specific questions will reveal competence and protect the owner should be decided beforehand.
Ask for licensing, insurance, local references, experience with freestanding tubs, anchoring methods, and detailed written estimates.
Verify warranty scope and duration for labor and materials, transferability, and exclusions.
Compare cost ranges versus DIY savings and hire a pro for structural, plumbing, or warranty-dependent work.
Examples and real-world scenarios
The section presents three concise case studies that illustrate common solutions for securing freestanding tubs.
Case A describes an uneven subfloor corrected with leveling compound and adjustable feet.
Case B covers reinforced joists and a subframe for a heavy stone tub, while Case C highlights a flexible plumbing retrofit to prevent future leaks.
Case A Uneven subfloor corrected with leveling compound and feet
Leveling compound combined with adjustable feet provides a practical fix for tubs set on slightly uneven subfloors: contractors first determine high and low points with a straightedge, apply a thin-layer self-leveling compound to fill depressions, and then fine-tune the tub’s position using threaded feet or shims to achieve a stable, fully supported base.
Technicians allow cure time, verify full perimeter contact, and test for wobble before finishing.
Case B Reinforced joists and subframe for heavy stone tub
After addressing minor unevenness with leveling compound and adjustable feet, projects involving heavy stone tubs require a fundamentally different approach: reinforced joists and a dedicated subframe.
Contractors evaluate load, sister joists or add steel flitch plates, and construct a plywood-and-lumber subframe anchored to perimeter framing.
The assembly spreads weight, prevents deflection, and isolates tub movement from finish surfaces, reducing risk of cracks and fittings failure.
Case C Flexible plumbing retrofit preventing future leaks
Many homeowners and contractors now favor flexible plumbing retrofits to reduce the chance of future leaks around freestanding tubs.
Installers replace rigid lines with braided stainless or PEX, add isolation valves and accessible junction boxes, and secure connections with compression fittings.
Case studies show fewer repair calls after retrofits, especially where settled floors or slight tub movement previously stressed rigid joints.
Final checklist before finishing and using the tub
Before finishing and using the tub, a concise verification of structural connections, plumbing seals, and waterproofing integrity is completed to guarantee long-term performance.
Recommended curing periods for adhesives and sealants are observed and noted, with clear first-use precautions to prevent premature stress.
Any outstanding issues are addressed and documented before the tub is filled and put into service.
Structural, plumbing, and waterproofing verification
A final verification guarantees the freestanding tub and its surroundings are structurally sound, plumbed correctly, and fully waterproofed prior to finishing and use.
Inspect subfloor and anchoring, confirm no movement; test all supply and drain connections under pressure for leaks; verify membrane, seams, and floor slope for effective drainage and waterproof continuity before sealing finishes.
- Check structural fastenings and level
- Pressure-test plumbing
- Inspect waterproof membrane and connections
Recommended curing periods and first-use precautions
With structural, plumbing, and waterproofing checks completed, attention turns to curing times and first-use precautions to protect finishes, seals, and fixtures until they reach full strength.
Allow adhesives, sealants, and mortar to cure per manufacturer instructions—typically 24–72 hours; full strength may require seven days.
Avoid heavy loads, water exposure, and temperature extremes.
Perform a visual leak and adhesion inspection before first use.
Conclusion
In a scene worthy of a DIY sitcom, the freestanding tub—once a rebellious canoe—now stands tamed: feet leveled, brackets bolted, silicone dressed like armor. Inspectors nod, the plumber pats a wrench, and the tub, no longer moonlighting as a swing, keeps its secrets (and water) where they belong. Homeowners relax, imagining heroic maintenance rituals; the lesson is clear: secure the throne, avoid soggy drama, and enjoy serene baths without aquatic plot twists.