How to Replace a Sewer Line Under the House: Step-by-Step Guide for Homeowners
Replacing a sewer line under your house requires careful planning and execution. Start by diagnosing the issue with a camera inspection, and ensure you have the necessary permits. You can choose between traditional trenching or trenchless methods like pipe bursting or CIPP. The process includes utility locates, excavation or tunneling, removal of the damaged pipe, installation of the new pipe, followed by pressure and camera testing to ensure proper function. Finally, backfill the area and restore the site. It’s crucial to use safety gear, have a clear plan, and hire licensed contractors. Costs and timelines can vary, so be sure to review your options and warranties before proceeding.
What Replacing a Sewer Line Under a House Entails
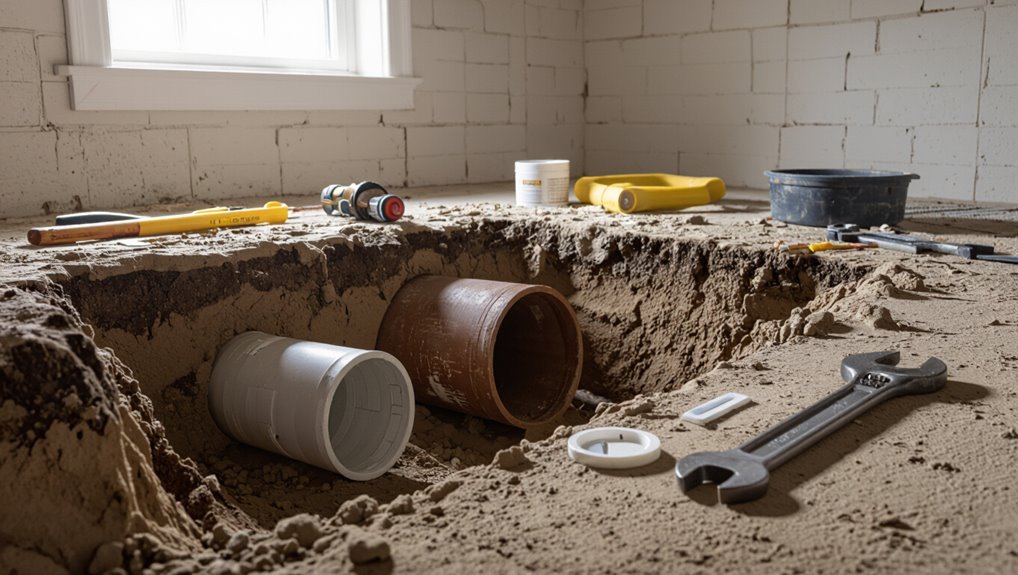
Replacing a sewer line under a house is contrasted with less invasive repairs and is chosen when damage is extensive, recurring, or confirmed by camera inspection and diagnostic testing.
Typical indicators that replacement is necessary include persistent backups, foul odors, sinkholes or uneven floors, and repeated patch repairs that fail.
The work usually involves excavation or trenchless methods, pipe replacement, connection testing, and can span from a day to several weeks depending on access, soil conditions, and permitting.
Overview of sewer line replacement vs repair
Although both options address failing drains, sewer line repair and full replacement differ in scope, cost, and disruption: repairs (like spot fixes or cured-in-place lining) target localized defects and are less invasive, while replacement removes and renews the entire pipe beneath the house, resolving extensive corrosion, root intrusion, or structural collapse but requiring heavier excavation or tunneling and higher expense.
Homeowners researching how to replace sewer line under the house should weigh long-term benefits versus short-term savings.
When replacement is necessary (signs and diagnostics)
When recurring blockages, widespread slow drains, sewage odors inside the home, or visible sinkholes in the yard persist despite multiple repairs, a full sewer line replacement becomes the likely remedy.
Further indicators include frequent grease- or root-caused backups, collapsing pipe segments shown by CCTV inspection, severe corrosion or bellied pipe sections, and repeated repair failures.
Professional diagnostics confirm extent and necessity.
Typical scope of work and timeline
A typical sewer-line replacement under a house involves coordinated steps: site evaluation and permits, excavation or access creation beneath the structure, removal of the failed section, installation of new pipe (or liner), backfilling, testing, and final restoration of disturbed areas.
Timelines vary: simple repairs may take one to two days; full replacements under a house typically require three to seven days, depending on access, complexity, and inspections.
Assessing Your Situation Before You Start
Before beginning work, the homeowner should note symptoms like backups, persistent odors, slow drains, or sinkholes that signal sewer trouble.
A professional camera inspection and clear mapping of the pipe route relative to the foundation will confirm the problem location and extent.
Finally, verify local codes, obtain necessary permits, and mark utilities to guarantee the job proceeds safely and legally.
Inspecting symptoms: backups, smells, slow drains, sinkholes
How can a homeowner tell whether a problem merits a full sewer-line replacement? Persistent backups, recurring foul sewage odors, multiple slow drains despite plunging, and new depressions or sinkholes over the yard indicate systemic failure rather than isolated clogs.
Frequency, spread, and severity matter: occasional issues suggest maintenance, while chronic, widespread symptoms suggest pipe collapse, root intrusion, or extensive corrosion requiring replacement.
Obtaining a professional sewer camera inspection
When symptoms point to widespread or recurring sewer failure, the next step is a professional camera inspection to determine location, extent, and cause.
A licensed plumber inserts a waterproof camera to record pipe condition, blockages, roots, cracks, and joints.
The report provides timestamped footage, measurements, and repair recommendations, informing decisions about repair type, cost estimates, and necessary permits.
Locating pipe route and understanding house foundation layout
A clear map of the sewer route and the house foundation is essential for planning any under-house pipe work; this involves combining camera inspection results, building plans, and surface indicators to trace the pipe path and identify footing locations, crawlspaces, and load-bearing elements.
The homeowner or contractor then marks pipe alignment, notes slab or beam positions, and plans access points while minimizing structural interference.
Checking local codes, permits, and utility markings
Why check local codes and call-before-you-dig services now? Homeowners must confirm permit requirements, setback rules, approved materials, and inspection timing before work begins.
Contact utility-locating services to mark underground gas, water, electric, and communications lines. Failure to comply risks fines, unsafe excavation, and project delays.
Document permits and markings and incorporate restrictions into the replacement plan.
Choosing the Best Replacement Method
The homeowner must weigh full dig (traditional trenching) against trenchless options like pipe bursting and cured-in-place pipe (CIPP), considering how each is performed and what conditions they require.
Key comparison points include upfront and long-term costs, site disruption, expected lifespan, and suitability for soil, root intrusion, or pipe layout.
Decisions about hiring a licensed plumber versus a general contractor hinge on project scope, structural work needs, and required permits.
Full dig (traditional trenching) explained
Of several replacement options, full dig—or traditional trenching—remains the most straightforward method for replacing a sewer line under a house: it involves excavating a continuous trench from the point of connection at the main to the house plumbing, removing the old pipe, and installing new piping at grade before backfilling and restoring the surface.
It requires heavy equipment, permits, utility locates, and careful bedding to guarantee proper slope and jointing.
Trenchless options: pipe bursting and pipe lining (CIPP)
Consider trenchless methods when minimizing excavation, landscaping disruption, and restoration costs is a priority; two common approaches—pipe bursting and cured-in-place pipe (CIPP) lining—replace or rehabilitate sewer lines with little or no open trenching.
Pipe bursting fractures the old pipe while pulling a new one into place.
CIPP inserts a resin-saturated liner that hardens to form a smooth, jointless pipe within the existing conduit.
Comparing methods: costs, disruption, lifespan, suitability
When weighing replacement options, homeowners should compare upfront costs, site disruption, expected service life, and suitability for the existing pipe condition; pipe bursting typically offers a full replacement with moderate-to-high cost and limited surface disturbance, while CIPP lining is often less invasive and cheaper initially but may be inappropriate for severely collapsed or offset pipes and can have a shorter practical lifespan depending on resin and installation quality.
| Method | Cost | Disruption |
|---|---|---|
| Pipe bursting | Higher | Low surface |
| CIPP lining | Lower | Minimal surface |
When to hire a licensed plumber vs general contractor
Choosing between a licensed plumber and a general contractor hinges on the selected replacement method and the scope of work around the house.
If work is limited to pipe repairs, trenchless lining, or sewer connections, a licensed plumber is appropriate.
When replacement requires significant excavation, structural repairs, permits, or coordinating multiple trades, a general contractor should manage the project and subcontract plumbing as needed.
Preparing the Worksite
Before beginning any excavation or replacement work, the crew reviews safety protocols and outfits themselves with appropriate protective gear.
They secure flooring, foundation edges, landscaping, and exposed utilities, and arrange utility locates and any necessary temporary shutdowns.
A concise checklist of required tools and equipment is assembled and staged to minimize delays.
Safety considerations and protective gear
A clear safety plan is essential for any sewer-line replacement under a house, covering hazard assessment, required personal protective equipment (PPE), ventilation, and emergency procedures.
Workers should use hard hats, chemical-resistant gloves, eye protection, N95 or P100 respirators when airborne contaminants exist, and waterproof boots.
Establish ventilation, gas monitoring, illuminated exits, a communication plan, and first-aid/eye-wash readiness before work begins.
Protecting flooring, foundation, landscaping, and utilities
Several protective measures should be implemented to shield flooring, the foundation, landscaping, and utilities when preparing a worksite for a sewer-line replacement under a house.
Install rigid floor coverings, plywood pathways, and moisture barriers indoors.
Protect foundation walls with sheeting and shoring to prevent collapse or soil intrusion.
Temporarily reroute irrigation, cover plants, and secure exposed service lines without disabling them.
Monitor for settlement.
Utility locates and temporary shutdowns
When preparing a sewer-line replacement, verifying and marking all underground utilities is essential to prevent accidental strikes and service disruptions.
Professional utility-locate services and local one-call notifications should be used.
Coordinate temporary shutdowns with utility providers for gas, water, and electrical lines, schedule outages during minimal-impact hours, and document clear reinstatement procedures and emergency contacts before excavation begins.
Required tools and equipment checklist
Tools and equipment must be selected and staged to support safe, efficient sewer-line replacement under the house. This checklist covers personal protective equipment, excavation and shoring gear, pipe-handling tools, diagnostic devices, and materials for temporary services and backups.
Essential items include:
- Hard hats, gloves, respirators, eye protection
- Trench boxes, shores, shovels, compactors
- Pipe cutters, lifts, couplings, seals
- Camera inspection, locator, portable pump, temporary plumbing connectors
Step-by-Step: Replacing a Sewer Line Under the House (Traditional Trenching)
The contractor begins by securing permits and contacting utility locators, then isolates and caps interior plumbing to prevent backups.
Next, crews excavate access trenches and an under-house opening to reach the existing sewer, remove the old pipe, and inspect surrounding soil and foundation for damage.
Finally, they grade and prepare proper bedding and slope to guarantee the new pipe is installed on a stable, correctly pitched base.
Step 1 Secure permits and notify utilities
Before any digging begins, homeowners must obtain required permits and notify utility companies to prevent legal issues and dangerous surprises.
They should contact local building departments for permit specifics, arrange utility locates (gas, water, electric, telecom), and document approvals.
Compliance guarantees inspections, avoids fines, and prevents accidental strikes.
Retain copies of permits and clear any municipal conditions before trenching commences.
Step 2 Isolate and cap plumbing fixtures
Shut off and seal the building’s internal plumbing to prevent sewage backflow and protect work areas during trenching.
A qualified plumber closes main valves, isolates branch lines, and installs temporary caps or test plugs on fixtures and vents.
Drain and test traps, label capped lines, and verify seals.
Maintain a log of capped locations for safe reconnection after pipe replacement.
Step 3 Excavate access trenches and under-house opening
With fixtures isolated and caps verified, excavation can begin to gain clear access to the damaged run.
Workers mark utility lines, set safety barriers, and remove soil in controlled layers to expose the trench path.
Under-house openings are enlarged only as necessary, shoring installed to prevent collapse, and debris staged for removal while maintaining ventilation and minimizing disturbance to the structure.
Step 4 Remove old pipe and inspect soil/foundation
Workers cut and remove the damaged section of pipe using appropriate tools—saws, jackhammers, or pipe cutters—taking care to avoid nearby utilities and structural elements.
Debris is cleared, joints exposed, and remaining line examined.
Technicians inspect soil for contamination, stability, and voids, document any foundation cracks or undermining, and note remediation needs before proceeding to bedding and new-pipe installation.
Step 5 Prepare grade, bedding, and slope for new pipe
After removing the damaged pipe and evaluating soil and foundation conditions, the crew establishes the proper grade and prepares the trench bed for the replacement line.
They compact subgrade, add uniform bedding material, and verify a consistent slope using a level or laser.
Stakes and string lines mark gradient; measurements guarantee minimum fall toward the sewer main.
Final tamping creates stable support.
Step 6 Install new sewer pipe and fittings (materials and techniques)
Begin by laying out the selected pipe and fittings along the prepared trench, confirming materials, sizes, and joint types match the plans and local code before installation.
Cut, chamfer, and deburr pipe ends; dry-fit sections for alignment and slope.
Use approved solvent welds, gasketed push-fit, or mechanical couplings per manufacturer instructions.
Compact bedding around pipe uniformly, avoiding point loads on joints.
Step 7 Pressure/leak testing and camera verification
Perform pressure and leak testing followed by camera verification to confirm system integrity before backfilling.
The installer pressurizes the line (air or water) to specified psi, monitors for hold times and pressure drop, and inspects joints.
A drain camera runs the full length to check alignment, slope, and for obstructions or infiltration.
Document results and address any defects prior to proceeding.
Step 8 Backfill, compact, and restore foundation and finishes
Compact the trench in uniform lifts and restore structural elements and finishes only after passing all tests and inspections.
Backfill with specified material, moisture-conditioned and placed in 6–8 inch lifts, compacted to required density.
Protect adjacent foundation and slabs; repair or re-pour concrete, restore soil grading, landscaping, and hardscapes.
Reconnect utilities and replace insulation or vapor barriers disturbed during excavation.
Step 9 Final inspection and permit sign-off
Once all repairs, reinstatements, and testing are complete, the final inspection and permit sign-off confirm the work meets code and the approved plans.
A building inspector verifies pipe placement, connections, slope, cleanouts, and restoration.
Provide documentation, pressure/leak test results, and contractor credentials.
Address any punch-list items promptly.
Receive the signed permit closure and retain records for warranties and future property transactions.
Step-by-Step: Replacing a Sewer Line Under the House (Trenchless Methods)
This section outlines trenchless options for sewer replacement, focusing on pipe bursting and cured-in-place pipe (CIPP) lining and the specific installation steps for each method.
It also covers site preparation and access point requirements needed for equipment and entry, plus the testing and verification procedures used to confirm a successful installation.
Practical notes on sequencing and common obstacles are included to guide selection between methods.
Pipe bursting process and installation steps
Begin by mobilizing the crew and positioning access pits at the launch and receive points outside and beneath the structure.
A bursting head attached to a new pipe is pulled through the existing line using hydraulic winches, fracturing the old pipe outward. Inspectors monitor alignment and grade; debris is removed.
Connect new pipe to fittings, pressure-test, backfill pits, and restore surface finishes.
CIPP lining process and installation steps
After describing the pipe bursting sequence, attention shifts to cured-in-place pipe (CIPP) lining as an alternative trenchless method for rehabilitating an existing sewer without full replacement.
Technicians inspect and clean the host pipe, measure and prepare a resin-saturated liner, invert or pull it into place, cure the resin with hot water, steam, or UV light, then reconnect laterals and perform final inspections and testing.
Site preparation and access point requirements
Prepare the work area by establishing safe, code-compliant access points and clearing surfaces both inside and outside the structure for equipment staging.
Identify ideal entry and exit points for pipe insertion, protect finished floors, and provide ventilation.
Mark utilities, secure permits, and set barriers to prevent unauthorized access.
Guarantee stable ground for rigs and unobstructed routes for material handling and waste removal.
Testing and verification after trenchless installation
Testing and verification confirm that the new trenchless sewer installation performs to code and functions reliably before the project is closed out.
Inspectors conduct TV camera inspections to verify alignment and seam integrity, followed by hydrostatic or air tests for leaks and pressure stability.
Results are documented, permits signed off, and any defects remediated.
Final records and warranties are provided to the homeowner.
Materials, Costs, and Lifespan
Choice of pipe material — PVC, ABS, cast iron, clay, or HDPE — influences durability, installation complexity, and susceptibility to root intrusion or corrosion.
Costs vary widely based on material, trenchless versus open excavation, pipe length, and local labor rates, so homeowners should expect a broad price range and request itemized estimates.
Expected lifespans and any manufacturer or contractor warranties also affect long-term value and should be confirmed before work begins.
Common pipe materials (PVC, ABS, cast iron, clay, HDPE) and pros/cons
Selecting the right sewer pipe material affects installation complexity, upfront cost, maintenance needs, and service life.
PVC: lightweight, inexpensive, corrosion-resistant; jointed with solvent weld.
ABS: similar to PVC but less common, slightly more brittle.
Cast iron: durable, noisy, heavy, resists crush but corrodes.
Clay: long-lasting when intact, brittle and prone to root intrusion.
HDPE: flexible, joint-free, costly but resilient.
Typical cost ranges and factors that affect price
Cost is driven by a combination of material, labor, site conditions, and permitting: homeowners can expect a broad range—typically $3,000 to $25,000 or more—depending on whether the job is a short in-place PVC replacement under a crawlspace or a full trench-and-replace with cast iron or HDPE beneath a slab. Typical factors and ranges:
| Factor | Typical impact |
|---|---|
| Material | Low–high |
| Labor | Moderate–high |
| Access/site | Low–very high |
| Permits/inspections | Low–moderate |
Expected lifespan and warranty considerations
Longevity of a sewer line depends primarily on the material, installation quality, and operating conditions; typical service life ranges from about 20 years for older cast iron and clay to 50 years or more for modern PVC and HDPE when properly installed.
Warranties vary: manufacturers may offer 10–50 years, while contractor workmanship guarantees commonly cover 1–5 years; homeowners should confirm coverage, exclusions, and transferability.
Common Problems, Risks, and How to Avoid Them
Common pitfalls in under-house sewer replacement include foundation damage from improper excavation, tree-root intrusion and unstable soils, and incorrect pipe slope or poor jointing that lead to blockages.
Preventive measures focus on proper shoring, root barriers or rerouting, correct bedding and slope calculations, and high-quality connections.
Contractors cutting corners can be identified by vague bids, lack of permits or inspections, and refusal to provide warranties.
Foundation damage and settling prevention
Preventing foundation damage and settling requires careful planning during sewer-line replacement to avoid undermining soil support beneath the house.
Contractors should map load-bearing areas, limit excavation beneath foundations, and use shoring or underpinning where needed.
Backfill with properly compacted granular material in lifts, monitor for differential movement, and schedule inspections during and after work to verify stability and detect early signs of settling.
Dealing with tree roots and soil instability
Addressing tree roots and unstable soils requires proactive assessment and targeted mitigation because invasive roots can crack pipes and shifting soils compromise bedding and joints.
Contractors should identify nearby vegetation, test soil composition and moisture patterns, and plan trenching, root management, and pipe selection accordingly to minimize future intrusion and settlement.
Recommended measures include root barriers, selective tree removal, reinforced bedding, deeper pipe placement, and routine inspections to detect recurrence.
Improper slope, blockages, and poor connections
Recognize that improper slope, blockages, and poor connections are among the most frequent causes of sewer failure under a house. A slope too flat or too steep hinders flow, debris and grease create backups, and poorly fitted joints leak or separate under load.
Homeowners should guarantee correct pitch (1/4″ per foot), use cleanouts, choose durable fittings, and schedule routine inspections and jetting to prevent failures.
Signs of contractor shortcuts and red flags
Many warning signs point to contractor shortcuts when replacing a sewer line under a house: inconsistent trench depth, mismatched pipe materials, glued or poorly sealed joints, missing or improperly placed cleanouts, and lack of proper slope markings.
Additional red flags include absence of permits, no soil compaction or backfill records, refusal to provide warranties, vague invoices, and reluctance to show inspection receipts or references.
Post-Installation Care and Maintenance
In the weeks following a sewer line replacement, homeowners can expect settling noises, minor ground movement, and a temporary change in drainage behavior as connections stabilize.
A simple routine—periodic visual inspections, avoiding heavy loads or deep planting over the trench, and scheduled cleanings or camera inspections every few years—will help preserve the new line.
Persistent odors, slow drains, new wet spots, or sudden sinking should prompt prompt contact with a licensed plumber.
What to expect in the first weeks after replacement
After the sewer line replacement, occupants should expect a brief period of heightened attention to the system as the new connections settle and any residual construction issues are identified.
During the first weeks, monitor for slow drains, odors, dampness, or unusual noises.
Verify clean-outs remain accessible, note contractor follow-up visits, and report leaks or persistent issues immediately to guarantee prompt correction and warranty coverage.
Routine maintenance schedule and tips
Although the new sewer line should function reliably, a simple, regular maintenance schedule is essential to protect the investment and prevent future problems.
Recommended actions include periodic inspections, cleaning, and record-keeping.
Suggested routine:
- Inspect visible connections and drains monthly.
- Flush drains with hot water weekly.
- Schedule a camera inspection every 2–3 years.
- Keep a maintenance log with dates and notes.
When to call a pro: warning signs post-replacement
Regular maintenance helps spot issues early, but some signs indicate the need for professional attention after a sewer-line replacement.
Persistent odors, slow drains despite snaking, recurring backups, new sinkhole formation, wet spots in the yard, unusual plumbing noises, or visible pipe settlement require prompt inspection.
If warranties are involved, contact the installer or licensed plumber to diagnose and prevent further structural or health risks.
Cost-Saving Tips and Financing Options
Determining whether to repair or replace a sewer line can greatly affect overall cost, so homeowners should weigh the extent of damage, the line’s age, and long-term risks before deciding.
They should also review insurance and home warranty coverage and explore financing options such as personal loans, home equity lines, or contractor payment plans to manage expense.
Finally, obtaining multiple estimates and negotiating bids can lower costs and clarify which approach—repair or replacement—is the most economical.
When to repair vs replace to save money
When evaluating whether to repair or replace a sewer line, homeowners should weigh the extent of damage, remaining pipe life, and long-term costs rather than focusing solely on the immediate price tag.
Minor localized breaks or limited corrosion often justify targeted repairs or relining.
Extensive collapse, widespread corrosion, multiple repairs, or outdated materials usually make full replacement more economical over time.
Insurance, home warranty, and financing possibilities
Homeowners should review insurance policies, home warranties, and available financing before committing to a sewer-line replacement, since coverage and payment options can substantially reduce out-of-pocket costs.
Check policy exclusions, claim thresholds, and preexisting-condition clauses. Verify whether a home warranty covers plumbing lines.
Explore low-interest loans, HELOCs, contractor financing, and municipal assistance programs.
Document communications and obtain written approval before work begins.
Negotiating bids and getting multiple estimates
After confirming coverage, approvals, and financing options, the next step is to solicit multiple bids to compare scope, materials, timelines, and warranties.
Each estimate should be evaluated objectively, negotiating line items and asking for references. Focus on value, not lowest price.
- Request at least three written bids
- Compare identical scopes
- Ask about permits and cleanup
- Negotiate payment terms and warranties
Sample Project Timeline and Checklist
A clear sample timeline outlines each phase from preparation and permits through excavation, replacement, and final inspection.
A concise homeowner checklist lists tasks to complete before work begins, actions to take while crews are on site, and steps to confirm after the job is finished.
The following timeline and checklist provide a practical sequence and checklist items to keep the project on schedule and minimize surprises.
Typical project timeline (preparation to completion)
Seven stages typically structure a sewer line replacement project, from initial assessment and permits through excavation, pipe installation, backfill, inspection, and final restoration.
Timeline spans days to weeks depending on scope, weather, and permit speed.
Mobilization and utility locates start day one.
Excavation and replacement follow, then testing and inspections.
Final grading and landscaping complete the project before cleanup and handover.
Homeowner checklist before, during, and after the job
With the timeline established, homeowners can use a focused checklist to manage responsibilities before, during, and after a sewer-line replacement.
A concise, task-oriented list guarantees coordination with contractors, safety, and post‑work verification.
- Confirm permits, insurance, and written estimates.
- Secure pets, valuables, and alternate restroom access.
- Monitor contractor progress, ask questions, document changes.
- Inspect final connections, request warranties, keep records.
Local Regulations, Permits, and Hiring the Right Professional
Before work begins, the homeowner should confirm local permit requirements and inspection stages to avoid delays or fines.
They should ask contractors about licensing, insurance, references, and experience with similar under-house sewer replacements.
A clear written contract must define the scope of work, timeline, payment schedule, and responsibility for permits and inspections.
Understanding permit requirements and inspection stages
Because sewer work affects public health, property boundaries, and municipal infrastructure, homeowners must navigate local regulations, obtain required permits, and schedule inspections before replacing a sewer line under a house.
Permit types, application steps, fees, and required plans vary by jurisdiction. Typical inspection stages include trench, rough connection, and final sign-off.
Failure to comply risks fines, rework, or denied occupancy certificates.
Questions to ask contractors and verifying licenses
Who should the homeowner ask, and what proof should they demand?
The homeowner should request contractor credentials, current state or local licensing, insurance certificates (liability and workers’ compensation), and bonding.
Verify license numbers with the issuing agency, confirm permit experience, request references from recent similar jobs, and check complaints or disciplinary records.
Document all verifications before hiring.
Contract essentials and scope of work to include
Begin by spelling out a clear, legally compliant scope of work in the contract that lists required permits, applicable local codes, exact materials and methods, start and completion dates, payment schedule, and responsibilities for inspections and utility notifications.
The contract should also specify change order procedures, warranty terms, insurance and bonding proof, lien release process, cleanup standards, and dispute resolution to protect homeowner and contractor obligations.
Visual Aids and Reference Resources
Clear diagrams illustrating required pipe slopes, typical fittings, and access point locations help readers visualize proper installation and troubleshoot potential problems.
Authoritative links to local code resources, inspection guides, and manufacturer specifications provide the technical standards and tolerances that drawings alone cannot convey.
Together, these visual aids and references form a concise toolkit for planning and verifying a compliant sewer line replacement.
Diagrams to show pipe slopes, fittings, and access points

When planning sewer-line replacement under a house, accurate diagrams concisely show pipe slopes, fittings, cleanouts, and access points so installers and inspectors can verify grade, connections, and maintenance locations at a glance.
Diagrams should include scale, slope percentages or rise/run, fitting types and orientations, pipe diameters, and existing utilities.
Clear symbols and a legend reduce misinterpretation during excavation and installation.
Links to code resources, inspection guides, and manufacturer specs
Because compliance and safety hinge on authoritative specifications, diagrams should be paired with direct links to applicable codes, inspection checklists, and manufacturer technical data so installers and inspectors can verify requirements and product limits without ambiguity.
Essential references include:
- Local plumbing code and amendment links
- Municipal inspection checklist PDFs
- Manufacturer installation and pressure ratings
- Approved materials and testing standards databases
Conclusion
Replacing a sewer line under a house is challenging but manageable when approached systematically. Homeowners can expect disruption, permits, and costs, yet careful assessment, choosing the right method, and hiring competent professionals minimize surprises. With patience and planning, the project proceeds smoothly—transforming a messy ordeal into a triumph. The result restores plumbing integrity and home value, leaving families relieved and gratified as if their house had been reborn overnight.