How to Turn Up Hot Water in the Shower: Quick Fixes and When to Call a Pro
To turn up the hot water in your shower, start by running the shower on full hot while ensuring no other appliances are using hot water. Check for deposits in the showerhead and flush it if necessary. Next, verify the water heater’s thermostat is set to about 120°F (49°C), and check the pilot light or breaker for any issues. Inspect for leaks or error codes, and examine the mixing valve, cartridge, and anti-scald limiter—clean or adjust these components if needed. Only reset or test elements if it’s safe to do so. If you still have issues or encounter gas or electrical problems, it’s best to call a professional for further assistance.
How to Increase Shower Hot Water Quickly and Safely
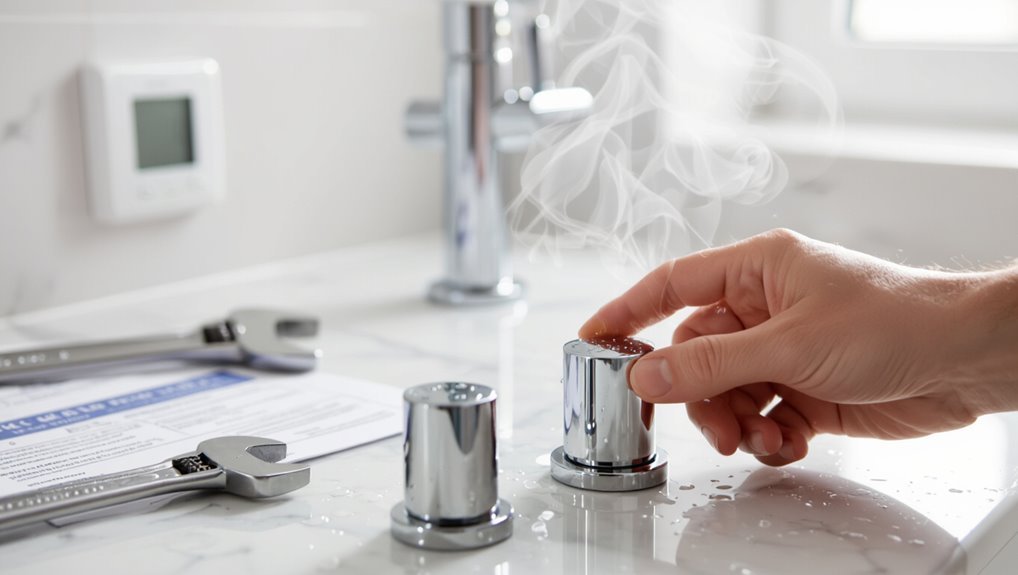
Before calling a professional, one can try a few immediate steps to boost shower heat, such as ensuring other hot water taps are off and running the shower on full hot.
Simple adjustments to the shower mixer or home thermostat can quickly increase temperature if done cautiously.
If those fail, checking the water heater’s reset switch, pilot light (gas), and temperature setting offers a fast way to restore hot water.
Immediate steps to try before calling a professional
Start by checking simple, fast fixes that often restore heat without tools or a service call.
Confirm other taps and appliances use hot water to rule out a heater issue.
Reset the water heater breaker or pilot if safe.
Inspect the showerhead for mineral buildup, and flush the shower briefly.
These steps explain how to turn up hot water in the shower before contacting a pro.
Quick thermostat and mixer adjustments you can make
If those quick checks don’t restore warmth, attention should turn to the shower’s thermostat and mixing components, which often control outlet temperature without needing a service call.
Inspect the cartridge or valve for mineral buildup, gently clean or replace the cartridge if accessible, and verify the anti-scald limiter position.
Minor adjustments can rebalance hot/cold flow; stop and consult a pro if uncertain.
How to check and reset your water heater fast
Check the water heater’s basic settings and status to quickly restore hot water: confirm the thermostat is set to the recommended 120°F (49°C), inspect the pilot light on gas units or the breaker and heating element indicators on electric models, and look for obvious signs of leaks, sediment buildup, or error codes.
If safe, reset the unit per manufacturer instructions, allow recovery time, and monitor temperature.
Diagnosing Why Your Shower Isn’t Hot Enough
A quick diagnosis pinpoints whether the issue stems from the shower valve, the water heater, or the supply plumbing by comparing symptoms and simple tests.
Common causes include a malfunctioning mixing valve, a partially failed heater (low output, strange noises, or discolored water), or restricted cold/hot supply lines.
Distinguishing signs—consistent lukewarm water across fixtures suggests the heater, while only one shower affected points to the valve or local piping—guides the next steps.
Common causes of low hot water in showers
Many factors can cause a shower’s hot water to run lukewarm or cold, and diagnosing the problem requires systematically evaluating both the water heater and the shower plumbing.
Common causes include insufficient water heater capacity, incorrect thermostat settings, sediment buildup reducing tank efficiency, faulty dip tubes, partially closed shutoff valves, clogged pipes or aerators, cross-connections with cold lines, and simultaneous high hot-water demand elsewhere.
How to tell if the problem is the shower valve, water heater, or plumbing
After reviewing common causes that affect hot water delivery, diagnosing whether the issue lies with the shower valve, the water heater, or intervening plumbing requires a methodical comparison of symptoms and simple on-site tests.
Check if other taps deliver consistent hot water, observe temperature changes when multiple fixtures run, test hot output at the heater, and inspect the shower trim for stuck cartridges or pressure-balancing faults.
Signs of a failing water heater vs simple supply issues
When showers deliver lukewarm water despite normal household usage, distinguishing between a failing water heater and simple supply problems hinges on specific, observable signs: uneven temperature between fixtures, rusty or discolored water, strange noises, frequent cycling, or no hot water indicate heater failure.
Low overall pressure, only one fixture affected, or recent municipal work suggest supply or localized plumbing issues rather than the heater.
Step-by-Step Fixes You Can Do Yourself
The following steps outline practical, homeowner-level fixes to try before calling a pro.
They cover adjusting a single-handle mixing valve, flushing a tank water heater to remove sediment, and inspecting or replacing a faulty shower cartridge or balancing spool.
Cleaning or replacing the showerhead and removing flow restrictors are also included.
Adjusting a single-handle mixing valve
Loosen the handle and inspect the single-handle mixing valve for a temperature limit stop or adjustment screw that restricts hot flow.
Identify the stop, turn screw clockwise to allow more hot, reassemble handle, and test temperature.
If resistance or corrosion is present, stop and call a pro.
- Locate stop/adjuster
- Turn incrementally
- Reassemble securely
- Test and observe
Flushing a tank water heater to remove sediment
Flush a tanked water heater periodically to remove sediment that reduces efficiency and can damage the unit.
The homeowner can drain the tank, flush until clear, then refill and restart the heater following manufacturer safety steps.
Recommended steps:
- Turn off power and water supply.
- Attach hose to drain valve.
- Open drain and flush until clear.
- Close, refill, restore power.
Checking and replacing a faulty shower cartridge or balancing spool
After sediment is cleared from a tanked water heater, attention can shift to the shower valve, where a worn cartridge or failing balancing spool often causes temperature swings or reduced hot flow.
A technician or careful DIYer can inspect, remove, and replace the component to restore stable hot delivery.
- Shut water supply and open valve
- Remove handle and trim
- Extract cartridge/spool and inspect seals
- Install replacement and test for leaks
Replacing or cleaning showerhead and flow restrictors
Remove and inspect the showerhead and its flow restrictor to restore stronger hot water delivery and improve spray patterns.
- Shut off water, unscrew showerhead with a wrench and cloth.
- Extract and examine the flow restrictor for mineral buildup.
- Soak parts in vinegar, brush deposits, rinse thoroughly.
- Reassemble or replace the showerhead; test temperature and flow, repeat if needed.
Checking and Adjusting Your Water Heater
Before adjusting shower temperature, one should locate the water heater thermostat and confirm power or gas is off for safety.
Instructions differ for electric and gas units—electric models usually have access panels and reset buttons, while gas models require adjusting the temperature dial near the pilot or following manufacturer guidance.
After increasing the setting, wait 30–60 minutes for the tank to reach the new temperature and never exceed recommended safety limits (typically 120°F) to prevent scalding.
How to safely locate and change the thermostat setting
Locating the water heater and identifying its thermostat is the essential first step to safely adjusting shower temperature. The procedure differs for electric and gas models but follows consistent safety precautions.
Turn power or gas off before accessing controls. Confirm tank temperature with a reliable thermometer.
Make small incremental adjustments (1–2°F), wait for temperature to stabilize, then recheck and restore power or gas.
Electric vs gas water heater specific adjustments
While electric and gas water heaters accomplish the same task, their thermostat locations, adjustment methods, and safety steps differ enough that users must follow model-specific procedures.
Electric units often have dual thermostats behind access panels and require power shutdown before adjusting.
Gas units use a single control near the burner with pilot or electronic ignition; adjustments demand careful venting checks and following manufacturer safety warnings.
How long to wait after raising the temperature and safety limits
After adjusting the thermostat on an electric or gas unit, the tank and connected pipes need time to reach the new setpoint. Typically, this requires 30 minutes to an hour for tank-style heaters and up to several hours for larger or heavily insulated tanks.
Monitor outlet temperature with caution. Avoid exceeding 120°F (49°C) to prevent scalding, and verify relief valve operation before raising limits.
When Temperature Changes Don’t Work: Advanced Troubleshooting
When adjusting the water heater’s thermostat fails to restore hot water, further inspection of internal components such as the dip tube, anode rod, and heating elements is warranted.
The technician should also check for cross-connections or recirculation faults that can mix cold water into the hot line.
Collecting temperature and pressure readings with a thermometer and gauge will help pinpoint the source of the problem.
Inspecting dip tube, anode rod, and heating elements
Begin by visually and functionally inspecting the water heater’s dip tube, anode rod, and heating elements, since faults in any of these components can produce inadequate or inconsistent hot water even when the thermostat seems correct.
- Check dip tube for cracks or detachment causing cold-water mixing.
- Inspect anode rod corrosion reducing tank efficiency.
- Test electric elements for continuity; replace faulty ones.
- Verify gas burner and thermocouple operation for gas units.
Diagnosing cross-connection and recirculation issues
A few subtle plumbing faults—cross-connections between hot and cold lines or a malfunctioning recirculation loop—can nullify thermostat adjustments and leave showers lukewarm despite a properly set water heater.
Tracing piping at fixtures, checking for single-handle faucet cartridge failures, and observing temperature change when nearby valves close helps isolate issues.
Persistent cross-flow or loop pump faults merit professional diagnostic and repair.
Using a thermometer and pressure gauge to collect diagnostic data
Measure and record temperatures and pressures at key points to transform subjective complaints into actionable data.
A technician or homeowner uses simple tools to pinpoint flow or mixing faults:
- Check hot outlet temperature at the shower valve.
- Measure cold inlet temperature to detect crossover.
- Read system pressure near the water heater and shower.
- Log results and compare to manufacturer specifications.
When to Call a Professional Plumber
If basic adjustments and resets fail, a licensed plumber should be called when there are persistent temperature fluctuations, strange noises, leaks, or signs of corrosion.
Professionals commonly handle tasks such as replacing thermostats, repairing or swapping out valves, fixing gas or electric water heaters, and addressing hidden pipe damage.
When contacting a technician, describe recent symptoms, any error codes or sounds, approximate duration of the issue, and what troubleshooting steps have already been taken to obtain an accurate estimate.
Clear signs you need a licensed technician
Recognize when shower heating issues go beyond simple homeowner fixes and require a licensed technician.
Persistent temperature fluctuations, no hot water at all, gas smell or pilot light problems, water leaking from the heater or pipes, electrical faults or tripped breakers tied to the water heater, and failed DIY diagnostics all indicate professional assessment.
Safety risks or code compliance concerns also warrant a licensed plumber.
Typical repairs or replacements a pro will perform
When problems exceed simple troubleshooting, a licensed plumber will address a range of repairs and replacements to restore reliable hot water and safety.
- Replace faulty thermostatic mixing valves or cartridge assemblies.
- Repair or swap damaged shower valves and trim.
- Service, flush, or replace water heaters and heating elements.
- Repair pipe leaks, sediment-clogged lines, or install balancing valves to correct temperature fluctuations.
How to describe the problem to get an accurate estimate
Although the homeowner may not know plumbing terminology, providing clear, specific details about symptoms, timing, and recent changes helps a plumber give an accurate estimate.
Describe water temperature fluctuations, if cold starts after several minutes, any noises, visible leaks, and how many fixtures are affected.
Note recent work, water heater age, and utility type (gas/electric).
Include photos or short video when possible.
Cost, Time, and Safety Considerations
Typical costs for common repairs and replacements—such as thermostat adjustments, element swaps, or tank repairs—vary widely and can influence whether a homeowner attempts a DIY fix or hires a professional.
DIY adjustments often take an hour or two, while more complex repairs or replacements can require a day or several days when scheduling and parts are considered.
Safety precautions, including when to shut off power or gas and to wear protective gear, should guide the decision to proceed or call a licensed technician.
Typical costs for common repairs and replacements
Many common shower repairs and replacements carry predictable ranges of cost, time, and safety considerations that homeowners should expect. Typical examples include valve replacement, tankless unit service, and thermostatic cartridge swaps. Estimated costs, approximate labor time, and safety notes appear below.
| Repair | Cost (USD) | Safety note |
|---|---|---|
| Valve replacement | 150–450 | Shut off water/power |
| Cartridge swap | 60–200 | Avoid scalds |
Timeframes for DIY fixes vs professional service
How quickly can a homeowner expect a shower issue to be resolved depends on the problem’s complexity and the chosen approach—DIY fixes often address simple tasks like aerator cleaning or cartridge swaps within 30 minutes to a few hours.
In contrast, professional service for valve replacement, tankless unit repairs, or complex diagnostics typically requires a few hours to a full day (plus scheduling lead time).
Costs, parts availability, and technician availability influence turnaround.
Safety precautions and when to shut off power or gas
Whenever work involves electrical components, open flame, or the home’s main water supply, homeowners should prioritize shutting off power or gas and isolating the water source before beginning any repair.
Technicians recommend verifying shutdowns with meters or appliance switches, ventilating spaces when gas is suspected, wearing protective gear, and keeping fire extinguishers nearby.
If uncertain, stop and call a licensed plumber or electrician.
Preventive Maintenance to Keep Hot Water Reliable
A brief preventive maintenance plan helps guarantee consistent hot water by combining a simple water heater checklist—flushing the tank, checking the anode rod, and testing the thermostat—with seasonal and household habit adjustments like lowering shower lengths in winter or staggering appliance use.
Attention to insulation, switching to a tankless system, or adding a recirculation loop can markedly improve performance and recovery time. Regular inspections and timely upgrades reduce surprises and extend equipment life.
Regular water heater maintenance checklist
Regular inspections and simple seasonal tasks prevent most common water heater failures and keep hot water available when needed.
- Flush tank annually to remove sediment and improve efficiency.
- Test the temperature-pressure relief valve for proper operation.
- Inspect anode rod every 2–3 years; replace if heavily corroded.
- Check for leaks, corrosion, loose fittings, and confirm thermostat settings.
Seasonal and household habits that affect hot water supply
Seasonal changes and daily household routines directly influence how much hot water is available and how efficiently a water heater performs.
Colder inlet water in winter increases demand; summer reduces recovery time. High simultaneous use—laundry, dishwasher, showers—drains reserves.
Routine behaviors like shorter showers, staggering appliance cycles, and lowering shower flow conserve hot water.
Monitoring usage patterns prevents unexpected shortages and extends heater life.
Upgrades that improve hot water performance (insulation, tankless, recirculation)
Household habits and seasonal demand highlight where upgrades will have the most impact on hot water reliability and efficiency.
- Insulate tank and pipes to reduce heat loss and shorten recovery time.
- Install a tankless heater for on-demand hot water and reduced standby losses.
- Add a recirculation pump or demand-controlled loop to eliminate long waits.
- Upgrade thermostats and mixing valves for precise temperature control and safety.
Quick Troubleshooting Flowchart and Decision Guide
A compact troubleshooting flowchart gives a homeowner a clear first response: five-minute checks to try now (pilot light, circuit breaker, and faucet settings).
If those fail, the guide outlines 30–60 minute DIY actions to attempt before calling a pro, such as flushing a small section of the line or inspecting visible valves.
It also defines when issues require immediate escalation to emergency repair, including gas leaks, no hot water after basic fixes, or signs of tank failure.
First 5-minute checks to try now
Start with five quick checks that can identify the most common causes of cold or lukewarm shower water.
Inspect settings and supply in sequence, noting immediate fixes or red flags.
- Confirm water heater power/gas is on and pilot lit.
- Verify thermostat set above 120°F (49°C).
- Check other hot fixtures to isolate problem.
- Make sure shower valve fully turned to hot.
30 to 60 minute DIY actions before scheduling service
If the five-minute checks did not restore hot water, proceed to systematic 30–60 minute DIY steps that confirm supply, isolate components, and reveal problems a homeowner can fix without professional tools.
- Verify other hot fixtures and main water heater power/gas.
- Inspect and flush showerhead and inline screens.
- Test mixing valve balance and adjust thermostatic cartridge.
- Check for recent plumbing changes and bleed trapped air.
When to escalate to emergency repair
When should a homeowner call for emergency repair rather than continue DIY troubleshooting?
Immediate escalation is warranted for:
- no hot water with gas smell
- visible leaks soaking floors
- electrical sparks or tripped breakers tied to the water heater
- persistent loss of hot water after resets
- sudden pressure loss suggesting a burst pipe.
Otherwise, schedule non-urgent service after basic checks.
Useful Tools, Parts, and When to Replace Equipment
A concise tool kit—adjustable wrench, multimeter, pipe wrench, screwdriver set, and temperature gauge—helps diagnose most shower temperature problems.
Common replacement parts include thermostatic cartridges, mixing valves, and heater elements, with attention to model compatibility and thread sizes.
Persistent temperature swings, leaks, reduced capacity, or an aging heater (10–15 years) indicate it’s time to replace the shower valve or water heater.
Essential tools for diagnosing and fixing shower temperature issues
Several basic tools and a few common replacement parts are indispensable for diagnosing and fixing shower temperature problems: a screwdriver set, adjustable wrench, multimeter, thermometer, bucket, and plumber’s tape, plus replacement cartridges, thermostatic elements, and pressure-balancing valves.
- Inspect valves and cartridges for wear.
- Test thermostats and sensors with a multimeter.
- Check supply pressure and temperature.
- Replace faulty components promptly to restore performance.
Common replacement parts and compatibility tips
Compatibility matters: shower repair typically requires a short list of replacement parts—cartridges, thermostatic elements, pressure-balancing valves, seats and springs, and trim kits—chosen to match the brand, model, and valve family.
- Verify OEM part numbers before ordering.
- Measure valve dimensions and inlet/outlet spacing.
- Match temperature range and pressure specs.
- Keep compatible trim and fasteners for proper fit and seal.
Signs it’s time to replace the water heater or shower valve
When replacement parts and measurements still leave persistent temperature or pressure problems, it may indicate failure beyond cartridges or trim and point to the heater or valve itself.
Signs include fluctuating water temperature, weak or uneven pressure at multiple fixtures, visible leaks from the valve body or tank, rusty or discolored water, frequent pilot or heating element failures, and increasing energy bills despite normal usage.
Conclusion
When a lukewarm shower refuses to comply, the homeowner can treat the problem like a stubborn puzzle: start with simple checks, move to thermostat and dip tube inspections, and call a professional when safety or complexity grows. Swift DIY fixes often restore comfort, but persistent issues signal worn parts or system limits. With routine maintenance and timely replacement of failing components, reliable hot water becomes less a luxury and more an expected certainty.