How to Replace a Garden Tub Faucet Without an Access Panel: Step-by-Step Repair Guide
Introduction: You can replace a garden tub faucet without an access panel by following a straightforward trim-and-cartridge swap process. This guide will walk you through the necessary steps to complete the replacement efficiently.
A homeowner can replace a garden tub faucet without an access panel by performing a trim-and-cartridge swap, using temporary water shutoffs and careful disassembly. Shut the main or local valves, remove the handles and escutcheon, extract and match the cartridge or stem, then install the new unit with proper seals and torque. Test slowly for leaks and reassemble the trim. If the valve itself needs replacement, the guide outlines safe behind-the-wall access options and further steps to follow.
What You Need to Know Before Replacing a Garden Tub Faucet Without an Access Panel
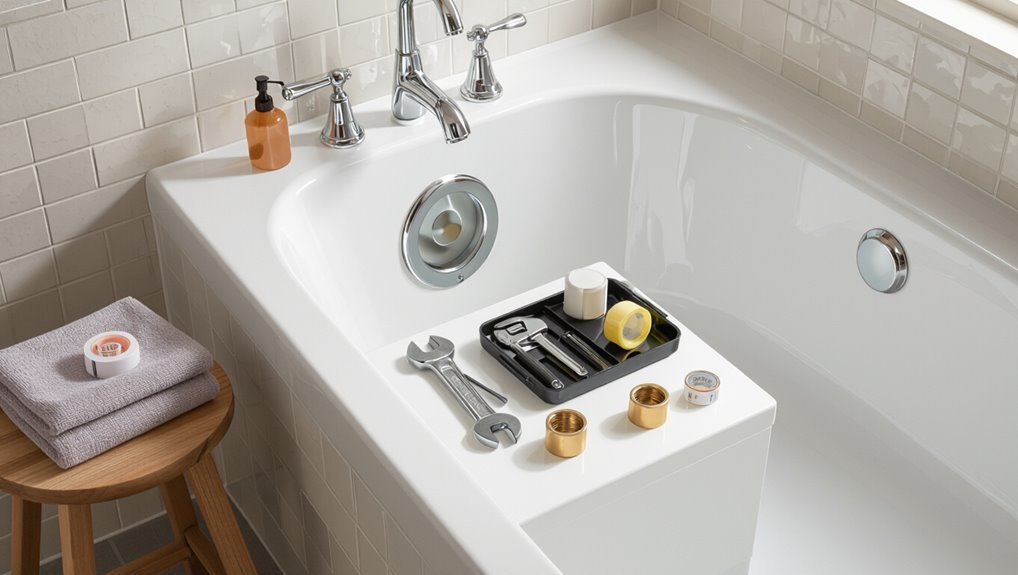
Before replacing a garden tub faucet without an access panel, the homeowner should assess whether the leak, corrosion, or functional failure warrants replacement versus repair.
They must recognize common challenges—limited workspace, hidden fasteners, and potential need to remove trim or tile—and assemble a concise tools-and-materials checklist including basin wrenches, replacement cartridge or valve, sealant, and flashlight.
Safety precautions about shutting off water at the house or local shutoff, isolating circuits if using powered tools, and preparing for possible water cleanup are essential.
When and why you might replace the faucet
How often a garden tub faucet is replaced depends on signs of failure, desired upgrades, and the practicality of working without an access panel.
Replacement is warranted for persistent leaks, corrosion, weakened flow, or obsolete styling.
Consider water savings, compatibility with existing plumbing, and homeowner skill.
Assess whether to learn how to replace garden tub faucet without access panel or hire a pro for safe, effective results.
Common challenges of no-access-panel installations
When replacing a garden tub faucet without an access panel, homeowners face a set of practical obstacles that differ from standard replacements.
Restricted access complicates valve alignment, limits visibility and maneuverability, and increases risk of damaging surrounding finishes. Unexpected pipe configurations and concealed fasteners prolong work.
Temporary water shutoff and contingency plans for leaks become essential due to difficulty reaching connections or making clean repairs.
Tools and materials checklist
A concise checklist keeps the job efficient and minimizes surprises: essential hand tools (adjustable wrenches, basin wrench, Phillips and flat screwdrivers), plumbing supplies (thread seal tape, plumber’s putty or silicone, replacement supply lines and compression fittings), and materials for temporary water control and containment (ball valve shutoff, hose or bucket, towels, and a wet/dry vacuum).
- Replacement faucet and trim
- Assorted washers and O-rings
- Pipe cutter and tubing brush
- Protective gloves and safety glasses
Safety precautions and water shutoff options
Begin by prioritizing safety: since there is no access panel, turning off water at the correct source, isolating electrical risks, and preparing for possible leaks are mandatory before loosening any fittings.
Confirm main or local shutoff valves, drain residual water, and test taps.
Wear gloves and eye protection. Place towels and a bucket.
If unsure, consult a licensed plumber to avoid damage or injury.
Identifying Your Garden Tub Faucet Type and Valve System
Before starting any work, the homeowner should identify whether the fixture is a single-handle or double-handle faucet and note the presence and style of any shower/tub diverter.
They should locate the rough-in valve and observe common mounting methods (wall or deck) to determine access and replacement options.
Finally, a brief inspection of leaks, looseness, or poor temperature control will indicate if the valve itself requires replacement or if only the trim and cartridges need attention.
Single-handle vs. double-handle faucets
Distinguishing between single-handle and double-handle garden tub faucets is essential because the type determines the valve assembly, handle removal method, and parts needed for replacement.
Single-handle units typically use a cartridge or ball valve with one control stem; double-handle setups use separate hot and cold stems, often with individual cartridges or ceramic discs.
Identifying handle count simplifies ordering correct replacement parts and tools.
Shower/tub diverter styles
Several common diverter styles control whether water flows to the tub spout, the showerhead, or both, and recognizing them is key to identifying the valve system.
Styles include three-port valve cartridges, pull-up spouts, integrated lever diverters, and push-button or rotary diverters.
Each type alters internal valve configuration and replacement parts required, so visually inspecting the spout and trim reveals the specific diverter mechanism.
Rough-in valve locations and common mounting methods
When identifying a garden tub faucet type, locating the rough-in valve and noting its mounting method are the most practical first steps.
The valve’s position—on the wall behind the tub, in the deck, or within an adjacent access panel—directly influences repair options and part compatibility.
Wall-mounted valves sit in studs, deck-mounted valves fit through the rim, and drop-in or bracket mounts secure to floor or substructure.
How to tell if the valve needs replacement or only the trim
Having located the rough‑in valve and noted its mounting—whether in the wall, deck, or access panel—the next step is to determine whether the problem lies with the visible trim or with the valve body itself.
Inspect trim for leaks, loose handles, worn cartridges, or mineral buildup.
If seals or cartridges fail despite tight trim, persistent leaks, low flow, or temperature control issues indicate valve replacement.
Preparing the Workspace Without an Access Panel
When no access panel exists, the technician first locates the valve by tracing the faucet lines from visible fittings, tapping the wall to listen for cavity changes, and measuring from known pipe runs in adjacent rooms.
They then weigh temporary access options—carefully cutting a small drywall opening for direct reach versus working through the faucet opening with specialty tools—choosing the method that minimizes damage.
Before any work begins, the tub, surrounding walls, and nearby fixtures are protected with drop cloths, painter’s tape, and foam padding to prevent scratches and water intrusion.
How to locate the valve behind the wall using indirect methods
Begin by gathering clues from the tub area and nearby fixtures to infer the valve location behind the wall.
Measure distances from the faucet, spout centerline, and overflow.
Trace visible pipe routes in basements or crawlspaces.
Listen for water flow when taps operate.
Use a stud finder with metal detection or a small inspection camera inserted via grout or overflow openings to confirm approximate valve placement.
Options for temporary access: cutting access vs. working through the faucet opening
Decide whether to create a temporary access opening or to work through the existing faucet/overflow openings by weighing visibility, control, and risk to surrounding finishes.
Cutting a small drywall or tile access yields direct sight and tool clearance but requires patching.
Working through the faucet or overflow minimizes demolition and finish repair but limits hand movement, visibility, and tool options; choose based on skill and urgency.
Protecting tub, walls, and surrounding fixtures
If the homeowner opts to work through the faucet or overflow rather than cutting an access panel, extra care must be taken to shield the tub, walls, and nearby fixtures from scratches, chips, and debris.
Lay down adhesive-backed protective film over surfaces, cover hardware with soft cloths, and use magnetic trays for small parts.
Keep a shop vacuum and damp rags handy to collect debris immediately.
Step-by-Step: Replacing the Trim and Cartridge Without Opening the Wall
First, the water supply is shut off and the absence of flow is confirmed.
Next, the handle, escutcheon, and trim are removed so the cartridge or stem assembly can be inspected and extracted.
Finally, a replacement cartridge or stems are installed, the trim is reassembled, and the fixture is tested and adjusted for leaks.
Step 1 Shut off water and verify
Shut off the water supply to the tub at the house shutoff or the local shutoff valves, then confirm the supply is off by opening the tub spout and the faucet handles until no water flows.
Inspect the area for secondary shutoffs and shut them. Drain remaining water by holding handles open.
Wear eye protection and place towels to catch residual drips before proceeding.
Step 2 Remove handle, escutcheon, and trim
Begin by removing the handle assembly to access the escutcheon and trim. The technician loosens set screws or removes decorative caps, then lifts the handle off.
Next, screws securing the escutcheon plate are removed and the plate is gently pried away. Trim pieces and any gaskets are detached and set aside, keeping fasteners organized for reinstallation.
Step 3 Inspect and remove cartridge or stem assembly
With the handle and escutcheon removed, the technician inspects the cartridge or stem assembly for mineral buildup, corrosion, or visible damage and notes the model or markings for a matching replacement.
Then the technician loosens retaining clips or nuts, extracts the cartridge or stem straight out, and clears debris from the housing.
Any stuck parts are gently rocked and withdrawn with minimal force to avoid bore damage.
Step 4 Install replacement cartridge or stems
Carefully align the new cartridge or stem with the valve bore, matching any tabs, flats, or keyed features to the corresponding slots in the housing before insertion.
Push the unit straight in until it seats fully, ensuring O-rings or seals remain lubricated and undistorted.
Secure retaining clips or nuts to manufacturer torque specs.
Confirm smooth rotation or movement of the stem without forcing.
Step 5 Reassemble trim, test for leaks, and adjust
After the cartridge or stems are seated and retaining hardware tightened to specification, the trim plate, escutcheon, and handle can be reinstalled in reverse order of removal.
Tighten decorative screws snugly, restore trim caps, and operate handles slowly.
Check for leaks at connections and cartridge seals.
Adjust handle alignment and stop screws.
Recheck after several cycles and correct any persistent drips before finishing.
Step-by-Step: Gaining Access and Replacing the Valve When Behind-the-Wall Work Is Required
When the valve sits behind the wall, the technician first determines the ideal location for an access panel or cut opening to reach the rough‑in.
Next, they cut a clean opening in drywall or tile, remove and replace the valve assembly or rough‑in unit, and reconnect supply lines using solder or compression fittings as appropriate.
Finally, they pressure‑test the connections, restore and finish the wall, and install a removable access panel for future service.
Step 1 Decide where to create an access panel or cut an opening
Identify the most practical location for an access panel or opening by mapping the valve position, surrounding studs, and any existing tile or trim that must remain intact.
Consider access angle, proximity to floor joists, and plumbing chase locations. Choose a spot minimizing visible patching and avoiding electrical wiring.
Mark stud centers and tile grout lines to align the panel for easier framing and future maintenance.
Step 2 Methods for cutting a clean access opening in drywall or tile
Begin by evaluating the surface material and surrounding geometry to choose the appropriate cutting method and tools.
Drywall, ceramic tile, and cement backer board each require different blades, bits, and cutting techniques to produce a clean, repairable opening.
Mark a rectangular outline between studs, score tile grout lines, use diamond or carbide blades for tile, and a drywall saw or oscillating multi-tool for drywall.
Step 3 Removing and replacing the valve assembly or rough-in unit
Gaining access to the valve assembly requires careful removal of the trim and surrounding wall material to prevent damage to finished surfaces and to the plumbing.
Once exposed, shut off water and verify isolation. Remove retaining clips, screws, and cartridge or cartridge sleeve, noting orientation and retaining parts.
Install the new rough‑in unit, secure with manufacturer hardware, and verify smooth operation before restoring the wall.
Step 4 Reconnecting supply lines and soldering vs. compression fittings
Reconnect the supply lines carefully, ensuring the new valve is properly oriented and all connections are clean and free of debris before making the final joints.
Choose soldering for permanent copper joints where heat access is safe; flux, heat evenly, and avoid damaging nearby materials.
Use compression fittings for quicker, no-heat installs or mixed materials, tightening to manufacturer torque and checking alignment before full system pressurization.
Step 5 Pressure testing, restoring wall, and finishing the access panel
With the supply lines secured and fittings made, the next step is to pressure test the assembly before closing the wall to confirm there are no leaks and that the valve operates correctly.
Apply water pressure per manufacturer specs, inspect joints for seepage, and exercise the valve.
Dry the cavity, repair drywall or access panel framing, mud, sand, paint, and reinstall or finish the access panel for future service.
Repair Options When Replacement Isn’t Feasible
When full replacement is impractical, homeowners may pursue targeted repairs to restore function.
Common fixes include applying sealants, epoxy, or plumber’s putty to stop leaks, replacing worn O-rings and seals via trim access, and installing repair cartridges or universal stems to refresh internal valve components.
These options can extend service life without major demolition.
Repairing leaks with sealants, epoxy, and plumber’s putty
Evaluating small leaks with sealants, epoxy, or plumber’s putty can extend a garden tub faucet’s service life without full replacement.
Choose a product rated for potable water and submerged use. Clean and dry surfaces thoroughly, apply sparingly to cracks or loose joints, cure per manufacturer instructions, and test under low pressure.
Monitor repairs; retreat or pursue access-based repairs if leaks recur.
Replacing only worn O-rings and seals through trim access
Accessing worn O-rings and seals through the trim plate offers a targeted repair that can stop leaks and restore smooth operation without removing the entire faucet assembly.
Technicians remove handles and escutcheon, inspect seals, lubricate and replace degraded O-rings with correct sizes, and seat new seals properly. This conserves time and parts when valve bodies remain sound, resolving common drip and stiffness issues.
Using repair cartridges and universal stems
Consider installing a repair cartridge or universal stem as a practical alternative when full faucet replacement is impractical or unnecessary.
Technicians can remove trim, document orientation, and extract the old stem or cartridge. Match dimensions and inlet types, then install the new unit with proper seals and retaining clips.
Test for leaks and smooth operation; cartridges often restore function without behind-wall access.
Preventing Future Problems and Maintaining a Garden Tub Faucet
Routine care keeps a garden tub faucet functioning and extends its lifespan, so a concise maintenance checklist is essential.
Guidance on winterizing, preventing mineral buildup, and simple cleaning techniques helps avoid common failures.
Clear signs that professional plumbing is needed should be identified to prevent small issues from becoming major repairs.
Regular maintenance checklist
A straightforward maintenance checklist helps keep a garden tub faucet functioning reliably and prevents small issues from becoming costly repairs.
Routine inspections, timely seal replacements, and prompt leak responses extend faucet life. Recommendations focus on simple, periodic tasks to monitor performance and prevent deterioration.
- Inspect for leaks and drips monthly.
- Tighten fittings as needed.
- Replace worn washers/Cartridges yearly.
- Clean aerators and surfaces.
How to winterize and prevent mineral buildup
Prepare the garden tub faucet for cold months and hard water by draining exposed lines, insulating vulnerable parts, and using targeted descaling methods to prevent mineral buildup.
Flush lines, remove and soak aerators and removable trim in vinegar or mild descaler, and apply silicone insulation or foam to fittings.
Schedule quarterly inspections, promptly replace worn washers or cartridges, and maintain moderate water heater temperatures to reduce scaling.
When to call a professional plumber
After flushing lines and addressing mineral buildup, some issues exceed homeowner skills and require a licensed plumber.
Call a professional when leaks persist despite seal replacement, when corrosion compromises valve bodies, when water damage or mold is evident behind walls, when plumbing access or structural modifications are needed, or when irregular water pressure and noisy pipes resist basic troubleshooting.
Licensed assessment prevents costly mistakes.
Troubleshooting Common Issues After Replacement
After replacement, common post-installation problems can be systematically checked to identify low water pressure causes and fixes.
Stepwise diagnostics help trace drips and slow leaks from cartridge seats, supply connections, or worn seals.
Pipe noise such as banging or vibration is addressed by checking water hammer arrestors, securing loose pipes, and correcting high flow or air entrapment.
Low water pressure causes and fixes
Diagnose low water pressure by checking common causes such as partially closed shutoff valves, clogged aerators or cartridge passages, and supply line restrictions. Each source requires a specific fix—fully open valves, clean or replace aerators and cartridges, or clear/replace obstructed supply lines—to restore proper flow.
Verify municipal supply issues, inspect in-line shutoffs and flexible hoses for kinks, and test hot and cold separately to isolate the problem.
Drips and slow leaks stepwise diagnostics
Begin by isolating the source of any persistent drip or slow leak around the newly installed garden tub faucet.
Methodically checking seals, connections, and valve components in a specific order so the exact failure point can be identified without unnecessary disassembly.
Inspect external escutcheon and spout O-rings.
Tighten supply nuts.
Test cartridge/seat for wear.
Apply plumber’s grease or replace worn parts, then retest under pressure.
Noisy pipes, banging, or vibration solutions
Check the plumbing for loose straps, worn washers, or unsecured lines that allow movement and transmit water hammer or vibration; tight mounting, replacing degraded clamps or valve seats, and installing arrestors or cushioning sleeves typically stop banging and reduce noise without major rework.
Verify supply shutoff and operate taps to locate source; secure piping, add air chambers or arrestors, and replace faulty cartridges or washers to eliminate resonance.
Access Panel Alternatives and Finishing Options
The homeowner should consider removable decorative access panels as a practical and attractive way to reach valves and fittings without disturbing surrounding finishes.
For tiled or fully finished walls, concealed access solutions—such as recessed frames or magnetic tile-access plates—provide maintenance access while preserving the surface appearance.
A brief comparison of costs and materials for these methods helps decide between budget-friendly plastic panels, metal frames, or custom tile-matching options.
Installing a removable decorative access panel
When access to the tub’s plumbing must be both functional and unobtrusive, installing a removable decorative access panel provides a clean solution that preserves the bathroom’s aesthetics while allowing easy maintenance.
Prefabricated or custom panels fit openings, secure with magnetic catches or recessed screws, and match trim or tile.
Verify panel dimensions allow tool access, seal edges against moisture, and choose durable, water-resistant finishes.
Concealed access solutions for tile and finished walls
Several discreet options exist for providing concealed access behind tile and finished walls without disrupting a bathroom’s visual continuity.
Recessed magnetic panels, hinged tiles with invisible clips, and removable grout blocks allow serviceability while preserving aesthetics.
Flush access doors painted or tiled to match surroundings minimize sightlines.
Installation prioritizes secure fastening and waterproof seams so repairs remain accessible without permanent demolition.
Costs and materials comparison for access methods
How much does discreet access actually cost depends on chosen materials, installation complexity, and finish integration. Comparison focuses on panel types, labor, durability, and concealment. Budget-friendly options use removable drywall or magnetic panels; premium choices use framed tile-access doors or custom cabinetry. Selection balances cost, appearance, and repair ease.
| Option | Typical cost |
|---|---|
| Magnetic panel | Low |
| Drywall hatch | Low |
| Tile door | Medium |
| Custom cabinet | High |
Conclusion
Careful planning, correct identification, and safe techniques allow a garden tub faucet to be replaced without an access panel; careful planning prevents surprises, careful identification avoids incompatible parts, and careful technique protects finishes. When behind‑the‑wall work proves necessary, safe access methods restore function; when replacement is impractical, thoughtful repairs extend service. Consistent maintenance prevents recurrence, consistent inspection catches wear early, and consistent documentation simplifies future work—prioritizing caution, competence, and clarity throughout.