How to Clean Ceiling Around Vents: Step-by-Step Tips for Dust, Stains, and Mold
To effectively clean the ceiling around vents and eliminate dust, stains, and mold, begin by turning off the HVAC system and opening windows for ventilation. Use a sturdy ladder and have a spotter for safety. Equip yourself with gloves and an N95 mask. Start by vacuuming the area and vent grille using a soft brush attachment. Next, dry-dust the ceiling with a microfiber duster. For painted ceilings, use a mixture of mild dish soap or diluted vinegar to wet-clean tougher residues. If you encounter mold, treat it with EPA-approved products or a diluted bleach solution, then rinse and dry thoroughly. Finally, check your filters and humidity controls to prevent future issues. The following steps will guide you through addressing various stain types and implementing long-term maintenance solutions.
Overview of Cleaning Ceilings Around Vents
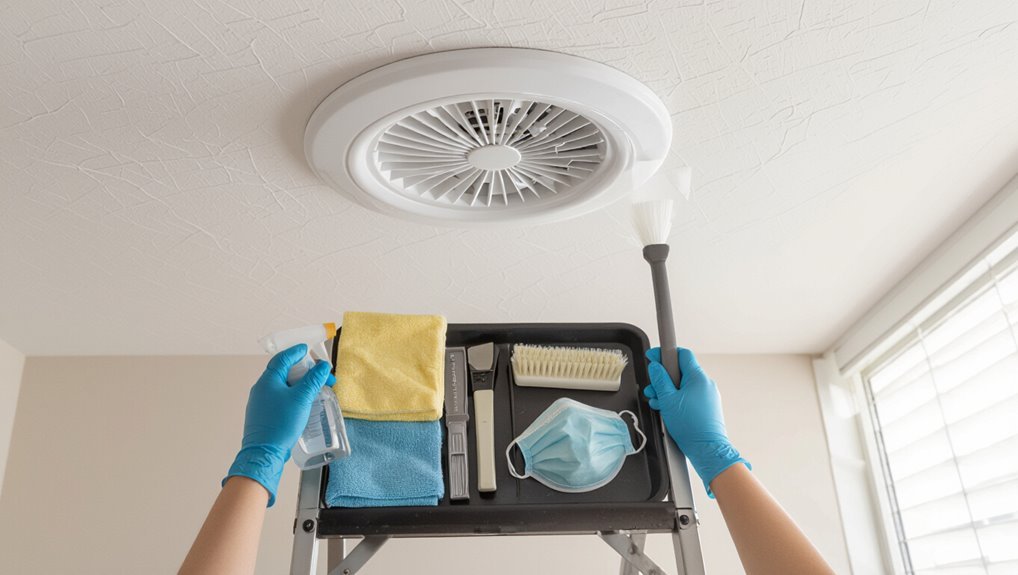
Airflow and trapped dust from vents often leave nearby ceiling areas dusty, discolored, or prone to mold when moisture is present.
Regular inspection—typically every few months or sooner in high-use or humid spaces—helps determine when cleaning or maintenance is needed.
Before beginning any work, the person should address safety: turn off power to nearby fixtures, use a stable ladder, and wear a mask and guarantee adequate ventilation.
Why ceiling areas around vents get dusty, stained, or moldy
Many ceilings near vents accumulate dust, stains, or mold because moving air carries particulates and moisture that settle on nearby surfaces. Causes include airflow depositing dust, humidity encouraging mold, and leaks causing stains. Guidance on how to clean ceiling around vents emphasizes targeted cleaning and moisture control.
| Cause | Effect | Prevention |
|---|---|---|
| Dust | Surface buildup | Filtering |
| Humidity | Mold growth | Ventilation |
| Leaks | Stains | Repair |
When to clean and how often to inspect vents and surrounding ceilings
Having covered why dust, humidity, and leaks concentrate around vents, attention turns to timing: establishing a simple inspection and cleaning schedule helps prevent buildup and detect problems early.
Inspect vents and surrounding ceilings monthly for visible dust, discoloration, or dampness; deep clean or dust registers every three months; perform a thorough check and treat stains or mold seasonally, and after any plumbing or HVAC work.
Safety considerations before you start (electrical, ladder, masks, ventilation)
Before beginning any cleaning around vents, prioritize safety by addressing electrical, fall, respiratory, and ventilation risks: Inspect wiring and turn power off, use a sturdy ladder with spotter, wear N95 or P100 mask and gloves, and guarantee cross-ventilation. Use gentle cleaners to avoid fumes and test small areas first.
| Hazard | Precaution | Notes |
|---|---|---|
| Electrical | Cut power | Verify with tester |
| Falls | Stable ladder | Have helper |
| Respiratory | N95 mask | Replace if damp |
| Ventilation | Open windows | Use fan |
| Chemicals | Low-VOC cleaner | Patch test first |
Quick Checklist: Tools and Materials Needed
A concise checklist helps guarantee the ceiling around vents is cleaned safely and effectively.
Essential items include cleaning tools and equipment, appropriate cleaning solutions and stain treatments, and personal protective equipment with clear precautions.
Confirming these supplies before starting minimizes interruptions and safety risks.
Cleaning tools and equipment
Gathering the right tools guarantees the ceiling around vents is cleaned safely and effectively.
Essential equipment includes a sturdy ladder, soft-bristled brush, microfiber cloths, and a vacuum with brush attachment.
Protective gear—gloves, safety glasses, and a dust mask—reduces exposure. A lightweight extension pole eases reach.
- Ladder for stability
- Protective gear for safety
- Vacuum and brushes for dust removal
Cleaning solutions and stains treatments
Select cleaning solutions based on ceiling material and stain type to avoid damage and guarantee effective removal.
Use mild detergent for general dirt, hydrogen peroxide or enzymatic cleaners for organic stains, and diluted bleach for stubborn mold on nonporous surfaces.
Test a small area first. Prefer nonabrasive application methods to protect finish and paint.
- Relief: quick visible improvement
- Confidence: safe choices
- Calm: predictable results
Personal protective equipment and precautions
Several essential items and precautions guarantee safe ceiling cleaning around vents: disposable gloves, eye protection, an N95 or P100 respirator for dust and mold, a step ladder with a spotter if possible, drop cloths to protect floors and furnishings, and appropriate cleaning solutions matched to the ceiling material.
Protective clothing, ventilation, and pretesting cleaners prevent damage and exposure.
- Wear gear consistently.
- Secure ladder.
- Ventilate area.
Prepare the Area and Vent Before Cleaning
Before cleaning, the power to the HVAC or exhaust fan should be shut off at the thermostat or circuit breaker to prevent accidents.
Furniture and flooring beneath the work area must be covered or moved to protect surfaces from dust and debris.
If the grille is removable, it should be unscrewed or gently popped off and placed on a drop cloth; if not, it can be taped or masked to keep dust contained.
How to turn off HVAC or fan power safely
Shut off the HVAC system or exhaust fan at the thermostat or dedicated switch to prevent the unit from starting while work is underway.
Confirm power off by attempting to run the fan briefly. If unsure, switch the appropriate breaker in the electrical panel and label it.
Use a noncontact voltage tester on accessible fan wiring before touching components.
Re-enable power only after cleaning is complete.
Protecting furniture and flooring
A few protective layers should be placed beneath and around the work area to catch dust and debris and prevent cleaning solutions from staining upholstery or flooring.
Furniture should be moved or tightly covered with lightweight drop cloths; tape edges to avoid slips.
Use plastic sheeting or contractor-grade paper on floors, weighted at corners.
Keep pathways clear for safe ladder placement and waste removal.
Removing or covering the vent grille (when and how)
Loosen or remove the vent grille when feasible to allow thorough cleaning of both the cover and the surrounding ceiling. If removal is impractical, secure a protective covering over the opening to prevent debris from entering the ductwork.
Use a screwdriver or drill for screws, gently pry snap-fit models, label fasteners, and set the grille on a protected surface.
Replace or seal it tightly after cleaning.
Step-by-Step Cleaning for Dust and Light Dirt
The section outlines practical steps for removing dust and light grime from ceilings and vent grilles.
It compares dry dusting with a microfiber duster, vacuuming attachments for vents and adjacent ceiling areas, and a gentle wet-cleaning method safe for painted surfaces.
Each technique emphasizes appropriate tools and motions to avoid surface damage.
Dry dusting method for ceilings and vent grilles
Begin by gathering a microfiber duster with an extendable handle and a soft-bristle brush attachment to reach ceilings and vent grilles without touching delicate surfaces.
Work in overlapping strokes from the grille outward, dislodging loose dust. Rotate the grille cover if removable and dust both sides.
Afterward, gently tap the duster into a trash bag outdoors to avoid resettling particles.
Vacuuming techniques for vents and surrounding ceiling
Switch to a vacuum with a soft brush attachment to remove settled dust and light debris from vent grilles and the surrounding ceiling without spreading particles.
Work in gentle, overlapping strokes, holding the hose steady. Use extension wands for reach, stabilizing a ladder.
Empty the canister or replace the bag promptly. Inspect for remaining dust, repeating carefully to avoid paint abrasion or dislodging fragile fixtures.
Wet cleaning method for painted ceilings without damage
After removing loose dust with a soft-brush vacuum, proceed to wet cleaning for painted ceilings to handle remaining grime without harming finish.
Mix mild dish soap with warm water, dampen a microfiber cloth or sponge, and wring thoroughly. Test an inconspicuous spot first.
Gently wipe in small sections, rinse the cloth frequently, and dry immediately with a clean towel to prevent streaks.
Removing Stubborn Stains and Grease
The guide distinguishes common stain types—smoke, cooking grease, and water marks—to choose appropriate treatments.
It recommends safe-cleaning solutions in a specific application order, starting with mild detergents and progressing to targeted cleaners only if needed.
Practical lifting techniques are described to remove blemishes while minimizing the need for repainting.
Identifying stain types (smoke, cooking grease, water marks)
Begin by visually and tactically evaluating stains around vents to determine whether they are caused by smoke, cooking grease, or water:
smoke yields thin, yellow-brown film with faint odor; cooking grease appears sticky, darker, often radiating from kitchen vents; water marks show irregular brownish rings, possible texture changes, and may coincide with dampness or peeling paint.
Note location and pattern for diagnosis.
Safe stain-removal solutions and application order
Start with the gentlest cleaners and progress to stronger agents only as needed; mild dish soap and warm water remove most cooking grease and light smoke residue, while diluted white vinegar or a low-strength all-purpose cleaner handles tougher films.
For stubborn grease, test first, work outward from the stain, then consider an oxygen-based cleaner sparingly.
- Cautious
- Resolute
- Relieved
Techniques for lifting stains without repainting
After trying mild soap, vinegar, and an oxygen-based cleaner as suggested, attention turns to targeted methods for lifting stubborn stains and grease without repainting.
Enzyme degreasers, diluted trisodium phosphate alternatives, or a bleach spot treatment (for nonporous painted surfaces) can break oils and organic stains.
Apply sparingly, blot—don’t scrub—rinse, and test hidden areas first to avoid finish damage.
Treating and Removing Mold and Mildew
A clear distinction between harmless discoloration and active mold is made by noting texture, spread pattern, and musty odor.
Recommended remedies include safe cleaning solutions with specific concentration guidelines, step-by-step scrubbing, disinfecting, and thorough drying to prevent recurrence.
Professional remediation is advised for extensive growth, porous-material infestation, or persistent respiratory symptoms.
How to identify mold vs. harmless discoloration
When dark spots appear around vents, distinguishing harmless stains from active mold is essential for safety and proper remediation. Visual cues (fuzzy texture, musty odor), moisture history, and spread speed guide assessment. If uncertain, document and consult a professional.
| Sign | Mold | Stain/Discoloration |
|---|---|---|
| Texture | Fuzzy | Flat |
| Odor | Musty | None |
| Spread | Rapid | Stable |
| Moisture link | Yes | Often no |
| Color range | Dark/green/black | Yellow/brown |
Safe mold removal solutions and concentration guidelines
Begin by selecting EPA-registered products or common household agents known to be effective against mold—such as diluted bleach, hydrogen peroxide, or distilled white vinegar—and prepare solutions at concentrations recommended for surface disinfection to guarantee efficacy while minimizing material damage and health risks.
Consider ventilation, PPE, and spot testing to prevent harm.
Steps for scrubbing, disinfecting, and drying mold-affected areas
Start by donning appropriate PPE—gloves, safety goggles, and an N95 respirator—and ensuring the room is well ventilated before touching any mold-affected surfaces.
Gently scrub with a soft brush and a mild detergent solution, rinse, then apply an approved disinfectant per label instructions.
Allow surfaces to air-dry fully or use fans/dehumidifiers to reduce moisture and prevent mold recurrence.
When to call a professional for mold remediation
If mold covers more than a small area, recurs despite proper cleaning, or is accompanied by persistent musty odors, a professional remediation specialist should be contacted.
Professionals assess extent, identify hidden growth, test for hazardous species, and recommend containment, removal, and repairs.
Call for mold after water damage, repeated ceiling leaks, visible black mold, or when occupants experience respiratory symptoms or weakened immune responses.
Reinstalling and Cleaning Vent Components
Attention turns next to the vent hardware, where grilles and filters should be inspected for cleaning or replacement to restore proper function.
After parts are cleaned or new components installed, vents are reassembled and HVAC airflow is tested to confirm even distribution.
Practical tips for improving airflow—such as straightening bent fins, clearing obstructions, and upgrading to higher-quality filters—help reduce future buildup.
How to clean or replace vent grilles and filters
Remove and inspect vent grilles and filters before cleaning to determine whether they require simple washing or full replacement.
Wash metal or plastic grilles in warm, soapy water; scrub crevices with a soft brush, rinse, and air dry.
Replace disposable or heavily soiled filters. For reusable filters, vacuum both sides before washing.
Reinstall only when components are completely dry and intact.
Reassembling vents and testing HVAC airflow
With grilles and filters clean and fully dry, the next step is to reassemble the vent components and verify airflow to confirm the system functions correctly.
Reinstall the filter and grille securely, aligning screw holes and seals. Restore any clips, then power the HVAC briefly at different settings.
Observe airflow, listen for unusual noises, and check for rattles or leaks before completing the job.
Tips for improving vent airflow to reduce future buildup
Optimize airflow by addressing both the vent hardware and the surrounding ductwork: guarantee grilles sit flush and seals are intact, replace damaged or undersized filters with higher-efficiency versions rated for the system, and straighten or secure loose duct connections to prevent leaks.
Balance dampers and adjust register direction for even distribution, clean fan blades and coils, and schedule periodic professional duct inspections.
Preventive Measures to Keep Ceilings Clean
Routine preventive steps can greatly reduce ceiling grime around vents, including a consistent maintenance schedule for vents and ceiling inspections.
Choosing appropriate HVAC filters and replacing them on a set timetable, controlling indoor humidity and improving ventilation, and using kitchen and bathroom exhausts correctly all limit dust, grease, and moisture buildup.
Implementing these measures minimizes cleaning frequency and preserves ceiling finishes.
Regular maintenance schedule for vents and ceilings
A consistent maintenance schedule for vents and ceilings reduces dust buildup, prevents stains, and extends the life of HVAC components.
Monthly visual inspections, quarterly light cleanings of grilles and surrounding ceiling areas, and semiannual deeper cleanings and moisture checks provide practical intervals.
Record findings, note recurring issues, and schedule prompt spot-cleaning after spills or leaks to prevent staining and mold development.
HVAC filter selection and replacement frequency
Selecting the correct HVAC filter and replacing it on a consistent schedule greatly reduces airborne dust and particulates that can settle on ceilings around vents.
Choose filters rated MERV 8–13 for residential systems balancing filtration and airflow.
Replace disposable filters every 1–3 months based on occupancy, pets, and season.
Reusable filters require monthly inspection and cleaning to maintain performance and prevent ceiling dust accumulation.
Humidity control and ventilation improvements
How can controlling humidity and improving ventilation prevent ceiling staining and dust buildup around vents? Proper humidity limits mold, reduces dust clinging, and improves air circulation. Strategies include exhaust fans, dehumidifiers, and balanced HVAC ventilation. Regular checks and simple upgrades maintain airflow and prevent condensation.
| Measure | Benefit | Frequency |
|---|---|---|
| Dehumidifier | Reduces moisture | As needed |
| Exhaust fans | Expels humid air | During use |
| Vent balancing | Improves flow | Annually |
Kitchen and bathroom vent use habits to reduce grease and moisture
After addressing humidity control and balanced ventilation, attention turns to everyday vent use habits in kitchens and bathrooms that limit grease and moisture buildup on ceilings.
Occupants should run exhaust fans during and 10–15 minutes after cooking or showering, keep fan grilles clean, use lids and lower heat to reduce airborne grease, and guarantee ducts vent outdoors.
Regular habits cut staining and mold risk.
Troubleshooting Common Problems
When problems persist after cleaning, identifying the underlying cause is essential.
Common issues include stains that resist removal, mold that returns shortly after treatment, and paint or texture damage caused by cleaning methods.
The following section outlines likely causes and targeted remedies for each problem.
Persistent stains that won’t come out
Persistent stains that resist standard cleaning often indicate deep-set residue, paint discoloration, or water damage rather than surface dirt.
The guide recommends evaluating stain depth, testing a small area with targeted cleaners (oxygen bleach or trisodium phosphate alternatives), and gently abrading if safe.
If discoloration persists, consider priming with a stain-blocking primer and repainting.
Investigate and repair any underlying leaks before finishing.
Recurring mold despite cleaning
If mold keeps returning around vents despite thorough cleaning, it usually signals an ongoing moisture or ventilation problem rather than ineffective cleaners. Investigate leaks, improve airflow, and use a dehumidifier. Address hidden condensation and duct issues; consider professional inspection for persistent growth. Monitor humidity and recheck vents regularly.
| Cause | Check | Fix |
|---|---|---|
| Leak | Inspect roof/ducts | Repair |
| Condensation | Measure humidity | Ventilate |
| Blocked air | Visual check | Clean ducts |
| Mold source | Professional | Remediate |
Paint peeling or texture damage after cleaning
Scrape away loose paint and surface texture damage around vents before proceeding with further cleaning or repairs, since aggressive cleaning, moisture exposure, or improper cleaning agents often weaken paint and underlying drywall or plaster.
After scraping, sand edges smooth, apply a stain-blocking primer, then match texture with joint compound or spray texture.
Finish with appropriate ceiling paint and guarantee ventilation to prevent recurrence.
When to Repaint, Retexture, or Replace Ceiling Material
When stains, persistent odors, or structural damage persist after cleaning, it may be time to evaluate repainting, retexturing, or replacing the ceiling material.
Selecting mold-resistant primers and paints can prevent future problems around vents and improve durability.
For significant damage or uncertain repairs, a qualified professional should be consulted for safe assessment and replacement.
Assessing when cleaning is no longer sufficient
Although routine cleaning removes surface dust and discoloration, there comes a point when stains, texture damage, or recurring moisture indicate that cosmetic measures are inadequate.
At that stage, evaluate structural integrity, persistent mold growth, and water stains penetrating drywall or plaster.
If repairs are frequent, textures are flaking, or vent leaks recur, consider repainting with repair, retexturing, or full replacement based on extent and budget.
Choosing mold-resistant paint and primers
Select mold-resistant primers and paints that match the ceiling material and anticipated moisture exposure, since product formulation and application determine long-term protection. Choose mildew-resistant acrylic primers for drywall, and elastomeric or mold-inhibiting latex for textured or high-humidity areas. Guarantee proper surface prep and coverage; follow manufacturer cure times to maximize resistance.
| Surface | Recommended type |
|---|---|
| Drywall | Mildew-resistant acrylic |
| Textured/High humidity | Elastomeric/mold-inhibiting latex |
Hiring professionals for ceiling repairs or replacement
Assess the scope of damage and the homeowner’s comfort with DIY work before deciding to hire a professional for ceiling repairs or replacement.
Minor cosmetic issues like isolated stains or small cracks often only require spot repairs and repainting, while extensive water damage, sagging, widespread mold, or compromised structural components warrant contractor assessment.
- Fear: unseen rot demands urgent help.
- Relief: pros restore safety and appearance.
- Confidence: warranty and insurance support peace of mind.
Conclusion
In the grand theater of household heroics, one learns that ceiling grime around vents is less a crisis than a character flaw—admit it, neglect won’t clean itself. Armed with a rag, ladder, and dubious optimism, the homeowner stages a brief, noble assault on dust, stains, and mold. Victory is measured in cleaner paint and bruised pride. Prevention becomes the sequel: less drama, more maintenance, and fewer excuses for future domestic tragedy.