
How to Clean a Gas Heater Pilot Light Safely: Step-by-Step Guide
To clean a gas heater pilot light safely, follow these steps: First, ensure your safety by shutting off the gas and power, ventilating the area, and wearing eye and heat protection. Next, access the pilot assembly and inspect it for soot or corrosion. Use compressed air, a soft brush, and a fine pick to gently clear the orifice and tube. If necessary, clean or replace the thermocouple or flame sensor. Reassemble everything securely, then test for gas leaks using soapy water. Finally, relight the pilot to verify a steady blue flame. For detailed instructions and safety checks, continue reading.
How to Clean a Gas Heater Pilot Light Safely: Quick Overview
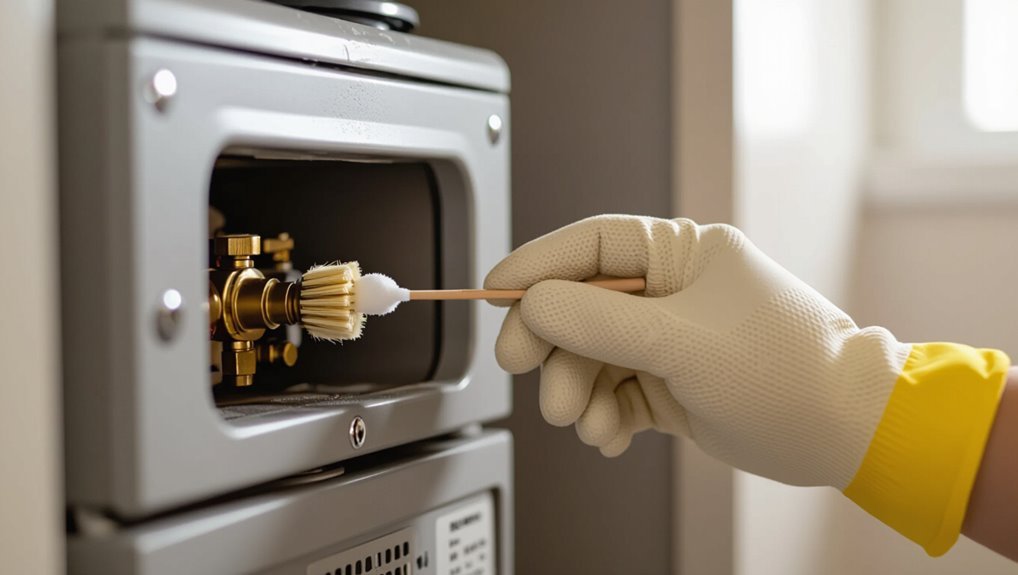
This quick overview summarizes the steps for cleaning a gas heater pilot light, the estimated time and difficulty, and who should attempt the task.
It notes that the procedure is suitable for competent DIYers with basic mechanical skills and comfort working near gas appliances, while recommending a professional for anyone uncertain or without proper qualifications.
Estimated time is typically 20–45 minutes depending on access and model, with a low-to-moderate difficulty.
What this guide covers and who should follow it
Who should read this guide and what will it do for them?
This guide explains how to clean gas heater pilot light components safely, outlining necessary steps, common issues, tools, and safety precautions.
It is aimed at competent homeowners and maintenance personnel seeking clear, practical instruction for routine pilot light cleaning.
Professional intervention suggestions are included for complex or unsafe situations.
Estimated time, difficulty level, and required qualifications
When performed as a routine maintenance task, cleaning a gas heater pilot light typically takes 20–45 minutes, depends on access and the extent of buildup, and requires only basic mechanical aptitude and comfort with gas appliances.
It is a low-to-moderate difficulty job for DIYers familiar with shutting off gas and using simple tools. Those unsure, or with gas leaks or complex systems, should hire a licensed technician.
Safety Precautions Before You Start
Before beginning, the technician should put on appropriate personal protective equipment and guarantee good ventilation to disperse any gas or fumes.
The gas supply must be shut off and electrical power isolated according to the heater’s instructions before accessing the pilot assembly.
If corrosion, damaged components, persistent gas odor, or uncertainty is encountered, work should stop and a qualified professional contacted.
Personal protective equipment to wear
At minimum, wear safety goggles, heat-resistant gloves, and a long-sleeved shirt to protect eyes, hands, and arms from sparks, hot components, and accidental flare-ups.
Additionally, use closed-toe shoes, a dust mask or respirator rated for particulate and fumes, and hearing protection if noisy tools are used.
Remove loose jewelry and secure long hair before starting maintenance.
Ventilation, gas shutoff, and electrical isolation steps
How should ventilation, gas shutoff, and electrical isolation be handled to guarantee safety?
Make sure the room is well ventilated by opening windows and using fans to disperse gas.
Locate and turn off the heater’s gas supply valve.
Disconnect electrical power at the breaker or unplug the unit.
Verify no gas odor remains and confirm power is off before proceeding with pilot cleaning.
When to stop and call a professional
Recognize warning signs that require a professional: persistent gas odor, damaged or corroded pilot assembly, repeated pilot outages despite proper cleaning, visible gas leaks, unexplained soot or carbon buildup, or any electrical faults.
If these appear, stop work immediately, evacuate if necessary, shut off the gas at the main, ventilate, and contact a licensed technician.
Do not attempt repairs beyond basic cleaning.
Tools and Materials Needed
A concise list of essential tools and materials is provided to complete pilot light cleaning safely and effectively.
Recommended items include a soft brush, compressed air or a can of compressed gas, a screwdriver set, and a flashlight.
Optional tools and replacement parts to have on hand—such as a needle, replacement thermocouple, and plumber’s tape—are noted for troubleshooting or minor repairs.
Essential tools list
Gathering the right tools before beginning guarantees the pilot cleaning task is safe and efficient. The technician assembles compact, reliable items to access, clean, and test the pilot without improvisation.
- Screwdriver set (flat and Phillips)
- Needle-nose pliers
- Soft-bristle brush
- Compressed air canister
- Gas leak detector solution
These essentials prioritize safety, accessibility, and accurate inspection.
Optional tools and replacement parts to have on hand
Keep a small selection of optional tools and replacement parts on hand to streamline troubleshooting and reduce downtime if the pilot assembly requires more than basic cleaning.
Useful extras include items for diagnosis and safe swapping of worn parts:
- Multimeter for thermocouple checks
- Spare thermocouple
- Replacement pilot orifice
- High-temp silicone grease
- Small needle files for stubborn deposits
Basic Anatomy of a Gas Heater Pilot Light
The pilot assembly consists of the burner orifice, igniter, and thermocouple, each serving a specific role in creating and sensing the flame.
The igniter lights gas from the burner orifice while the thermocouple detects heat to keep the gas valve open.
Common failure points include a clogged orifice, a weak igniter, or a faulty thermocouple that prevents sustained operation.
Components: pilot assembly, thermocouple, burner orifice, igniter
A gas heater’s pilot assembly houses the small, continuously burning flame and the parts that control it: the thermocouple (a safety sensor), the burner orifice (which meters gas to the pilot), and the igniter (which lights the gas).
The thermocouple senses heat and permits gas flow; the orifice guarantees correct gas volume; the igniter provides sparks or a hot surface to establish the flame.
How the pilot light system works and common failure points
Functioning as the control hub for continuous ignition, the pilot light system directs gas to a small, steady flame while monitoring its presence and enabling the main burner to operate safely.
Gas flows through a pilot orifice; a thermocouple senses heat and keeps the valve open.
Common failures include clogged orifices, corroded thermocouples, loose connections, and weak ignition causing intermittent or no flame.
Step-by-Step Pilot Light Cleaning Procedure
Before beginning, the technician shuts off the gas supply and electrical power to guarantee safety.
Next, access is gained to the pilot assembly and any protective covers so the area can be inspected for soot, debris, or corrosion.
The procedure then proceeds to clean the pilot orifice and tube and to inspect or clean the thermocouple and flame sensor as needed.
Step 1 Turn off the gas and power
Turn off the heater’s gas supply and cut electrical power to eliminate ignition sources and prevent accidental startup.
Confirm valve is fully closed and switch breaker or power switch is off. Allow the unit to cool several minutes.
Verify gas is off by checking nearby appliances for pilot outage or using a gas detector.
Keep matches, lighters, and flames well away during the procedure.
Step 2 Access the pilot assembly and protective covers
Locate and remove any access panels or protective covers to reach the pilot assembly, using the appropriate screwdriver or socket to avoid stripping fasteners.
Work methodically, keeping screws and clips organized. Note wiring, tubing, and component positions before loosening attachments.
Use a flashlight to confirm clear access. Avoid forcing metal panels; if resistance occurs, reassess fasteners to prevent damage.
Step 3 Visual inspection for soot, debris, or corrosion
A careful visual inspection of the pilot assembly should be performed to identify soot buildup, loose debris, or signs of corrosion that could impair ignition.
Check the pilot hood, thermocouple, and surrounding surfaces for discoloration, flaking metal, or foreign particles.
Note loose connections, warped components, or evidence of gas sooting.
Record findings before proceeding to cleaning or service.
Step 4 Cleaning the pilot orifice and pilot tube safely
Begin cleaning the pilot orifice and tube only after confirming the gas supply is shut off and the appliance is cool.
Then gather the correct small tools—compressed air, fine-gauge wire or orifice pick, soft brush, and a lint-free cloth.
Remove accessible debris with air and brush; gently clear the orifice with a pick without enlarging it.
Reinspect visually, wipe external surfaces, and reassemble.
Step 5 Cleaning or inspecting the thermocouple and flame sensor
With the pilot orifice and tube cleared and reassembled, attention shifts to the thermocouple and flame sensor—components that detect the pilot flame and allow the gas valve to remain open.
Inspect for soot, corrosion, or misalignment. Gently clean sensor tips with fine emery cloth or soft brush; avoid bending.
Replace any damaged parts. Verify proper positioning relative to the flame before testing ignition.
Step 6 Reassembling components and checking for leaks
Reconnect all components in the reverse order of disassembly, ensuring each fitting, clip, and screw is seated securely and the thermocouple and flame sensor retain their correct alignment.
Then prepare to test for gas tightness before restoring full operation. Tighten connections to manufacturer torque specs where provided.
Apply soapy water or an approved leak detector to joints, watch for bubbles, and correct any leaks immediately.
Step 7 Relighting the pilot and testing stable flame
Carefully relight the pilot following the manufacturer’s procedure, ensuring the gas supply is on and any control valves are set to the pilot position.
Use the appliance’s built-in igniter or a long-reach lighter as specified.
Observe the flame for steady blue color and minimal yellow tips.
Adjust thermocouple seating if needed, and confirm the pilot remains lit when control knob returns to the ON position.
Step 8 Final safety checks and monitoring after cleaning
After confirming the pilot burns steadily and the main control responds as expected, proceed to final safety checks and short-term monitoring to verify long-term reliability.
Inspect connections and venting for leaks or obstructions, tighten fittings, and guarantee flame color and height remain correct for 10–15 minutes.
Note unusual odors or noises, record observations, and advise professional inspection if any irregularities persist.
How to Identify and Fix Common Pilot Light Problems
Common pilot light issues include a weak or unstable flame, a pilot that will not stay lit, and signs of incomplete combustion such as soot, a yellow flame, or gas odor.
Causes range from blocked ports and airflow problems to a faulty thermocouple or restricted gas flow, each with specific diagnostic checks and fixes.
Addressing these symptoms promptly—cleaning orifice and pilot tube, testing/replacing the thermocouple, and correcting combustion or ventilation—restores safe operation.
Weak or unstable pilot flame: causes and fixes
A weak or flickering pilot flame indicates the heater is not getting consistent fuel or air, which can cause inefficient operation or safety shutdowns.
Causes include clogged pilot orifice, dirty burner ports, low gas pressure, or drafts.
Fixes: clean the orifice and ports with compressed air or soft brush, guarantee adequate ventilation, check for obstructions, and consult a qualified technician for pressure or regulator issues.
Pilot light that won’t stay lit: thermocouple and gas flow checks
When a pilot flame goes out shortly after lighting, the problem often lies beyond simple cleaning and airflow adjustments and points instead to thermocouple failure or interrupted gas supply.
Inspect the thermocouple for corrosion, loose connections, or misalignment; replace if weak.
Verify steady gas flow and valve position, check for clogged lines or regulators, and consult a qualified technician if flow or fittings appear compromised.
Sooting, yellow flame, or odor indicators and remedies
Several visible and olfactory signs—soot buildup, a yellow or flickering pilot flame, or a persistent gas smell—indicate incomplete combustion or fuel leakage and require prompt attention.
Technicians should shut off gas, ventilate, inspect burner ports, clean soot with a soft brush, and verify correct air-to-fuel mix.
Persistent yellow flame or odor warrants professional service and possible regulator, pilot or venting replacement to guarantee safety.
When Cleaning Is Not Enough: Repair and Replacement Guidance
When pilot cleaning does not restore reliable ignition, certain symptoms—such as frequent flame outages, visible damage, gas smell, or a continuously failing thermocouple—indicate the need for professional repair.
Common remedies include replacing the thermocouple, pilot assembly, or orifice, each of which has distinct installation requirements and safety checks.
Typical parts and labor can range from a modest DIY-cost for a thermocouple to higher professional fees and a few hours of service for full pilot assembly replacement.
Signs that require professional repair
How can one tell if a pilot light issue exceeds routine cleaning?
Persistent failure to light, frequent outages, unusual gas odors, visible flame irregularities (weak, yellow, or flickering), repeated need for relighting, or safety device trips indicate professional repair.
Also, corrosion, damaged controls, or suspected gas leaks demand immediate service by a licensed technician rather than further user attempts.
Replacing the thermocouple, pilot assembly, or orifice
If cleaning and basic troubleshooting do not restore reliable ignition, the problem often lies in worn components that must be replaced rather than cleaned.
Replacement steps should be methodical, safety-checked, and use correct parts. A technician or competent DIYer can replace:
- Thermocouple
- Pilot assembly
- Orifice
- Seals and fittings
- Mounting screws and brackets
Verify leak-free connections and test ignition before normal use.
Estimated costs and time for common replacements
Although component prices and labor rates vary by region and appliance type, a clear expectation of parts cost and turnaround time helps homeowners decide between DIY repair and hiring a technician. Typical estimates: thermocouple $10–40 (30–60 min), pilot assembly $30–120 (1–2 hrs), orifice $5–25 (30–60 min). Choose based on skill, warranty, and safety.
| Part | Cost | Time |
|---|---|---|
| Thermocouple | $10–40 | 30–60 min |
| Pilot assembly | $30–120 | 1–2 hrs |
| Orifice | $5–25 | 30–60 min |
Maintenance Schedule and Preventive Tips
A regular maintenance schedule helps prevent pilot light problems before they start, with most manufacturers recommending inspection and cleaning of pilot components at least once a year.
Seasonal checks—especially before winter—should follow a brief homeowner checklist covering pilot cleanliness, burner flame quality, and gas connections.
Simple preventive steps, such as keeping vents clear, using a filter schedule, and addressing soot or irregular flames promptly, can extend both pilot light and heater lifespan.
How often to clean and inspect pilot light components
Regularly scheduled inspections and cleanings keep pilot light components reliable and safe; a simple baseline is a visual check every month, a light cleaning and burner inspection every 6–12 months, and a professional service annually or before each heating season.
More frequent attention is warranted if soot, yellow flame, intermittent ignition, or odors appear.
Replace worn thermocouples and seals promptly to prevent failures.
Seasonal checks and homeowner maintenance checklist
Prepare a concise seasonal checklist that guides homeowners through key pilot-light maintenance tasks before and during the heating season.
A simple routine prevents outages and identifies issues early.
- Inspect pilot flame for steady blue color and correct height.
- Clean debris around pilot assembly and vent openings.
- Verify thermocouple connection for tightness and corrosion.
- Test ignition cycles and listen for irregular sounds.
- Schedule professional inspection annually.
Tips to extend pilot light and heater lifespan
Extend the pilot light and heater lifespan by following a concise maintenance schedule and targeted preventive measures that address wear points, safety, and efficiency.
Inspect and clean burner ports, pilot assembly, and vents quarterly.
Replace faulty thermocouples and seals promptly.
Keep surrounding area clear, guarantee proper ventilation, and schedule annual professional inspections.
Document service dates and component replacements to anticipate future maintenance.
Safety Checklist After Servicing
After cleaning, the technician checks for gas leaks, verifies proper flame color and stability, and confirms adequate ventilation.
A final walkaround guarantees no tools or debris remain and that all panels are secure.
The service and next recommended inspection date are recorded for the owner’s records.
Leak detection, flame characteristics, and ventilation confirmation
Inspect for gas leaks, verify flame characteristics, and confirm ventilation before returning the heater to regular use.
Using a soap solution or electronic sniffer, check all connections for bubbles or alarm.
Guarantee the pilot flame is steady, blue, and centered; yellowing or flutter indicates adjustment or blockage.
Confirm exhaust pathways and room airflow are unobstructed.
If issues persist, shut off gas and contact a technician.
Documentation: recording maintenance and next service date
When servicing is complete, a concise entry should be made documenting the work performed, parts replaced, measurements taken (such as pilot flame characteristics and leak checks), and any corrective actions applied; this record enables traceability and informs future technicians.
A clear log should include:
- Technician name and date
- Tasks completed and parts installed
- Measured flame color, size, and pressure
- Leak test results and ventilation status
- Recommended next service date
Conclusion
Following the outlined steps, the pilot light can be restored with care, patience, and basic tools; routine cleaning prevents most nuisances before they become furnace-sized catastrophes. Technicians and homeowners should always prioritize shutoff, ventilation, and flame checks, and consult a professional if ignition remains erratic, the orifice is severely corroded, or gas odors persist. Regular inspections and gentle cleaning extend service life and preserve safe, efficient operation.
