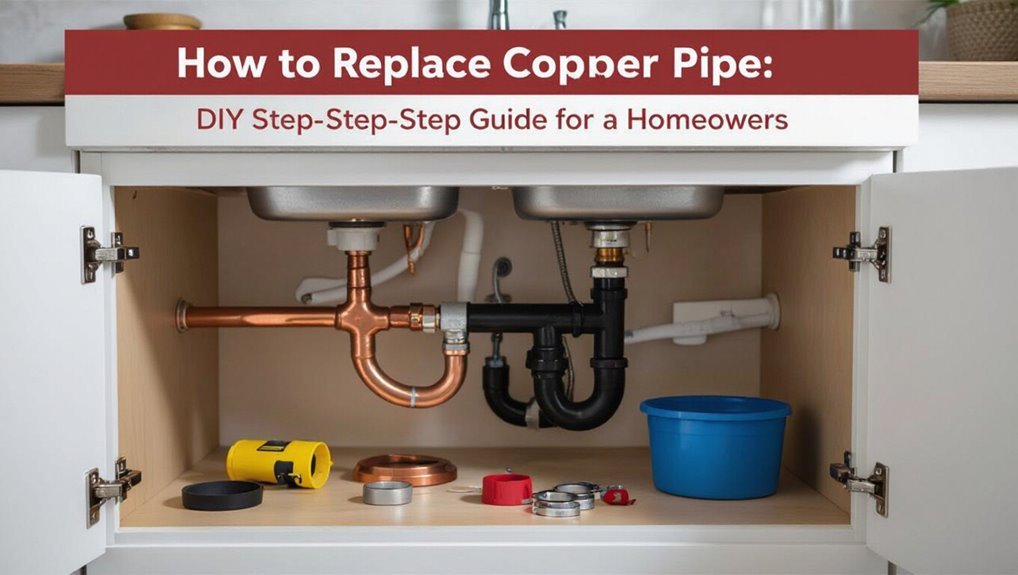
How to Replace Copper Pipe: DIY Step-by-Step Guide for Homeowners
To replace a short copper pipe, first shut off the main water supply and drain the line. Cut out the damaged section, then deburr and clean the pipe ends. Install a new length of copper pipe using properly prepared joints or approved push-fit fittings. For sweat joints, apply flux and use lead-free solder; for compression or push-fit connections, follow the manufacturer’s instructions. Remember to take fire and permit precautions, test the repair under pressure, and monitor for leaks afterwards. For detailed techniques, tool lists, and safety tips, continue reading.
Quick Answer: When to Replace Copper Pipe
Frequently, a homeowner should consider replacing copper pipe when visible corrosion, persistent leaks, low water pressure, or discolored water indicate failure; additionally, replacement is warranted if the system is over 50 years old, incompatible with modern fixtures, or has suffered freezing or mechanical damage that compromises integrity.
Indicators include pinhole leaks, green or white deposits, brittle sections, and recurring repairs in the same area.
Systems exposed to acidic water, galvanic corrosion from mixed metals, or heavy mineral buildup merit inspection and possible replacement.
Proactive replacement before catastrophic failure prevents water damage, maintains water quality, and guarantees reliable pressure and flow.
Who Should Attempt Copper Pipe Replacement
After identifying signs that copper piping may need replacement — such as corrosion, recurrent leaks, or age-related failures — the next consideration is who should perform the work.
Homeowners with plumbing experience, proper tools, and knowledge of local codes can tackle straightforward sections like accessible runs or small replacements. Novices, complex layouts, gas lines, or work requiring soldering near combustible materials should hire a licensed plumber.
Large-scale jobs, whole-house repiping, or situations involving water damage and structural access also merit professional assessment. Liability, permits, testing, and insurance considerations favor professionals when doubt exists or code compliance is required.
Emergency Fixes for Urgent Leaks
When a copper pipe begins to leak, the first action is to shut off the water supply immediately to limit damage.
Temporary leak seals—such as pipe clamps, rubber and hose-clamp wraps, or epoxy putty—can stop or slow the leak long enough for a proper repair.
These measures are short-term solutions designed only to stabilize the situation until professional replacement or permanent repairs can be made.
Shut Off Water Immediately
Shut the main water supply immediately to stop flow and limit damage when a copper pipe bursts or leaks heavily. The homeowner locates the main shutoff—usually near the meter, basement, or exterior wall—and turns it clockwise until tight.
After water stops, electric-powered appliances are turned off and drainage opened at faucets to relieve pressure. Notifying household members and isolating affected areas prevents contamination and slips. Record valve position and any visible damage for repair planning.
- Identify main shutoff location quickly.
- Turn valve fully clockwise to close.
- Open nearby faucets to drain lines.
- Cut power to affected appliances.
Temporary Leak Seals
Apply quick, reliable temporary seals to control urgent copper-pipe leaks until permanent repairs can be made.
A homeowner locates the leak, dries the area, and selects an appropriate stopgap: rubber patches with hose clamps, epoxy putty, pipe repair tape, or commercial compression clamps.
Clean metal for adhesion, follow product cure times, and test at low pressure before restoring full flow.
Temporary fixes reduce water damage but are not substitutes for replacement; document the location and type of seal for the professional or later DIY repair.
Remove the temporary device before soldering or fitting a new copper section to guarantee proper installation.
Tools and Materials for Copper Pipe Replacement
For a successful copper pipe replacement, the correct combination of tools and materials is essential: common hand tools (pipe cutter, deburring tool, adjustable wrench), soldering equipment or fittings for push-to-connect/flare connections, flux and lead-free solder for sweat joints, appropriate lengths and types of copper tubing (K, L, or M), fittings, pipe supports, and sealing materials such as joint compound or PTFE tape where applicable.
A clear inventory prevents delays and guarantees code-compliant repairs. Selection depends on access, joint type, and water quality.
Replace only damaged lengths and match wall thickness to system pressure ratings.
- Measure and plan materials.
- Choose joining method.
- Verify code and fittings.
- Prepare clean, deburred ends.
Safety Steps and How to Shut Off Your Water
Before starting pipe work, the homeowner should locate the main water shutoff valve and confirm its operation.
Once identified, the valve is turned off to stop incoming supply, and faucets are opened to drain remaining water.
Finally, any trapped pressure is relieved by flushing fixtures and checking low points for residual flow.
Locate Main Water Valve
Locating the main water shutoff is the first safety step: it allows quick isolation of the home’s water supply to prevent flooding and protect anyone working on the pipes.
The homeowner should identify valve types—gate, ball, or curb—and note whether it’s inside (basement, utility room) or outside (meter box, near foundation).
Clear access by removing obstacles and mark the location for future reference.
Inspect the valve for corrosion or damage and report issues before proceeding.
- Check near the water meter or where main enters the house
- Inspect valve type and orientation
- guarantee unobstructed access
- Tag or label the valve location
Turn Off Water Supply
With the main shutoff identified, the next step is to stop the flow to the affected line to prevent water damage and allow safe pipe work.
The homeowner locates and closes the appropriate valve—main, branch, or fixture isolation—using the correct tool to avoid rounding. For gate valves, turn clockwise until snug; for ball valves, rotate the handle perpendicular to the pipe.
Verify the valve is fully closed by checking downstream taps for cessation of flow. If a wrench is needed, apply steady pressure.
Note valve condition; corroded or seized valves may require professional assistance before proceeding.
Drain And Relieve Pressure
Bleed the system and relieve residual pressure to prevent water spray and make repairs safer. After closing the main shutoff, open the highest hot and cold faucets and the lowest drain valve to allow trapped water to flow out.
Flush toilets and operate outdoor hose bibs. Wear eye protection and place a bucket beneath fixtures to catch drips. Confirm pressure is zero by squeezing a downstream faucet briefly; no flow indicates success.
- Open highest and lowest points to vent lines.
- Flush toilets and run taps until dry.
- Open appliance valves (water heater, ice maker).
- Use bucket and towels to catch residual water.
Locating and Accessing the Damaged Copper Section
Before cutting or replacing any copper, the homeowner must precisely identify the damaged section by inspecting visible lines, listening for leaks, and checking for corrosion, green staining, or wet spots along nearby walls and ceilings.
Once located, trace the pipe path to determine if access requires removing trim, drywall, or ceiling panels. Mark both ends of the repair area, allowing a small margin beyond visible damage. Verify routing to avoid electrical, gas, or HVAC lines. Prepare appropriate tools and protective gear.
If access is obstructed or the pipe runs inside structural elements, consider consulting a professional before proceeding further.
Cutting Out Damaged Copper Pipe
Turn off the water supply and open a nearby faucet to relieve pressure, then confirm the repair section marked earlier is accessible and clear of obstructions.
The installer measures and marks cut points allowing room for fittings and deburring.
A tubing cutter or fine-tooth hacksaw makes straight cuts; support the pipe to prevent twisting.
Remove the damaged segment and inspect adjoining pipe for corrosion or pinholes.
Deburr and clean ends with a file and emery cloth, removing burrs and oxidation to make certain snug connections later.
Dispose of debris, recheck measurements, and prepare tools and fittings for the next step.
- Mark cuts with allowance for fittings
- Use proper cutter and steady support
- Deburr, file, and clean cut ends
- Inspect adjoining pipe and clear debris
Choosing Joints: Solder vs Push‑Fit vs Compression
When replacing copper pipe, the choice of joint affects durability, skill required, and suitability for the location.
Soldered (sweat) joints offer a permanent, leak‑resistant connection but require torchwork and clean preparation.
Push‑fit (quick‑connect) and compression fittings provide faster, tool‑light options—push‑fit for ease and temporary or concealed work, compression for mechanical reliability without solder.
Soldered (Sweat) Joints
Selecting between soldered (sweat), push‑fit, and compression joints requires weighing permanence, skill level, and leak risk.
Soldered (sweat) joints create a permanent, metallurgical bond ideal for buried or hard‑to‑access runs. They demand clean pipe, proper flux, correct heat, and safety precautions. When executed correctly, they resist vibration and thermal cycling better than mechanical fittings.
However, soldering requires practice and a torch, making it less suited to inexperienced DIYers or flammable environments.
Consider local codes and water quality, as lead‑free solder is mandatory for potable systems.
- Permanence and durability
- Skill and tools needed
- Safety considerations
- Code and material compliance
Push-Fit (Quick Connect)
Push-fit (quick‑connect) fittings offer a tool-free, reversible alternative to soldered and compression joints, using internal O‑rings and a metal grab ring to seal and secure copper, PEX, or CPVC pipe.
They simplify repairs and retrofit work, requiring only clean, deburred pipe cut squarely to proper insertion depth.
Their speed and accessibility suit novice homeowners and tight spaces.
Temperature and pressure ratings vary by brand; validation for potable water and local code compliance is essential.
Long-term reliability depends on correct installation and pipe condition; damaged or heavily corroded tubing can compromise the O‑ring seal and should be replaced first.
Compression Fittings
Compression fittings provide a mechanical, solder-free method for joining copper pipe using a nut, ferrule (olive), and threaded body to compress and seal tubing. They suit tight spaces and retrofit work where heat or specialized tools are undesirable.
Installation requires clean, square-cut tubing and correct ferrule seating; overtightening can deform the ferrule and cause leaks. Maintenance is straightforward: re-tighten once if a slow drip appears. Compared with solder and push-fit, compression balances permanence, cost, and skill level.
- Reusability: limited—ferrules often crimp and may need replacement.
- Tools: simple wrenches.
- Pressure rating: moderate.
- Vibration: less tolerant than solder.
Preparing Copper Ends for Soldering
Before soldering, the cut ends of copper pipe must be clean, square, and free of burrs to guarantee a reliable joint.
Deburr the inside with a reamer and remove external roughness with a file. Square cuts assure even seating; use a tubing cutter rather than a saw for best results.
Clean the mating surfaces with abrasive cloth or emery paper until bright copper appears, removing oxidation and oils. Wipe with a clean rag or acetone to remove debris and residue. Dry thoroughly.
Test-fit fittings to confirm proper alignment and correct any minor imperfections before proceeding to flux and heat application.
Soldering Copper Pipe: Flux, Heat, and Technique
When joining cleaned copper pipe and fittings, proper use of flux, controlled heat, and correct soldering technique guarantee a durable, leak-free connection.
Apply a thin, even layer of water-soluble flux to both pipe end and fitting interior.
Heat the joint evenly with a propane torch until flux sizzles, then touch solder to the opposite side; capillary action draws solder through the seam.
Avoid overheating or melting flux.
Allow joints to cool naturally, then wipe residue.
Pressure-test after cooling.
- Flux: even coverage, avoid excess
- Heat: even, controlled application
- Solder: feed to opposite side
- Cool: natural, then test
Soldering in Tight Spaces and Awkward Angles
When space is limited, the technician selects a torch sized for precision to direct heat without excessive flame.
Careful positioning and shortened tool strokes help complete joints where clearance is minimal.
Heat shields, wet rags, and brief, controlled heating prevent damage to nearby fittings, insulation, or finishes.
Choosing Right Torch
Selecting the right torch is critical for soldering copper pipe in tight spaces and at awkward angles, because flame size, tip shape, and heat control determine access and joint quality. A compact torch with adjustable flame lets the user focus heat without overwhelming nearby fittings.
Narrow or bent tips improve reach behind obstacles. Piezo ignition and fine control reduce relighting and overheating. Fuel choice affects flame temperature and convenience; propane is common, but map-pro offers faster heating for larger joints.
Safety features such as backflow prevention and stable bases matter when maneuvering in constrained positions.
- Choose compact, adjustable torches.
- Prefer narrow or angled tips.
- Consider fuel temperature and convenience.
- Prioritize safety features.
Working With Limited Clearance
In confined areas where access is restricted, soldering copper pipe demands compact tooling, deliberate heat control, and staged work to avoid overheating adjacent materials.
The technician selects a small-head torch or micro-torch, angled tips, and slim-profile wrenches.
Pipe joints are oriented for the clearest approach; short, controlled heats are applied with frequent inspection of solder flow.
When space prevents torch use, a catalytic or soldering iron designed for plumbing joins is preferred.
Hands-free clamps and heat sinks positioned on nearby fittings aid steadiness.
Patience, incremental work, and cleanup of flux assure reliable joints in awkward angles.
Preventing Heat Damage
Often a deliberate, measured approach prevents heat damage when soldering copper pipe in tight or awkward spaces. The practitioner uses heat shields, damp cloths, and heat-absorbing paste to protect nearby materials. Small, focused flames and intermittent heating reduce thermal spread. Proper ventilation and a fire extinguisher remain essential.
- Use heat shields or copper blocks to deflect heat.
- Wrap adjacent materials with wet cloths or fire-resistant tape.
- Apply low-temperature solder and heat-sink compounds for sensitive joints.
- Heat briefly, cool quickly, and inspect joints for integrity.
Attention to technique minimizes scorch, warping, and failed seals.
Installing Push‑Fit Fittings Correctly
When preparing to join copper pipe with push‑fit fittings, the installer must make sure pipe ends are square, burr‑free, and clean to guarantee a leak‑proof connection.
Measure, mark insertion depth with a caliper or template, then deburr and chamfer the outer edge.
Inspect the O‑ring and internal grab ring for debris or damage; replace the fitting if compromised.
Align pipe straight into the fitting and push firmly until the marked depth is reached.
Confirm secure engagement by attempting a gentle pull.
Pressure‑test per code, check for leaks, and trim or support nearby tubing to prevent undue stress on the joint.
Using Compression Fittings the Right Way
For reliable compression joints, the installer must cut copper pipe square, remove burrs, and slide the compression nut and ferrule on in the correct order before seating the assembly onto the fitting body. The installer tightens the nut until the ferrule bites, then checks alignment and tests for leaks. Overtightening deforms the ferrule; undertightening leaks. Compression fittings suit accessible runs and avoid soldering, but require periodic inspection in vibration-prone locations. Use proper-size ferrules and nuts, and replace ferrules when reusing fittings to guarantee a new seal.
- Verify tube seat depth
- Hand-start threads to avoid cross-threading
- Tighten incrementally with specified turns
- Pressure‑test after assembly
Replacing Copper Near Appliances, Fixtures, and Inside Walls
When replacing copper near appliances, the technician must work around existing connections and clearances to avoid damaging wiring or components.
Routing pipe inside walls requires planning for studs, insulation, and access points to maintain code compliance and future serviceability.
Proper connections to fixtures demand secure fittings and leak checks to guarantee reliable operation.
Working Around Appliances
Near appliances and fixtures, replacing copper requires careful planning to avoid damage to equipment, assure proper clearances, and maintain access for future repairs.
The technician assesses connections, shuts utilities, and documents existing layouts. Flexible connectors reduce vibration stress; shutoff valves are positioned for accessibility.
Heat-sensitive components receive shielding during soldering; drip pans or temporary supports protect finishes.
Coordination with appliance manuals assures warranty compliance and correct pressures. After replacement, joints are pressure-tested and inspected for leaks, then appliances are slowly returned to service while monitoring for noise or movement.
Proper labeling speeds later maintenance.
- Verify clearances and appliance manuals.
- Use flexible connectors where needed.
- Protect appliances during soldering.
- Test, inspect, and label connections.
Routing Inside Walls
Routing copper inside walls requires planning to preserve structural integrity, prevent future access issues, and meet code for firestopping and support. The installer verifies stud locations, insulation, and existing services, then maps a route minimizing bends and crossings.
Pipes are centered in cavities or protected with nail plates where required, and sufficient slope is maintained for drainage. Secure straps to framing at code intervals and use vibration-isolating clips near appliances.
Fireblocking is reinstated where penetrations occur, and access panels are planned for valves or complex junctions. Pressure-test the system before closing walls to confirm leak-free integrity.
Connecting To Fixtures
After the wall cavities are mapped and pipes secured, attention shifts to connecting the copper to fixtures and appliances while preserving the integrity of the finished surfaces and maintaining proper clearances. The installer measures inlet locations, trims tubing squarely, deburrs, and fits appropriate adapters or stops. Soldered, brazed, or press fittings are selected based on access and appliance requirements; dielectric unions prevent galvanic corrosion where copper meets different metals. Compression fittings may be used for confined spaces. Support is added near connections to prevent stress. Tests for leaks and final trim work are performed before restoring wall finishes.
- Match connection type to fixture
- Assure straight, clean cuts
- Allow access and support
- Perform pressure test
Supporting, Sloping, and Clamping Replacement Runs
When installing replacement copper runs, proper support, slope, and clamping are essential to guarantee mechanical integrity, prevent stress on joints, and maintain drainage where required.
Supports should be spaced per code—typically 6–8 ft for horizontal Type L, closer for smaller sizes—and fastened to solid structure, avoiding direct metal-to-metal contact that can chafe insulation or finish.
Maintain a slight continuous slope (1/8–1/4 in per foot) for gravity drainage where applicable.
Use cushioned clamps or straps sized to allow slight thermal movement while restraining vibration.
Secure connections at hangers and through-penetrations with protective sleeves to prevent wear.
Pressure Testing Your New Copper Run
Begin testing the new copper run by isolating the section and filling it with water or air at a controlled rate to check for leaks and joint integrity.
The installer watches pressure gauges and fittings for drops, listens for hisses, and inspects visible joints.
Maintain test pressure for the recommended dwell time, noting any change.
Record initial and final readings and release pressure slowly before reopening the system.
Safety precautions include wearing eye protection and avoiding over-pressurization beyond pipe ratings.
- Confirm test medium and allowable pressure
- Use calibrated gauge and pump
- Maintain dwell time (e.g., 15–30 minutes)
- Log results and take photos
Common Problems and How to Fix Them (Leaks, Cold Joints, Pinholes)
With the pressure test complete, attention turns to identifying and correcting common faults such as visible leaks, cold joints, and pinholes.
Visible leaks require draining the line, cutting out the damaged section, deburring, and replacing with properly fitted pipe and soldered or compression joints.
Cold joints—formed by insufficient heat during soldering—are reheated after cleaning, flux reapplied, and solder flowed until a smooth fillet forms.
Pinholes from mechanical damage are best repaired by cutting out the tiny area and inserting a short replacement piece or using a rated repair coupling.
After repairs, repeat the pressure test and inspect for seepage before restoring service.
Corrosion Prevention and When to Consider Re‑Piping With PEX
Preventing corrosion on copper piping relies on controlling chemical and physical factors that accelerate deterioration—water chemistry, stray electrical currents, abrasive particulates, and incompatible metals.
Regular water testing, dielectric unions at dissimilar joints, and grounding checks reduce corrosion risk.
Where pitting, widespread pinholes, or recurring solder failures occur, consider repiping with PEX for cost, flexibility, and resistance to scale and electrochemical attack.
PEX resists many common failure modes but requires proper fitting and protection from sunlight and rodents.
- Test water pH and hardness.
- Install dielectric fittings.
- Inspect for stray current.
- Evaluate extent of damage before switching.
Permits, Local Code, and When to Call a Licensed Plumber
After evaluating corrosion risk and deciding a course of action—repairing, replacing sections, or full repipe with PEX—attention must turn to legal and safety boundaries: local building codes, permit requirements, and the limits of homeowner work. Homeowners should verify jurisdictional rules; many municipalities require permits for plumbing alterations, pressure tests, and inspections. Unpermitted work risks fines and failed resale inspections.
Complex tasks—main shutoff relocation, gas connections, multi-story systems, or work affecting structural elements—warrant a licensed plumber. When unsure about code interpretation, leak diagnosis, soldering near combustibles, or handling lead solder concerns, hire a professional to assure compliance and safety.
Time, Cost Estimates, and Budgeting for DIY Replacement
In planning a DIY copper-pipe replacement, the homeowner should establish a realistic timeline, itemize all material and tool costs, and build a contingency for unexpected issues.
Typical small repairs take a few hours; larger runs or rerouting can require days.
Estimate materials (pipe, fittings, flux, solder), rental or purchase of tools, and permit fees.
Include emergency funds (15–25%) for hidden corrosion, access obstacles, or replacement fittings.
- Break project into phases with time estimates.
- List exact quantities and local prices.
- Compare tool rental vs. purchase.
- Track receipts and revise budget as work proceeds.
Maintenance Tips to Keep Replaced Copper Pipe Lasting Decades
Once the replacement is complete and the budget tracked, regular maintenance preserves the longevity of new copper piping.
Periodic inspections detect corrosion, pinholes, or loose fittings early; check visible runs annually and after extreme weather.
Flush lines to remove sediment and minimize galvanic corrosion by confirming dielectric unions where copper meets dissimilar metals.
Maintain stable water chemistry—monitor pH and hardness—and install a water softener if mineral buildup recurs.
Insulate exposed pipes to prevent freezing and condensation.
Address leaks immediately and tighten or replace fittings as needed.
Keep records of repairs and inspections to guide future maintenance decisions.
Conclusion
When a homeowner finishes replacing a copper pipe, the system stands quieter, safer, and more reliable — but is that gleaming new joint worth the care it demands? Routine inspections, proper insulation, and corrosion prevention turn a successful repair into decades of trouble‑free service. Knowing when to call a licensed plumber, securing permits, and weighing PEX repiping for widespread corrosion keep costs and risks manageable, ensuring the project’s long‑term value and peace of mind.