How to Repair Quartz Sinks: Step-by-Step Fixes for Chips, Cracks, and Stains
Repairing quartz sinks involves assessing the damage—whether it’s a chip, crack, or stain—and using the right two-part epoxy and pigments for color matching. Start by cleaning, degreasing, and sanding the surface. Apply epoxy in thin layers for chips, using backing for larger voids. For hairline cracks, inject epoxy, while wider splits may need reinforcement. Address stains with appropriate cleaners, and if necessary, extract them. After curing, sand the area from 400 to 1200 grit, then polish and seal. Follow these steps for effective quartz sink repairs and restoration.
What to Know Before Repairing a Quartz Sink
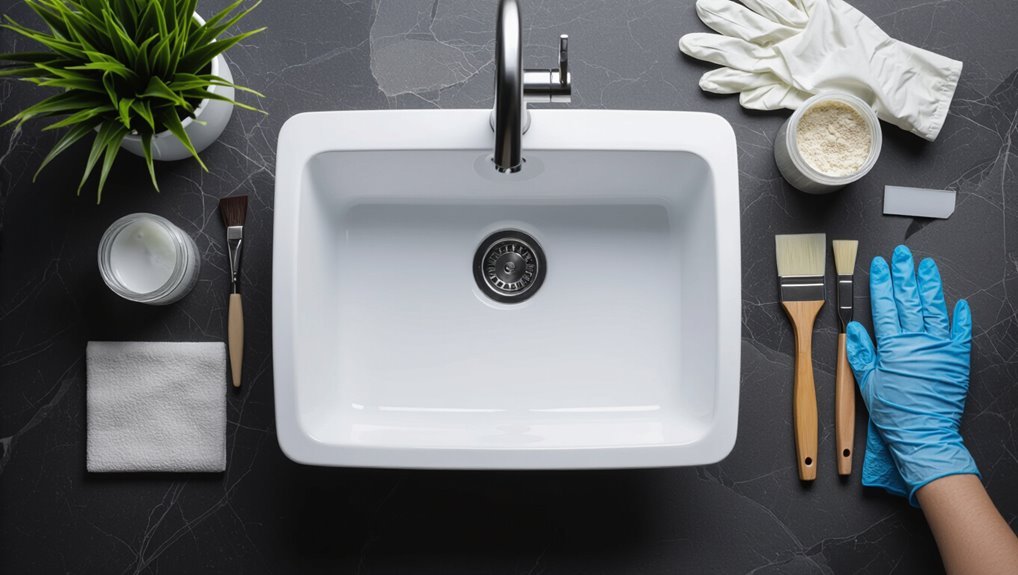
Quartz sinks are composed of crushed quartz bound with resin, so repair methods and materials differ from those for porcelain or stainless steel.
Typical damage—chips, hairline cracks, and surface stains—usually stems from impact, thermal shock, or chemical exposure, and each requires a distinct approach.
Proper protective gear and safety steps are essential, and homeowners should weigh the extent of damage against skill and tools to decide between DIY repair and hiring a professional.
How quartz sinks are made and why repairs differ from other materials
Because it combines crushed natural stone with polymer resins and pigments, a quartz sink is a manufactured composite rather than a solid slab of stone. That composition shapes both its strengths and repair needs.
Repairers must understand engineered layers, resin-filled textures, and color matching when learning how to repair quartz sinks. Techniques differ from natural stone: bonding, filler selection, and curing protocols are specific.
Common causes of chips, cracks, and stains in quartz sinks
Identify typical failure modes before attempting repairs: chips usually result from hard impacts at edges or corners where the resin-stone bond is thinner; hairline cracks arise from thermal shock, heavy point loads, or manufacturing defects that concentrate stress; and stains develop when pigmented liquids or oils penetrate an unsealed surface or exploit micro-abrasions.
Additional contributors include abrasive cleaners, prolonged chemical exposure, improper installation stress, and repeated mechanical wear that degrades surface integrity.
Safety precautions and protective gear required
Before beginning any repair work, a clear safety plan should be established that addresses eye, respiratory, hand, and skin protection as well as safe tool handling and proper ventilation.
Wear safety goggles, N95 or respirator when sanding or using solvents, chemical-resistant gloves, and long sleeves.
Guarantee adequate ventilation, secure workpieces, use correct power-tool guards, keep a fire extinguisher nearby, and read product safety data sheets.
When to call a professional vs. DIY feasibility
When evaluating a damaged quartz sink, assess the size, depth, and location of chips or cracks to determine whether a DIY repair is practical or a professional is required.
Small surface chips, minor stains, and shallow scratches are usually DIYable with kits.
Structural cracks, undermounted seam failures, large missing material, or warranty concerns warrant a professional to guarantee proper bonding, color match, and long-term integrity.
Tools and Materials You’ll Need
A concise list of essential tools—sandpaper, utility knife, mixing sticks, and safety gear—prepares one for most quartz sink repairs.
Recommended repair kits and products, including epoxy or polyester fillers and matching sealants, should be compared for compatibility and cure time.
Choosing the correct color filler involves testing swatches under the sink’s lighting and following manufacturer color-matching guides.
Essential tools list
Preparation requires the right tools and materials to secure a durable, safe repair of a quartz sink.
Essential items ascertain accurate, clean work and prevent further damage.
- Protective gloves and safety glasses
- Fine-grit sandpaper and polishing pads
- Epoxy or resin (matched color)
- Plastic applicator and mixing sticks
- Clean microfiber cloths and isopropyl alcohol
Recommended repair kits and products
With tools assembled and surfaces cleaned, selecting the right repair kit and products guarantees a durable, color-matched fix.
Recommended items include professional quartz epoxy, fine-grit sandpaper, color pigments, solvent for grease removal, and a clear topcoat.
Suggested kit components:
- Two-part quartz epoxy
- Matching pigment set
- Fine sanding pads (400–1200 grit)
- Solvent wipes
- Clear polyurethane sealer
How to choose matching color fillers and sealants
When selecting color fillers and sealants for quartz sink repairs, the goal is to achieve a seamless, durable match by balancing hue, translucency, and finish.
Choose epoxy or polyester fillers with adjustable pigments, sampling small mixes on hidden areas. Match matte or gloss levels, test cured color under real lighting, and pick sealants rated for water resistance and adhesion to engineered stone for lasting, invisible repairs.
Preparing the Sink for Repair
Before any repair begins, the sink must be thoroughly cleaned and degreased to remove soap scum, oils, and residues that could prevent adhesives or fillers from bonding.
The extent of damage is then evaluated—small chips and surface stains require different approaches than large chips, hairline cracks, or deep fractures.
Finally, the repair area is prepared by sanding to roughen the surface, drying completely, and masking off surrounding areas to protect the finish.
Cleaning and degreasing procedures
A thorough cleaning and degreasing step is essential to guarantee proper adhesion of repair materials and to reveal the full extent of damage.
Remove debris, rinse, and dry.
Use a mild, non-abrasive cleaner, then an acetone or isopropyl alcohol wipe to eliminate oils and residues.
Avoid waxes or silicone-based products.
Allow full evaporation before sanding or bonding.
Assessing damage: small chip, large chip, hairline crack, deep crack, surface stain
Assessment of damage begins with a methodical inspection to classify issues as small chip, large chip, hairline crack, deep crack, or surface stain, since each requires a different repair approach.
The inspector notes size, depth, location, and any structural compromise. Measure chips, trace cracks under light, and test stains for permanence.
Document findings to determine materials and whether professional repair is warranted.
Surface preparation: sanding, drying, and masking
Prepare the repair area by thoroughly sanding, drying, and masking the surrounding surfaces to secure adhesion and protect finishes.
Sand edges of chips and cracks with progressively finer grit to remove loose particles and feather shifts.
Wipe with solvent and allow complete drying.
Apply painter’s tape and protective paper around the basin.
Confirm dust-free conditions before mixing repair compounds and proceeding with application.
Step-by-Step Repair for Small Chips
The following steps outline how to repair small chips in quartz sinks, covering choice of filler materials and correct mixing ratios.
It describes application techniques for an invisible bond, then the sanding, shaping, and finishing required to restore the profile.
Finally, polishing and blending methods are explained to match the repaired area to the surrounding surface.
Filling small chips: materials and mixing ratios
Begin by selecting a compatible repair compound—typically a two-part epoxy or polyester resin specifically formulated for quartz or engineered stone—and the correct hardener ratio recommended by the manufacturer.
Add color-matching pigments or quartz dust sparingly to match sink hue. Measure components precisely with calibrated syringes or scales.
Mix thoroughly to a uniform consistency, avoiding air entrapment. Prepare only the amount needed for each chip.
Application technique for seamless results
Mix the color-matched epoxy carefully into the chip, using a fine-tipped applicator to place just enough material to fill without overbuilding.
Work in thin lifts, curing between passes if needed. Remove excess immediately with a solvent-dampened swab, keeping edges feathered to the surrounding surface.
Maintain steady hand pressure, avoid air pockets, and inspect under bright light to guarantee uniform fill before curing completes.
Sanding, shaping, and finishing small-chip repairs
Allow small repairs to fully cure to the touch before proceeding; once hardened, the restoration can be sanded and shaped to match the surrounding quartz.
Begin with fine-grit wet sandpaper to level filler, progressing to finer grits for smoothness. Use a light touch and inspect frequently.
Remove dust with a damp cloth and allow to dry. Final checks confirm contours align before polishing.
Polishing and blending to match surrounding surface
With the repaired area sanded smooth and free of dust, attention turns to restoring the surface luster so the patch visually disappears.
A series of fine-grit abrasives and non-abrasive polishing pads refine texture, then a quartz-safe polish restores sheen.
Blend edges gently, compare under varied light, and repeat until finish and color match.
Clean residue and inspect for seamless integration.
Step-by-Step Repair for Large Chips and Missing Fragments
When addressing large chips and missing fragments, the technician first stabilizes the surrounding area and secures any loose pieces with an appropriate adhesive.
For deep voids, a backing or support is installed, then the repair is built up in thin, cured layers to prevent sinking or shrinkage.
After filling, the surface is contoured, sanded, and color-matched to restore a seamless finish.
Stabilizing the area and adhering loose fragments
Begin by clearing the damaged zone of loose debris and moisture to create a stable surface for repair.
Next, gently lift and collect any remaining loose fragments, keeping matching pieces for reattachment.
Apply a small amount of manufacturer-recommended epoxy or acrylic resin to fragment edges and the cavity.
Press pieces into position, hold or clamp briefly, and wipe excess adhesive before curing according to product instructions.
Creating a backing or support for deep voids
Create a firm backing to support filler in deep voids before applying adhesive or resin. A backing prevents sagging and guarantees proper cure.
Options include thin metal mesh, waterproof tape, or rigid foam shaped to the cavity. Secure backing with temporary adhesive or clamps, guaranteeing it sits flush and level.
Trim excess and confirm access for subsequent filler placement.
Layered filling and curing process
Layered filling for large chips and missing fragments proceeds in controlled passes, building material from the deepest point outward to restore thickness and profile.
Each thin layer is applied, compacted, and allowed to partially cure to prevent heat buildup and shrinkage.
Successive layers guarantee full fill without voids.
Final cure follows manufacturer time and temperature guidelines before any shaping or finishing steps.
Contouring, sanding, and color-matching large repairs
Careful contouring and precise sanding transform the cured fill into a seamless repair that matches the sink’s original profile.
After rough shaping with files and coarse grit, progress through 120, 240, then 400–600 grit abrasives to blend edges. Final polishing restores sheen.
Mix tints into resin incrementally, testing on scrap, and apply thin layers until hue and translucency align with surrounding quartz.
Step-by-Step Repair for Cracks
The section begins by distinguishing hairline cracks from structural fractures to determine appropriate repair methods.
For fine cracks, technicians commonly use an epoxy injection technique, while wider or load-bearing cracks require internal reinforcement before bonding.
After curing, repairs are finished by sanding, polishing, and performing strength tests to confirm durability.
Identifying hairline vs. structural cracks
How can one distinguish a hairline crack from a structural one?
Visual inspection shows hairline cracks as thin, surface-level lines without depth or substrate exposure. Hairline cracks rarely flex under pressure.
Structural cracks are wider, deeper, may pass through the sink thickness, reveal backing or aggregate, and can widen when pressed.
Measure width, tap for sound differences, and note any surrounding delamination.
Epoxy injection method for hairline cracks
Having confirmed a crack is hairline rather than structural, the epoxy injection method offers a minimally invasive way to restore surface integrity and prevent moisture intrusion.
The process involves cleaning and drying the area, masking surrounding surfaces, injecting low-viscosity epoxy into the crack with a syringe, allowing full cure, then sanding and polishing flush with the sink surface for an invisible, durable repair.
Reinforcement techniques for wider or structural cracks
Begin by stabilizing the area around wider or structural cracks to prevent further propagation and prepare for reinforcement.
Apply fiberglass or carbon-fiber patches beneath the sink for load-bearing support, bonding with epoxy resin.
For extensive damage, install stainless steel backing plates anchored with marine-grade adhesive.
Allow full cure before any further work; verify reinforcement aligns with sink geometry and plumbing clearances.
Finishing, sanding, and testing strength after repair
Proceed to finish the repair by smoothing, blending, and verifying the restored area to guarantee a durable, visually consistent result.
Allow full cure, then sand progressively with 220, 400, and 800 grit to match surrounding texture.
Clean residues, inspect for voids, and apply polish or sealant.
Perform a gentle load and water test to confirm structural integrity and waterproofing before regular use.
Removing and Treating Stains from Quartz Sinks
The discussion moves to identifying common quartz sink stains—organic, mineral, rust, and dye—and explaining how each type responds to treatment.
It then outlines safe commercial cleaners and simple home remedies to try first, followed by deeper extraction techniques that minimize surface damage.
Finally, it covers ways to prevent recurrence, including proper care and suitable sealing options.
Identifying types of stains: organic, mineral, rust, dye
Recognizing the type of stain is the essential first step in effectively treating a quartz sink; different stains—organic (coffee, food, mildew), mineral (hard-water deposits), rust (iron-based), and dye (ink, turmeric)—require distinct cleaning approaches and products.
Assess color, location, texture and persistence: organic stains darken and may smell, mineral deposits are chalky, rust shows reddish-brown spots, dyes penetrate and resist simple wiping.
Safe stain removers and home remedies to try first
Begin with mild, nonabrasive options that are safe for quartz: a paste of baking soda and water for organic spots, white vinegar diluted with equal parts water for mineral deposits (used briefly and rinsed thoroughly), and a commercial, non-acidic, non-bleach countertop cleaner labeled safe for engineered stone for tougher residues.
Test in an inconspicuous area, apply gently with a soft cloth, then rinse and dry.
Deep stain extraction methods without damaging surface
When mild household remedies and nonabrasive cleaners fail to lift deep or stubborn discoloration, more targeted extraction techniques are needed to preserve the quartz surface.
Professionals recommend poultices with a neutral pH absorbent and gentle solvent to draw pigment, low-pressure steam or controlled heat to loosen residues, and nonabrasive micro-abrasion tools only when followed by proper polishing to restore luster.
Preventing stain recurrence and sealing options
To minimize recurrence, maintenance routines should focus on promptly removing contaminants, controlling exposure to staining agents, and addressing surface defects that trap pigments.
Regular gentle cleaning, immediate spill response, and avoiding harsh chemicals reduce staining.
For persistent issues, consider professional-grade quartz sealers or resin-based fillers applied per manufacturer instructions; test in an inconspicuous area and reapply periodically to maintain protection.
Color Matching and Finishing Techniques
Color matching begins with proportionate pigment mixing to recreate the sink’s base tone and flecking for an invisible repair.
Appropriate tools and techniques for feathering and blending—small spatulas, fine-grit abrasives, and controlled polishing—ensure smooth shifts between old and new material.
Finally, choosing matte or glossy finishing methods should replicate the factory sheen to maintain a consistent appearance.
How to mix pigments for an invisible repair
Achieving an invisible repair requires precise pigment mixing to replicate the sink’s base hue, undertones, and surface characteristics.
The technician samples surrounding color, then blends minute amounts of universal pigments into resin until hue, value, and chroma match.
Test patches on scrap quartz confirm accuracy.
Adjust for translucency with clear resin layers; document ratios for consistent future touch-ups.
Tools and techniques for feathering and blending
Begin by assembling a compact kit of precision tools—micro spatulas, fine-grit sanding pads, tapered blending sticks, high-magnification loupe, and a selection of polishing compounds—alongside adjustable-speed rotary tools with soft-backers and micro-mesh wheels.
Use progressive grit sanding, feather edges into surrounding quartz, apply ultra-thin pigment layers, cure between passes, and finish with controlled polishing to seamlessly blend repairs into the sink surface.
Matte vs. glossy finishes: restoring factory look
Differentiate between matte and glossy quartz surfaces early in the process, since each finish requires distinct pigment loads, layering techniques, and abrasive sequences to replicate the factory look.
Assess sheen with a light angle, match resin gloss modifiers, and adjust filler grain size.
For matte, use fine micro-abrasion and low-gloss topcoat; for glossy, progress to ultra-fine polishing compounds and high-gloss clear sealant.
Curing, Polishing, and Final Inspection
Recommended curing times and ideal temperature and humidity ranges are outlined before polishing begins to guarantee the repair compound reaches full strength.
A concise, step-by-step polishing sequence—progressing from coarse to fine abrasives and finishing with a fine buff—restores the sink’s luster.
Finally, a visual and tactile inspection followed by a water test confirms bond integrity, color match, and leak-free performance.
Recommended curing times and environmental conditions
Proper curing is essential to achieve full hardness and bond strength in repaired quartz sinks. Typically, adhesives and fillers require 24–72 hours at controlled temperatures to reach initial set and up to 7 days for complete cure depending on product specifications.
Ideal conditions: 18–25°C, 40–60% relative humidity, good ventilation, and vibration-free placement.
Avoid direct heat, sunlight, and premature loading until full cure.
Step-by-step polishing to restore luster
Once the repair has reached its specified cure time and the area is confirmed hard and stable, polishing begins to restore the sink’s original sheen.
Begin with fine-grit wet sandpaper to level the surface, progress through progressively finer grits, then use a non-abrasive polishing compound with a soft pad.
Buff evenly until uniform gloss appears. Wipe clean and allow final set before light use.
How to inspect repair quality and perform a water test
Begin inspection by visually and tactilely evaluating the repaired area for uniform gloss, seamless edges, and absence of ridges, indentations, or loose material.
Check cured resin hardness and color match. Lightly run a fingernail to confirm adhesion.
Perform a water test: fill sink, observe for leaks, bubbling, or seepage at repair.
Dry and recheck finish; buff minor haze if needed.
Maintenance and Prevention After Repair
Following repair, the article outlines daily cleaning habits that preserve the integrity of restored areas and recommends gentle, non-abrasive cleaners.
It also lists products to avoid—such as harsh acids, bleach, and abrasive pads—that can damage quartz and compromise repairs.
Finally, a concise long-term maintenance schedule with periodic inspections and touch-up tips is provided to extend the life of the repair.
Daily cleaning habits to protect repaired areas
Maintain consistent, gentle cleaning routines to preserve the integrity of repaired quartz areas.
Use a soft cloth or nonabrasive sponge and mild, pH-neutral cleaner to remove daily grime.
Wipe spills promptly, especially oils and acidic residues, and dry surfaces to prevent mineral buildup.
Inspect repaired spots weekly for looseness or discoloration and address issues immediately to prolong repair longevity.
Products to avoid that can damage quartz
Avoid using abrasive pads, acidic cleaners, or bleach-based products on repaired quartz surfaces, as they can scratch the protective finish, weaken adhesives, and cause discoloration; instead, opt for mild, pH-neutral cleaners and soft cloths to preserve both the repair and surrounding material.
Solvents, nail polish remover, oven cleaners, and grout removers should also be avoided because they can break down resin binders and stain or etch the surface.
Long-term maintenance schedule and touch-up tips
Consistency is key: establish a simple schedule for inspection and gentle cleaning to preserve repaired quartz sinks.
Weekly wiping with mild detergent prevents buildup; monthly checks identify hairline issues.
Apply a polymer touch-up kit to small chips as needed; reseal or renew surface polish annually.
Avoid abrasive pads and harsh chemicals.
Record dates and observations to track wear and plan timely maintenance.
Cost, Time, and When Replacement Is Better
Typical DIY repairs often cost a few dollars to a few hundred, while professional repairs commonly range from a couple hundred to over a thousand depending on severity.
Repair time varies from an hour for surface fixes to several days for complex restorations or waiting on parts and curing.
Replacement becomes more practical when damage is extensive, structural, or when repair costs and downtime approach replacement price and convenience.
Typical DIY vs. professional repair cost ranges
When weighing repair options, homeowners should compare DIY costs and time against professional quotes to decide whether to fix or replace a quartz sink. Typical DIY kits cost $15–$60; professional repairs range $100–$600 depending on damage severity. Replacement often exceeds $500–$1,200.
| Option | Low Cost | High Cost |
|---|---|---|
| DIY kit | $15 | $60 |
| Minor pro repair | $100 | $250 |
| Major pro repair/replacement | $500 | $1,200 |
Estimated time for each repair type
Repair time for quartz sink issues varies with damage type and chosen method: small chips and surface scratches often take 30–90 minutes with a DIY kit.
Moderate cracks or stains repaired by a professional usually require 2–4 hours (including curing), and extensive structural damage or full replacements can span several hours to a full day or more when countertops and plumbing are involved.
Typical timelines:
- DIY chip scratch: 30–90 minutes;
- pro crack/stain: 2–4 hours;
- replacement: half day–full day.
Signs that indicate replacement is more practical
Although minor chips and stains can often be fixed quickly and affordably, replacement becomes more practical when damage is extensive, recurring, or compromises function—such as multiple deep cracks, large sections missing, persistent staining that resists professional refinishing, warped or delaminated areas, or damage that requires altering adjacent countertops or plumbing.
Replacement is advisable when repair costs approach or exceed replacement, when repairs are temporary, or when structural integrity is lost.
Troubleshooting Common Repair Problems
The guide next addresses frequent complications encountered after quartz sink repairs, including visible seams or color mismatches and practical correction methods.
It also covers failed repairs and delamination, outlining diagnostic steps and when professional intervention is warranted.
Finally, it examines recurring stains and crack propagation, with strategies to manage underlying causes and prevent recurrence.
Visible seams or color mismatches and how to fix them
What causes visible seams or color mismatches in quartz sinks, and how can they be minimized?
Fabrication joins, resin color variation, and uneven polishing produce seams or slight hue differences.
To minimize visibility, align grain and pattern when installing, use color-matched epoxy, feather edges carefully, sand and blend gradually, then polish to uniform sheen.
Test patches before final application.
Repairs that won’t cure or delaminate
When a repair compound fails to cure or the bond separates, common culprits include improper surface preparation, expired or incorrectly mixed adhesives, contamination by oils or moisture, and incompatible materials.
Diagnose by inspecting surface cleanliness, cure times, and product compatibility.
Remove failed material, abrade to fresh substrate, thoroughly degrease, follow manufacturer mixing ratios and environmental recommendations, and test a small patch before completing the repair.
Managing recurring stains or crack propagation
Several factors can cause recurring stains or advancing cracks in quartz sinks, including incomplete stain removal, chemical etching from harsh cleaners, stress concentrations from undermount installation, and microcracks left untreated.
Diagnose with magnification and dye penetrant, then address sources: neutral cleaners, secure mounting, and relieve edges.
For persistent issues, widen repairs to sound material or consult a professional to prevent propagation and staining recurrence.
Quick Reference Cheat-Sheet
A compact cheat-sheet provides a step-by-step checklist tailored to each type of quartz sink damage, guiding users through assessment, preparation, repair, and finishing.
It also lists emergency fixes for immediate containment to prevent further cracking, staining, or water intrusion.
The sheet is designed as a quick-reference aid to speed response and reduce the risk of improper repairs.
Step-by-step checklist for each damage type
Begin by identifying the specific type of damage—chip, crack, scratch, burn mark, or stain—then consult the matching checklist to guarantee the correct tools, safety gear, and materials are on hand.
A concise procedural checklist follows; each item adapts per damage category:
- Assess severity and document location
- Gather repair kit and PPE
- Clean and prep surface
- Follow repair sequence (fill, sand, cure)
- Inspect finish and sealant
Emergency fixes for immediate containment
Contain visible damage immediately to prevent water infiltration and further cracking by applying temporary barriers and absorptive measures tailored to the defect:
- Clean and dry area thoroughly
- Apply waterproof tape over cracks
- Press a rubber patch for chips
- Use quick-setting epoxy for small holes
- Place absorbent cloth under leaking seams
These steps stabilize the sink until professional repair or replacement can proceed.
Conclusion
Repairing a quartz sink demands patience and attention; when done correctly it restores beauty and function, yet sometimes replacement proves wiser. Investigating the theory that careful, skilled fixes can make a damaged sink indistinguishable from new evokes relief and quiet pride. Seeing a chip vanish under steady hands confirms the belief in salvage over waste, stirring satisfaction. Ultimately practical judgment—balanced with hope—guides whether to mend, maintain, or replace.