How to Tell If My Well Pump Is Bad: 9 Signs, Causes, and When to Call a Pro
If you’re wondering how to tell if your well pump is bad, look for these key signs: strange noises, sputtering or no water flow, low or fluctuating pressure, rapid on/off cycling, visible leaks, or discolored water. Common causes of pump failure include worn components, clogged intakes, electrical issues, waterlogged tanks, dry-run damage, and poor water quality. You can perform basic checks such as inspecting breakers and the pressure gauge, but if you encounter major electrical problems or need to access submersible pumps, it’s best to call a professional. Continue reading for detailed tests, causes, and repair guidance.
How to Quickly Tell If Your Well Pump Is Failing
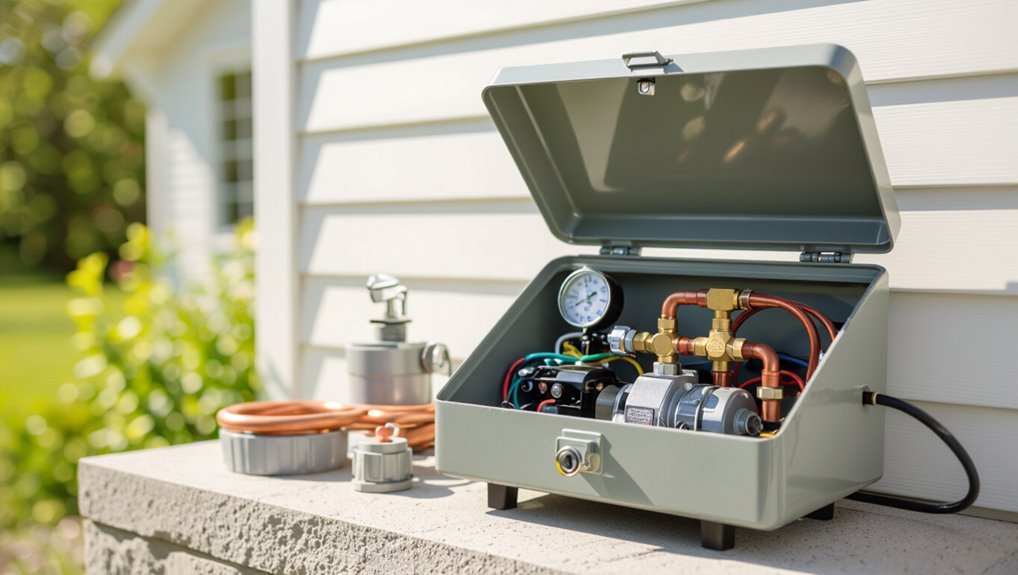
Immediate checks for a failing well pump include unusual noises, rapid pressure drops, and sputtering or no water at fixtures.
A simple pressure gauge reading and listening at the pump can quickly confirm whether pressure is erratic or the motor is struggling.
If these quick tests show abnormal readings or sounds, further diagnosis or professional service is warranted.
Clear signs to check immediately
How can a homeowner quickly tell if a well pump is failing?
Signs to check immediately include sputtering or no water flow, low pressure, unusual noises, rapid cycling, muddy or discolored water, and rising electricity bills.
Visible leaks at pressure tank fittings and frequent breaker trips also indicate trouble.
Observing these symptoms helps determine how to tell if my well pump is bad.
When a quick test can confirm a problem
After spotting obvious symptoms like sputtering water, low pressure, or unusual noises, a homeowner can run a few quick tests to confirm whether the well pump itself is failing or the issue lies elsewhere.
Check circuit breaker and fuses, listen for pump cycling, measure pressure at the tank, and note water flow after bleeding air from fixtures.
Quick results indicate pump, pressure switch, or pipe problems.
Common Symptoms of a Bad Well Pump
A malfunctioning well pump often announces itself through distinct, observable issues that affect household water use.
Common signs include the following problems that warrant inspection or professional service:
- No water or very low pressure; sputtering or intermittent flow
- Pump runs constantly or short-cycles; unusual noises from pump or tank
- Sudden surges or bursts of high pressure
No water or very low water pressure
Detecting no water or very low water pressure is one of the clearest signs that a well pump may be failing. Homeowners may find taps barely trickling or showers reduced to dribbles.
Causes include pump motor failure, worn impellers, clogged intake screens, collapsed pressure tanks, or electrical issues.
Immediate troubleshooting and professional inspection are recommended to prevent complete water loss and further damage.
Intermittent water flow or sputtering faucets
Why does water sometimes sputter from faucets or alternate between strong flow and near-dry drips?
Intermittent flow often signals air entering the line, a failing pressure tank bladder, or debris partially blocking the pump intake or check valve.
These issues cause uneven delivery rather than steady pressure.
Diagnosis requires checking tank air charge, inspecting filters and valves, and observing pump behavior under load.
Pump runs constantly or cycles on and off frequently (short cycling)
When sputtering or uneven flow has been observed, attention often shifts to how the pump operates over time; one common complaint is that the pump runs continuously or cycles on and off rapidly (short cycling).
Short cycling often indicates pressure tank issues, faulty pressure switch settings, leaks, or a failing pump. Persistent cycling stresses components, reduces lifespan, wastes energy, and merits prompt diagnosis by a professional.
Strange noises from the pump or pressure tank
Unusual sounds coming from a well pump or pressure tank often signal mechanical trouble.
Grinding, rattling, screeching, or loud banging indicate worn bearings, motor issues, loose components, or waterlogged tanks.
Intermittent clanking can point to air-charge loss or pipe movement.
Persistent or worsening noises warrant prompt inspection to prevent failure, electrical hazards, or more costly damage.
Water surges or sudden bursts of high pressure
How can sudden surges or bursts of high pressure from a well system be recognized?
Sudden spikes cause faucets to jerk, pipes to bang, and fixtures to sputter or spray unpredictably.
Pressure gauge readings jump erratically instead of holding steady.
These symptoms suggest failing pump controls, a malfunctioning pressure switch, or a compromised pressure tank bladder; prompt inspection prevents plumbing damage.
Brown, rusty, or contaminated water
Pressure issues can accompany water quality problems, and brown, rusty, or otherwise contaminated water is a clear indicator that the well system may be failing.
Discolored water suggests corrosion, casing breaches, or disturbed sediments. Persistent staining, metallic taste, or visible particles warrant testing for iron, manganese, bacteria, and sediment.
If contamination coincides with pressure changes, a professional inspection and pump evaluation are advised immediately.
Tripped breakers or electrical issues related to the pump
Frequent tripped breakers or other electrical faults often point to problems with the well pump or its control components.
Repeated trips, blown fuses, or erratic voltage can indicate motor overload, shorted windings, capacitor failure, or wiring faults.
Intermittent operation, burning smells, or hot junction boxes warrant immediate inspection by a qualified electrician or pump technician to prevent damage and safety hazards.
Reduced water temperature or hot water issues (if pump affects supply)
Why is the hot water suddenly lukewarm or inconsistent?
Reduced pump performance can lower flow and pressure, causing tankless heaters to misfire or conventional tanks to stratify, yielding cooler deliveries.
Intermittent pump cycling or air in the line can produce temperature swings.
If household hot water issues track with well pump behavior—especially pressure drops—have the pump inspected before assuming plumbing or heater failure.
Visible leaks, moisture, or corrosion around well components
Rust, dampness, or steady dripping around well equipment are clear red flags that the pump or its fittings may be failing.
Visible corrosion on pipes, pressure tanks, wiring, or seals indicates metal degradation and potential leaks.
Persistent moisture accelerates damage, causes electrical hazards, and reduces efficiency.
Prompt inspection and repair by a qualified technician prevent contamination, system failure, and higher replacement costs.
How a Well Pump Works Key Components to Inspect
The article outlines the main pump types—submersible and jet/above-ground—and how each operates within a well system.
It then highlights key components to inspect: the pressure switch and tank, electrical wiring, breakers and control box, and the wellhead, casing, and plumbing connections.
Understanding these parts helps identify common failure points and guides basic troubleshooting.
Types of well pumps (submersible vs. jet/above-ground)
Although both types move water from well to home, submersible and jet (above-ground) pumps operate differently and require distinct inspections.
Submersible pumps sit below water, needing checks for motor seals, wiring, and corrosion.
Jet/above-ground pumps remain outside the well; inspections focus on suction lines, priming, drive components, and visible leaks.
Each type demands appropriate access and safety precautions during assessment.
Pressure switch and pressure tank function
One essential pair of components that governs water delivery and pump cycling is the pressure switch and pressure tank; together they sense demand and prevent rapid on/off cycling by storing pressurized water and signaling the pump to run when system pressure drops below a set threshold.
Proper function maintains steady pressure, reduces wear, and prevents short-cycling; faults include loss of air charge, leaks, or a stuck switch.
Wiring, circuit breakers, and control box basics
Because electrical faults are a common cause of pump failure, inspecting wiring, circuit breakers, and the control box is a critical step in diagnosing well system problems.
Check for loose or corroded connections, burnt insulation, tripped breakers, and proper voltage at the motor.
Verify control box components—relays, capacitors, overloads—operate correctly.
Document findings and shut power before any repairs; consult a licensed electrician for complex issues.
Wellhead, casing, and plumbing connections
After checking electrical components, attention should turn to the wellhead, casing, and plumbing connections, where physical leaks, corrosion, and mechanical failures commonly originate.
Inspect seals, caps, and pressure tanks for rust, cracks, or loose fittings.
Check for visible water at the base, unusual smells, and reduced pressure downstream.
Promptly repair damaged piping or deteriorated casings to prevent contamination and pump strain.
Step-by-Step Troubleshooting Checklist
A concise checklist helps identify whether a well pump or its supporting systems are the source of water problems.
Before any hands-on work, basic safety checks and a review of electrical and pressure components should be completed.
Suggested focus areas include:
- Verify safety, power supply, and visible plumbing for obvious faults
- Test the pressure tank and pressure switch function
- Measure pump performance and flow rate to confirm output
Safety checks to perform before inspecting
Begin by ensuring all power sources to the well pump are fully disconnected and locked out, including circuit breakers and any disconnect switches, to prevent accidental energization.
Verify absence of voltage with a proper tester.
Shut off any upstream valves, relieve system pressure, and wear PPE.
Inspect for hazards: loose wiring, water on electrical components, slippery surfaces, and confined-space risks before proceeding with diagnostics.
How to test the pressure tank and pressure switch
Proceed to evaluate the pressure tank and pressure switch, since these components commonly cause cycling issues or loss of pressure.
Inspect tank air charge with a tire gauge at the Schrader valve; drain water to check bladder integrity.
Observe switch for corroded contacts, proper cut-in/cut-out settings, and loose wiring.
Replace faulty switch or repressurize/replace tank as needed.
Checking electrical supply, breakers, and fuses
How should the electrical supply be verified before declaring a well pump faulty?
Inspect the main panel for tripped breakers or blown fuses; reset or replace cautiously.
Verify power at the pump circuit with a multimeter at the disconnect and starter.
Check for loose connections, burned terminals, or corrosion.
Note intermittent voltage drops and ground faults.
If uncertain, hire a licensed electrician.
Inspecting visible plumbing, fittings, and valves
Inspect visible plumbing, fittings, and valves for signs that water flow or pressure problems originate before the pump rather than from the pump itself.
Look for leaks, corrosion, loose connections, partially closed or clogged valves, and damaged pressure tanks or check valves.
Verify isolation valves fully open and hose bibs closed.
Note any unusual pipe noises, trapped air pockets, or blocked strainers.
Performing a pump performance and flow rate test
Begin by measuring the pump’s actual output and pressure under normal operating conditions to determine whether performance falls within the manufacturer’s specifications.
Record static and drawdown levels, run time, and gallons per minute at typical fixtures.
Compare results to expected curves. Note irregular drops, surges, or inability to sustain flow.
Document findings and decide if calibration, maintenance, or professional evaluation is required.
When to disinfect and test water quality
When should water be disinfected and tested? Routine testing is advised annually; disinfect and test immediately after pump repairs, well construction or flooding, unusual taste, odor, discoloration, or gastrointestinal illness.
Also test after pressure issues or repeated pump failures. Use accredited labs and follow local guidelines; disinfect via chlorination when contamination is suspected, then confirm clearance with repeat bacterial and chemical analysis.
Common Causes of Well Pump Failure
Common causes of well pump failure include mechanical wear and age-related breakdown, clogged intake screens and sediment buildup, and electrical faults or voltage issues.
Additional common problems are a waterlogged pressure tank or a faulty pressure switch, which can cause short cycling and loss of pressure.
Overheating and dry-run damage also frequently lead to pump seizure or motor failure.
Mechanical wear and age-related breakdown
Over years of service, well pumps naturally degrade as moving parts wear, seals harden, and electrical components lose reliability. This gradual mechanical wear and age-related breakdown reduces performance, increases failure risk, and is often the underlying cause when a pump begins cycling, losing pressure, or running noisily.
Bearings, impellers, and shafts fatigue, valves leak, and motor insulation deteriorates, causing inefficiency, intermittent operation, and eventual seizure.
Clogged intake screens and sediment buildup
Mechanical wear and age-related breakdown can expose a pump to new vulnerabilities, including increased susceptibility to debris and sediment that it once handled without issue.
Clogged intake screens and accumulated sediment restrict flow, lower pressure, and force the motor to run longer. Sediment accelerates impeller wear and can cause cavitation.
Regular inspection, screen cleaning, and wellhead maintenance reduce risk and restore performance.
Electrical faults and voltage issues
Many well pump failures trace back to electrical faults and unstable voltage, which can quickly damage motors and control components.
Frequent causes include loose or corroded wiring, bad terminals, reversed polarity, blown fuses, tripped breakers, and voltage spikes or drops.
Symptoms are intermittent operation, buzzing, overheating, reduced performance, and premature motor burnout.
Proper diagnosis requires testing voltage, continuity, and grounding.
Waterlogged pressure tank or faulty pressure switch
A waterlogged pressure tank or a faulty pressure switch can cause rapid cycling, loss of pressure, and excessive wear on a well pump by disrupting the normal pressure-control cycle.
Symptoms include short pump runs, fluctuating faucets, and frequent motor starts.
Inspection should verify tank air charge, bladder integrity, and switch contacts.
Failure to address these leads to premature pump component fatigue and reduced system reliability.
Overheating and dry-run damage
Overheating and dry-run damage occur when a pump operates without adequate cooling from water flow, causing bearings, seals, and windings to overheat and degrade rapidly.
Persistent overheating leads to oil breakdown, seal failure, electrical insulation melting, and reduced pressure or total seizure.
Common triggers include stuck valves, clogged intake, or running without water; timely shutdown and inspection prevent irreversible motor and impeller damage.
Well contamination, low water table, and environmental causes
How can environmental factors silently undermine a well pump’s function?
Contamination from surface runoff, bacteria, or chemicals can clog filters, corrode components, and trigger failures.
A declining water table forces pumps to run dry, overheat, or cavitate.
Seasonal shifts, erosion, and nearby construction alter aquifer recharge and pressure.
Regular testing and monitoring of water levels and quality help prevent environment-driven pump breakdowns.
Diagnostic Tests You Can Do Yourself
A few basic diagnostic tests can help determine whether a well pump is failing before calling a professional.
The homeowner can measure static and drawdown water levels, use a multimeter to check voltage and continuity, observe short cycling and run-time patterns, and calculate flow rate and pumping capacity.
These steps provide clear data to identify common electrical, pressure, and performance problems.
Measuring static and drawdown water levels
Want to know whether the well can keep up with household demand? A simple tape or sounder measures static level with the pump off.
Run water until the pump starts, then record the pumped-down level (drawdown).
Compare drawdown to well yield and manufacturer specs. Excessive drawdown or slow recovery indicates low yield, clogged screens, or failing pump—call a pro if unsure.
Using a multimeter to check voltage and continuity
Grab a multimeter and basic safety gear to perform simple electrical checks that can distinguish wiring or motor failures from plumbing problems.
Measure voltage at the pressure switch or pump terminal with power on; verify correct supply (typically 120/240V).
With power off, test continuity across motor windings and overloads; infinite or shorted readings indicate electrical faults.
Record values and compare to pump specifications.
Testing for short cycling and run time patterns
Observe the pump’s cycling and run-time behavior to reveal issues that electrical checks alone may miss.
Note frequency of starts, duration of each run, and gaps between cycles over several hours. Rapid on/off (short cycling) suggests pressure tank, pressure switch, or leaks.
Excessively long runs indicate low well yield or clogged intake.
Record patterns, times, and conditions for technician review.
Calculating flow rate and pumping capacity
Before altering hardware or calling a pro, measure how much water the pump actually delivers and how quickly the well recovers: these two figures—flow rate (gallons per minute) and pumping capacity—determine whether the pump matches the well.
Use a container and stopwatch for GPM, then shutdown and record recovery level over time. Compare results to pump specs and required household demand; shortfalls indicate undersized pump or well limitation.
When to Call a Professional vs. DIY Fixes
A clear line separates minor well pump tasks homeowners can safely handle—such as checking pressure switches, replacing fuses, or tightening loose fittings—from complex problems that demand licensed well or electrical technicians, like wiring faults, buried pump retrieval, or submersible motor failures.
When professional help is needed, documenting symptoms, pressure readings, noise patterns, recent work, and any error codes will speed diagnosis and reduce service time.
Providing concise, dated notes and photos at the time of the call helps the technician prepare the right tools and parts.
Problems typically safe for homeowners to fix
Several common well-pump issues can be safely handled by a homeowner with basic tools and caution: checking and replacing fuses or circuit breakers, tightening loose electrical connections at the control box, clearing a clogged pressure switch or its air gap, replacing a worn pressure tank bladder, and repairing or replacing simple surface piping and fittings above the wellhead.
Homeowners should follow safety precautions, consult manuals, shut power before work, and stop if unsure.
Issues that require licensed well or electrical technicians
When should a homeowner stop troubleshooting and call a licensed well or electrical technician?
Major electrical faults, persistent motor overheating, burnt smells, tripped breakers that reset instantly, or repeated pump failures indicate professional intervention.
Collapsed or contaminated wells, sudden pressure tank collapse, complex control box or wiring issues, and inaccessible submersible pump work require licensed technicians to guarantee safety, code compliance, and proper diagnosis.
How to document issues for a service call
Homeowners should record clear, specific details before contacting a service technician to guarantee fast, accurate diagnosis and to help distinguish DIY fixes from professional repairs.
Note symptoms, timing, noises, pressure readings, recent work, power interruptions, and visible leaks.
Photograph equipment, label measurements, and save error codes or meter screenshots.
Provide serial numbers and accessibility notes to expedite onsite assessment and reduce diagnostic time.
Repair and Replacement Options with Cost Guidance
Typical repair tasks (seal, capacitor, impeller) and their rough price ranges can often be handled affordably, while component swaps like a pressure switch or tank bring specific cost/benefit trade-offs. When diagnostics show motor failure, full pump replacement is usually warranted and carries substantially higher expected costs depending on depth and pump type. The table below illustrates common options and a simple cost impression to frame decisions.
| Option | Typical Cost Range |
|---|---|
| Minor repairs (seals, wiring, capacitors) | $100–$500 |
| Pressure switch replacement | $75–$250 |
| Pressure tank replacement | $300–$1,200 |
| Full pump replacement (submersible or jet) | $1,000–$5,000+ |
Typical repair tasks and approximate price ranges
Repair and replacement work for a failing well pump ranges from simple component swaps to full-system overhauls, with costs that vary accordingly.
Common tasks include impeller or seal replacement ($150–$500), motor rewinds or replacements ($400–$1,500), control box or capacitor swaps ($75–$300), and complete pump and piping replacement ($1,000–$5,000+).
Labor, depth, and parts quality drive final prices.
Replacing a pressure switch or pressure tank: cost/benefit
Why replace the pressure switch or tank now rather than later?
Replacing a failing switch or waterlogged tank is relatively inexpensive compared with pump replacement. Benefits include restored pressure cycles, reduced pump start/stop frequency, longer pump life, and fewer emergency repairs.
Costs vary by part and labor but often pay back via energy savings and avoided major failures; consult a pro for diagnostics.
When full pump replacement is warranted and expected costs
When repeated diagnostics, repairs, or part replacements fail to restore consistent pressure and flow, full pump replacement becomes the most cost-effective and reliable option.
Signs that justify replacement include frequent motor burnouts, seized or corroded components, significant decreases in capacity, contaminated well water damaging pump internals, or age beyond the manufacturer’s expected lifespan.
Typical replacement costs range from $1,200 to $6,000, depending on pump type, depth, labor, and materials.
Preventive Maintenance to Extend Pump Life
Preventive maintenance can greatly extend a well pump’s service life by catching problems early and reducing strain. Key actions include routine inspections, water quality and sediment control, and electrical checks with surge protection:
- Regular inspection routines and seasonal checks
- Water testing and sediment control measures
- Electrical maintenance and surge protection
Recognizing warning signs that maintenance is overdue—noisy starts, reduced flow, or pressure changes—helps prioritize interventions.
Regular inspection routines and seasonal checks
Establishing a concise inspection routine helps detect minor issues before they become costly failures.
Technicians or owners should check pressure gauges, listen for unusual noises, inspect wiring, fittings, and the pump housing, and verify cycle frequency monthly.
Seasonal checks before winter and after heavy storms guarantee insulation, freeze protection, and secure mounting.
Document findings, schedule repairs, and replace worn components promptly.
Water testing and sediment control measures
Why test the water regularly? Routine testing detects contaminants, pH shifts, and mineral loads that accelerate pump wear.
Identifying sediment, iron, or manganese prompts filtration, settling tanks, or cartridge replacements.
Installing sediment filters, periodic flushing, and well chlorination where appropriate reduce abrasives and biofilm.
These measures preserve pump components, improve water quality, and extend service life while guiding timely professional intervention.
Electrical maintenance and surge protection
Because electrical faults and spikes are common causes of sudden well pump failure, routine electrical maintenance and surge protection are essential to reliable operation.
Periodic inspection of wiring, junctions, and control boxes guarantees tight connections and corrosion-free terminals.
Installing whole-system surge arrestors and dedicated breakers protects motors and control circuits.
Regular testing of capacitors and relays prevents premature failure and costly downtime.
Signs to watch that mean maintenance is overdue
When should attention be paid before a small problem becomes a failure? Visible signs include reduced flow, fluctuating pressure, frequent cycling, unusual noises, and muddy or discolored water.
Also monitor higher energy bills, tripped breakers, and longer run times. Regular checks of pressure tanks, fittings, and filters catch wear early. Ignoring these indicators increases risk of pump damage and costly emergency repairs.
Safety Precautions and Legal/Regulatory Considerations
When evaluating a failing well pump, attention to electrical hazards and confined-space risks is essential to protect anyone working at the site.
Local codes often require permits and the use of licensed contractors for repairs or replacements, so compliance should be confirmed before work begins.
If the pump or well produces contaminated water, proper handling and disposal procedures must be followed to prevent environmental or health harms.
Electrical and confined-space safety around wells
How should safety be prioritized before any electrical work or entry near a well?
Workers should de-energize circuits, lock out/tag out, and verify absence of voltage with properly rated testers.
Use GFCI protection, insulated tools, and PPE.
For confined-space entry, test atmosphere for oxygen, flammables, and toxic gases; ventilate, establish rescue plans, maintain communication, and employ trained personnel only.
Local codes, permits, and licensed contractor requirements
Many jurisdictions impose specific codes, permit requirements, and licensure standards for well-related electrical and excavation work to protect public safety and water quality.
Homeowners must verify local regulations before repairs or replacements. Licensed contractors guarantee compliance, inspections, and proper documentation.
Unauthorized work may void warranties, trigger fines, or create liability. When in doubt, contact the local permitting office or hire a certified well professional.
Handling contaminated water and proper disposal
Because contaminated well water can pose acute health risks and environmental hazards, it must be handled and disposed of according to strict safety and regulatory protocols to prevent exposure and downstream contamination.
Professionals should test contaminants, use appropriate PPE, contain and neutralize pollutants, and follow local disposal rules for sewage, chemical disinfectants, or hazardous waste.
Documentation and reporting to authorities may be required.
How to Prepare for a Service Visit
Before scheduling a technician, the homeowner should compile key details such as pump model, recent symptoms, water levels, and any prior repairs.
Prepare a concise list of questions for the pump technician about diagnostics, estimated costs, timeline, and warranty coverage.
Expect the visit to include inspection, pressure and electrical tests, a clear explanation of findings, and a repair or replacement estimate.
Information to gather before calling a pro
What details should be collected before contacting a well service technician? Note well location, pump model, age, and recent maintenance. Record symptoms: loss of pressure, noises, intermittent operation, wet spots, electrical tripping. Measure static and pump run water levels if known. List recent weather, power events, and any DIY attempts. Provide access notes and preferred contact times.
Questions to ask a pump technician
With the gathered details in hand, homeowners should prepare a concise list of questions to ask the pump technician to make the visit efficient and productive.
Suggested queries include expected causes, diagnostic steps, approximate costs, required parts, warranty status, estimated timeline, safety precautions, and preventive maintenance recommendations.
Also ask about licensing, insurance, written estimates, and whether a report or checklist will be provided after service.
What to expect during diagnosis and repair
Prepare the site so a technician can diagnose and repair the well pump efficiently: clear access to the pump, pressure tank, control box and any external equipment, secure pets, and guarantee a homeowner or authorized representative is present to answer questions and approve work.
The technician will inspect electricals, measure pressure and flow, test pump performance, identify leaks or contamination, and provide a written estimate before proceeding.
Real-World Scenarios and Quick Resolutions
The article presents common failure patterns and quick fixes homeowners might encounter with well systems. Below are three concise, illustrative scenarios to prompt practical troubleshooting and next steps:
- Pump short-cycling after pressure tank failure
- Sudden loss of water after storm or power outage
- Intermittent flow due to electrical fluctuation
Scenario: Pump short-cycling after pressure tank failure
When a pressure tank fails, the pump often begins short-cycling—rapidly turning on and off in quick succession—because the tank can no longer store and deliver water between pump cycles.
This causes excessive wear, overheating, higher electricity use, and premature pump or motor failure.
Inspect the tank bladder/air charge, check pressure switch settings, and replace or repair the tank promptly; call a pro if cycling persists.
Scenario: Sudden loss of water after storm or power outage
After a severe storm or an extended power outage, homeowners may discover an abrupt loss of water despite no prior pump problems. This sudden stoppage often stems from tripped breakers, a failed control box, frozen or clogged inlet lines, sump flooding, or debris and air locks introduced during the event.
The homeowner should check breakers, visible wiring, pressure switch, and well cap. Purge air locks, and call a pro if electrical faults or contamination are suspected.
Scenario: Intermittent flow due to electrical fluctuation
Fluctuating electrical supply can cause a well pump to run erratically. Voltage drops or surges lead to reduced pressure, sputtering taps, or brief outages.
A multimeter check for consistent voltage, inspection of wiring, and testing of the control box and capacitor can identify issues.
If problems persist or involve dangerous wiring, a licensed electrician or well technician should be called immediately.
Conclusion: Prioritizing Repairs and When Replacement Is Best
A concise decision guide helps determine whether a malfunctioning well pump should be repaired, replaced, or monitored.
Evaluation should weigh symptom severity, repair cost versus replacement cost, and projected remaining life of the system.
When failures are recurrent, repairs exceed half the value of a new pump, or safety/health risks exist, replacement is generally recommended.
Quick decision guide: repair, replace, or monitor
When should a homeowner repair, replace, or simply monitor a failing well pump?
Assess age, symptoms, repair cost versus replacement, and water needs.
Repair for isolated faults under midway service life and low cost.
Replace when recurring failures, corrosion, or repairs exceed 50–60% of replacement cost, or pump is near end of life.
Monitor minor, intermittent issues and document changes.
Conclusion
When a well pump falters, it is the quiet keening of a house’s unseen heart. Ignored symptoms snowball into costly silence; timely attention stitches the breach. Homeowners who heed signs, follow safe troubleshooting, and call professionals when needed preserve not just water flow but the household’s equilibrium. Sometimes repair mends the pulse; sometimes replacement lays fresh foundations. In either case, acting promptly keeps daily life from running dry.