How to Adjust the Temperature on a Delta Shower Faucet: Step-by-Step Guide for Safe, Precise Control
To adjust the temperature on a Delta shower faucet, first confirm the valve model, then shut off the water supply. Remove the handle to access the cartridge and temperature limit stop. Make small incremental turns of the calibration nut or limit stop to adjust the hot limit, reassembling and testing the temperature after each adjustment. Check seals and cartridges for wear, replacing them if necessary. Always follow safety precautions to prevent scalding and ensure a stable outlet temperature. Additional model-specific details and troubleshooting steps are included for your convenience.
Overview of Temperature Adjustment for Delta Shower Faucets
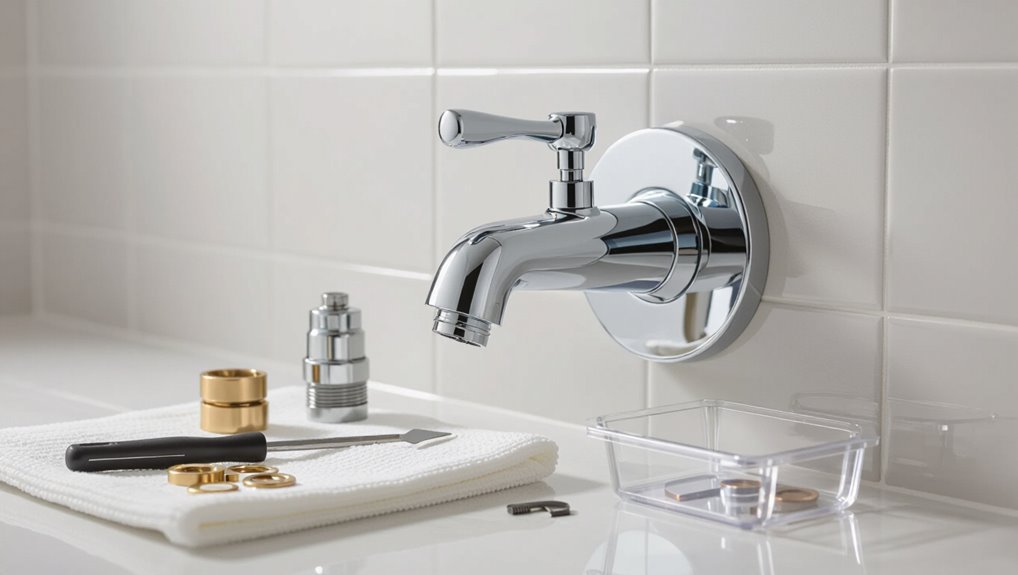
Before attempting any adjustments, homeowners should confirm the faucet model, shut off the water supply if required, and have basic tools on hand.
Common reasons to change the temperature setting include preventing scalding, improving shower comfort, and optimizing hot water usage for energy efficiency.
Understanding these prerequisites and motivations helps guarantee a safe and effective adjustment process.
What homeowners need to know before adjusting the temperature
A few simple checks can prevent common mistakes when adjusting the temperature on a Delta shower faucet.
Homeowners should verify water supply shutoff access, inspect for visible leaks, and confirm cartridge type. Basic tools and manufacturer instructions are essential.
Knowing how to adjust the temperature on a Delta shower faucet safely avoids damage and guarantees correct parts or professional help if unfamiliar with plumbing components.
Common reasons to adjust temperature (safety, comfort, efficiency)
Adjusting a Delta shower faucet’s temperature often stems from three practical concerns: safety, comfort, and efficiency.
Safety prevents scalding for children, elderly, or vulnerable users by limiting maximum output.
Comfort tailors water warmth to personal preference and seasonal changes.
Efficiency reduces energy and water waste by optimizing setpoint and avoiding prolonged balancing or excessively hot preheating.
Quick answer: How to adjust the temperature on a Delta shower faucet
A quick adjustment on a Delta shower faucet involves removing the handle, accessing the cartridge or temperature limit stop, and turning the adjustment screw to shift the hot/cold balance.
The task typically takes 15–30 minutes, is of moderate difficulty, and requires a screwdriver, hex wrench, and possibly pliers.
Safety precautions and a basic understanding of faucet components are recommended before beginning.
One-sentence summary of the process
Begin by turning off the water and removing the handle to access the temperature limit stop.
Then loosen the stop to rotate it toward hotter or colder as needed.
Reassemble the handle and test the water until the desired temperature is reached.
The process requires minor adjustments of the limit stop, incremental testing, and re-tightening; repeat until the valve delivers the preferred mix consistently and safely.
Estimated time, difficulty, and tools required
Most homeowners can complete the job in 20–45 minutes using basic tools and moderate DIY skills.
Required tools include an adjustable wrench, screwdriver, Allen key, needle-nose pliers, and a cartridge puller if needed.
Difficulty is low to moderate: straightforward for those comfortable with plumbing basics; seek professional help if corrosion, unusual fittings, or persistent leaks are encountered.
Identify your Delta shower faucet type and valve model
Before making any temperature adjustments, the technician should locate the Delta model number—usually stamped on the trim, escutcheon, or valve body—and verify the valve type (cartridge, ball, or thermostatic).
Single-handle, two-handle, and thermostatic systems each use different internal components and require distinct adjustment procedures. Knowing the exact valve model determines whether temperature limiting stops, cartridge shims, or thermostat recalibration will be needed.
How to find the model number and valve type
How can a homeowner quickly identify a Delta shower faucet model and its valve type?
Locate visible markings on the escutcheon, spout, or handle; remove trim to inspect the cartridge or valve body for stamped part numbers.
Match numbers to Delta’s online parts lookup or take clear photos to a plumbing supplier.
Note installation date and finish for accurate identification and replacement parts.
Differences between single-handle, two-handle, and thermostatic Delta valves
When identifying a Delta shower faucet type, the homeowner should distinguish among single-handle, two-handle, and thermostatic valves by their control layout and functionality:
Single-handle units combine temperature and flow in one lever;
two-handle systems separate hot and cold controls;
thermostatic valves maintain set temperature automatically with separate stop/volume controls.
Recognizing these differences aids accurate identification before adjustments.
How valve type affects the adjustment method
Identifying the specific Delta valve type and model is essential because each design requires different access points, tools, and adjustment procedures.
The user must note single-handle cartridges, dual-handle stems, or thermostatic cartridges. Model numbers (often on the cartridge or paperwork) guide parts and torque specs.
Correct identification prevents damage, guarantees proper adjustment of limit stops, and maintains safe temperature control.
Safety precautions and preparatory steps
Before any adjustments are made, the water supply should be shut off and residual pressure relieved to prevent leaks or scalding.
The technician should assemble the required tools and any replacement parts specific to the identified Delta model.
Surfaces and finishes around the work area should be protected with cloth or tape to avoid scratches and debris.
Turn off water supply and relieve pressure
Shut off the main water feed or the shower’s dedicated shutoff valve to prevent flow while working on the Delta faucet.
Open a nearby faucet to verify supply is off.
Drain residual water by operating the shower handle and holding a towel or bucket beneath the spout.
Close any secondary valves and wear eye protection; make certain no water pressure remains before disassembling components.
Gather necessary tools and replacement parts
Gather the proper tools and parts to guarantee a safe, efficient repair: a Phillips and flathead screwdriver, adjustable wrench or cartridge puller, needle-nose pliers, plumber’s grease, replacement O-rings or a new Delta cartridge model-matched to the fixture, and Teflon tape.
Verify cartridge model, gather replacement screws and escutcheon hardware, keep a clean container for small parts, and have a flashlight and safety gloves available.
Protect finishes and surrounding surfaces
Protect adjacent surfaces and finishes by covering the tub, shower floor, and nearby fixtures with a soft, non-abrasive cloth or padded drop cloth to prevent scratches and dents; secure the covering with painter’s tape so it won’t shift during work.
Remove jewelry and place small parts on a magnetic tray; mask grout edges and tile seams to avoid tool chips, chemical stains, or accidental caustic contact.
Step-by-step temperature adjustment for single-handle Delta faucets
The procedure begins with safely removing the handle and trim to expose the cartridge and temperature-limiting components.
Next, the user locates the temperature limit stop or stop ring and adjusts its position to allow hotter or cooler maximums.
Finally, the handle is reassembled and the temperature tested, with common troubleshooting steps noted for issues like stuck stops or persistent scalding.
Remove handle and trim safely
Begin by turning off the water supply and ensuring the valve is in the off position to prevent leaks while working.
Using appropriate tools, remove the handle set screw and lift the handle straight off.
Unscrew the decorative trim and escutcheon plate, taking care not to scratch finishes.
Keep fasteners and small parts organized, and place components on a soft cloth to prevent damage.
Locate the temperature limit stop or stop ring
Locate the temperature limit stop or stop ring by inspecting the cartridge area once the trim and handle are removed.
The stop is typically a plastic or metal ring seated on the cartridge shoulder or valve body. It may have tabs, screws, or a set position indicator.
Note its orientation and any markings before proceeding, and guarantee visibility and access for the next adjustment step.
How to move the stop for hotter or cooler limits
Loosen any retaining screws or tabs, then rotate the stop ring toward the hot side to increase maximum temperature or toward the cold side to reduce it.
Move the ring in small increments, noting detents or index marks.
Secure the ring lightly, restore power or water pressure if needed, and verify range by gently moving the cartridge.
Adjust again if limits remain off.
Reassemble handle and test temperature
Reinstall the handle assembly by sliding the cartridge stem cover and handle back into place, aligning any index marks, and securing the handle with its retaining screw or cap.
Restore trim and decorative pieces.
Turn water supply on, operate handle through full range, and verify hot and cold limits.
Fine-tune stop position if necessary, then run water until temperature stabilizes before final confirmation.
Troubleshooting common issues during this process
When issues arise during the single-handle temperature adjustment process, systematically verify common causes—improper cartridge alignment, debris in the valve, or incorrect limit stop positioning—before disassembling further.
Inspect cartridge orientation and spline engagement, clear mineral buildup with vinegar or a soft brush, confirm the limit stop’s set screw and travel range, and test with controlled hot/cold supply.
Replace worn seals or cartridge if problems persist.
Step-by-step temperature adjustment for Delta thermostatic valves
The procedure begins by removing the trim to access the thermostatic cartridge and control assembly.
Next, the technician adjusts the temperature limit stops or calibration nuts, then reassembles the valve and makes fine calibration adjustments to the thermostat.
Finally, the installer tests the shower under normal flow to verify stable, accurate temperature control.
Accessing the cartridge and thermostatic control
Begin by shutting off the water supply and relieving residual pressure before removing the handle and escutcheon to expose the cartridge and thermostatic control.
Remove retaining clip or nut, then withdraw the cartridge straight out, noting orientation.
Inspect seals, O-rings, and thermostatic assembly for wear or debris.
Clean components gently, replace damaged parts, and guarantee the cartridge slides freely before reassembly.
Adjusting temperature limit stops or calibration nuts
With the cartridge and thermostatic components exposed and inspected, attention shifts to the temperature limit stop or calibration nut responsible for regulating maximum water temperature.
The technician loosens the lock, adjusts the stop or nut in small increments toward cooler or hotter limits, retests temperature after each change, and secures the mechanism once the desired maximum is consistently achieved, avoiding overadjustment.
Reassembling and calibrating the thermostat
Reassemble the valve by reversing the disassembly steps, seating the cartridge, reinstalling seals and trim, and hand-tightening fasteners to factory torque specifications before final adjustments.
With the handle removed, align the thermostat index to the calibrated stop, replace the handle and escutcheon, then use the calibration nut or set screw to make small incremental temperature changes.
Secure trim and retest adjustments after system pressure stabilizes.
Testing and verifying stable temperature control
Start testing the thermostat by running water at a steady flow and measuring the outlet temperature with a calibrated thermometer or digital probe, noting any deviation from the target setpoint.
Allow temperature to stabilize for several minutes, adjust trim or limit stop if needed, retest across multiple flow rates, confirm repeatable readings within desired tolerance, and document results before finalizing installation.
Step-by-step adjustment for two-handle Delta faucets
For two-handle Delta faucets, the adjustment process begins by locating and balancing the hot and cold stops to limit handle travel and reduce temperature extremes.
Next, internal stops or cartridge components are adjusted or replaced as needed to fine-tune the mix.
Finally, the faucet is reassembled and the water temperature is tested and readjusted until a safe, consistent setting is achieved.
Balancing hot and cold stops
Balancing the hot and cold stops on a two-handle Delta shower faucet guarantees the handles move smoothly and the mix of water temperature is predictable.
This procedure involves locating each stop screw, setting the desired range for hot and cold independently, and testing adjustments incrementally to avoid sudden temperature spikes.
Adjust each stop screw in small increments, test water temperature, and repeat until both handles provide the aimed safe range.
Adjusting internal stops or cartridge components
Access the faucet’s internal stops or cartridge components by first shutting off the water supply and removing the handle and trim; this grants clear access to the stop screws or cartridge retaining hardware used to limit travel and fine-tune temperature range.
For two-handle Delta faucets, loosen stop screws incrementally on the hot side to restrict hot travel or adjust cartridge cams to shift mixing balance, testing positions visually.
Reassembly and temperature testing
With the internal stops or cartridge components adjusted and the handle trim removed, reassembly begins by reinstalling the cartridge or stem assemblies, ensuring cartridges seat fully and any retaining clips or screws are secured to the manufacturer’s torque recommendations.
Reattach trim, handles, and escutcheon. Restore water, slowly open both handles, check hot/cold balance, confirm desired maximum temperature, and fine-tune stops if necessary.
When to replace cartridges, cartridges types, and parts
Persistent leaks, reduced temperature control, or unusual noises indicate a cartridge or valve may need replacement.
Identifying the correct parts requires noting the Delta model number and comparing cartridge types (e.g., ball, ceramic disc, or cartridge assemblies) with manufacturer specifications.
Basic replacement involves shutting off water, removing the handle and trim, swapping the old cartridge for the matched part, and reassembling while testing for proper operation.
Signs a cartridge or valve needs replacement
Inspecting a Delta shower’s performance reveals clear signs that a cartridge or valve needs replacement: fluctuating water temperature, difficulty turning the handle, visible leaks from the trim or valve body, reduced water flow, and rusty or mineral-clogged components.
Additional indicators include persistent dripping, loss of temperature control despite adjustments, and noises like knocking or grinding.
Prompt replacement prevents damage and restores safe, reliable operation.
How to identify correct replacement parts
After noting symptoms that indicate a failing cartridge or valve, the next step is identifying the correct replacement parts to restore proper function.
Determine model and series using the faucet’s trim code, manufacturer stamp, or measurements.
Match cartridge type (single-handle ball, ceramic disc, or cartridge) and check temperature limit stops, O-rings, springs, and retaining clips.
Verify OEM part numbers for compatibility.
Basic cartridge replacement steps
Begin by confirming that a cartridge replacement is warranted—common signs include erratic temperature, leaks around the handle, reduced flow, or difficulty moving the handle.
Shut off water, remove trim and retaining clip, extract old cartridge.
Identify cartridge type (Delta/RP or universal), install matching replacement with new O-rings and seals, secure clip, restore trim.
Slowly reopen water and test for leaks and proper temperature control.
Tools, parts, and costs
The following notes summarize what is needed to adjust and maintain a Delta shower faucet and where to source common parts.
- Adjustable wrench, Phillips and flathead screwdrivers, hex/Allen keys, and pliers.
- Replacement cartridges, O-rings, and trim pieces.
- Typical cost ranges: cartridges $20–$80, O-rings $5–$15, with purchases available at hardware stores, plumbing suppliers, and major online retailers.
These items cover most basic repairs and cost expectations.
Essential tools for adjustment and maintenance
Several basic tools and a handful of replacement parts cover most Delta shower faucet temperature adjustments and routine maintenance.
Required tools include a Phillips and flathead screwdriver, adjustable wrench, Allen keys, and needle-nose pliers.
Replacement items often kept on hand are a cartridge, O-rings, and seat-and-spring assemblies.
A plumbers’ grease and a soft cloth complete the kit for efficient, damage-free work.
Typical replacement part costs and where to buy
Most homeowners can expect modest expenses when replacing common Delta shower faucet parts.
Cartridge assemblies typically run $20–$60, temperature limit stops $5–$15, O-rings and seals under $10.
Genuine Delta parts are available from manufacturer websites, plumbing supply stores, Home Depot, Lowe’s, and online retailers like Amazon.
Prices vary by model; confirm compatibility before purchase to avoid returns.
Common problems and how to fix them
Common issues that can arise after adjusting a Delta shower faucet include failure to reach the desired temperature, sudden temperature fluctuations, leaks, and noisy operation or reduced flow.
Each problem typically points to specific causes such as cartridge misalignment, worn seals, mineral buildup, or water pressure problems.
The following section outlines quick diagnostic steps and targeted fixes for each symptom.
Faucet not reaching desired temperature
When a Delta shower faucet fails to reach the desired temperature, users will typically encounter water that remains lukewarm despite adjustments to the handle.
This issue often stems from problems such as a worn cartridge, blocked hot-water inlet, incorrect pressure balancing, or a scald-prevention stop set too low.
Inspect and clean the hot inlet, test and replace the cartridge if worn, verify supply temperatures, and adjust the stop appropriately.
Sudden temperature fluctuations
If water temperature suddenly shifts between hot and cold during use, the problem often lies with pressure imbalances, failing cartridges, or intermittent supply issues such as a cycling water heater or nearby appliance draws.
Diagnosing the cause requires systematically isolating supply pressures, inspecting and cleaning or replacing the cartridge and check valves, and verifying the water heater’s thermostat and recovery cycle.
Test supply pressure, replace faulty cartridge, and install pressure-balancing or thermostatic valve.
Leaks after adjustment
Sudden temperature swings can sometimes mask or precede another frequent issue: leaks that appear after adjusting a Delta shower faucet.
Leaks commonly stem from improperly seated cartridges, damaged O-rings, or loose retaining nuts. Inspect the cartridge and seals, replace worn O-rings, and torque retaining hardware to specification.
Test operation slowly, then recheck for drips. If leaks persist, consult a technician.
Noisy operation or reduced flow
Address common causes of noisy operation or reduced flow by checking the aerator, cartridge, and supply lines for debris, mineral buildup, or partially closed valves.
Clean or replace clogged aerators and cartridges; flush lines to remove sediment.
Inspect and tighten loose fittings and valve stems.
Replace worn washers or cartridges causing cavitation.
If flow remains weak, test supply pressure and consult a plumber for further diagnosis.
Best practices to maintain safe, consistent shower temperature
A regular maintenance schedule — including annual cartridge inspection and periodic valve cleaning — helps prevent temperature fluctuations before they occur.
For households with young children or elderly residents, setting a maximum shower temperature around 120°F (49°C) reduces scald risk.
Persistent or unexplained temperature changes warrant contacting a licensed plumber to inspect thermostatic or mixing components.
Proactive maintenance schedule
Regularly scheduled inspections and simple preventive steps keep a Delta shower faucet delivering safe, consistent temperatures and reduce the chance of scalding or cold spikes.
Establish quarterly checks for cartridge wear, mineral buildup, and valve operation. Clean aerators and showerheads monthly, flush lines semiannually, and replace the cartridge or thermostatic components at the first sign of inconsistency to guarantee reliable performance.
Recommended temperature limit for households with children or elderly
Building on routine checks and timely cartridge replacement, households with young children or elderly occupants should set a conservative maximum shower temperature to reduce scald risk.
A recommended limit is 100°F (38°C) to balance comfort and safety.
Use a thermostatic or pressure-balancing valve, verify temperature with a reliable thermometer, and educate household members about gradual temperature increases and supervision during bathing.
When to call a licensed plumber
When should a licensed plumber be contacted to guarantee a shower maintains a safe, consistent temperature?
A licensed plumber is needed if adjustments, like limiting stop or cartridge replacement, fail to stabilize temperature.
If scalding or sudden cold snaps persist, if anti-scald devices are absent or malfunctioning, or when plumbing code compliance, complex valve work, or leak diagnosis exceeds homeowner capability.
Comparison of Delta temperature adjustment vs. other brands
A concise comparison helps readers weigh Delta’s temperature adjustment against competitors on practical grounds. Key considerations include ease of adjustment, anti-scald performance and related safety features, and the cost and availability of replacement parts. The table below summarizes these points for quick reference.
| Feature | Delta | Other Brands |
|---|---|---|
| Ease of adjustment | Simple cartridge stops and limits | Varies; some require special tools |
| Safety / anti-scald | Built-in adjustable limit stops and pressure balance options | Mixed; some offer thermostatic valves for better control |
| Parts cost & availability | Widely available OEM parts, moderate cost | Range from inexpensive aftermarket to high-cost OEM parts |
Ease of adjustment
Compare Delta’s temperature adjustment system directly with competitors to clarify how intuitive and precise each brand feels in daily use.
Delta often offers smoother, more linear control with clear detents and predictable response. Competing valves vary: some require multiple turns or feel coarse, others provide finer incrementing but less tactile feedback.
Safety features and anti-scald performance
Having established how Delta’s control feel supports repeatable adjustments, attention shifts to how those controls protect users from scalding.
Delta mixers often include integrated temperature limit stops and pressure-balancing or thermostatic cartridges.
Compared to many competitors, Delta’s designs deliver reliable anti-scald response during pressure fluctuations, with straightforward adjustment steps.
Performance varies by model; thermostatic systems generally outperform simple pressure-balancing units.
Cost and availability of parts
Parts and replacement cartridges for Delta shower controls are generally priced and distributed in a midrange band, with OEM cartridges and temperature limit stops widely available through plumbing suppliers, big-box retailers, and online marketplaces.
Compared to premium brands, Delta parts cost less and are easier to source; compared to budget brands, they offer better availability and consistent fitment, reducing repair time and compatibility issues.
Final checklist before finishing the job
Before finishing, the technician confirms the faucet works correctly and records any settings for future reference.
- Run hot/cold cycles and check for steady temperature and no leaks.
- Verify pressure balance and anti-scald operation.
- Label cartridge position and note adjustment steps in documentation.
Functional tests to perform
Run through a concise series of functional tests to confirm the Delta shower faucet operates safely and smoothly before finalizing the job.
Verify cold, warm, and hot stops reach designated temperatures; test gradual temperature ramp across handle range; confirm thermostatic or pressure-balance response to simulated cold-water loss; check flow rates at each setting; inspect for leaks during operation; guarantee handle returns smoothly and stops are secure.
Documentation and labeling for future adjustments
Having completed functional tests, document the results and label components so future adjustments are straightforward.
Record final temperature setting, cartridge orientation, and any stop-limit positions in a simple log.
Attach durable labels to the trim plate or access panel indicating adjustment direction and date.
Include contact info, parts used, and notes about water pressure or anomalies for quicker troubleshooting and consistent future service.
Conclusion
The task is complete, but one more moment lingers: after following the steps and safeguards, the Delta faucet will likely respond, yet a subtle tweak may still be needed. The homeowner pauses, tools lowered, and wonders if the temperature now matches expectation. If not, a final adjustment or inspection could reveal the quiet culprit — a worn cartridge or calibration setting — ensuring the shower will deliver safe, precise comfort every time.