
How to Repair Galvanized Steel Pipe: Step-by-Step Fixes for Leaks, Rust, and Joints
To effectively repair galvanized steel pipe issues such as leaks, rust, and joint wear, start by conducting a safety inspection and a pressure check. For immediate leaks, use temporary solutions like repair clamps, epoxy putty, or rubber patches. For long-term fixes, consider replacing sections of the pipe, relining, or converting to copper or PEX with appropriate fittings and dielectric unions. Regular inspections and corrosion control can significantly extend the lifespan of your galvanized pipes. Follow the step-by-step techniques provided for detailed guidance on each repair method.
What Causes Leaks and Damage in Galvanized Steel Pipe
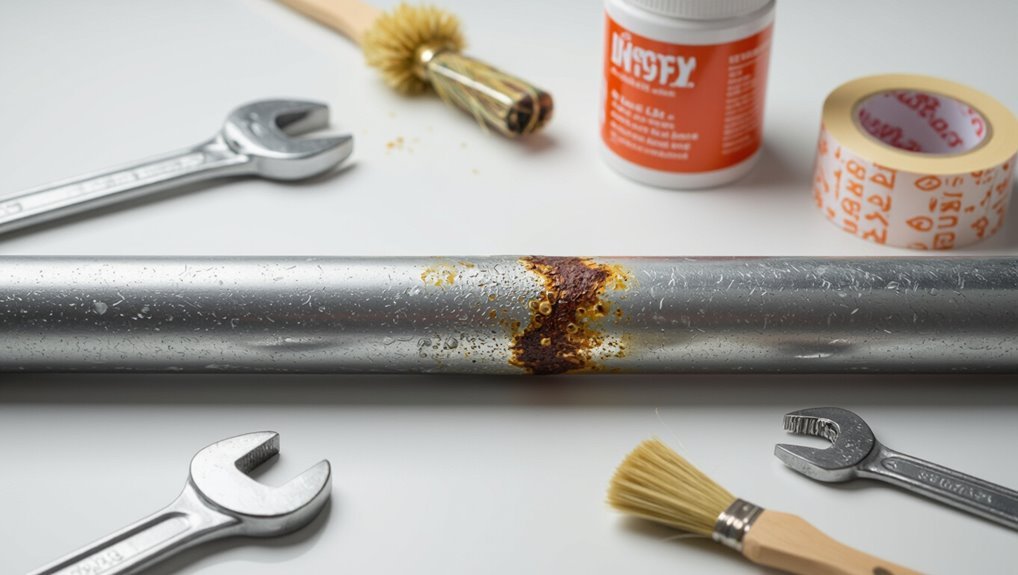
Corrosion in galvanized steel typically occurs through galvanic reaction, pitting, and general zinc coating wear that exposes the underlying iron.
Leaks most often originate at joints, threads, fittings, and thin or pitted wall sections.
Visible rust, active leaks, reduced flow, and discolored water are common signs that a pipe is failing.
Common corrosion mechanisms in galvanized steel
Deterioration of galvanized steel pipes results from a few predictable mechanisms that weaken the zinc coating and expose the underlying iron.
Electrochemical galvanic action, pitting from chlorides, uniform corrosion in acidic waters, and hydrogen embrittlement progressively thin protection.
Mechanical wear and abrasion remove coatings.
Understanding these processes informs how to repair galvanized steel pipe and select appropriate coatings, inhibitors, or replacement strategies.
Typical weak points: joints, threads, fittings, and walls
As the zinc coating fails in predictable patterns, failures most often appear at interfaces and thin sections where protective layers are disrupted or stressed.
Joints and threaded connections corrode from water pooling and mechanical wear.
Fittings suffer galvanic attack where dissimilar metals meet.
Pipe walls thin from uniform or pitting corrosion, especially at bends and supports.
Mechanical damage and vibration exacerbate leak initiation.
Signs of failure: visible rust, leaks, reduced flow, discolored water
Visible signs often provide the earliest clue that galvanized steel pipe is failing: rust streaks or flaking zinc on the exterior, wet spots or dripping at joints, a steady decline in water pressure, and brown or metallic-tinted water coming from taps.
Corrosion inside narrows the bore, weakens threads and fittings, and undermines seams. Left unaddressed, pits and scale accelerate leaks and contamination.
How to Assess the Condition of Galvanized Pipes Safely
Before beginning any assessment of galvanized pipe condition, one should follow clear safety precautions and don appropriate personal protective equipment such as gloves, eye protection, and a mask.
Additionally, gather basic inspection tools and materials like a flashlight, pipe wrench, inspection mirror, and corrosion test kit.
A concise step-by-step checklist—covering visual checks for rust and pitting, pressure and leak tests, and joint inspections—helps homeowners and professionals work methodically.
If structural corrosion, widespread leaks, or inaccessible piping is found, a licensed plumber should be contacted.
Safety precautions and required personal protective equipment
A few simple safety measures dramatically reduce risk when evaluating galvanized pipe condition:
wear gloves resistant to cuts and chemicals, eye protection, and a dust mask or respirator when disturbing rust or scale.
Guarantee adequate ventilation, use knee pads or a harness for confined or elevated work, and isolate water and electrical sources before inspection.
Dispose of debris following local regulations.
Tools and materials for inspection
Having taken basic safety steps, inspectors should assemble the specific tools and materials needed to evaluate galvanized pipe condition accurately and safely.
Essential items include a flashlight, inspection mirror, wire brush, portable moisture meter, digital calipers or gauge, non-destructive corrosion test kit, adjustable wrench, penetrating lubricant, replacement sealing tape, clean rags, and a corrosion-resistant marker for tagging problematic areas.
Step-by-step inspection checklist for homeowners and pros
Several clear steps guide a systematic inspection of galvanized pipe so both homeowners and professionals can assess condition and prioritize repairs.
Visually examine exposed runs for rust, flaking, pitting, and scale. Check joints and fittings for leaks, corrosion, and loose threads.
Test water pressure and discoloration. Tap suspect sections for thin metal sounds.
Document findings, photograph issues, and mark urgent areas for repair scheduling.
When to call a professional plumber
After completing a visual and functional inspection, determine whether issues exceed typical homeowner repairs and require a licensed plumber.
Significant corrosion, active pinhole leaks, reduced water pressure across multiple fixtures, lead contamination concerns, or failures at main joints and buried lines warrant professional assessment.
A plumber can perform pressure testing, pipe replacement, code-compliant upgrades, and safe handling of hazardous materials beyond DIY scope.
Quick Temporary Fixes for Active Leaks
For immediate stops on active leaks, common temporary options include pipe repair clamps and sleeves, epoxy putty or cold-weld compounds applied per manufacturer instructions, and rubber patches secured with hose clamps.
Each method has specific application steps, material needs, and limitations—epoxy requires surface prep and cure time, while rubber-and-clamp patches suit small breaches but are not long-term solutions.
Tape-based emergency repairs can provide very short-term containment but should only be used when pressure and temperature are low and a permanent fix is arranged.
Using pipe repair clamps and sleeves
When a galvanized steel pipe develops an active leak and a permanent repair cannot be done immediately, pipe repair clamps and sleeves provide a fast, temporary seal to stop or reduce leaking.
They suit emergency stabilization before professional work.
Key points:
- Select correct diameter and material
- Clean surrounding pipe surface
- Center clamp/sleeve over leak
- Tighten evenly to specified torque
- Monitor for continued leakage
Epoxy putty and cold weld compounds: application steps
Mixing epoxy putty or a cold weld compound provides a quick, hands-on way to temporarily seal active leaks on galvanized steel pipe when immediate professional repair is not possible.
Surface must be cleaned and dried; corroded scale removed.
Knead to uniform color, press firmly over leak, sculpt edges to overlap intact metal, and allow full cure per manufacturer.
Test for leaks before restoring pressure.
Rubber and hose-clamp patch method: materials and limitations
Although meant only as a short-term measure, the rubber-and-hose-clamp patch is a simple, widely available method for temporarily stopping active leaks on galvanized steel pipe:
It uses a rubber piece (cut from inner tube or flat gasket) wrapped over the leak and secured with one or more stainless-steel hose clamps tightened evenly.
Effectiveness is limited by pressure, corrosion, hole size, and temperature; not a permanent repair.
Tape-based emergency repairs and when they are appropriate
Several types of tape—commonly silicone self-fusing, butyl, and specialized pipe-repair tapes—are used as quick temporary fixes for active leaks on galvanized steel pipe.
They bond over clean, dry metal, conforming to irregularities to slow or stop flow until permanent repair.
Appropriate for small pinholes or until shutdown; not suitable for large ruptures, high pressure, or long-term corrosion mitigation.
Permanent Repair Options for Galvanized Pipe Leaks
Permanent repairs for galvanized pipe leaks range from direct section replacement with new galvanized fittings to converting the system to copper or PEX, each with distinct installation steps and trade-offs.
Appropriate threaded fittings and couplings are essential when joining dissimilar materials, and any soldering or brazing at changeover joints requires attention to corrosion barriers and code compliance.
The following sections outline step-by-step replacement procedures, conversion pros and cons, fitting techniques, and soldering/brazing considerations.
Replacing sections with new galvanized pipe: step-by-step
Begin by isolating the damaged section and turning off the water supply to the affected line; this guarantees a dry, safe workspace for cutting and fitting.
Remove compromised pipe using appropriate cutters, clean remaining threads, and inspect fittings.
Measure and cut new galvanized pipe to length, apply thread sealant, and tighten fittings with pipe wrenches.
Restore water, check for leaks, and retighten as necessary.
Converting to copper or PEX: pros, cons, and installation overview
After removing and replacing damaged galvanized sections, homeowners often consider converting the run to copper or PEX to avoid future corrosion and improve water quality. The article contrasts durability, cost, and ease of installation: copper resists heat and lasts, PEX is flexible and cheaper. Permit requirements, fittings, and local codes influence choice; professional installation is often recommended.
| Material | Pros | Cons |
|---|---|---|
| Copper | Durable | Costly |
| PEX | Flexible | UV-sensitive |
| Both | Code-dependent | Requires fittings |
Using galvanized-to-threaded fittings and coupling techniques
Employ galvanized-to-threaded fittings and proper coupling techniques to create a long-lasting, mechanically sound repair for leaking galvanized runs.
Select fittings rated for galvanic compatibility, cut squarely, deburr, and clean threads.
Apply pipe thread sealant or PTFE tape correctly, tighten to manufacturer torque, and use coupling unions for alignment.
Inspect for leaks and support the repaired section to prevent stress and subsequent failure.
Soldering and brazing considerations for transition joints
While threaded fittings and couplings are common for mechanical repairs, some situations call for metallurgical joins to restore pressure integrity and reduce potential leak points.
Soldering or brazing galvanized-to-copper or steel connections requires thorough cleaning, flux selection compatible with zinc coatings, heat control to avoid zinc vapor, and proper filler metal.
Prefer brazing for higher strength; guarantee ventilation and safety precautions.
Repairing Rusted or Thinned Pipe Walls
When evaluating rusted or thinned galvanized pipe walls, the inspector determines whether remaining wall thickness can be safely repaired or if full replacement is necessary.
If repairable, internal relining or cured-in-place liners can restore flow and corrosion resistance, while external reinforcement with sleeves or high-pressure clamps provides localized strength.
Each option has trade-offs in durability, application process, and expected service life that should guide the final selection.
Evaluating whether thinning is repairable or requires replacement
How thin is too thin for repair? The inspector assesses remaining wall thickness, corrosion pattern, pressure rating, and location.
Localized pitting under 50% original thickness often merits patching; widespread thinning, compromised threads, or safety-critical runs require replacement.
Consider future load, accessibility, and inspection frequency. Document measurements and consult codes or a qualified plumber when thresholds or service conditions are uncertain.
Using internal pipe liners and relining methods: benefits and process
Installers can extend the service life of rusted or thinned galvanized steel pipe by applying internal liners or relining systems, which restore hydraulic capacity and corrosion resistance without full pipe replacement.
Methods include cured-in-place pipe (CIPP), spray-applied epoxy, and pull-in-place liners.
Preparation involves cleaning, inspection, and flow isolation.
Benefits: reduced downtime, cost savings, and improved longevity when structural integrity remains adequate.
External reinforcement techniques (sleeves, clamps) and lifespan
Several external reinforcement options—sleeves, wrap-around clamps, and banded collars—provide a practical way to stabilize rusted or thinned galvanized steel pipe without full replacement.
These devices compress and distribute pressure, sealing small leaks and supporting weakened sections. Installation is quick, requiring surface cleaning and proper torque.
Lifespan varies with corrosion severity and environment, typically extending service by 5–15 years.
Fixing and Maintaining Pipe Joints and Threaded Connections
Attention to joints and threads is critical when repairing galvanized pipe.
The section outlines safe methods for disassembling corroded threaded connections, cleaning and re-taping or re-sealing threads (comparing PTFE tape and pipe dope), and when to replace damaged fittings.
Clear reassembly practices and torque considerations are emphasized to restore leak-free joints.
Disassembling corroded threaded joints safely
Loosen corroded threaded joints with care to prevent damage to fittings and injury; frozen or seized joints require the right combination of penetrating lubricant, heat, and controlled force to free them.
Support piping to avoid torque stress, protect nearby finishes, and wear eye/hand protection.
Apply slow, steady turns with appropriate wrenches, alternate directions to work corrosion, and stop if cracking or excessive resistance occurs.
Cleaning, re-taping, and re-sealing threads (PTFE tape vs pipe dope)
Before reassembling, threads should be thoroughly cleaned, inspected, and properly resealed to guarantee a leak-free joint.
Wire brush and solvent remove rust, old tape, and debris.
For galvanized steel, PTFE tape provides dry sealing and easy removal; pipe dope (thread sealant) offers lubricity and fills irregularities.
Apply tape clockwise, two to three wraps, or a thin, even coat of dope.
Replacing damaged fittings and best practices for reassembly
After cleaning and resealing threads, any fittings showing cracks, corrosion beyond the threads, or stripped connections should be replaced to restore joint integrity.
New fittings must match pipe material and thread type. Apply thread sealant correctly, hand-start threads to avoid cross-threading, and tighten to manufacturer torque.
Inspect for alignment, support piping to prevent stress, and pressure-test the assembly before returning to service.
Corrosion Control and Long-Term Prevention
Effective corrosion control begins with evaluating water chemistry to identify pH, dissolved oxygen, and chloride levels that drive corrosivity.
Appropriate protective actions include applying repair-grade zinc-rich coatings or re-galvanizing damaged areas and considering sacrificial anodes or basic cathodic protection where practical.
A regular maintenance schedule with periodic testing, visual inspections, and records of coatings and anode performance guarantees long-term prevention.
Water chemistry effects and testing for corrosivity
Understanding water chemistry is essential for evaluating how a supply will affect galvanized steel over time.
Technicians assess pH, dissolved oxygen, chloride, sulfate, alkalinity, and hardness to gauge corrosivity. Simple lab or field tests (pH meter, conductivity, test strips, titrations) identify aggressive conditions.
Results inform mitigation: water treatment, buffering, or system adjustments to minimize corrosion rates and extend pipe life.
Protective coatings and galvanizing repair products
Restore and extend the life of galvanized steel by selecting appropriate protective coatings and repair products designed to seal bare metal, inhibit undercutting, and recreate a sacrificial zinc barrier where the original galvanizing has been compromised.
Use zinc-rich primers, cold galvanizing sprays, epoxy zinc primers, and corrosion-inhibiting topcoats.
Prepare surfaces by cleaning and removing loose rust; follow manufacturer curing and compatibility guidelines for lasting protection.
Anode installation and cathodic protection basics
After sealing bare metal and applying zinc-rich coatings, long-term corrosion control often requires active cathodic protection to guard areas where galvanizing cannot be fully restored.
Sacrificial anodes (zinc or magnesium) are electrically connected to the pipe, corroding preferentially and protecting steel.
Impressed current systems use external power to supply protective current.
Proper anode selection and placement guarantee effective, localized protection without overprotection.
Regular maintenance schedule and monitoring tips
A routine maintenance schedule combined with targeted monitoring is essential to sustain corrosion control measures on galvanized steel pipe systems.
Routine inspections, cleaning, and record-keeping prevent failures.
Recommended actions include:
- Quarterly visual inspections for rust and coating damage
- Annual cathodic protection tests
- Monthly leak checks at joints
- Immediate repair of compromised coatings
- Maintain detailed logs for trend analysis and scheduling
Cost, Time, and Decision Factors: Repair vs Replace
Estimating material and labor costs for common repairs helps determine whether patching, section replacement, or isolation fittings are economically viable.
Comparing the expected remaining life of repaired galvanized runs versus fully replaced systems clarifies long-term value and maintenance burden.
When recurring failures, extensive corrosion, or compromised water quality are present, full repiping often becomes the better investment despite higher upfront cost.
Estimating material and labor costs for common repairs
Calculate expected material and labor costs by breaking common galvanized pipe repairs into component tasks—pipe replacement segments, fittings, joints, corrosion treatment, and labor hours—then applying local unit prices and hourly rates. Itemize quantities, estimate hours, and add contingency. Example cost sketch:
| Task | Material | Labor |
|---|---|---|
| Short segment | $15 | 0.5h |
| Fitting/joint | $8 | 0.3h |
| Corrosion repair | $12 | 1.0h |
Life expectancy comparisons: repaired galvanized vs replaced systems
Many repaired galvanized systems can regain functionality for several years, but full replacements generally offer a longer, more predictable service life.
Repairs often extend service by 3–10 years depending on corrosion extent and repair quality.
Replacements (copper, PEX, CPVC) commonly last 20–50 years.
Decision factors include remaining pipe condition, budget, expected occupancy duration, and acceptable maintenance frequency.
When full repiping is the better investment
When corrosion is widespread, leaks recurrent, or water quality is consistently poor, full repiping often becomes the more cost-effective and reliable choice than piecemeal repairs.
Decision factors include age of system, frequency and location of failures, cumulative repair costs, disruption time, and long-term water quality.
Upfront replacement reduces future emergency repairs, improves flow and safety, and may increase property value despite higher initial expense.
Step-by-Step Project Guide: Replacing a Section of Galvanized Pipe
A concise project guide begins with a clear tools and materials checklist and safety steps including shutting off the water and preparing the work area.
The procedure then covers cutting out the damaged section, prepping the pipe ends, and installing the replacement pipe and fittings.
Finally, the work is validated with a pressure test and any finishing touches to secure and protect the repair.
Tools and materials checklist
Gather the correct tools and materials before cutting into the galvanized pipe to guarantee safety and prevent delays.
Required items include:
- pipe cutter or reciprocating saw with metal blade
- pipe wrenches
- threader or rethreading kit
- replacement galvanized or approved replacement pipe and fittings
- pipe joint compound or PTFE tape
- rust penetrant
- wire brush
- measuring tape
- marker
- safety glasses
- gloves
- bucket for debris.
Preparing the work area and shutting off water
Begin by isolating the affected plumbing and creating a safe, organized workspace: shut off the main water supply or the nearest shutoff valve, open downstream faucets to drain residual water and relieve pressure, and place a bucket or rags beneath the work area to catch runoff.
Clear surrounding clutter, guarantee adequate lighting and ventilation, lay protective coverings, and gather tools within reach.
Verify water is fully off before proceeding.
Cutting out the damaged section and prepping pipe ends
With the water confirmed off and the work area drained, the next step is to remove the corroded or leaking pipe segment and prepare the cut ends for a replacement.
Mark cut locations beyond visible corrosion, support surrounding pipe, cut squarely using a pipe cutter or hacksaw, deburr edges, clean threads or pipe surface, and inspect for remaining damage before fitting new components.
Installing replacement pipe and fittings
Install the replacement section by measuring, cutting, and joining components so the new run aligns and seals with the existing system.
Use matching galvanized pipe, fittings, and proper thread tape or sealant on male threads.
Thread adapters or couplings join to remaining sections; tighten with pipe wrenches without over‑torquing.
Support the new run with straps and check alignment visually before restoring service.
Pressure testing and finishing touches
After reassembling and securing the replacement section, perform a careful pressure test to confirm leak-free connections and proper alignment before restoring full service.
Isolate the repaired segment, pressurize per code, and inspect joints and fittings for drops or seepage.
Release pressure slowly, check gauges, and tighten as needed.
Apply corrosion protection, label the repair, and document test results for future reference.
Common Mistakes and How to Avoid Them
Common errors in repairing galvanized pipe include choosing incompatible materials or improper changeover fittings, which can accelerate corrosion or cause leaks.
Failing to perform pressure tests or to seal joints properly often leads to undetected leaks and system failures.
Relying on temporary fixes instead of permanent repairs can mask problems and increase long-term costs.
Improper material choices for repairs and transitions
Choosing the wrong materials for repairs and changes undermines the longevity and safety of galvanized steel piping systems.
Using incompatible metals, improper sealants, or substandard fittings causes galvanic corrosion, leaks, and failures.
Repairs should match galvanization, use approved connector fittings, and employ corrosion-resistant compounds.
Consulting material specifications and local codes prevents premature deterioration and costly rework.
Skipping pressure tests or inadequate sealing
Incorrect materials not only accelerate corrosion but also increase the risk of leaks and pressure-related failures if proper testing and sealing are neglected.
Skipping pressure tests leaves undetected weak points; inadequate sealants or improperly applied threads allow slow leaks and joint failure.
Professionals recommend standardized pressure testing, correct gasket and thread sealant selection, and careful torqueing to guarantee durable, leak-free galvanized pipe repairs.
Over-reliance on temporary fixes
Relying on temporary fixes for galvanized steel pipe issues often masks underlying damage and delays necessary permanent repairs, increasing the chance of sudden failures and more extensive corrosion.
Short-term patches, tape, or sealants may stop leaks briefly but obscure root causes.
Professionals recommend inspection, proper replacement of compromised sections, and using correct fittings and coatings to guarantee durable, code-compliant repairs.
Recommended Products and Materials for Galvanized Pipe Repair
A concise selection of products and materials can determine the longevity of a galvanized pipe repair.
The following items summarize reliable options and selection criteria to evaluate when planning a repair:
- Heavy-duty repair clamps and split sleeves for temporary and permanent seals
- Water-resistant epoxies and metal-repair putties rated for galvanized steel
- Threaded brass or stainless fittings to minimize galvanic corrosion
- Galvanized or replacement steel pipe matched to original diameter and wall thickness
- Appropriate sealants and pipe dope compatible with potable water systems
Top repair clamps and sleeves
Several reliable repair clamps and sleeves are available specifically for galvanized steel pipe, each designed to stop leaks quickly and restore pressure integrity without replacing pipe sections.
Popular choices include stainless steel band clamps with rubber gaskets, split sleeve couplings for corroded areas, and full-wrap emergency clamps for larger ruptures.
Select size-matched, pressure-rated models and torque bolts per manufacturer instructions for a lasting seal.
Reliable epoxies and putties
After securing leaks with clamps or sleeves, durable epoxies and putties offer a more permanent surface repair for small holes, pinholes, and corroded areas on galvanized pipe.
Choose products labeled for metal and wet environments, such as two-part epoxy sticks, marine-grade putties, or cold-weld compounds.
Verify surfaces are cleaned and roughened; follow cure times and temperature limits for reliable adhesion and corrosion resistance.
Best practices for selecting fittings and replacement pipe
When replacing sections or installing fittings, prioritize compatibility with the existing galvanized system and the water chemistry it will carry; mismatched metals or improper thread types accelerate corrosion and cause leaks.
Select galvanized fittings or use dielectric unions when joining dissimilar metals.
Choose pipe rated for pressure and potable water, with correct thread type (NPT or BSP) and wall thickness.
Prefer brass or stainless for durability.
Visual Troubleshooting Guide and Examples
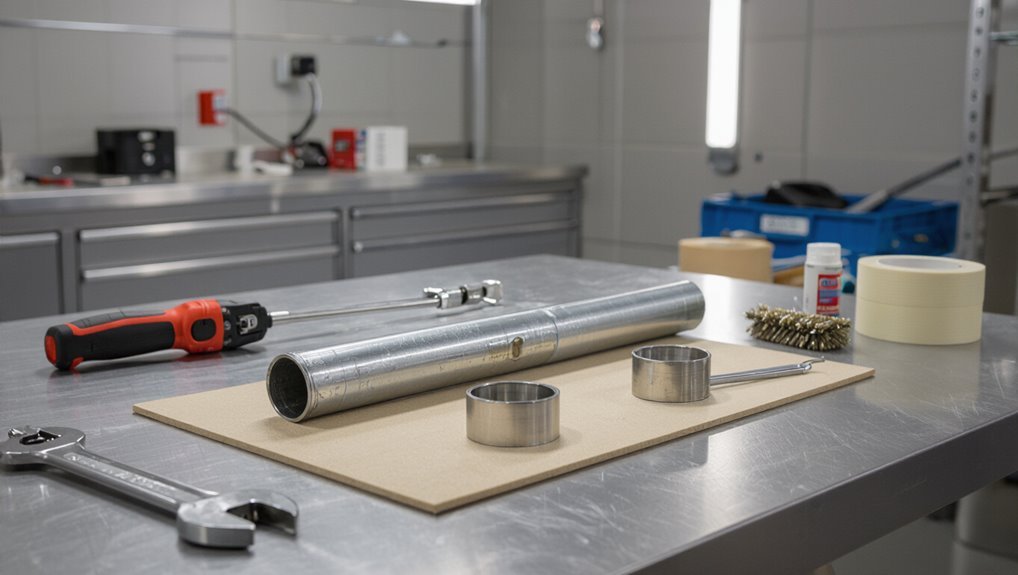
The section presents clear photo indicators distinguishing damage that can be repaired from damage that requires replacement.
It includes before-and-after repair examples with brief captions to illustrate typical outcomes and expected longevity.
Readers are guided to compare visible corrosion patterns, cracks, and thinning against the example set to make informed decisions.
Photo indicators of repairable vs replaceable damage
If corrosion appears as thin, localized white or gray powdery deposits with intact surrounding metal, a repair is often practical; photos showing surface pitting without through-holes, minor flange or thread wear, and isolated paint loss indicate salvageable sections.
Images revealing deep corrosion, perforations, extensive scaling, warped fittings, or multiple joint failures signal replacement.
Use clear close-ups, scale references, and multiple angles for assessment.
Before-and-after repair examples with brief captions
Show clear before-and-after image pairs that focus on the defect area and include captions that state the problem, the repair performed, and the outcome.
Examples:
- corroded elbow — cleaned, galvanized patch applied — leak sealed;
- pinhole rust spot — drilled, brazed, coated — restored;
- threaded joint leak — resealed with pipe dope and tightened — dry.
Keep captions concise and factual.
Conclusion
In the end, the galvanized pipe’s drama reads like a small civic tragedy: rust whispers destiny, leaks stage rebellions, and the homeowner summons tools with heroic ineptitude. Practical repair saves water and dignity, yet satire reminds readers that patchwork often masks deferred responsibility. If metal could roll its eyes, it would. The sensible course—assess, fix, replace—is almost noble, though absurdity lingers in every temporary patch and optimistic sealant.
