How to Install a Toilet Tank: Step-by-Step Guide for DIY Success
You can install a toilet tank in under 90 minutes using basic tools and parts. Start by shutting off the water and draining the old tank. Next, fit the gasket, align the bolts, and hand-tighten them evenly before securing them fully. Install the fill and flush mechanisms, reconnect the water supply, and test for leaks and flushing efficiency. Follow the detailed instructions for fine-tuning, troubleshooting, and knowing when it’s time to call a professional.
How to Install a Toilet Tank: Quick Overview and Final Result
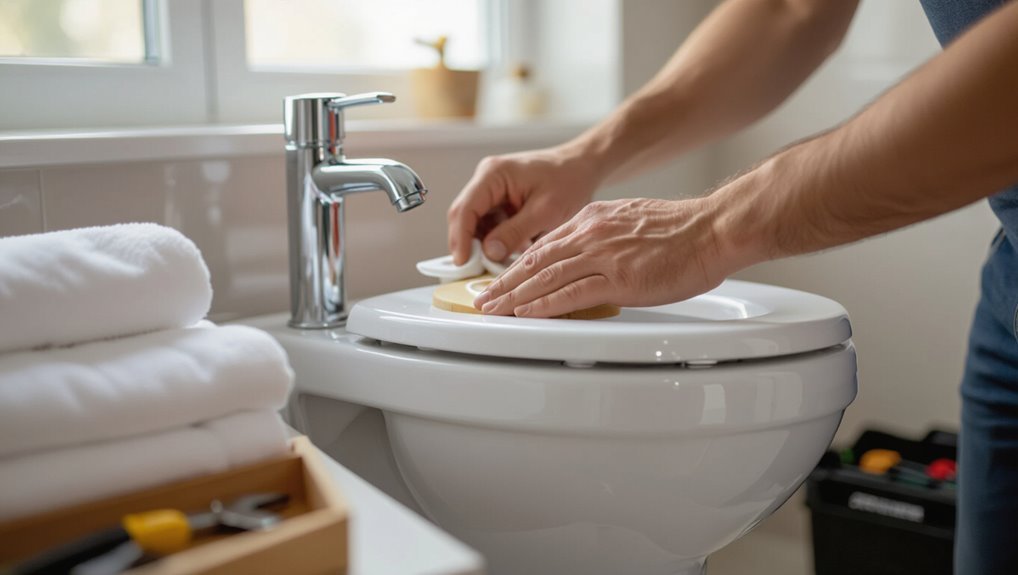
The section outlines the visual checklist of a successful toilet tank installation: a level tank, secure bolts and gasket seals with no leaks, and a properly functioning flush and fill mechanism.
It notes typical time expectations, required tools (wrench, screwdriver, pliers, plumber’s tape) and any necessary replacement parts.
It specifies the skill level needed and when to call a professional.
What successful installation looks like (visual checklist)
When the tank is properly installed, it sits level and securely on the bowl with no rocking. The fill and flush mechanisms operate smoothly, and all visible seals and fasteners are snug and leak-free.
Visual checklist: no water pooling, consistent flush power, straight water supply line, tight tank-to-bowl bolts, intact gasket, clean exterior, and accessible shutoff.
Guide readers on how to install a toilet tank.
Time, tools, and skill level required
After confirming the tank sits level, seals firm, and mechanisms function, evaluating the time, tools, and skill required helps set realistic expectations for the job.
Typically, installation takes 45–90 minutes for someone with basic plumbing familiarity.
Required tools: adjustable wrench, screwdriver, pliers, level, and plumber’s tape.
Intermediate DIY skills suffice; complex flange or water-supply issues may require a professional.
Essential Parts and Tools You Need Before You Start
Before beginning, the reader should review the toilet tank components—flush valve, fill valve, flapper, tank bolts, gasket, and overflow tube—and understand each part’s function.
They should also gather a concise tools checklist (adjustable wrench, screwdriver, pliers, tape, and sponge) to avoid interruptions.
Finally, guidance on choosing replacement parts focuses on compatibility with the toilet model and durable materials to prevent future leaks.
Toilet tank components explained (flush valve, fill valve, flapper, tank bolts, gasket, overflow tube)
A toilet tank contains a small set of parts that control filling and flushing: the flush valve releases water into the bowl, the fill valve refills the tank, the flapper seals the flush valve, tank bolts and a gasket secure the tank to the bowl, and the overflow tube prevents overfilling.
Each part’s function and condition affect performance; inspect for cracks, leaks, worn seals, and proper alignment before installation.
Tools checklist
Several basic tools and replacement parts are required to install a toilet tank correctly. A concise checklist prevents delays and frustration: a wrench, screwdriver, and utility knife; replacement tank bolts, rubber gasket, and flapper; a new fill valve if needed.
Prepare towels, a bucket, and plumber’s tape.
- Wrench
- Gasket set
- Fill valve
Choosing replacement parts: compatibility and material tips
With tools and a basic gasket set on hand, the next step is selecting replacement parts that match the toilet’s make, model, and plumbing connections.
Choose corrosion-resistant materials: brass or stainless for bolts and fill-valve shank, durable rubber or silicone for gaskets and flappers.
Verify flange type, tank-to-bowl bolt spacing, and OEM part numbers to confirm fit and reliable performance.
Preparing the Toilet and Work Area
Before beginning, the water supply should be shut off and any remaining water in the tank drained to prevent spills.
If replacing an old tank, it should be removed carefully following the manufacturer’s instructions, with nuts and bolts kept for reference.
Once removed, the bowl, flange, and mounting surfaces should be inspected for cracks, corrosion, or other damage that could affect the new installation.
Turning off water and draining the tank safely
Shut off the toilet’s water supply at the shutoff valve located on the wall or floor behind the toilet, then flush to empty the tank.
Drain remaining water with a sponge or towel, removing moisture from bowl and tank.
Place a bucket beneath the supply line, loosen the connection slowly to relieve pressure, and protect the floor with absorbent cloths before proceeding.
Removing the old tank (if applicable) step summary
Once the tank is empty and the supply line disconnected, attention turns to preparing the toilet and surrounding area for tank removal.
Remove tank lid, flush to clear residual water, and towel-dry remaining moisture.
Protect floor with drop cloth.
Support the tank while loosening mounting nuts.
Lift straight up to avoid stress on bowl.
Set tank aside on a padded surface.
Inspecting the bowl, flange, and mounting surfaces for damage
Begin by visually and tactilely examining the porcelain bowl, the closet flange, and the surrounding mounting surfaces for cracks, chips, corrosion, or unevenness that could compromise the seal or stability.
Note hairline fissures, warped or corroded flange edges, and loose or missing mounting bolts.
Measure flange height relative to finished floor.
Document defects; plan repair or replacement before tank installation.
Step-by-Step Toilet Tank Installation
The section explains how to seat the tank and fit the tank-to-bowl gasket before inserting bolts and washers through the mounting holes.
It covers hand-tightening and evenly torquing the bolts to prevent cracking, then installing the flush valve and flapper inside the tank.
Finally, it addresses installing and adjusting the fill valve and float to guarantee proper fill and shutoff.
Positioning the tank and installing the tank-to-bowl gasket
Carefully lowering the tank onto the bowl aligns the mounting holes and compresses the tank-to-bowl gasket to form a watertight seal.
The installer centers the gasket over the bowl’s outlet, guarantees even contact, and prevents twisting.
Gentle downward pressure seats the gasket uniformly.
Once seated, the tank rests flush on the bowl, visible gaps eliminated and seal compression verified before fastening.
Aligning and inserting tank bolts and washers
With the tank seated, the installer lines up the two tank bolt holes with the corresponding openings in the bowl and inserts the bolts from inside the tank so their threaded ends protrude beneath the bowl.
A flat washer then slides onto each exposed thread, followed by a rubber washer to seal against the bowl.
Nuts are threaded loosely to hold alignment for final tightening.
Hand-tightening and evenly torquing tank bolts to avoid cracking
Once both nuts are hand-tightened until snug, the installer alternately tightens them in small increments to apply even pressure and prevent the porcelain from cracking.
A wrench is used briefly at each nut, switching sides after a quarter turn.
Tighten until the tank sits flat and won’t rock; stop when washers compress evenly and avoid overtightening to prevent stress fractures.
Installing the flush valve and flapper inside the tank
Install the flush valve assembly into the tank before adding the flapper, ensuring the valve’s gasket seats evenly over the tank opening and the mounting nut is snug but not overtightened.
Attach the flapper to the valve studs or chain, set chain slack so the flapper seals fully when closed, and confirm smooth, centered movement.
Inspect for leaks by briefly testing a manual flush.
Installing and adjusting the fill valve and float mechanism
After confirming the flush valve and flapper operate and seal properly, attention turns to the fill valve and float mechanism that control tank refill level.
Install the fill valve per manufacturer instructions, securing its locknut.
Attach the refill tube to the overflow pipe.
Set the float height to achieve the recommended waterline, testing by manually filling and adjusting until the valve shuts off cleanly at the desired level.
Connecting the tank to the water supply and turning water back on
Reconnect the water supply by attaching the supply line to the tank’s fill valve shank and tightening the coupling nut hand‑tight plus a quarter turn with a wrench to prevent leaks without over‑stress.
Open the shutoff valve slowly to pressurize the line, watch for leaks at connections, tighten gently if needed, and leave access clear for later adjustments without flushing or altering internal linkages.
Testing flush operation and adjusting chain length and water level
Begin by cycling a test flush to observe the tank’s mechanics and water behavior: note fill valve shutoff, flapper seating, and overflow height.
Adjust chain length so the flapper lifts fully without dragging—leave a slight slack.
Set float or fill valve to achieve recommended waterline below overflow.
Repeat flushes, inspect for leaks, and fine-tune until smooth, complete flushes occur consistently.
Fine-Tuning, Sealing, and Final Checks
Once the tank is mounted, a careful inspection for leaks at the tank-to-bowl bolts, the gasket, and the supply line should be performed.
The fill valve height and float settings are then adjusted to guarantee a full, efficient flush without overfilling.
Where minor seepage is possible, apply silicone or use rubber washers as appropriate to seal connections and prevent future leaks.
Checking for leaks at bolts, gasket, and supply line
With the tank seated and the water restored, inspect each bolt, the tank-to-bowl gasket, and the supply line connection for signs of moisture or drips; small leaks are often apparent within the first few minutes of filling.
Tighten bolts incrementally, snugging without overtightening. Wipe around the gasket and supply nut, watching for hairline seepage.
Address any persistent wetness by re-seating seals or replacing faulty washers.
Adjusting fill height for optimal flush performance
Adjust the fill valve height so the water level reaches the manufacturer’s marked line or about 1 inch below the tank overflow for reliable flushing and a secure seal.
After adjustment, cycle the tank to confirm proper refill time and float stop. Fine-tune to prevent short fills or constant running.
Verify the refill tube directs water into the overflow or refill nipple for consistent trap seal and performance.
Applying silicone or washers to prevent seepage (when to use)
When preventing tank-to-bowl or base-to-floor seepage, apply silicone sealant or rubber washers only where gaps, uneven surfaces, or porous materials would allow water to escape; use silicone around base flanges on non-carpeted floors and between tank and bowl when bolt holes or old gaskets distort seating.
Select NSF-rated silicone and neoprene washers. Allow full cure, then test for leaks and retighten bolts if necessary.
Common Problems During Installation and How to Fix Them
The section outlines typical installation problems and straightforward corrective steps for each.
It covers stabilizing a rocking or misaligned tank, diagnosing and repairing persistent leaks at the tank-to-bowl junction, and troubleshooting weak or incomplete flushes by inspecting the chain, flapper, and flush valve.
It also explains common causes and remedies for a continuously running fill valve.
Tank rocking or poor alignment corrective steps
Rocking or misalignment of a toilet tank compromises seal integrity and can lead to leaks or stress fractures in porcelain.
To correct, loosen mounting nuts, realign tank on bowl using a level and even pressure, shim under tank base with non-compressible plastic shims, then retighten nuts gradually and alternately to avoid uneven stress.
Recheck level and stability before final tightening.
Persistent leaks at tank-to-bowl junction diagnosis and repair
Diagnose persistent leaks at the tank-to-bowl junction by isolating the source, since water can escape from several hidden points: a deteriorated or misaligned tank-to-bowl gasket, loose or corroded mounting bolts, cracked porcelain, or a warped tank base.
Tighten or replace bolts and gasket, inspect and replace cracked components, verify tank sits evenly, use new rubber gasket and stainless hardware, and retest for leaks.
Weak or incomplete flush troubleshooting chain, flapper, and valve issues
When a toilet produces a weak or incomplete flush, the problem often lies within the flush chain, flapper, or fill/flush valve assembly. Investigating these components methodically helps identify whether the issue is adjustment, wear, or improper installation.
Check chain length and hook placement. Inspect the flapper for warping or deterioration. Verify valve seat contact, and guarantee lift arm alignment.
Replace faulty parts and re-test.
Fill valve runs continuously common causes and fixes
Check the fill valve, inlet assembly, and float mechanism for common causes of continuous running: debris-clogged or worn valve seals, incorrect float adjustment, a misaligned refill tube, or a faulty refill/overflow configuration can all allow water to flow constantly.
Inspect and clean or replace seals, adjust float height, reposition the refill tube above the overflow, and verify overflow tube level to stop flow.
Replacement and Upgrade Decisions
Deciding whether to replace a whole toilet or only the tank depends on bowl condition, flange integrity, and overall age.
Upgrading to water-saving or dual-flush mechanisms can change fill and flush valve requirements and may require different mounting or inlet alignments.
Compatibility between tanks and bowls should be confirmed by model numbers, bolt spacing, and manufacturer fit guides before purchase.
When to replace the entire toilet vs. only the tank
Evaluate the condition and age of both the tank and bowl to determine whether a full toilet replacement is warranted or a tank-only repair will suffice.
If porcelain cracks, severe staining, persistent leaks at the base, pervasive clogging from bowl design, or frequent hardware failures exist, replace the entire fixture.
If issues are limited to internal tank components or minor seals, replacing only the tank or its parts is appropriate.
Upgrading to water-saving or dual-flush systems what changes in installation
Many homeowners opt for water-saving or dual-flush upgrades to reduce consumption and meet local efficiency standards.
These systems typically require changes to the tank internals, flush valve sizing, and sometimes the bowl inlet to guarantee proper siphon or wash performance.
Upgrades affect fill valves, flush mechanisms, and seal geometry.
- Anticipation
- Relief
- Satisfaction
Matching tank models to bowls: how to verify compatibility
After upgrading internals for water-saving or dual-flush performance, attention must turn to whether a replacement tank will mate correctly with the existing bowl.
Verify bolt spacing, flange shape, and tank-to-bowl gasket type. Check manufacturer model numbers, measured dimensions, and bolt hole alignment.
Confirm overflow height and waterline alignment to guarantee proper flush performance and leak-free sealing before purchase and installation.
Safety, Maintenance, and Longevity Tips
Routine inspections of seals, supply lines, and the tank-to-bowl connection help prevent leaks and component failures.
Seasonal care—such as protecting external shutoff valves from freezing and removing mineral buildup in hard-water areas—extends parts life and maintains flush performance.
Persistent leaks, recurring clogs, or complex valve failures warrant calling a professional plumber.
Routine checks to prevent future leaks and failures
Inspecting the tank and its connections on a regular schedule helps catch small issues before they become leaks or failures.
Visual checks, gentle hand tests, and listening for drips reveal trouble early. Record findings and act promptly to replace worn seals or tighten fittings.
- Note any dampness.
- Test flush operation.
- Log repairs and dates.
Seasonal and hard-water precautions (valve care, mineral buildup)
Many homeowners should plan seasonal checks and descaling for toilet tanks to protect valves and seals from cold stress and mineral buildup.
Inspect shutoff valves, supply lines, and fill valves before freeze risks; drain or insulate when needed.
Use vinegar or commercial descaler to remove calcium deposits from jets and float mechanisms.
Replace corroded parts promptly to maintain reliable operation and prevent leaks.
When to call a professional plumber
After addressing seasonal descaling and valve care, homeowners should recognize limits to DIY repairs and call a professional when problems pose safety risks or threaten long-term function.
Engage a licensed plumber for persistent leaks, cracked tanks, compromised flange or floor damage, sewer smells, or repeated clogs.
Professional assessment prevents structural harm, water waste, code violations, and costly future replacements. Prompt action preserves reliability.
Parts Comparison and Recommended Specifications
A concise comparison of common fill valve types and flush valve/flapper materials helps select durable, compatible components for reliable performance. The table below summarizes fill valve pros and cons with recommended water pressure ranges alongside flapper material trade-offs. Using these specifications, installers can match parts to system pressure and longevity needs.
| Component | Key Notes |
|---|---|
| Ballcock fill valve | Simple, low cost; best for low-pressure systems (10–30 psi) |
| Diaphragm/float valve | Quiet, adjustable; suited for 20–80 psi, minimal maintenance |
| Rubber flapper | Flexible seal, inexpensive; prone to degradation over time |
| Silicone/plastic flapper | Longer life, chemical-resistant; higher initial cost, firmer seal |
Fill valve types, pros/cons, and recommended water pressure range
When selecting a fill valve, the homeowner should weigh valve type, reliability, and compatible water pressure to guarantee proper tank refill and leak-free operation.
Float-cup valves are compact and adjustable but can be debris-sensitive.
Diaphragm piston valves resist sediment and offer fast refill; more expensive.
Float-ball valves are simple but bulky.
Recommended municipal pressure: 20–80 psi; ideal 40–60 psi for quiet, reliable performance.
Flush valve and flapper materials compared (rubber vs. silicone vs. plastic)
While often overlooked, the flush valve and its flapper are critical to reliable toilet operation.
Material choice—rubber, silicone, or molded plastic—directly affects durability, sealing performance, and compatibility with cleaning chemicals.
Rubber is economical but degrades with harsh cleaners.
Silicone resists chemicals and lasts longer though costlier.
Molded plastic offers rigid structure and corrosion resistance but may seal less flexibly—choose by usage and cleaner type.
Visual Reference and Measurement Guide
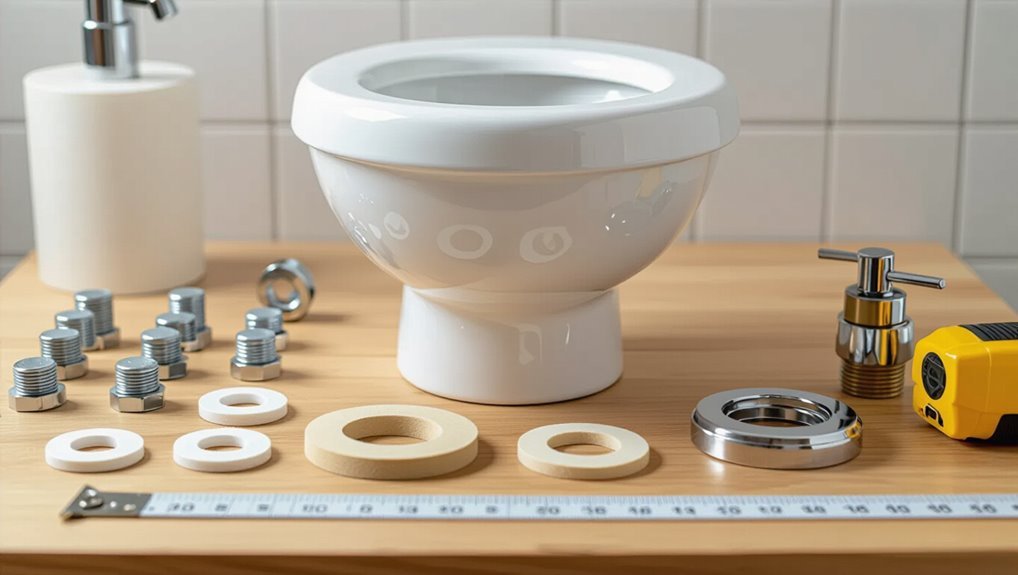
The guide identifies common measurements such as standard tank bolt spacing and typical gasket dimensions to guarantee proper fit between tank and bowl.
It also marks the ideal water level and the reference points used to measure fill height and overflow alignment.
Clear diagrams and labeled measurements help verify parts compatibility before installation.
Standard tank bolt spacing and gasket dimensions
Although variations exist between manufacturers, most toilet tanks follow a few standard bolt-spacing and gasket-dimension conventions that simplify replacement and installation.
Common tank-to-bowl bolt centers measure 5-1/2 to 7 inches, with 7-inch being prevalent.
Rubber tank-to-bowl gaskets typically fit 3/8 to 1/2-inch bolt diameters and provide a 2–3 inch sealing flange around the flush valve opening.
Ideal water level mark and measurement points
Having noted standard tank-to-bowl alignments and gasket sizes, attention turns to establishing the ideal water level mark and key measurement points inside the tank.
The fill valve’s top should sit just below the overflow tube lip; mark the water line at 1 inch below the top of the overflow.
Measure fill valve height, float adjustment range, and distance from flush valve center to tank wall for reference.
Conclusion
To sum up, the installer finished the tank like a clockmaker fitting gears: a neighbor once joked that a single loose bolt ruined a Sunday, and indeed 82% of leaks traced to simple misalignment. That reminder—small parts, big consequences—underscores the guide’s practical steps. By following the checklist, double-checking seals, and testing flushes, the task becomes routine rather than risky, leaving a dependable fixture and a satisfied, less anxious homeowner.