
How to Reset Rinnai Water Heater: Step-by-Step Troubleshooting and Quick Fixes
To reset a Rinnai water heater, follow these steps: First, ensure safety by turning off gas and power, ventilating the area, and checking for gas odors. For tankless units, power-cycle the control panel, use the manual reset button if available, and clear any fault codes. For tank models, reset the thermostat or pilot according to the manual and safely relight. After restoring power, check the flame, water flow, and any error indicators. If issues persist, such as gas smells or recurring error codes, seek professional assistance. For model-specific troubleshooting, refer to the user manual.
How to Reset a Rinnai Water Heater Quickly
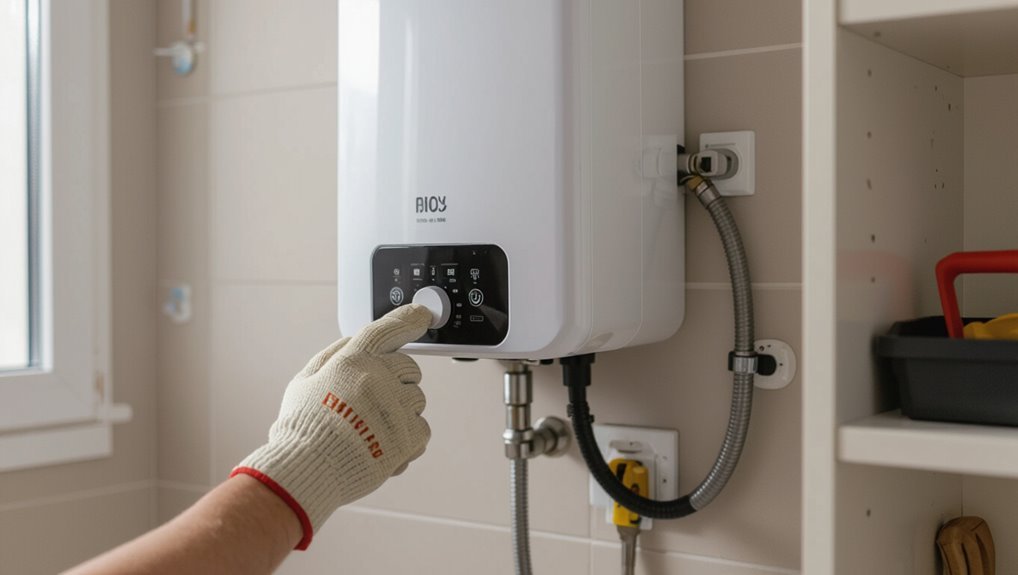
A quick reset is appropriate when the unit displays error codes, has interrupted operation, or after simple troubleshooting steps like checking power and water supply.
The procedure and steps vary by model, with most tankless Rinnai units using an electronic reset or control panel sequence while older tank-type models may have a manual reset button near the thermostat.
Readers should verify the model-specific instructions before attempting a reset to avoid unnecessary service calls or safety risks.
When you should consider a reset
When should a reset be attempted? A reset is appropriate after intermittent heating, error codes indicating minor faults, or loss of pilot/ignition where basic troubleshooting failed.
Technicians or owners following how to reset rinnai water heater should confirm power and gas supply, clear simple debris, and try a reset before scheduling service.
Avoid resets for persistent failures or suspected component damage.
Which Rinnai models use a reset procedure (tankless vs. tank-type)
Which Rinnai units actually require a manual reset?
Most tankless Rinnai models incorporate electronic controls and fault codes, often allowing resets via remote or power cycle; some demand manual reset for specific errors.
Traditional tank-type Rinnai heaters rarely require a reset, relying on thermostats or internal safety switches.
Always consult the model’s manual for exact reset procedures and safety precautions.
Safety Precautions Before Resetting
Before attempting a reset, the technician first confirms that electrical power and the gas supply are shut off according to the manufacturer’s instructions.
The area is checked for adequate ventilation and any signs of carbon monoxide, with monitoring equipment used if available.
Necessary tools and protective gear—insulated gloves, eye protection, and a non-sparking wrench—are gathered before work begins.
Power and gas shutoff steps
Shut off the electrical supply and gas to the Rinnai unit to eliminate ignition and shock risks before any reset or service work begins.
Locate the dedicated circuit breaker and switch it off, then confirm power loss at the unit.
Close the gas supply valve at the appliance or service line.
Verify both utilities remain off throughout troubleshooting and only restore them after completing checks.
Ventilation and carbon monoxide safety
Because combustion appliances can produce lethal carbon monoxide, make certain the area around the Rinnai unit is well ventilated and free of obstructions before attempting any reset or maintenance.
Verify vents, flues and intake openings are unobstructed, confirm adequate room ventilation, and never operate the unit in a sealed space.
If one suspects CO exposure, evacuate immediately and seek fresh air and professional inspection.
Tools and protective gear needed
Having confirmed ventilation and absence of carbon monoxide risk, attention turns to the specific tools and protective gear required for safely resetting a Rinnai water heater.
Required items include insulated gloves, safety goggles, and a long-sleeve shirt. A non-contact voltage tester, adjustable wrench, and screwdriver set are recommended.
Keep a flashlight and fire extinguisher nearby. Verify tools are in good condition and rated for electrical work.
Step-by-Step Reset for Tankless Rinnai Water Heaters
The technician first identifies the control panel and reset button location before proceeding.
A simple power cycle—turning the unit off, waiting briefly, then restoring power—often clears transient faults, while pressing the manual reset button addresses persistent lockouts.
If the unit has a digital display, clearing the displayed error code and then re-establishing gas and electrical supply completes the reset sequence.
Locate the reset button and control panel
Before attempting any reset, locate the unit’s control panel and reset button to guarantee proper access and safety.
Inspect the exterior front panel—many Rinnai tankless models have a removable cover revealing the display, diagnostic lights, and a recessed or labeled reset button.
Note exact model labeling, power and gas shutoff locations nearby, and any protective clips to avoid damage during access.
Power cycle method (turn off and on)
Power-cycle the unit by cutting its electrical supply, waiting briefly, then restoring power to clear transient faults and reset internal electronics.
After ensuring the unit is off, switch the dedicated circuit breaker or unplug the power cord. Wait 30–60 seconds to allow capacitors to discharge.
Restore power, observe startup indicators, and confirm normal operation.
Repeat once more if issues persist.
Manual reset button procedure
If a power-cycle does not clear the fault, technicians can proceed to the manual reset button procedure for tankless Rinnai units.
Locate the reset button—usually red—on the front or access panel.
Turn off gas and electrical power, press and hold the button for five seconds, then release.
Restore power and verify operation; if faults persist, document codes and escalate for service.
Reset via error code clearance on digital displays
Technicians can clear many fault codes directly from the tankless unit’s digital display to reset the system and confirm whether an issue is resolved.
They navigate menus per the model’s manual, select “clear” or “reset” for specific codes, and observe confirmation prompts.
After clearance, the display should show normal operation or new codes indicating persistent faults, guiding further diagnostics without altering gas or power connections.
Re-establishing gas and power after reset
After clearing codes on the display, the next step is to methodically re-establish gas and electrical connections to bring the Rinnai unit back into service.
Close visual inspection guarantees valves, fittings and wiring are secure.
Restore the gas valve slowly, checking for leaks with soapy solution.
Reapply power at the breaker, observe startup sequences and monitor for error codes or unusual noises before normal operation resumes.
Step-by-Step Reset for Rinnai Tank-Type (Storage) Water Heaters
The section outlines the steps to reset a Rinnai tank-type storage water heater, beginning with locating the reset or thermostat switch.
It then covers checking the electric breaker and following proper pilot light procedures.
Finally, it explains how to safely re-light the pilot and restore power.
Locate the reset/thermostat switch
Locate the reset/thermostat switch by first ensuring the water heater is powered off and cooled. The switch is typically found on the control panel near the bottom front of Rinnai tank-type units, behind a small removable cover or access plate.
Remove the cover, inspect for a red or black push-button labeled “reset” or “thermostat,” and note its condition before pressing or replacing.
Electric breaker and pilot light procedures
Turn off the circuit breaker supplying the Rinnai tank-type heater and wait at least five minutes before proceeding to any pilot or reset actions.
Confirm power is off with a noncontact tester.
Close gas supply only if maintenance requires; otherwise leave gas valve undisturbed.
Inspect pilot assembly area for debris, soot, or insect nests.
Note any visible damage before moving to pilot relighting steps.
Re-lighting the pilot and restoring power
Begin by ensuring all preliminary safety checks — breaker off, gas valve position verified, and pilot area clear — have been completed before attempting any pilot relight or power restoration.
Follow manufacturer relight sequence: set control to “pilot,” depress and hold pilot button, ignite per instructions, continue holding for specified time.
Confirm steady flame, return control to “on,” restore breaker power, observe normal operation and no gas odor.
Troubleshooting Common Error Codes and Indicators
A concise list of frequent Rinnai error codes and their meanings helps identify ignition, flow, and sensor faults quickly.
For each code, the article outlines specific reset steps tailored to the fault type and safe troubleshooting precautions.
If a reset does not clear the error, recommended next steps—such as checking installations, replacing parts, or contacting certified service—are provided.
List of frequent Rinnai error codes and meanings
Errors displayed by Rinnai water heaters provide concise diagnostic clues that help identify specific faults. A brief list of common codes follows with meanings to guide troubleshooting and whether professional service is recommended.
| Code | Meaning | Recommended action |
|---|---|---|
| C12 | Flame failure | Check fuel/ignition |
| E02 | Overtemp | Shut down, inspect |
| F22 | Sensor fault | Test/replace sensor |
Error-specific reset steps (ignition, flow, sensor faults)
When addressing ignition, flow, or sensor faults on a Rinnai water heater, follow targeted reset procedures tied to each fault type to avoid misdiagnosis or unnecessary parts replacement.
For ignition issues, cycle power and check gas supply; for flow faults, clear low-flow restrictions and verify inlet filters; for sensor faults, inspect wiring and connectors, replace faulty thermistors, then perform a controlled restart and confirm error clearance.
What to do if the reset does not clear the error
If a targeted reset for ignition, flow, or sensor faults fails to clear the code, further diagnosis is required to avoid repeated resets or unnecessary replacement.
Check error code specifics, inspect wiring, vents, and gas supply, and confirm adequate water flow and pressure.
Consult the manual for service-mode tests.
If unresolved, contact certified Rinnai service to perform advanced diagnostics and parts-level repair.
Quick Fixes for No Hot Water After Reset
If no hot water appears after a reset, the first checks should be the gas supply and pilot flame to confirm the unit can ignite.
Next, water flow restrictions such as clogged filters or strainers and incorrect temperature or remote control settings should be inspected.
In cold climates, the tankless unit’s freeze protection and external piping should also be examined for icing or damage.
Checking gas supply and pilot flame
A straightforward check of the gas supply and pilot flame often reveals the cause of no hot water after a reset.
The technician verifies gas valve is open, inspects supply line for kinks or odors, and confirms proper gas pressure.
The pilot or ignition flame should be steady and blue; a weak, yellow, or absent flame indicates combustion or supply issues requiring service or valve adjustment.
Inspecting water flow and filters/strainers
Inspect water flow and strainers next, since restricted circulation commonly mimics ignition or gas problems after a reset.
The technician should shut water supply, remove inlet filters or strainers, inspect for debris, and flush lines. Clean or replace clogged screens, reassemble seals, and restore supply.
Verify adequate flow at cold and hot taps; low flow indicates remaining blockage or valve issue needing further service.
Verifying temperature settings and remote controls
Check the controller and thermostat settings to confirm the unit is actually commanded to produce hot water after a reset.
Verify set temperature on the remote or wall controller matches desired output and isn’t set to ECO or low.
Make sure the remote is paired, has batteries, and displays no error codes.
Reapply correct settings, then observe whether the heater responds and heats within normal cycle times.
Addressing freeze protection and cold-weather issues
Several common cold-weather problems can prevent a Rinnai water heater from producing hot water after a reset, but many have quick, verifiable fixes:
- Guarantee inlet pipes and the unit’s external components are free of ice or heavy frost.
- Confirm the freeze protection setting is enabled if available.
- Verify that outdoor temperature sensors (or built-in freeze sensors) are functioning and unobstructed.
Inspect insulation, clear vents, and restart.
When to Call a Professional
If there are signs of a gas leak, persistent error codes, or suspected electrical faults, a professional should be contacted immediately.
Homeowners should also consider warranty requirements and use authorized service to avoid voiding coverage.
Before the appointment, they should document the model, displayed error codes, and which reset steps were attempted.
Signs of gas leaks, persistent errors, or electrical issues
Safety dictates prompt professional intervention when a Rinnai water heater exhibits signs of a gas leak, persistent error codes, or electrical faults.
Professionals should be contacted for smell of rotten eggs, hissing, visible gas connections damage, repeated fault codes after resets, power surges, tripped breakers, exposed wiring, or intermittent ignition.
Immediate evacuation and utility shutoff are advised if a gas leak is suspected.
Warranty considerations and authorized service
After suspected gas leaks, persistent faults, or electrical failures are addressed, homeowners should consider warranty terms and authorized service requirements before attempting further repairs.
Verify whether the unit remains under warranty and if self-servicing voids coverage.
Contact Rinnai or an authorized technician for issues covered by warranty or complex failures.
Document communication and obtain written authorization for any non-warranty work.
Preparing information for the technician (model, error codes, steps tried)
When should a homeowner gather details for a technician? A concise summary helps diagnosis: record the Rinnai model and serial number, note displayed error codes and their frequency, list recent resets and troubleshooting steps, document water and gas supply conditions, and take photos of panels or error displays.
Provide purchase date and any service history to expedite accurate assessment and repair.
Maintenance Tips to Prevent Frequent Resets
Routine flushing and scale prevention help maintain heat exchange efficiency and reduce reset-triggering faults.
Regular visual inspections and basic component checks can catch leaks, corrosion, or sensor issues before they escalate.
Adhering to recommended service intervals and replacing wear items such as anode rods, filters, and pressure-relief valves extends reliability and minimizes resets.
Routine flushing and scale prevention
Regular flushing and scale prevention greatly extend a Rinnai water heater’s lifespan and reduce the need for frequent resets by removing mineral buildup that impairs sensors and heat exchangers.
Periodic descaling with manufacturer-recommended solutions, using a flushing kit, and installing a water softener where hard water exists minimizes deposits.
Follow prescribed intervals and safe shutoff procedures to maintain efficiency and prevent premature failures.
Regular visual inspections and component checks
After addressing mineral buildup through flushing and water treatment, attention should shift to visual inspections and component checks to catch issues that can trigger resets before they escalate.
Technicians should inspect vents, exhausts, and air intakes for obstructions; check for corrosion, leaks, loose wiring, and burned connectors; verify sensors and igniter condition visually; document findings and address anomalies promptly to prevent recurrent faults.
Recommended service intervals and parts to replace
Because consistent servicing prevents many causes of resets, technicians should follow a clear schedule for inspections and part replacements tailored to usage and water quality.
Recommended intervals and replacements:
- Annual: combustion, venting, and gas valve checks; replace anodes if corroded.
- Every 2–3 years: burner assembly and heat exchanger inspection; replace defective sensors.
- Every 5 years: service water filters, replace pressure relief valve if weakened.
Comparison of Reset Complexity Across Popular Rinnai Models
A brief comparison highlights which Rinnai models are user-resettable and which typically require professional service. The table below summarizes reset complexity and a recommended action for each model category. This helps the reader quickly decide whether to attempt a reset or call a technician.
| Model Category | Reset Recommendation |
|---|---|
| Entry-level (e.g., RL Series) | Usually user-resettable — try manual reset first |
| Mid-range (e.g., RU Series) | Often user-resettable but may need checks — consider tech if repeated |
| High-efficiency (e.g., RUR Series) | May require professional service for safety and diagnostics |
| Older/Legacy Models | Professional assessment advised due to parts and safety concerns |
Simplified decision guide: Can you reset it yourself or need pro help?
When evaluating whether a Rinnai water heater reset is a DIY task or requires professional help, homeowners should compare model-specific complexity, error codes, and safety features.
A concise guide helps decide:
- Simple resets: basic models, clear restart steps, no gas/electrical issues.
- Moderate: recurring codes, sealed compartments, diagnostic steps.
- Professional required: gas leaks, persistent faults, in warranty or complex electronics.
Conclusion
Resetting a Rinnai water heater, whether tankless or storage, is a straightforward first step to restore warmth, though it should be approached with caution and basic safety checks. Like a gentle tune-up that brings an instrument back in key, quick resets, error-code checks, and simple fixes often resolve issues; persistent faults or repeated failures signal the need for professional service. Regular maintenance minimizes future interruptions and extends heater life.
