How to Bleed Air From Water Pipes: a Step-By-Step Guide to Fix Noisy Radiators and Restored Water Flow
How to Bleed Air From Water Pipes: A Quick Guide
To eliminate air trapped in your water pipes, which causes gurgling, cold spots, and poor flow, follow these steps: First, turn off the heating system and let it cool down. Place a container under the bleed valve of each radiator and use a bleed key to slowly open the valve until water flows steadily. Once done, close the valve and re-pressurize the system. Repeat this process for all radiators and monitor for any leaks or issues with the vents. For more detailed instructions and troubleshooting tips, continue reading.
Why Radiators and Water Pipes Get Noisy and Lose Flow
Air can enter domestic heating and water systems through leaks, during maintenance, or when systems are refilled, creating pockets that disrupt circulation.
Typical signs include gurgling, banging, reduced heat output, and uneven flow to taps or radiators.
If left unchecked, trapped air can cause corrosion, pump strain, and reduced system efficiency.
How Air Enters Domestic Heating and Water Systems
Entrapped gases accumulate in domestic heating and water systems through several common pathways: dissolved air released from heated water, ingress via faulty seals or corroded joints, and during maintenance or repairs when lines are opened.
Air also forms from corrosion, neglected system topping-up, or pressure fluctuations.
Understanding these entry points helps inform how to bleed air from water pipes and reduces recurrence through targeted repairs and maintenance.
Common Symptoms of Air in Pipes and Radiators
When pockets of gas collect within pipework and radiators, systems frequently exhibit a set of telltale symptoms: gurgling or banging noises, reduced or uneven heat output, cold spots on radiators, sputtering taps, and fluctuating water pressure or flow rate.
Additional signs include slower warm-up times, intermittent circulation, and visible air bubbles at bleed points or tap outlets, indicating trapped air disrupting normal flow.
Risks of Leaving Air in the System
Symptoms such as gurgling, cold spots, and fluctuating pressure often signal more than mere annoyance; leaving gas pockets in a heating or water system can cause progressive damage and functional decline.
Air reduces heat transfer, increases corrosion and rusting, stresses pumps and valves, and encourages leaks. Efficiency drops, energy costs rise, and emergency repairs become likelier.
Prompt bleeding prevents escalation and preserves system lifespan.
Quick Fix: How to Bleed a Single Radiator (Direct Answer)
Bleeding a single radiator is an appropriate first step when a specific unit is cold at the top or emitting gurgling sounds while the rest of the system performs normally.
Before starting, the operator should shut off the heating, allow surfaces to cool, protect floors with a cloth, and wear gloves and eye protection to guard against hot water.
A radiator key (or flat screwdriver for certain valves), a small container to catch water, and a rag are the only tools required to perform the bleed safely.
When Bleeding Is the Right First Step
Why start by bleeding a single radiator?
Bleeding a single radiator is appropriate when one unit is cold at the top, emits gurgling or banging, or when overall heating is uneven despite the boiler running.
It diagnoses trapped air quickly, often restoring flow without wider system intervention.
If symptoms persist after bleeding, broader system checks or professional assessment follow.
Essential Safety Precautions Before You Start
After confirming that a single radiator shows signs of trapped air, the next step is to follow safety precautions before opening any valves.
The person should turn off the heating system, allow the radiator to cool, protect flooring, wear gloves and eye protection, and place a container and cloth beneath the bleed valve.
Guarantee adequate ventilation and keep children and pets away.
Tools You Need to Bleed a Radiator
A small set of basic tools will make bleeding a single radiator quick and safe: a radiator key (or flathead screwdriver for some valves), a cloth or small towel to catch drips, a shallow container to collect water, and gloves and eye protection.
Additionally, include adjustable pliers, a small torch or flashlight to inspect the valve, and a towel or tray to protect flooring from spills.
Step-by-Step Guide to Bleeding Radiators and Water Pipes
The following steps outline how to prepare the system and work area, locate bleed valves, and isolate individual radiators before starting.
First, the heating should be turned off and the system allowed to cool. Then a container is placed beneath the valve and the bleed screw is carefully loosened.
Air is released until a steady stream of water appears, at which point the valve is closed and the process repeated as needed.
Preparing the System and Work Area
Prepare the work area and system by shutting off the heating or water supply, allowing pipes and radiators to cool, and ensuring all necessary tools—bleed key or screwdriver, bucket, cloths, and a towel—are within reach.
Inspect visible pipework for corrosion or leaks, clear surrounding space, protect floors with towels, and confirm easy access to the central stopcock or boiler controls before proceeding.
Locating Bleed Valves and Isolating Radiators
Locating bleed valves and isolating radiators begins with visually inspecting each radiator to find the small square or slotted valve—typically at the top corner—and identifying the corresponding lockshield or isolation valve at the opposite end.
Note valve types, accessibility, and required tools. Map radiator positions, mark isolated units, and guarantee keys or adjustable spanners are to hand before proceeding to the bleeding steps.
Step 1 Turn Off the Heating and Let System Cool
With bleed valves identified and radiators isolated, power to the heating system should be switched off and allowed to cool fully before any bleeding work begins.
This prevents burns and reduces pressure. Wait until surfaces are lukewarm and gauge readings stabilize.
Confirm the boiler is off and any timers are disabled. Inform occupants the system is inactive to avoid accidental restart during maintenance.
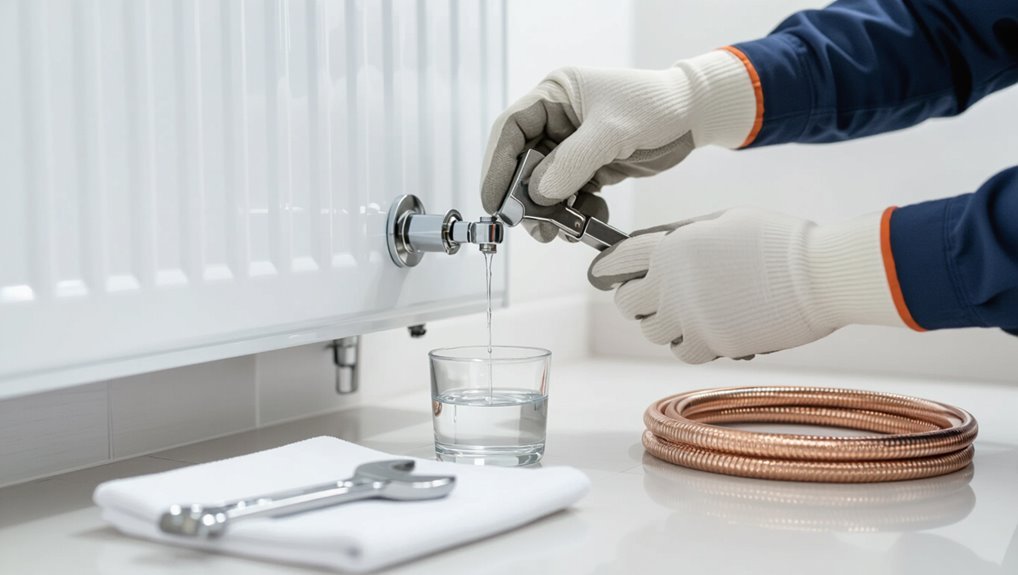
Step 2 Place a Container and Loosen the Bleed Valve
Position a shallow container beneath the radiator bleed valve to catch water and then insert a radiator key or flathead screwdriver into the valve head.
Turn the key or screwdriver counterclockwise just enough to open the valve a quarter to half turn.
Hold the container steady, guarantee a secure footing, and monitor for drips.
Do not force the valve or over-rotate it.
Step 4 Release Air, Then Close Valve When Water Flows
Open the bleed valve slowly until a steady, uninterrupted stream of water replaces the sputtering air.
Once that continuous flow appears, promptly close the valve by turning the key clockwise until just snug to prevent leaks.
The operator watches for consistent flow, then seals the valve.
Any remaining drips indicate a slight tightening.
Dispose of collected water and move to the next radiator.
Step 5 Re-pressurise the System and Check Pressure Gauge
After closing each bleed valve and wiping up any drips, the operator moves to restore system pressure by refilling from the boiler or filling loop until the gauge reads the manufacturer-recommended level (typically 1–1.5 bar for cold systems).
They then restart the boiler and observe the pressure gauge for stability as the system warms and any trapped air works its way out.
The operator checks for leaks and rechecks pressure after a short run.
Step 6 Repeat for All Radiators and Low-Flow Areas
Proceed to each remaining radiator and low-flow fixture systematically, working from the highest point of the system down to the lowest to guarantee trapped air is driven toward the bleed valves.
Open each valve briefly until steady water flows, close securely, then move on.
Recheck system pressure and listen for noise; repeat any location with persistent gurgling until normal circulation and consistent temperature are restored.
Bleeding Different Types of Systems and Components
Different systems and components require specific bleeding techniques and precautions.
Single-pipe and two-pipe radiators, baseboard heaters, convectors, combi boilers, pressurised systems, and cold-water supply pipes and taps each present distinct access points and pressure considerations.
The following sections outline methods and safety notes for each type to guarantee effective air removal.
Bleeding Single-Pipe vs. Two-Pipe Radiator Systems
1 primary distinction between residential heating setups is whether radiators operate on a single-pipe or two-pipe system, and that difference dictates how and where air is bled.
Single-pipe systems require bleeding at the radiator’s inlet to purge pockets before flow continues.
Two-pipe systems allow bleeding at individual radiators’ vents without disrupting return flow, simplifying isolation and balancing during purging.
How to Bleed Baseboard Heaters and Convector Units
Many baseboard heaters and convector units share a similar vulnerability to trapped air, but their access points and vent types differ enough that bleeding techniques must be matched to the component.
For baseboards, locate end-of-run bleeder valves or screws, open slowly until steady water flows.
For convectors, use top-side vents or inline air separators; purge from highest points toward the return, then reseal and test.
Dealing with Combi Boilers and Pressurised Systems
When servicing combi boilers and pressurised hot-water systems, technicians must account for sealed circuits, automatic controls, and pressure-sensitive components that change bleeding procedures compared with gravity or open systems.
Isolation of the pump, closing bypasses, and using the system’s bleed valves or automatic air vents while monitoring pressure are essential.
Re-pressurise to manufacturer specifications and check for leaks and proper flow.
Bleeding Cold-Water Supply Pipes and Taps
Several common cold-water supply configurations—mains-fed systems, gravity tanks, and small boosted circuits—require different bleeding approaches based on valve locations, pipe orientation, and presence of check valves or backflow prevention.
Identify high points, isolate affected runs, open downstream taps and drain cocks, and relieve trapped air by venting at the highest accessible fitting.
Re-pressurise and check for steady, air-free flow.
Tools, Materials, and When to Use a Professional
A concise list of basic tools and materials—wrenches, hose, bucket, and replacement seals—helps homeowners prepare for most air-bleeding tasks.
Clear guidance on when to call an HVAC technician or plumber distinguishes simple DIY jobs from issues requiring professional diagnosis.
The technician’s approach, including pressure testing, system flushing, and checking valves and pumps, will be contrasted with homeowner methods.
Basic DIY Tool Checklist
One clear set of basic tools and materials lets a homeowner safely and efficiently bleed air from water pipes: adjustable wrench, slip-joint pliers, screwdriver set, hose (or temporary discharge tube), bucket, rags, and plumber’s tape, plus replacement washers or small compression fittings for common leaks.
Useful extras and cautions:
- Flashlight for visibility
- Small mirror for tight spaces
- Gloves and eye protection
- Tape measure for valve access planning
When to Call an HVAC or Plumber
When should a homeowner escalate to a professional: if bleeding air fails to restore steady pressure, if persistent or widespread sputtering occurs, or if leaks, corroded fittings, or inaccessible shutoffs are discovered.
Call an HVAC or plumber when water discoloration, repeated pressure loss, frozen or damaged pipes, or unclear valve operation appear.
Professionals are advisable for gas-fired boilers, complex manifolds, or safety concerns beyond basic DIY skills.
What a Technician Will Do Differently
Technicians approach bleeding air with specialized tools, diagnostic steps, and safety precautions that most homeowners lack: pressure gauges and manifold gauges for accurate readings, vacuum pumps or air eliminators for stubborn pockets, chemical treatments and corrosion inhibitors for contaminated systems, and powered purge equipment for long runs or closed-loop hydronic systems.
They also perform leak detection, adjust system pressure, replace faulty valves, and document results, calling for replacement or balancing when needed.
Diagnosing Persistent Air Problems and Underlying Causes
Persistent air in a plumbing system often signals underlying faults such as leaks, loose fittings, or corrosion in pipes and joints.
Other common causes include failed expansion vessels, malfunctioning valves, or pump problems that introduce or trap air.
A systematic approach using pressure testing and leak-detection techniques can locate hidden breaches and distinguish mechanical failures from distribution issues.
Leaks, Loose Connections, and Corrosion as Sources of Air
Inspecting the plumbing for leaks, loose fittings, and corrosion is essential when air keeps appearing in a water system. These faults create entry points and pressure fluctuations that draw or trap air.
Technicians should check joints, valve threads, and pipe runs for drips, mineral deposits, or cracked seals. Repairing or replacing compromised sections prevents recurring aeration and stabilizes system pressure.
Faulty Expansion Vessels, Valves, and Pump Issues
Check the expansion vessel, valves, and pump when air repeatedly appears in a system, since failures in these components often allow air ingress or promote cavitation and pressure instability.
Inspect vessel precharge and membrane integrity, verify check and service valve seating, and assess pump impeller wear or incorrect speed.
Replace or repair faulty parts and rebalance system pressure to prevent recurring air accumulation.
How to Pressure-Test and Detect Hidden Leaks
When air continues to appear despite servicing expansion vessels, valves, and pumps, a systematic pressure test can reveal concealed leaks or weak fittings that permit ingress or allow pockets to form.
Technicians isolate zones, pressurize to manufacturer specifications, and monitor pressure decay. Soap solution and acoustic detectors locate leaks.
Repair, retest, and purge trapped air afterward to confirm system integrity and stable pressure.
Prevention: Maintenance Steps to Keep Air Out
Preventive maintenance focuses on routine actions that minimize air ingress and accumulation in domestic and commercial piping.
A regular bleeding schedule, periodic system checks, correct procedures for filling and repressurising, and attention to water quality and corrosion inhibitors together reduce the likelihood of recurring air problems.
Implementing these practices and documenting results helps identify trends and catch issues before they affect system performance.
Regular Bleeding Schedule and System Checks
A simple, consistent bleeding schedule combined with routine system inspections greatly reduces the chance of air accumulation in domestic water lines.
Regular checks prolong system life and prevent noise. Recommended actions include:
- Bleed radiators monthly during heating season
- Inspect valves and vents for leaks
- Monitor pressure and temperature trends
- Schedule annual professional inspection to catch hidden issues
Best Practices for Filling and Re-pressurising Systems
Start by isolating the section to be filled. Then introduce water slowly while monitoring pressure and vent points to avoid trapping air.
Maintain system pressure within manufacturer limits, top up gradually, and operate vents to expel pockets.
After filling, cycle pumps and open thermostatic valves to purge residual air.
Record pressure readings and inspect for leaks; repeat short bleed cycles until stable readings persist.
Water Quality, Inhibitors, and Corrosion Control
When corrosion inhibitors and proper water chemistry are maintained, trapped air is less likely to form and system performance remains stable. Monitoring pH, conductivity, and inhibitor concentration prevents scale and galvanic corrosion that create surfaces where air can collect.
Regular testing, periodic inhibitor top-ups, and targeted flushing remove deposits and suspended gases.
Professional water treatment guarantees compatibility with materials and prolongs system life while minimizing air ingress.
Troubleshooting Common Complications
The guide next addresses common complications that can arise after bleeding, including a radiator that remains cold at the top, a continuous pressure drop, no water emerging during the bleed, and persistent noises.
It summarizes likely causes for each symptom and outlines targeted checks to identify the root problem.
Practical corrective steps and when to call a professional are flagged for each scenario.
Radiator Still Cold at the Top After Bleeding
Why does a radiator remain cold at the top after bleeding? It often indicates trapped air pockets, sludge buildup, or an imbalanced system.
After bleeding, persistent coldness suggests insufficient venting, partial valve closure, or poor flow due to debris.
Recommend checking lockshield and thermostatic valves, flushing the radiator, and ensuring proper circulating pump operation; consult a professional if problems persist.
Continuous Pressure Drop After Bleeding
A persistent drop in system pressure after bleeding signals issues beyond a simple trapped-air fix and often follows troubleshooting attempts on individual radiators.
It indicates leaks, a faulty automatic air vent, a failing expansion vessel, or a leaking pressure relief valve.
Inspect visible pipework, radiator valves, and boiler connections.
Monitor pressure trend, isolate sections, and contact a qualified heating engineer if losses continue or sources cannot be located.
No Water Comes Out When Bleeding
Silence from a radiator when its bleed valve is opened usually indicates either an isolated closed valve, a blocked radiators’ inlet, or the system pressure being too low to force water to that point.
Inspect and confirm the lockshield or supply valve is open, check for visible blockages or sludge at the pipework, and verify boiler pressure.
If unclear, isolate the radiator and consult a qualified plumber for safe diagnostics.
Strange Noises Persist Despite Bleeding
If bleeding does not stop clicking, gurgling, or banging, the problem likely extends beyond trapped air.
The guide directs inspection of water pressure, flow obstructions, loose pipe supports, and failing valves.
Recommend checking pump operation and pressure-reducing valves, flushing sediment, and securing pipes.
If noises persist, consult a licensed plumber to diagnose issues such as water hammer, cavitation, or system imbalance.
Safety Considerations and Environmental Notes
When bleeding air from water pipes, caution is required to avoid burns from hot water or steam and to use tools and gloves that minimize exposure.
Collected water should be disposed of safely and surfaces protected to prevent damage or contamination.
Proper bleeding also conserves energy and reduces wasted heating, yielding both cost savings and environmental benefits.
Handling Hot Water and Steam Safely
Exercise caution around hot water and steam, as both can cause severe burns and damage plumbing if released uncontrolled.
The technician should allow systems to cool, wear heat-resistant gloves and eye protection, and open valves slowly to vent pressure.
Avoid standing over fittings, monitor temperature, and keep bystanders clear.
Report leaks or unusual noises immediately and shut off heating sources if uncertain.
Disposing Collected Water and Protecting Surfaces
Contain drained water in suitable receptacles and prevent spills onto floors or landscaping by placing trays, buckets, or hoses under fittings and directing outflow to appropriate drains.
Avoid disposing oily, contaminated, or chemically treated water into storm drains.
Wipe spills immediately, protect finishes with cloth or plastic, and ventilate damp areas.
Dispose of collected water following local regulations; small volumes may be discarded to sanitary drains.
Energy Savings and Environmental Benefits of Proper Bleeding
After disposing of drained water responsibly and protecting surrounding surfaces, attention turns to the energy and environmental implications of properly bleeding a plumbing system.
Proper bleeding restores efficient heat transfer, reducing boiler runtime and fuel use. Lower energy consumption cuts utility bills and greenhouse gas emissions.
Preventing leaks and corrosion also minimizes water waste and the need for premature repairs or component replacement, conserving resources.
Useful Reference Tables and Quick-Reference Checklists
The article provides compact reference tables that list common radiator valve types and the recommended bleeding method for each.
It also offers a quick bleed checklist for homeowners covering tools, safety steps, and sequence of actions.
These resources are designed to speed identification and guarantee a safe, efficient bleeding process.
Typical Radiator Valve Types and Bleeding Methods
Radiator valves come in several common designs—manual bleed valves, automatic air vents, lockshield valves, and thermostatic radiator valves (TRVs)—and each requires a specific bleeding approach to expel trapped air effectively. Procedures vary by valve: manual twist, replace or vent, adjust lockshield balancing, and partially open TRV during bleed. Reference:
| Valve Type | Bleeding Method |
|---|---|
| Manual | Use key to release air |
| TRV/Lockshield | Open slightly, balance as needed |
Quick Bleed Checklist for Homeowners
Moving from valve-specific techniques to an actionable checklist helps homeowners perform quick, effective bleeding without confusion.
A concise checklist guarantees safety, efficiency, and consistent results. Follow steps below before and during bleeding:
- Turn off heating and isolate radiator.
- Place container and cloth under bleed screw.
- Use correct key and slowly open until air hisses, then close.
- Check pressure and top up system if needed.
Conclusion
In sum, bleeding air from water pipes restores flow and quiets radiators, turning a nagging problem into smooth operation. When followed correctly, the stepwise approach addresses most systems; some situations, however, still call for a pro. Regular maintenance keeps air at bay, saving time and money. If uncertainty arises, it’s better to call an expert than to press on and make matters worse—an ounce of prevention, after all, goes a long way.