How to Make a Plunger at Home: Easy DIY Steps Using Common Materials
You can easily make a plunger at home using common household items. Here’s a quick guide: gather a rubber glove or flexible rubber sheet, a sturdy plastic bottle or small bucket, a wooden dowel or broom handle, and strong tape or clamps. Secure the rubber over the bottle or bucket rim, attach the handle, and ensure there are no leaks before using it. This DIY plunger is effective for minor clogs. Below, you’ll find more details on variations, safety tips, and troubleshooting.
What a plunger is and when you need one
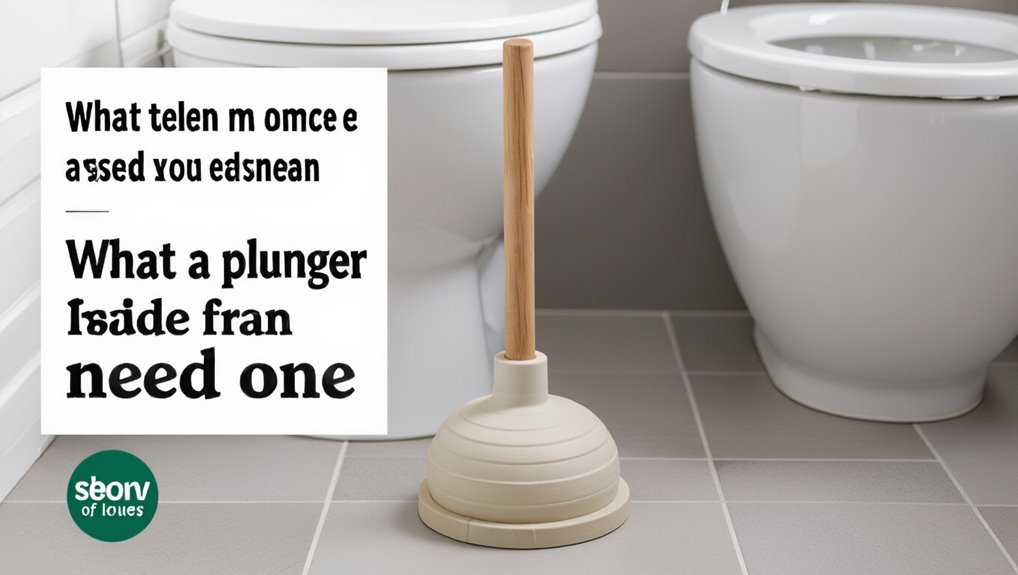
A plunger is a simple tool designed to create suction and pressure to dislodge blockages in drains and toilets.
It is commonly used for minor clogs caused by hair, soap, paper, or small debris in sinks, tubs, and commodes.
Severe obstructions, repeated backups, or suspected pipe damage typically require professional inspection and repair.
Purpose and common uses for a plunger
Plunger: a simple tool that uses suction and pressure to clear blockages in drains and pipes.
It serves to dislodge hair, soap scum, food scraps, and paper in sinks, tubs, and toilets. Homeowners use it for quick, noninvasive clogs.
Instructions on how to make a plunger at home appear alongside guidance on proper technique, maintenance, and safe storage.
Types of clogs a homemade plunger can handle versus when to call a pro
Identify the problem before attempting DIY fixes: a homemade plunger effectively clears simple, localized obstructions like hair, soap scum, food particles, and soft toilet paper that sit near the drain opening, but it is unlikely to resolve solid, hardened, or deeply lodged blockages, collapsed pipes, sewer line backups, or persistent slow drains caused by root intrusion or extensive grease buildup.
For complex issues, contact a licensed plumber.
Quick overview: Make a simple plunger in under 10 minutes
A basic plunger can be assembled from a sturdy plastic bottle or bucket, a rubber glove or sheet for the seal, strong tape or adhesive, and a sturdy stick or broom handle as a handle.
This makeshift tool can clear many common sink or small-diameter toilet clogs quickly, though it will be less effective on deep blockages or stubborn sewer-line issues.
Users should expect a temporary, improvised solution and be prepared to call a professional if the clog persists.
Materials and tools summary
Wood, a length of PVC pipe, a rubber glove, and a few basic fasteners are all that’s needed to make a simple plunger in under 10 minutes. Required items: 1x wooden dowel or scrap, 1x 1–1.5″ PVC pipe segment, 1 rubber glove or balloon, screws or zip ties, sandpaper, and a saw or utility knife. Basic safety gloves recommended.
Expected effectiveness and limitations
With the materials and basic assembly complete, the homemade plunger will handle many minor clogs effectively, especially those caused by soft debris in sinks or shallow toilet blockages.
It performs poorly on hardened obstructions, deep sewer issues, or damaged drains.
Durability, seal quality, and user technique limit success; persistent or hazardous blockages require professional tools or plumber services to avoid damage or health risks.
Materials and tools checklist
The section lists practical household items and a few optional tools that can improve the plunger’s durability or seal.
It focuses on readily available materials and simple upgrades that make the tool more effective. The reader is encouraged to choose items based on availability and the level of performance required.
- Rubber glove, plastic bottle or funnel, and strong tape
- Wooden dowel or broom handle for a sturdy shaft
- Silicone sealant or an extra rubber gasket for improved sealing
Household items that work best
Although improvised plungers can vary, the most reliable household substitutes share a few essential qualities: an airtight seal, a flexible cup or barrier, and a rigid handle or shaft for force transfer.
Suitable items include a rubber kitchen sink stopper paired with a broom or mop handle, a sturdy plastic bottle with cut edges and a wooden stick, or a silicone bowl plus metal rod.
Optional tools to improve durability or seal
Building on common household substitutes, a short checklist of optional tools can increase a homemade plunger’s lifespan and improve the seal against the drain.
Suggested items include heavy-duty silicone sealant, rubber gasket material, hose clamps, epoxy adhesive, a small utility knife, sandpaper for smoothing edges, and a heat gun for shaping rubber.
These improve durability, fit, and leak resistance.
Safety and hygiene precautions
Before beginning, appropriate personal protective equipment should be worn and a basic sanitation plan established to limit contamination.
The guide will address safe handling of sewage and common cleaning chemicals, including spill response and ventilation.
Guidance on proper disposal of waste and used materials will be provided to minimize health and environmental risks.
Personal protective equipment and sanitation steps
When working on a homemade plunger, proper personal protective equipment and sanitation steps minimize exposure to contaminants and reduce infection risk.
Wear disposable gloves, eye protection, and closed shoes. Use a washable apron or coveralls.
Disinfect tools and workspace before and after assembly with appropriate household disinfectant.
Wash hands thoroughly with soap and water for at least 20 seconds and launder clothing promptly.
Handling sewage, chemicals, and disposal
Any contact with sewage or concentrated drain chemicals should be treated as potentially hazardous and handled with strict precautions.
The individual must avoid skin contact, use impermeable gloves, eye protection, and masks.
Contaminated tools and materials require disinfection with bleach solution; wastewater and residues must be contained, neutralized if needed, and disposed of per local regulations.
Seek medical help for exposures.
Step-by-step: Make a basic bottle plunger
The guide begins by selecting a sturdy plastic bottle and preparing it by trimming the neck and smoothing edges.
Next, instructions cover forming a flexible rim and securely attaching a handle to create a suction surface.
Finally, testing the seal on both toilets and sinks is recommended with adjustments to rim shape or size as needed.
Select and prepare the bottle
Choose a sturdy plastic bottle with a wide neck and intact sides to guarantee a reliable seal and sufficient suction for a basic homemade plunger.
Inspect for cracks, deep scratches, or thin spots. Wash thoroughly with soap and water, rinse well, and dry.
Remove labels and adhesive residue to improve grip and hygiene. Reserve a size that fits the target drain without excessive diameter.
Create the plunger rim and handle attachment
With the cleaned, intact bottle ready, attention turns to forming a rim that seals against the drain and a secure attachment point for a handle.
Cut the bottle’s base to create a flared lip, smoothing edges with sandpaper.
Stretch rubber (from a glove or inner tube) over the cut edge, securing with strong tape or hose clamps.
Drill or puncture the cap to fasten a wooden dowel.
Test and adjust the seal for toilets and sinks
Begin by placing the homemade plunger over the drain and pressing gently to form an initial seal; observe whether gaps or uneven contact occur around the rim.
If leaks appear, reposition, trim or add soft padding (rubber strips or tape) to the rim.
Test by applying slow pressure and brief thrusts.
Repeat adjustments until firm, even suction is achieved for both sinks and toilets.
Alternative DIY plunger designs and when to use them
A few simple variations on homemade plungers suit different fixtures and blockage sizes. Each method trades permanence for fit or convenience, so choice depends on drain diameter and available materials.
Brief notes below highlight practical uses and limitations.
- Bucket-and-rubber-sheet plunger for larger drains
- Plastic bag and duct tape temporary seal method
- Shower/bath plunger adaptations
Bucket-and-rubber-sheet plunger for larger drains
For larger floor or commercial drains that a standard toilet plunger cannot seal, a simple bucket-and-rubber-sheet plunger provides a wide, flexible flange that conforms to irregular openings and creates strong suction.
Cut a rubber sheet to fit a clean plastic bucket rim, secure with clamps or heavy-duty tape, add a short handle through the center, and test seal before forceful plunging.
Plastic bag and duct tape temporary seal method
Use a sturdy plastic bag sealed with duct tape as a quick, temporary seal when drains are irregular or a proper plunger is unavailable.
Cut a bag to fit, create a tight flange over the drain, and secure edges with overlapping tape.
Apply firm downward pressure and release to force water movement.
Best for minor blockages; avoid chemical-contact situations and prolonged use.
Shower/bath plunger adaptations
Several simple adaptations can convert common household items into effective plungers for showers and bathtubs, where flat drains and overflow openings require different seals and techniques than toilets.
Use a silicone or rubber bowl inverted over the drain, secure with waterproof tape, or fashion a suction pad from a cut rubber glove or balloon.
Employ steady pumps and cover overflow ports before plunging.
Comparison of homemade plungers vs store-bought plungers
A quick comparison helps readers weigh homemade versus store-bought plungers across practical factors like cost, effectiveness, durability, and portability. The table below summarizes typical trade-offs to guide choice based on priorities. Practical suggestions follow for when one option may be preferable.
| Factor | Homemade Plunger | Store-bought Plunger |
|---|---|---|
| Cost | Very low (materials repurposed) | Moderate to high (retail price) |
| Effectiveness | Variable—depends on design and seal | Generally reliable with tested seal |
| Durability | Shorter lifespan, DIY repairs needed | Longer lifespan, replaceable parts |
Cost, effectiveness, durability, and portability
While homemade plungers often cost little more than existing household materials, store-bought plungers typically offer greater effectiveness, predictable durability, and easier portability due to purpose-built designs and materials tested for seal and suction.
Homemade options save money and suit occasional use but vary in performance, wear quickly, and can be bulky or fragile; store-bought models provide consistent suction, longer life, compact storage, and warranty.
Troubleshooting common problems
Common issues with homemade plungers include poor suction, leaks around improvised seals, and stubborn clogs that resist pressure.
The section outlines common causes and practical fixes for weak suction, quick repairs for messy or leaking seals, and when to stop plunging and pursue alternative methods.
Clear, stepwise guidance helps resolve most problems safely and effectively.
Poor suction: causes and fixes
Inspecting suction issues reveals the most frequent reasons a homemade plunger fails: improper seal against the drain, air leaks in the cup or handle, shallow cup depth, or blockages that prevent pressure buildup.
Remedies include ensuring a snug rim contact, sealing handle joints with tape or adhesive, deepening or reshaping the cup for better vacuum, and clearing obstructions before use.
Test and repeat until firm suction is achieved.
Leaks or messy seals: quick repairs
Address leaks and messy seals promptly to prevent water seepage and loss of suction.
Inspect the flange, rubber cup edge, and any taped joints for gaps or tears.
Replace torn rubber or trim jagged edges.
Use waterproof tape or silicone sealant for temporary fixes and allow curing time.
Test for airtight contact and repeat sealing until the plunger holds firm and operates cleanly.
When a clog won’t clear with a plunger
Try alternative strategies when a plunger fails to clear a clog, since persistent blockages often stem from issues the tool alone cannot resolve.
Assess trap and vent access, remove and inspect the P-trap, and use a drain snake or auger for deeper obstructions.
Consider enzymatic cleaners, pipe inspection with a camera, or professional help if multiple fixtures are affected or water levels remain abnormal.
Maintenance and storage to extend lifespan
After each use, the plunger should be rinsed, scrubbed with soap, and disinfected to prevent odors and bacterial buildup.
Once dry, it can be stored upright or hung in a ventilated, compact spot to save space and keep the rubber from warping.
Proper cleaning and mindful storage will make homemade plungers more sanitary and extend their usable life.
Cleaning and disinfecting after use
Rinse the plunger thoroughly with hot water immediately after use to remove residue.
Then apply a household disinfectant—such as diluted bleach (1 part bleach to 9 parts water) or an EPA-registered cleaner—letting it sit for the manufacturer-recommended contact time before rinsing.
Allow to air-dry fully in a ventilated area.
Inspect for wear, replace if rubber cracks or loses flexibility to maintain hygiene and effectiveness.
Compact storage tips and reusability
One practical way to preserve a homemade plunger’s shape and function is to store it upright in a well-ventilated, dry spot—ideally on a small tray or in a narrow holder that keeps the rubber cup off the floor and prevents contact with damp surfaces.
Regularly inspect for cracks, replace worn parts, coil handles neatly to save space, and label storage to discourage misuse and prolong service life.
Tips to prevent future clogs
Preventing future clogs requires simple habits and the right product choices for toilets, sinks, and showers.
Regularly removing hair and grease, using drain guards, and avoiding flushable wipes can reduce blockages. Choosing compatible cleaners and avoiding heavy chemicals or inappropriate items preserves pipes and fixtures.
- Use hair screens for showers and drain strainers for sinks
- Avoid flushing wipes, feminine products, and excessive paper; dispose of grease in the trash
- Select enzyme or mild cleaners and limit harsh chemical use
Best practices for toilets, sinks, and showers
A few simple habits can greatly reduce the risk of clogs in toilets, sinks, and showers by addressing common causes like hair, grease, and excess paper.
Regularly remove hair from drains, use strainers, dispose of grease and solids in the trash, flush only appropriate waste, and run hot water down sinks after use.
Schedule periodic inspections and gentle maintenance to catch buildup early.
Products and habits to avoid clog formation
After adopting routine habits like removing hair, using strainers, and avoiding grease, attention should turn to selecting products and adjusting behaviors that further reduce clog risks.
Choose biodegradable, low-residue cleaners and limited paper use; avoid flushable wipes, cotton swabs, and sanitary items.
Rinse food scraps into compost, use enzymatic drain treatments monthly, and educate household members on proper disposal to maintain free-flowing pipes.
Conclusion
A homemade plunger can be a quick, effective emergency fix when a store-bought option isn’t available. In under ten minutes, common items can form a functional tool for many minor clogs. Significantly, about 13 million households reported a clogged toilet emergency annually in recent surveys, highlighting the practicality of DIY solutions. With basic materials, sensible hygiene, and proper use, a simple bottle plunger can bridge the gap until a permanent solution is obtained.