How to Remove a Reverse Osmosis System: Step-by-Step Guide for Homeowners
To remove a reverse osmosis system from your home, follow these straightforward steps:
- Shut Off Water Supply: Turn off the water supply to the system.
- Relieve Tank Pressure: Open the faucet connected to the system to release any pressure.
- Disconnect Power: If your system has a power source, disconnect it.
- Drain and Remove Storage Tank: Empty and take out the storage tank.
- Detach Tubing: Remove the feed, drain, and dispenser tubing by pressing the quick‑connect collars or loosening the fittings.
- Unmount Filter Housings and Membrane Assembly: Take off the filter housings and the membrane assembly.
- Cap or Plug Exposed Lines: Seal any open lines to prevent leaks.
- Inspect for Leaks: Check all connections for potential leaks.
- Clean and Sort Parts: Organize the parts for disposal or recycling.
- Test Supply Lines: Finally, check the restored supply lines for leaks.
For detailed step-by-step instructions and troubleshooting tips, continue reading.
What Removing a Reverse Osmosis System Involves
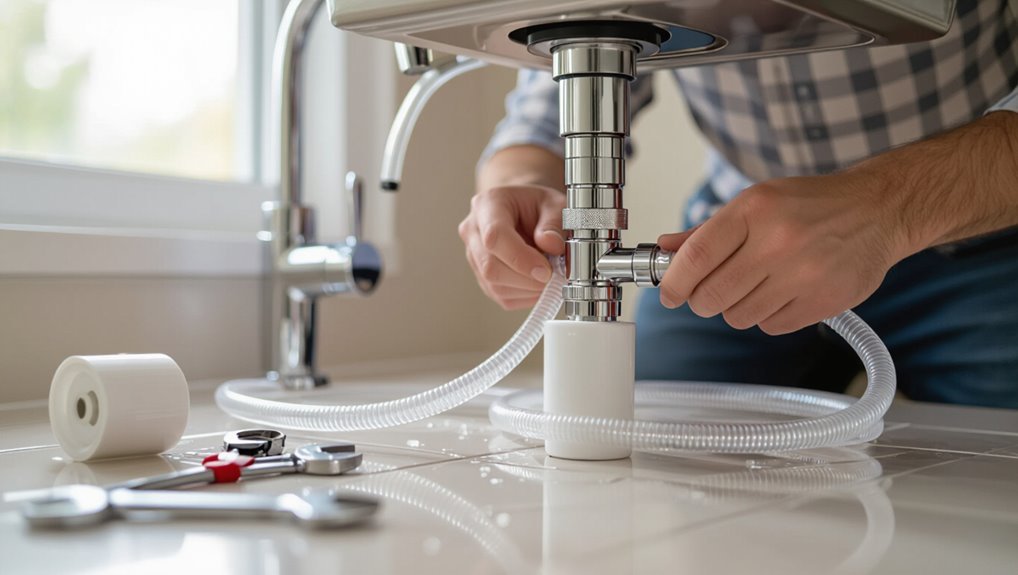
Removing a reverse osmosis system typically involves shutting off the water supply, depressurizing the lines, disconnecting tubing and fittings, and removing the membrane and filters.
Homeowners often remove RO units due to upgrades, leaks, space constraints, or switching to an alternative filtration method.
Simple disconnects and accessible installations can be handled as a DIY task, while complex setups, persistent leaks, or uncertainty about plumbing connections warrant a professional.
Quick overview of the removal process
Begin by turning off the water supply, relieving tank pressure, and disconnecting electrical components if present; then drain and remove the storage tank.
Detach tubing and fittings from the feed, drain, and dispenser lines, and finally unmount and take out the filter housings and membrane assembly.
The concise sequence outlines how to remove reverse osmosis system components methodically, minimizing leaks and preserving reusable parts.
Common reasons homeowners remove RO systems
After outlining the step-by-step removal sequence, homeowners often decide to take a system out for specific, practical reasons.
Common motives include system failure or persistent leaks, high maintenance or replacement costs, changes in water source or quality, space reconfiguration under the sink, perceived taste differences, or shift to alternative filtration.
These factors drive removal rather than cosmetic preference.
When to hire a professional vs DIY
Assess the scope and risks before deciding whether to tackle the job personally or call a professional.
Homeowners with basic plumbing skills, simple under-sink RO units, and proper tools can usually remove systems safely.
Hire a professional if leaks, complex fittings, electrical components, poor access, warranty concerns, or uncertainty exist.
Professionals guarantee proper shutoff, drainage handling, and code-compliant reconnection.
Tools, Materials, and Safety Precautions
Before beginning removal, a concise list of required tools and materials should be assembled, including wrenches, tubing cutters, replacement caps, and a bucket.
The worker must also wear appropriate personal protective equipment and prepare the workspace to control spills and protect surfaces.
Finally, water and electrical supplies should be shut off and verified safe before any disconnection.
Required tools and materials
When preparing to remove a reverse osmosis system, gather the specific tools, replacement parts, and safety gear required for the job to guarantee a controlled, efficient process.
- Adjustable wrench, pliers, tubing cutter, screwdriver set.
- Bucket, towels, replacement shutoff valve or tubing fittings, tubing caps.
- Replacement filters (if needed), compressed air source or dry cloth, silicone sealant.
Personal protective equipment and workspace preparation
After gathering tools and parts, attention turns to personal protective equipment and preparing the work area to prevent injury and protect surfaces.
Gloves, eye protection, and knee pads reduce risk.
Clear and dry the floor, use drop cloths for cabinets, and guarantee good lighting.
- Wear PPE
- Protect surfaces
- Maintain clear workspace
Turning off water and power safely
Shut off the feed to the reverse osmosis unit and disconnect its electrical supply to eliminate hazards before disassembly.
Locate and close the dedicated inlet shutoff valve; relieve line pressure by opening a nearby faucet.
Unplug transformer or switch off the breaker protecting the RO pump.
Use a noncontact voltage tester, wear gloves and eye protection, and keep a bucket to catch residual water.
Preparing Your Home and System for Removal
Before beginning removal, the homeowner should locate all system components: the storage tank, filter housings, dedicated faucet, feed valve, and drain line.
They must shut off the cold-water supply and open the RO faucet to relieve pressure in the lines.
If the system uses a transformer or other electrical connection, that power source should be disconnected or unplugged.
Locating system components (tank, filter housings, faucet, feed valve, drain line)
Locate each major element of the reverse osmosis system—storage tank, filter housings, dedicated faucet, feed valve, and drain line—so their positions and connections are clear before disassembly begins.
Photograph or sketch connections, note tubing routes and quick‑connect fittings, and identify shutoff components and the drain saddle location.
Label lines with tape to simplify reassembly and prevent confusion.
Shutting off the cold-water supply and relieving pressure
Turn off the cold-water supply to the RO unit at the under-sink feed valve and open the dedicated faucet to drain remaining water, ensuring the system is depressurized before disconnecting any tubing.
Close the shutoff fully, then wait until flow stops. Open a nearby cold tap to equalize pressure if needed.
Collect drained water with a towel or bucket to prevent spills.
Disconnecting electricity or transformer (if applicable)
If the RO system includes an electric pump or a transformer, cut power to the unit by unplugging the transformer from the outlet and switching off any dedicated circuit at the breaker panel; verify the device is unpowered by confirming indicator LEDs are off or by testing with a noncontact voltage tester.
After power is confirmed off, disconnect transformer wiring at terminals, label connections, and secure loose wires to prevent accidental contact.
Step-by-Step Removal: Storage Tank and Filters
The removal process begins with draining and disconnecting the pressurized storage tank to prevent spills and relieve system pressure.
Next, filter housings and cartridges are loosened and removed using appropriate tools and protective gloves to avoid contamination and injury.
Finally, used filters and membranes are handled as biohazardous or recyclable waste according to local regulations and packaged for safe disposal.
Draining and disconnecting the storage tank
Begin by relieving pressure in the RO system so water can be drained safely: close the feed valve, open a nearby cold-water faucet to bleed pressure, then open the tank faucet or disconnect the tank line at the tank’s shut-off to let the water flow out.
Once empty, shut the tank’s shut-off, disconnect the tank tubing at the ball valve, and remove the tank from its cradle.
Removing filter housings and cartridges safely
Proceed to remove filter housings and cartridges with care to prevent spills and contamination: wear gloves, place a towel or shallow pan beneath the assembly, and keep a bucket nearby to catch residual water.
Shut off feed valves, depressurize housings, then unscrew each housing using the wrench.
Lift cartridges straight out to avoid splashing. Inspect seals and O-rings, set components aside for cleaning or disposal.
Handling and disposing of used filters and membranes
Carefully catalog used filters and the membrane before removal, noting age and any visible damage to guide disposal or recycling choices.
Place contaminated cartridges and membrane in sealed bags to prevent leaks and odors.
Check local regulations for plastic filter housings, hazardous waste rules, and manufacturer take-back or recycling programs.
Label bags and arrange timely pickup or drop-off at approved facilities.
Step-by-Step Removal: Faucet, Feed Valve, and Drain Line
Next, attention turns to the external connections: the dedicated RO faucet, the feed/saddle valve and tubing, and the drain line.
The faucet is unmounted from the countertop or sink and its supply line is loosened and removed.
The feed valve and tubing are disconnected and the drain line is detached and capped to prevent leaks.
Removing the dedicated RO faucet from countertop or sink
Begin by turning off the RO system’s water supply and relieving pressure at the dedicated faucet; this prevents leaks when disconnecting the fixture.
Remove decorative cap and handle, then loosen mounting nut under countertop with appropriate wrench or basin tool.
Feed tubing and any retaining clips are detached at the faucet shank.
Lift faucet assembly upward through hole, inspect seals, and set aside for cleaning or replacement.
Disconnecting the feed/saddle valve and feed tubing
Locate the cold-water feed under the sink and shut the supply at the saddle or angle stop to isolate the RO system; then relieve any remaining pressure by opening the dedicated RO faucet.
After draining, loosen the saddle valve compression nut or shutoff connection, and remove the feed tubing from the valve.
Inspect fittings, cap exposed tubing with a temporary plug, and save or replace valve components as needed.
Detaching and capping the drain line
With the feed line removed and the RO faucet open to relieve pressure, attention turns to the drain line: identify the drain saddle on the sink or standpipe and the plastic tubing routed from the membrane housing to the saddle fitting.
Loosen the saddle’s clamp screws, remove tubing, plug or cap the membrane drain outlet with appropriate-sized cap, and reinstall saddle hardware or remove assembly.
Step-by-Step Removal: Under-Sink Components and Final Disassembly
Next, attention shifts to the under-sink components where tubing, check valves, and fittings are disconnected in a controlled sequence to prevent leaks.
The system bracket and tank cradle are then unmounted and removed from the cabinet.
Finally, remaining feed and drain connections are sealed or restored to their original plumbing configuration before testing for leaks.
Removing tubing connections and check valves
Begin by relieving any remaining pressure in the system—turn off the feed valve, open the faucet, and drain the tank—so tubing can be disconnected without spraying water.
Cut water at the shutoff, then depress quick‑connect collars to release tubing.
Label and remove feed, concentrate and product lines.
Inspect and remove in-line check valves; note orientation for reinstallation or disposal.
Cap or plug exposed fittings.
Unmounting the system bracket and tank cradle
After the tubing and check valves are disconnected and capped, attention turns to the physical supports holding the RO assembly in place.
The bracket and tank cradle are inspected for screws or bolts. Using appropriate drivers, fasteners are removed while supporting components to prevent drops.
Mounting hardware and wall anchors are collected for disposal or reuse.
The freed assembly is carefully lifted out for storage or disposal.
Sealing or restoring original plumbing connections
Restore the original plumbing by removing any temporary caps or adapters and reconnecting the supply lines, drain, and shutoff valve in their pre-installation configuration.
Inspect threads and compression fittings, replace worn seals or ferrules, and apply plumber’s tape where needed.
Tighten fittings to manufacturer torque, open valves slowly to check for leaks, and flush lines.
Confirm dry, secure connections before reinstalling cabinetry.
Post-Removal Tasks and Site Restoration
After reconnection, the water lines should be tested under normal pressure and observed for leaks for several minutes to confirm airtight seals.
The sink cabinet is then returned to its original layout and cleaned of debris, old tubing, and any mineral buildup.
Finally, consideration is given to replacement or upgrade options—such as a new RO unit, countertop filter, or inline carbon filter—based on water needs and available space.
Testing water lines for leaks after reconnection
Begin by pressurizing the reconnected supply and drain lines slowly while observing all fittings and joints for signs of moisture or weeping.
Inspect under-sink connections, shutoff valves, and tubing junctions for drips.
Run faucet and waste drain cycles, watching for pressure drops, pooling, or dampness.
Tighten or reseat fittings as needed, then recheck after ten minutes to confirm leak-free restoration.
Restoring sink cabinet layout and cleaning
Clear the workspace and return components to their original positions, starting with larger items like storage bins and brackets and finishing with smaller hardware such as screws and hose clips.
Wipe surfaces, remove debris, and vacuum under the sink.
Inspect for remaining stains or moisture, apply appropriate cleaners, and allow to dry.
Label any surviving tubing and hardware for future reference.
Options for replacing or upgrading filtration after removal
Consider available filtration options before reinstalling components: the homeowner should evaluate whether to replace the removed reverse osmosis (RO) system with a new RO, switch to a simpler carbon/ceramic under-sink filter, install a countertop or faucet-mounted unit, or connect to a whole-house treatment system.
Compare water quality needs, maintenance frequency, footprint, cost, and flow rate; select certified systems and plan plumbing adaptations or professional installation.
Troubleshooting Common Problems During Removal
During removal, common issues include stubborn fittings and tubing that resist disconnection, leaks that appear after reconnection, and damaged shutoff valves or fittings.
The section outlines simple diagnostic steps to identify the source of a leak and safe methods for freeing stuck components.
It also presents quick fixes and when to recommend parts replacement or professional help.
Stubborn fittings and stuck tubing
Encountering stubborn fittings and tubing that won’t budge is a common hurdle when removing a reverse osmosis system, often caused by mineral buildup, adhesive residue, or age-hardened plastic.
Apply gentle heat, penetrating lubricant, and steady twisting rather than pulling. Use proper wrenches or push-fit release tools, protect surrounding components, and work patiently.
If damage occurs, cut tubing and plan for replacement fittings.
Leaks after reconnection
Check all joints and fittings immediately after reconnection, since leaks often result from misaligned tubing, loose compression nuts, or damaged O-rings.
Inspect each connection under pressure, feel for moisture, and tighten fittings incrementally.
Replace compromised O-rings or ferrules before retesting.
Trace drip paths to identify hidden leaks at saddle clamps, faucet connections, or tank fittings, and re-seat tubing to guarantee proper engagement.
Damaged shutoff valve or fittings and quick fixes
If the shutoff valve or associated fittings show signs of corrosion, cracking, or stripped threads during removal, the system cannot be safely isolated and simple, targeted repairs are required before proceeding.
Replace worn compression nuts, use a new shutoff valve, or install push-fit adapters for temporary isolation.
Confirm leak-free connections under normal pressure; if doubt persists, call a licensed plumber to avoid water damage.
Disposal, Recycling, and Environmental Considerations
After removal, used filters and membranes should be handled according to manufacturer guidance or disposed of through approved waste programs to minimize contamination.
Metal housings and plastic components can often be separated and taken to local recycling centers that accept those materials.
Users should consult municipal regulations and hazardous-waste guidance to guarantee compliance with any special disposal requirements.
Proper disposal options for filters and membranes
Dispose of used reverse osmosis (RO) filters and membranes thoughtfully to minimize environmental harm and comply with local waste regulations.
Used cartridges and membranes often contain concentrated contaminants; consequently, they should be sealed in plastic bags and placed in household waste only if local rules permit.
Preferred options include hazardous-waste collection events, municipal guidance, or manufacturer take-back programs that guarantee safe handling and disposal.
Recycling metal and plastic components
Separate metal and plastic parts for recycling whenever possible, since each material follows different processing streams and yields greater environmental benefit when recovered correctly.
Components should be cleaned, disassembled, and sorted to maximize recovery.
Recommendations:
- Separate stainless steel/brass fittings and tubing for scrap metal recycling.
- Sort plastics by type (hard housings vs. tubes) and check local accepted codes.
- Remove non-recyclable mixed materials before drop-off.
Local regulations and hazardous-waste guidance
Compliance with local regulations and hazardous-waste guidance guarantees safe, legal handling of reverse osmosis system components and prevents environmental harm.
Homeowners should consult municipal waste authorities for filter, cartridge, and chemical disposal rules, identify hazardous materials (older lead-containing parts, cleaning solvents), and use designated drop-off sites or licensed haulers.
Documentation and receipts are recommended to demonstrate compliance and avoid fines.
Cost, Time, and When to Call a Pro
Typical DIY removal of a reverse osmosis system can take one to three hours and usually involves modest costs for basic tools and disposal; professional service fees and part replacement raise the total.
If leaks, old connections, frozen or corroded fittings, or local code concerns arise, a licensed plumber should be contacted.
When hiring a contractor, ask for an itemized estimate, confirmation of permits and warranties, and expect shutoff, disconnect, safe disposal, and pressure testing as standard steps.
Typical DIY time estimates and cost breakdown
A straightforward under-sink reverse osmosis removal generally takes 45–90 minutes for a homeowner with basic tools and plumbing familiarity; more complex installs with tucked tanks, hard-to-reach fittings, or mineral deposits can extend the job to two hours or more. Typical costs: minimal (free) if DIY, $20–80 for replacement parts, $100–250 for pro labor.
| Task | Time | Cost |
|---|---|---|
| Disconnect | 15–30 min | $0–$20 |
| Remove tank | 10–20 min | $0 |
| Remove filters | 10–20 min | $0–$60 |
| Flush/drain | 10–30 min | $0 |
| Disposal | 5–15 min | $0–$10 |
Signs you should hire a licensed plumber
Several clear indicators suggest hiring a licensed plumber is warranted.
Homeowners should call a pro when plumbing connections are corroded, fittings leak despite basic tightening, or shutoff valves fail.
If removal risks water damage, involves gas lines, or requires altering supply/drain piping, professional skills reduce risk.
Unexpected complications, visible mold, or lack of confidence in tools/time also justify hiring licensed help.
What to ask a contractor and expected service steps
How much should be expected and which questions matter most when hiring a contractor for reverse osmosis removal and reinstall?
A homeowner should ask about licensing, insurance, hourly versus flat fees, estimated duration, warranty on work and parts, and disposal policies.
Typical service steps: inspection, shutoff/drain, component removal, leak test, reinstall or cap.
Call a pro for leaks, membrane damage, or complex fittings.
Tips to Prevent Future Plumbing Issues After Removal
After removal, one should cap or adapt any unused lines with proper fittings to prevent drips and contamination.
Periodic inspections of connections and valves help catch loosening or degradation before leaks develop.
The article also notes alternatives to RO systems and briefly compares their maintenance and water-quality trade-offs.
Installing proper caps or adapters on unused lines
Install durable caps or threaded adapters on any unused RO lines to prevent leaks, backflow, and contamination.
Select fittings compatible with tube material and thread type, using brass or plastic rated for potable water.
Apply appropriate thread sealant or PTFE tape, tighten securely without over-torquing, and label capped lines.
Document locations for future plumbing work or system reinstallations.
Routine checks to ensure long-term leak-free connections
Perform regular visual and tactile inspections of all shutoff valves, capped lines, fittings, and hose connections to verify seals remain tight, threads show no corrosion, and no dampness or mineral buildup is present.
- Check monthly for drips and soft fittings; tighten or replace as needed.
- Replace worn washers and O-rings annually.
- Flush lines briefly after long idle periods to detect hidden leaks.
Alternatives to RO systems and pros/cons
Having completed routine checks to keep connections leak-free, attention can shift to water treatment options that avoid reverse osmosis and steps to minimize plumbing problems once an RO unit is removed. Consider alternatives, weigh pros/cons, and implement preventive measures like sediment filters, routine inspections, and proper shutoff valves.
| Option | Benefit | Drawback |
|---|---|---|
| Carbon filter | Improves taste | Doesn’t remove minerals |
| Water softener | Prevents scale | Adds sodium |
| UV purifier | Kills microbes | No chemical removal |
Conclusion
The homeowner stands at a tidy counter, tools stacked, tubing coiled, and old filters bagged; the system is gone, the space reclaimed. Faucets gleam where fittings once were, drains run clear where lines were loosened, and a quiet sense of order fills the kitchen. Having followed safe steps, checked valves, and capped fittings, the property is left ready: for repair, for replacement, or for simply enjoying water the way it was before.