
How to Convert a Propane Heater to Natural Gas Safely: Step-by-Step Guide
To safely convert a propane heater to natural gas, ensure your heater model is compatible and consult the manufacturer’s instructions along with local codes. You’ll need a certified conversion kit, the appropriate regulator, correct orifices, leak-testing tools, and any necessary permits. Begin by turning off the propane supply and removing propane components. Next, install the natural gas parts, adjust the pressure settings, and conduct pressure and leak tests. For complex tasks, it’s recommended to hire a licensed technician. Always adhere to labeling, inspection requirements, and local regulations for compliance.
Overview of Converting a Propane Heater to Natural Gas
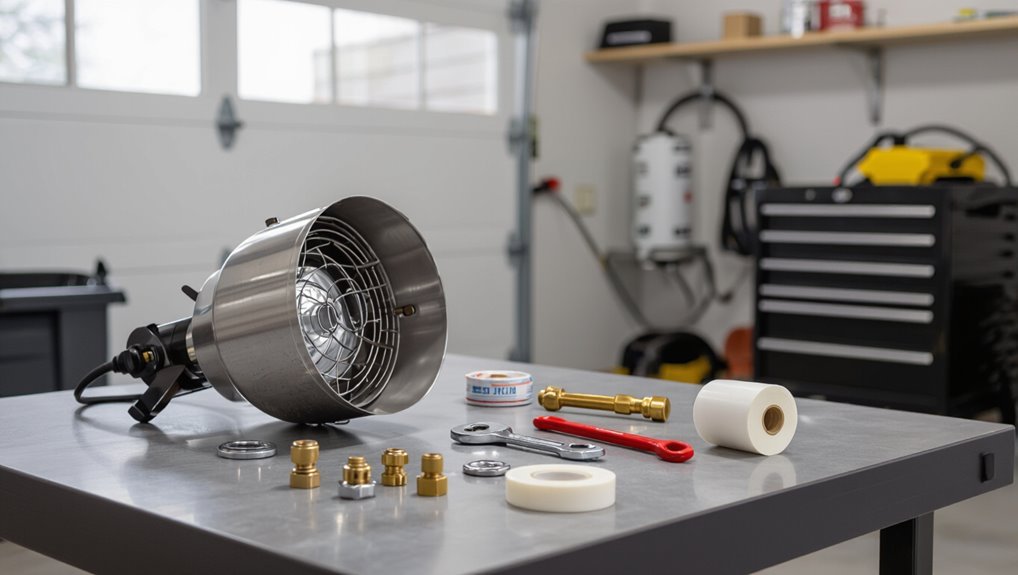
Homeowners typically convert propane heaters to natural gas when a permanent gas line becomes available or to reduce fuel costs and maintenance.
Before beginning, applicable safety codes, permits, and manufacturer guidelines must be verified to guarantee safe, compliant work.
Expected costs, timeframes, and skill requirements vary by appliance and installation complexity, often ranging from a few hundred to several thousand dollars and requiring either basic mechanical competence or professional service.
When and why homeowners convert propane heaters to natural gas
Why consider switching a propane heater to natural gas? Homeowners often convert for lower fuel costs, steady supply, reduced tank maintenance, and higher convenience.
Decisions hinge on local gas availability, long-term occupancy plans, and appliance compatibility.
Guides on how to convert propane heater to natural gas outline required parts, conversion kits, and professional assessment to guarantee efficient, cost-effective change without detailing safety or code steps.
Safety and code considerations to evaluate before starting
Before beginning a conversion, a thorough review of safety requirements and local codes is essential to prevent hazards and guarantee legal compliance.
Inspect appliance certification, venting, combustion air, and regulator compatibility.
Verify permit and inspection requirements, gas line sizing and pressure limits, and seismic or setback rules.
Confirm installer qualifications and manufacturer conversion policy to avoid voiding warranties or creating unsafe conditions.
Typical costs, time, and required skills
Although conversion complexity varies by heater type and local requirements, typical projects fall into a few predictable cost and time ranges.
Expect parts (conversion kit, fittings) $50–$300, labor $100–$500 if professional; total $150–$800.
Duration ranges from one hour for simple burner swaps to several hours or a day for complex systems.
Required skills: basic mechanical aptitude, gas-fitting certification for permit work.
Compatibility Assessment: Is Your Heater Convertible?
The technician first verifies the heater’s make and model to determine whether the unit was designed for conversion and to locate any model-specific instructions.
Manufacturer documentation and available conversion kits are consulted for approved parts, sizing, and step-by-step guidance.
If the unit lacks a kit, is damaged, or fails to meet pressure and safety requirements, conversion is not recommended and replacement or using the existing fuel type is advised.
How to identify heater make, model, and conversion capability
Can the existing propane heater be safely converted to natural gas?
Inspect the heater’s data plate for manufacturer, model, and serial numbers. Note burner type, orifice size, and gas valve markings. Photograph labels and components.
Cross-check visible certifications (ANSI, CSA) and installation date. If markings are missing, contact the manufacturer or a qualified technician for identification before proceeding.
Manufacturer documentation and conversion kits: what to look for
Before attempting conversion, review the manufacturer’s documentation for explicit conversion instructions and approved kit part numbers to confirm compatibility with natural gas.
Verify model-specific conversion kits, gas orifice sizes, regulator requirements, and pressure settings.
Check warranty implications, installation diagrams, and torque/specification data.
Confirm kit authenticity and obtain OEM support contact information.
Retain documentation for inspection and future service.
Situations when conversion is not recommended and alternatives
Although many propane heaters can be adapted, some models should not be converted due to design limitations, safety risks, or lack of approved parts.
Conversion is inadvisable for older units, sealed combustion or unserviceable burners, and heaters without manufacturer approval.
Alternatives include replacing the unit with a factory-built natural gas model, using an external propane-to-natural gas conversion appliance, or consulting a licensed HVAC professional for safe options.
Required Parts, Tools, and Materials
A conversion will require a certified natural gas conversion kit containing the correct orifices and any manufacturer-specified components.
Additional items commonly needed include a proper gas regulator, flexible gas connector, sealing compounds, and replacement fittings when the kit does not supply them.
Essential tools and safety equipment—wrenches, leak detector solution, a manometer, gloves, and eye protection—should be on hand before work begins.
Components included in a natural gas conversion kit
Conversion kits package the specific parts and basic tools needed to adapt a propane heater for safe operation on natural gas.
Typical kit contents include a conversion orifice set, pilot assembly components, jets, gaskets, mounting hardware, and detailed instructions.
Also included are adjustment screws, seals, and any appliance-specific brackets or plates.
Boxes may contain a basic wrench or driver for installation.
Additional parts often needed (regulators, orifices, connectors)
Beyond the parts included in many conversion kits, several additional components are commonly required to guarantee safe, reliable operation on natural gas: a properly sized gas regulator to reduce and stabilize incoming pressure, a set of orifices matched to the appliance BTU rating, and flexible gas connectors or rigid piping with appropriate fittings.
Installers may also need thread sealant rated for gas and inline shutoff valves.
Tools and safety equipment checklist
Proper preparation requires assembling all required parts, tools, and safety gear before starting the conversion. A concise checklist guarantees efficiency and safety: verify regulator and orifice sizes, confirm gas-compatible fittings, and secure leak detection supplies.
Essential items include:
- Adjustable wrenches, tubing cutters, thread sealant
- Manifold/regulator, proper orifices, gas-rated connectors
- Gas detector, leak spray, safety goggles and gloves
Preparing the Work Area and Safety Precautions
Before beginning conversion work, the technician guarantees the propane supply is shut off, the area is ventilated, and any residual gas is purged.
Appropriate personal protective equipment is worn and portable gas detectors are used to monitor for leaks during the procedure.
Permits and local code requirements are verified beforehand, with a licensed technician consulted or hired when regulations or complexity demand.
Shutting off fuel supply and ventilation requirements
Shut off the propane supply and isolate the appliance’s gas line before any conversion work begins, then secure ventilation to prevent gas accumulation.
Verify valves are closed, depressurize lines, and cap or tag isolated fittings.
Open windows and doors, and guarantee mechanical ventilation or exhaust is operating.
Post warning signs and restrict access until leak tests and final ventilation confirmations are completed.
Personal protective equipment and gas detection tools
Personal protective equipment and reliable gas detection instruments are essential when preparing the work area for a propane-to-natural gas conversion.
Workers wear flame-resistant clothing, safety glasses, cut-resistant gloves, and hearing protection.
Use a calibrated combustible gas detector and fixed or portable methane sensors to monitor leaks.
Confirm ventilation, keep a Class B-C fire extinguisher nearby, and verify detectors before and after testing.
Permits, local codes, and when to call a licensed technician
Although converting a heater involves straightforward mechanical changes, compliance with local building codes and permit requirements is mandatory in many jurisdictions to guarantee safe, legal installation.
Inspectors may require permits, inspections, or specific fittings. If codes are unclear, gas lines are complex, or homeowner insurance is affected, a licensed technician should perform or approve work.
Documentation and permits protect safety and liability.
Step-by-Step Conversion Process
The conversion begins with a careful inspection and documentation of the existing propane configuration.
Next, propane-specific parts are removed and replaced with natural-gas orifices, burner adjustments, and an appropriate regulator set to the correct pressure.
Finally, the gas supply is reconnected and the system is pressure-tested and checked for leaks before operation.
Step 1 Inspect and document the existing propane setup
Begin by visually surveying the heater and its immediate piping to record model numbers, appliance ratings, regulator types, fittings, and any visible wear or modifications.
Note serial numbers, data plate information, and gas type markings. Photograph assemblies and label connections.
Document pipe sizes, thread types, shutoff valve location, and venting condition.
Log previous repairs, corrosion, leaks, and accessibility for technicians.
Step 2 Remove propane-specific components safely
Wear appropriate PPE and guarantee gas lines are shut and purged before removing any propane-specific parts.
The technician labels and photographs connections, then disconnects regulators, hoses, and propane fittings. Caps and seals are installed on open ports.
Removed components are stored or disposed per local codes. Electricals remain untouched.
A leak test is performed on isolated sections before proceeding to natural gas modifications.
Step 3 Install natural gas orifices and adjust burner settings
Technicians replace propane orifices with correctly sized natural gas jets and adjust burner air shutters and manifold pressures to match the appliance’s conversion specifications.
They guarantee secure fitting, verify alignment, and clean burners before reassembly.
Pilot and main burner flames are observed for stable, blue combustion and adjusted for correct length.
Final checks include leak testing and recording settings for future reference.
Step 4 Replace or adjust the regulator and pressure settings
With orifices and burner settings verified and flame characteristics corrected, attention shifts to the regulator and system pressure to guarantee safe, reliable operation on natural gas.
Technicians must install a regulator rated for natural gas, confirm downstream pressure matches manufacturer specifications, and adjust or replace pressure relief devices as needed.
Secure fittings and verify venting and diaphragm integrity before restoring service.
Step 5 Reconnect gas supply, pressure test, and check for leaks
Reattach the natural gas supply, then perform a systematic pressure test and leak inspection before returning the heater to service.
After reconnection, slowly open the supply valve and monitor pressure with a manometer at recommended inlet points.
Apply an approved leak-detection solution to all joints and fittings.
Observe for bubbles, re-tighten or replace components if detected, and only energize the unit once no leaks remain.
Step 6 Adjust combustion settings and perform flame/CO checks
Begin by setting the heater to its manufacturer-recommended natural gas combustion settings.
Then proceed to fine-tune air shutter, gas valve pressure, and pilot adjustments as specified in the service manual.
Observe flame shape and color, ensuring a steady, blue flame with minimal yellow tipping.
Measure CO and O2 using calibrated instruments, record readings, and adjust until combustion values meet manufacturer and code limits.
Step 7 Finalize installation, labeling, and documentation
After combustion has been tuned and safety readings verified, attention shifts to completing the installation, applying required labels, and assembling the documentation package.
The technician secures fittings, verifies leak-free connections, reinstalls covers, and restores power. Required labels indicating fuel type and conversion date are affixed.
A record including conversion parts, regulator settings, test results, and contractor credentials is compiled and provided to the owner.
Testing and Verification After Conversion
After conversion, testing and verification must confirm safe gas delivery and proper combustion.
Technicians should perform pressure tests and leak detection, measure combustion efficiency and CO levels, and adjust burners as needed.
Final inspections and documented sign-offs guarantee compliance with codes and manufacturer requirements.
Methods for pressure testing and leak detection
Verify integrity and safety through systematic pressure testing and leak detection before declaring a converted heater ready for use.
Use a manometer to confirm line pressure matches appliance requirements, apply soap solution to joints and fittings, and inspect for bubbles.
Perform a calibrated pressure decay test over a specified interval. Document results, correct defects, and repeat tests until zero leakage and stable pressure are confirmed.
How to verify correct combustion, CO levels, and efficiency
One systematic check is required to confirm that combustion is correct, carbon monoxide (CO) concentrations are within safe limits, and the heater operates near its expected efficiency after conversion.
Technicians should measure CO with a calibrated detector, analyze flue gases (O2, CO2, stack temperature), adjust air/gas ratio, confirm flame pattern and stable operation, and record readings for baseline comparison.
Required inspections and sign-offs for compliance
Compliance requires documented inspections and formal sign-offs from qualified personnel to confirm the conversion meets codes and manufacturer requirements.
Inspectors verify gas pressure, fittings, regulator settings, combustion analysis, ventilation, and safety controls.
Required paperwork includes inspection reports, permit closure, and updated appliance labels.
Final sign-off by the authority having jurisdiction authorizes operation; retained records support warranties, insurance, and future service.
Troubleshooting Common Problems
After conversion, common issues such as poor ignition, yellow flames, or sooting are checked to identify improper air-gas mixture or burner contamination.
Pressure-related problems and regulator faults are evaluated by measuring supply and manifold pressures and inspecting connections.
Any unusual noises or odors prompt immediate inspection for leaks, loose components, or improper venting before returning the heater to service.
Poor ignition, yellow flames, or sooting causes and fixes
Troubleshooting poor ignition, yellow flames, and sooting begins with identifying whether the issue stems from fuel mixture, air supply, or ignition components.
Inspect burner ports for debris and clean; verify correct orifice and conversion kit installation for natural gas; check pilot and spark assembly alignment and gap; guarantee adequate combustion air and unobstructed venting.
Replace damaged electrodes or clogged burners as needed.
Pressure issues and regulator troubleshooting
Check regulator settings and supply pressure first, since most performance problems trace back to incorrect pressure or a failing regulator.
Technicians should verify inlet and outlet pressures with a manometer, inspect for regulator diaphragm damage, and confirm correct orifice sizing.
Replace faulty regulators, tighten fittings to stop leaks, and guarantee adequate supply line diameter.
Record readings and retest after adjustments.
When unusual noises or odors appear after conversion
When unusual noises or odors emerge following a propane-to-natural-gas conversion, they often signal combustion or ventilation problems that require prompt diagnosis.
The technician inspects burners, pilot assembly, and venting for soot, yellow flames, or loose connections. A gas leak test is performed if odor persists.
Replace faulty components, adjust air shutter, and guarantee proper pressure.
If unresolved, cease operation and call qualified service.
Cost-Benefit and Performance Comparison
A comparison of propane and natural gas should highlight differences in fuel cost, combustion efficiency, and emissions to inform whether conversion yields operational savings or environmental benefits.
It should also weigh long-term maintenance requirements and component longevity, since appliance wear and service frequency affect total cost of ownership.
Clear, quantified estimates of fuel prices, efficiency ratings, and expected maintenance intervals help determine if conversion is justified for a given installation.
Fuel cost, efficiency, and emissions differences between propane and natural gas
Although both fuels burn cleanly in modern heaters, propane and natural gas differ greatly in cost, energy content, and emissions profile, which affects operating expense and environmental impact. Propane offers higher energy per unit but usually higher price; natural gas often costs less per MBtu with slightly lower CO2 per unit energy.
| Aspect | Comparison |
|---|---|
| Price | Natural gas generally cheaper |
| Energy density | Propane higher |
| CO2 intensity | Natural gas slightly lower |
| Availability | Varies by location |
Long-term maintenance and reliability considerations
Because fuel choice affects not only operating costs but also equipment wear and service intervals, long-term maintenance and reliability considerations are central to any propane-to-natural-gas conversion decision.
Natural gas generally yields cleaner combustion, reducing soot and burner corrosion, but regulator and valve compatibility, periodic leak checks, and flow-rate verification remain essential.
Lifecycle cost, spare-part availability, and technician familiarity influence overall value and uptime.
When to Hire a Professional
Certain conversion tasks cross legal and safety thresholds and must be performed by licensed gas technicians.
Guidance on selecting a qualified HVAC/gas service provider should cover credentials, insurance, and experience with propane-to-natural gas conversions.
Homeowners are advised to ask for proof of license, liability and workers’ compensation insurance, references, and a detailed written estimate and scope of work.
Legal and safety thresholds that require licensed technicians
When conversion work crosses jurisdictional thresholds or involves gas line alterations, the task legally requires a licensed technician.
Permits, pressure testing, meter changes, and removal or alteration of fixed gas piping typically mandate certified professionals.
Building codes, utility company rules, and insurance conditions often prohibit homeowner-performed modifications.
For any work affecting supply, combustion safety, or venting, hire a licensed gas fitter to meet legal and safety standards.
How to select a qualified HVAC/gas service provider
Choosing a qualified HVAC or gas service provider is essential whenever a conversion exceeds basic adjustments or when local codes, safety concerns, or insurance requirements apply.
A licensed professional guarantees compliance, proper regulator sizing, and leak-free connections. Consider credentials, experience, and local reputation.
Visualize service scenarios:
- Technicians inspecting piping with gauges
- Certified trucks parked at the curb
- Detailed invoices and permit filings
Questions to ask and documents to request from a contractor
What should a homeowner require from a contractor before any gas conversion begins?
The homeowner should request proof of license, insurance, and relevant certifications, a written estimate with scope and timeline, manufacturer-approved conversion procedures, parts and labor warranties, inspection and permit documentation, code-compliance verification, and references.
Ask about emergency procedures, testing protocols, and who will obtain required permits and final inspection sign-off.
Preventive Maintenance and Safe Operation Post-Conversion
After conversion, a regular inspection schedule should be established to check burners, gas connections, vents, and pressure to detect wear or leaks early.
Carbon monoxide risks require correctly placed detectors and periodic testing to guarantee alarms function and occupants are alerted.
All records — manufacturer manuals, conversion certificates, and service logs — should be retained and updated to document compliance and maintenance history.
Routine inspection schedule and what to monitor
Once conversion is complete, a defined routine inspection schedule is essential to guarantee safe, efficient operation and early detection of issues.
Inspect monthly for visible leaks, burner flame quality, venting integrity and regulator condition.
Quarterly verify fittings, gas pressure and pilot assembly.
Annually perform combustion analysis, clean or replace filters, and confirm controls and safety valves function.
Document findings and corrective actions.
Carbon monoxide safety and detector placement
Because combustion appliances can produce carbon monoxide (CO) when improperly adjusted or vented, a clear CO safety plan is critical for any heater converted to natural gas.
Install listed CO detectors near sleeping areas and on each level; follow manufacturer placement (usually 5–20 feet from appliances). Test monthly, replace batteries annually, and replace detectors per date code.
Guarantee proper ventilation and prompt professional inspection if alarms sound.
Recordkeeping: manuals, conversion certificates, and service logs
A dedicated file—physical or digital—should be maintained for each converted heater, containing the original manual, the certified conversion certificate, and an ongoing service log documenting inspections, adjustments, and parts replacements.
Entries should include date, technician, scope, test results, and serial numbers. Retain records for the equipment lifespan plus regulatory period.
Provide accessible copies to owners, safety inspectors, and future service personnel.
Real-World Examples and Case Studies
Typical residential conversions often follow a predictable timeline—site assessment, parts procurement, gas-line hookup, and testing—with many completed within a day when permits and fittings are in order.
Common DIY pitfalls include incorrect or missing orifice changes, improper regulator sizing, and inadequate leak testing, all of which have led to service calls or safety hazards.
These case studies highlight practical lessons and checklist items that can prevent costly mistakes.
Typical residential conversion scenario and timeline
Many homeowners who switch from propane to natural gas follow a predictable sequence of steps and timelines that balance safety, code compliance, and minimal downtime.
Typical conversion spans one to three days:
- initial assessment and permit application (0–7 days)
- scheduling a certified technician
- gas line hookup and regulator adjustment (half–one day)
- appliance conversion and leak testing (half day)
- final inspection and system commissioning.
Common pitfalls from DIY conversions and lessons learned
Documenting failures and near-misses from DIY propane-to-natural-gas conversions highlights recurring errors that professionals see in the field.
Case summaries show incorrect regulator sizing, reused fittings, improper or missing orifice changes, inadequate leak testing, and ignored ventilation.
Resulting consequences included persistent carbon monoxide, gas leaks, and equipment damage.
Lessons emphasize following manufacturer procedures, using certified parts, and hiring licensed installers for verification.
Quick Reference Resources
A concise checklist outlines the steps and safety checks required for a conversion project.
Manufacturer resources, including installation manuals and conversion kits, provide model-specific instructions and parts information.
Relevant code references and regulatory contacts are listed for permit requirements and professional inspections.
Checklist for a safe conversion project
Before beginning any work, the checklist consolidates essential safety steps, required tools, and references to manufacturer specifications and local codes so the conversion proceeds methodically and in compliance with regulations.
It lists tasks, inspection points, and emergency preparedness items and serves as on-site verification.
- Visual inspection: fittings, vents, seals
- Tools: regulator, leak detector, wrenches
- Safety: shutoff, purge plan, fire extinguisher
Manufacturer resources, code references, and regulatory contacts
Because conversions intersect manufacturer limits, local codes, and utility rules, installers should assemble a compact set of authoritative references—owner’s manuals, conversion kits and parts lists, model-specific service bulletins, applicable gas codes (e.g., NFPA 54/ANSI Z223.1), and the local utility’s connection requirements—so each decision can be cross-checked against the source of authority.
Also include installer certification requirements, local permitting contacts, and manufacturer technical support lines.
Conclusion
Converting a propane heater to natural gas can extend equipment life and reduce fuel costs when done correctly. After verifying compatibility, gathering proper parts, and following safety steps, users can achieve a reliable conversion—but should they proceed without professional help if any doubt remains? Thoughtful preparation, adherence to regulations, and routine maintenance guarantee safe operation; opting for certified technicians when needed protects property and lives while delivering long-term benefits.
