How to Sanitize RV Water Heater: Step-by-Step Guide to Clean, Safe Hot Water
To effectively sanitize your RV water heater, follow these essential steps: drain the tank, turn off the gas and power, and introduce a bleach solution to achieve a concentration of 50–200 ppm. Circulate the sanitizer through all faucets and let it sit for 4–6 hours. Afterward, flush the system until chlorine is undetectable. If you prefer non-chlorine alternatives, consider using hydrogen peroxide. Always wear gloves, ensure proper ventilation, test for residual chlorine, and inspect fittings before restoring power. For detailed instructions and preventative maintenance tips, continue reading.
Why Sanitizing Your RV Water Heater Matters for Health and Performance
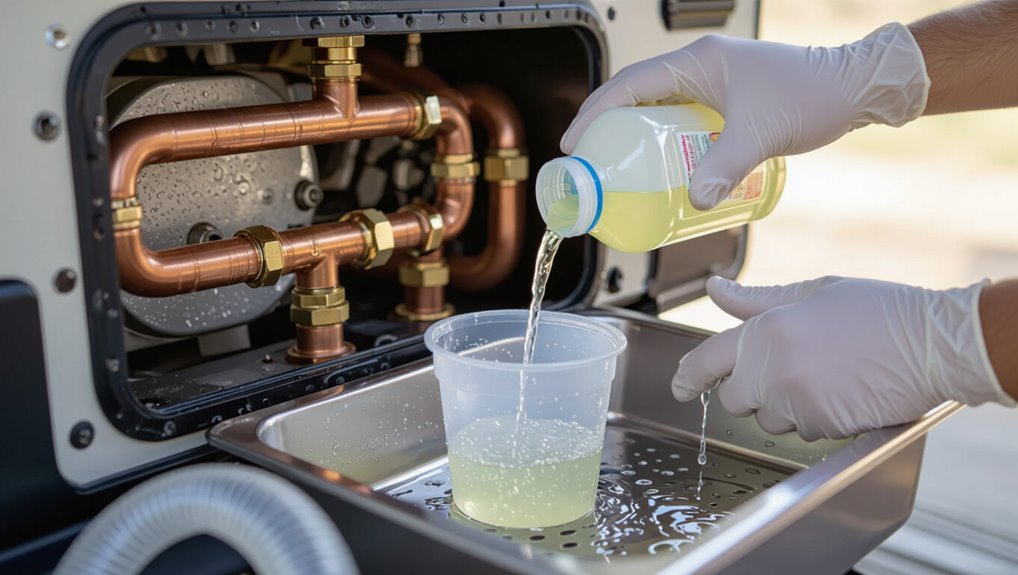
Unsanitized RV water heaters can harbor bacteria and biofilm that compromise water quality and produce unpleasant odors.
Regular sanitization reduces microbial contamination and guarantees the availability of safe hot water for drinking and washing.
Consistent maintenance also helps prevent corrosion and buildup, extending the heater’s service life.
Risks of Unsanitized RV Water Heaters (bacteria, biofilm, odors)
Allowing an RV water heater to remain untreated creates conditions where bacteria and biofilms can flourish, leading to foul odors, clogged plumbing, reduced heater efficiency, and potential health risks for occupants.
Neglected tanks harbor Legionella and other microbes, promote slimy biofilm that shields pathogens, and spread odor-causing compounds through faucets.
Owners seeking how to sanitize RV water heater should act promptly to mitigate contamination and exposure.
Benefits of Regular Sanitization (safe hot water, longer equipment life)
Because regular sanitization removes microbial buildup and mineral deposits before they become established, RV occupants gain reliably safe hot water and fewer foul odors.
Routine treatment also prevents corrosion and scale that reduce heater efficiency, lowering energy use and repair frequency.
Consistent maintenance preserves water taste, protects plumbing fixtures, and extends overall equipment lifespan, saving time and replacement costs over the long term.
Quick Overview: How to Sanitize an RV Water Heater (Direct answer)
Sanitizing an RV water heater typically takes 1–2 hours and is rated as a straightforward DIY task for someone comfortable with basic plumbing and safety precautions.
The process involves draining the tank, introducing a measured bleach solution, circulating and letting it sit, then thoroughly flushing until the water runs clear.
Minimal tools and common supplies are needed, making the procedure accessible for most owners.
Time required and difficulty level
Although the exact time depends on system size and preparation, sanitizing a typical RV water heater usually takes about 1 to 2 hours of active work plus 4 to 24 hours for the disinfectant to dwell.
Difficulty is low-to-moderate: basic mechanical skills, simple tools, and safety awareness suffice. Novices can complete the task; assistance helps for confined access or troubleshooting.
High-level steps summary
After allocating the necessary time and gathering tools, a concise sequence of steps guides the sanitizing process for an RV water heater.
Drain the tank, bypass the water heater if applicable, flush cold water until clear, introduce the correct bleach solution, circulate and soak per recommended time, flush thoroughly until no bleach odor remains, refill and test hot water for safety.
Tools, Materials, and Safety Precautions Needed
The section lists the necessary and optional supplies for sanitizing an RV water heater, including bleach or non-chlorine alternatives, gloves, a wrench, and a funnel.
It also mentions helpful extras like vinyl tubing, freshwater tank sanitizer, and test strips.
Safety precautions cover adequate ventilation, shutting off electrical and gas supplies, and releasing system pressure before starting.
Required supplies (bleach, non-chlorine alternatives, gloves, wrench, funnel)
Proper preparation requires a short list of supplies: household bleach or a non-chlorine sanitizer recommended for potable water, chemical-resistant gloves, an adjustable wrench for drain and anode access, and a funnel for adding disinfectant to the tank.
Additionally, measure disinfectant accurately, have clean water for flushing, and use eye protection.
Verify labels and concentrations match potable-water use before proceeding.
Optional supplies (vinyl tubing, freshwater tank sanitizer, test strips)
Several optional items can make sanitizing an RV water heater easier and more reliable: clear vinyl tubing to route disinfectant or flush water, a freshwater tank sanitizer specifically labeled for potable systems, and chlorine or pH test strips to verify concentrations and rinsing completeness.
Vinyl tubing helps reach fittings; commercial sanitizers simplify dosing and neutralizing; test strips confirm safe residual levels before returning the system to use.
Safety precautions and PPE (ventilation, electrical/gas shutoff, pressure release)
Before beginning work, one should confirm adequate ventilation, isolate power and gas sources, and relieve system pressure to prevent injury or equipment damage.
Wear gloves, eye protection, and a respirator when using disinfectants. Shut off electrical breakers and propane supply, and open a hot water faucet to bleed pressure.
Keep a fire extinguisher nearby and follow manufacturer safety instructions and local regulations.
Preparing the RV for Water Heater Sanitization
Before sanitization begins, the technician verifies power and gas to the water heater are shut off and the unit and cold water tank are fully drained.
If the RV uses onboard antifreeze, the heater is bypassed to prevent contamination, and the freshwater system is isolated by turning off faucets with a single hot faucet opened for venting.
These steps establish a safe, empty, and controlled system ready for the sanitizer to be introduced.
Shut off power and gas to the water heater
Turn off the water heater’s electrical and propane supplies to eliminate any risk of ignition or appliance damage during sanitization.
Confirm power at the breaker or shore/generator switch and shut the dedicated circuit.
Close the propane valve feeding the heater and verify tank valves as needed.
Tag controls to prevent accidental activation and wait several minutes for systems to fully de-energize before proceeding.
Drain the water heater and cold water tank
Drain the water heater and cold water tank by opening the appropriate pressure relief valves and drain plugs, allowing all standing water to exit the system.
Confirm city and tank valves are closed, then open low-point drains and faucet taps to speed flow.
Check for complete drainage, remove sediment with a gentle flush if accessible, and reclose drains before proceeding to sanitization.
Bypass water heater if connected to onboard antifreeze systems
If the RV uses an onboard antifreeze winterization system, the water heater must be placed in its bypass configuration so sanitizer flows through the potable plumbing instead of filling the heater tank.
Locate the bypass valves or kit, follow manufacturer diagrams, and set valves to divert flow around the tank.
Confirm seals and valve positions before introducing sanitizer to avoid contamination or wasted solution.
Isolate and prepare freshwater system (turn off faucets, open hot faucet)
Begin by shutting off the RV’s freshwater pump and closing the city water inlet to prevent incoming water during sanitization.
All faucets and valves are then turned off except a single hot faucet, which is opened to vent air and allow diluted sanitizer to exit.
Drain low-point drains if present.
Label any closed valves to avoid accidental reopening until sanitization completes.
Step-by-Step Sanitization: Using Household Bleach
The procedure begins by calculating the correct bleach concentration for the freshwater tank size and then mixing that solution to add to the system.
Next, the sanitizer is distributed through both hot and cold lines by running taps, followed by a prescribed soak period to guarantee effective contact.
Finally, the system is thoroughly flushed by draining, refilling, and running water until all chlorine is cleared.
Calculating proper bleach concentration for your tank size
Calculating the correct bleach amount requires knowing the exact tank capacity and aiming for a safe sanitizing concentration—typically 50 to 200 ppm of available chlorine for potable water systems.
Determine tank volume in liters or gallons, choose target ppm within that range, then convert ppm to milliliters or ounces of household bleach based on its percent sodium hypochlorite.
Record calculations for safety verification.
Mixing and adding bleach to the freshwater tank
Prepare the bleach solution by measuring the calculated amount of household bleach (sodium hypochlorite) and diluting it in a bucket of clean water before introducing it to the freshwater tank; this guarantees even distribution and prevents concentrated bleach from contacting hoses or fittings.
Slowly pour the diluted mixture into the tank, avoid spills, reseal the fill, and note the time to track contact duration.
Running water lines to distribute sanitizer through hot and cold taps
Begin opening each faucet—hot and cold—one at a time until you see a steady stream of the bleach solution, starting with a nearby sink and moving through showers, exterior hose bibs, and distant taps; this confirms the sanitizer has filled the lines and expelled trapped air.
Run until each outlet consistently flows, then close taps in reverse order, leaving sanitizer in the plumbing system.
Soaking time and recommended dwell period
Allow the bleach solution to dwell long enough to kill bacteria and biofilm but not so long that it risks corroding components.
A typical recommended dwell period is 4–6 hours at ambient temperature; shorter times reduce efficacy, longer times increase corrosion risk.
Monitor labels and manufacturer guidance; adjust for concentration, temperature, and heavy contamination.
After dwell, proceed to planned flushing steps.
Flushing bleach from the system (draining, refilling, running until clear)
Flush the bleach thoroughly from the RV water heater and plumbing to remove residual disinfectant and loosened contaminants.
Drain the tank completely, refill with fresh water, and open all faucets (hot and cold) until water runs clear and bleach odor disappears.
Repeat drain-and-refill cycles as needed.
Verify no chlorine smell remains, then inspect connections and restore normal use.
Alternative Sanitizing Methods (Non-Chlorine and Professional Options)
Non-chlorine options such as hydrogen peroxide and stabilized oxygen products offer effective disinfection without bleach odors or corrosion concerns and are commonly paired with enzyme cleaners for organic buildup.
Commercial RV tank sanitizers and enzyme formulas provide ready-to-use or concentrated choices, while users should weigh shock chlorination against continuous sanitizer systems for immediate versus ongoing control.
Professional services are recommended when tanks show persistent contamination, complex plumbing is involved, or owners prefer certified cleaning and testing.
Using hydrogen peroxide and stabilized oxygen products
Consider hydrogen peroxide and stabilized oxygen compounds as effective alternatives to chlorine for sanitizing an RV water heater; these oxidizers kill bacteria and break down organic matter without leaving a strong chlorine odor or taste.
They are applied at manufacturer-recommended concentrations, allowed sufficient contact time, then flushed thoroughly. Users should follow product instructions, verify potable-water approval, and rinse until no residual oxidizer remains.
Commercial RV tank sanitizers and enzyme cleaners
Explore specialized commercial RV tank sanitizers and enzyme cleaners as professional-grade, non-chlorine alternatives designed specifically for recreational vehicle plumbing.
These products target biofilm, odors, and organic buildup using enzymes, surfactants, or proprietary oxidizers.
Application instructions vary; follow manufacturer dosing, contact time, and safety guidance.
They are compatible with many tank materials but verify seals, hoses, and potable-water approvals before use.
Shock chlorination vs. continuous sanitizers pros and cons
After outlining enzyme-based and commercial tank cleaners, attention shifts to comparing shock chlorination and continuous sanitizer systems as alternative approaches for RV water safety.
Shock chlorination offers rapid, deep disinfection but can require downtime, odor, and careful dosing.
Continuous sanitizers provide steady low-level protection with less maintenance but need monitoring, potential chemical compatibility checks, and may be less effective against heavy contamination.
When to hire a professional service
When is it time to call a professional for RV water heater sanitization?
A professional should be considered when corrosion, persistent odors, discoloration, bacterial contamination, or complex component issues are present.
They offer diagnostic testing, non-chlorine treatments, safe chemical handling, and system repairs.
Choose licensed technicians with RV-specific experience to guarantee thorough sanitization, warranty compliance, and long-term system integrity.
Sanitizing Gas vs. Electric RV Water Heaters: Specific Considerations
When addressing gas versus electric RV water heaters, attention to fuel-specific safety and component care is essential.
For gas units, steps should include shutting off the gas, securing the pilot and burner area, and confirming trim safety before any service.
For electric models, power must be isolated and heating elements and wiring inspected, while both types require checking anode rods, sacrificial parts, and signs of corrosion.
Gas water heater trim/pilot and burner safety steps
While both gas and electric RV water heaters require flushing and disinfecting, gas units demand additional attention to the burner assembly, pilot light, and related trim components to guarantee safety and proper ignition.
Technicians should disconnect the propane supply, verify the pilot is fully extinguished, and inspect the burner area for corrosion, soot, or obstructions before introducing water and sanitizer.
Then remove trim, clean vents, reseat gaskets, and test for leaks and proper pilot operation before restoring propane.
Electric water heater element and wiring precautions
Begin by de-energizing the electrical supply to the RV water heater and confirming power isolation with a non-contact tester or multimeter before touching elements or wiring.
Inspect element access panels, tightness of terminal connections, and insulation condition.
Remove elements only after draining and verifying no voltage.
Use correct replacement elements and secure grounding.
Reassemble panels before re-energizing and test for leaks and proper operation.
Anode rods, sacrificial parts, and corrosion checks
Inspect anode rods and other sacrificial parts regularly, as they are essential to preventing corrosion inside both gas and electric RV water heaters.
Corroded anodes accelerate tank deterioration and contaminate water. During sanitization, check length and pitting; replace when heavily worn or less than half original.
Also inspect sacrificial magnesium/zincs, fittings, and tank seams; document condition and perform timely replacements to extend heater life.
Post-Sanitization Checks and Maintenance Tasks
After sanitizing, the operator should test water for chlorine or other sanitizer residuals to confirm safe levels before use.
A visual and tactile inspection for leaks, corrosion, or sediment buildup follows, and any deficiencies must be addressed promptly.
Finally, the pilot should be re-lit or power restored safely and the sanitization date and next scheduled treatment documented for future maintenance.
Testing water for chlorine or sanitizer residuals
How can one confirm that the sanitizer has been adequately flushed from the RV’s water system?
Use test strips or a digital chlorine meter to verify residuals are below safe thresholds. Collect samples from hot and cold taps after flushing.
- Rinse until readings drop below 0.2 ppm.
- Test both hot and cold outlets.
- Repeat after 10 minutes.
- Record results for maintenance.
Inspecting for leaks, corrosion, or sediment buildup
Several key areas of the RV water heater and connected plumbing should be examined visually and by touch for leaks, corrosion, or sediment deposits following sanitization.
Inspect tank exterior, fittings, pressure relief valve, anode rod access, inlet/outlet lines, and drain assembly.
Look for wetness, rust, pitting, loose connections, or granular buildup.
Address issues promptly: tighten fittings, flush sediment, or consult a technician for repairs.
Re-lighting pilot or restoring power safely
Proceed with caution when re-lighting the pilot or restoring electrical power to the RV water heater; verify all sanitization solution has been fully flushed from the system and that all access panels and valves are secure.
Follow the manufacturer’s lighting or power procedures, check for gas leaks with a soap solution, guarantee proper ventilation, confirm thermostat settings, and observe the unit through a complete heat cycle for normal operation and leaks.
Documenting date and next scheduled sanitization
A simple record of the sanitization date and the next scheduled treatment guarantees consistent water safety and aids long-term maintenance planning.
The owner notes date, method, chemicals and concentration, and any observations in a log or digital app.
Scheduling the next sanitization based on use, season, or regulatory guidance secures timely action.
Retain receipts and test results for reference and warranty compliance.
Troubleshooting Common Problems After Sanitization
After sanitization, common issues such as a lingering bleach odor, reduced hot water pressure from airlocks, persistent discoloration or off-tastes, and rapid recurrence of bacteria or biofilm may still appear.
Guidance should cover simple remedies like flushing and aeration for smells and pressure, targeted steps for resolving discoloration or taste, and diagnostic actions plus repeat-treatment options when microbial regrowth occurs.
Clear troubleshooting steps help guarantee the heater remains safe and functional between full maintenance cycles.
Lingering bleach smell and how to eliminate it
Though bleach effectively disinfects the RV water heater, a persistent chlorine odor can linger in the tank and plumbing, indicating residual sanitizer or trapped contaminated water.
Addressing it quickly prevents taste complaints and respiratory irritation. Flush the system thoroughly with fresh water, run all faucets until odor ceases, refill and repeat if needed.
Ventilate the camper and avoid strong heat until smell dissipates.
Low hot water pressure or airlocks
Check for airlocks and restricted flow when hot water pressure drops after sanitizing; trapped air or partially closed valves are the most common culprits.
Inspect inlet/outlet valves, open faucets (hot and cold) to purge air, and cycle the water pump briefly.
Verify shower diverter position and inline sediment screens for blockage.
If pressure remains low, retighten fittings and recheck valve positions before further action.
Persistent discoloration or taste issues
If low pressure and airlocks have been ruled out, persistent discoloration or off-tastes indicate problems with residual contaminants, rust, or reactions between sanitizer and tank materials.
The technician should inspect anode, drain sediment, flush lines thoroughly, and check fittings and hoses for corrosion or biofilm.
If odor or color persists, replace affected components and retest; avoid further chemical additions without diagnosis.
What to do if bacteria or biofilm returns quickly
Address recurring bacterial growth or biofilm with a systematic approach that isolates source, assesses treatment efficacy, and prevents reinfestation.
Inspect inlet lines, filters, and tanks for contamination; flush and replace suspect hoses or cartridges.
Repeat sanitization using higher concentration or longer dwell time; consider shock chlorination or non-chlorine biocide per manufacturer guidance.
Verify results with test strips; maintain drying and regular disinfection schedule.
Preventive Measures to Keep Your RV Hot Water Safe Year-Round
Routine preventive steps can preserve hot water safety, including a recommended sanitization schedule, regular flushing, and timely filter replacements.
Seasonal actions such as proper winterizing and careful de-winterizing help prevent contamination and degradation of water quality.
Selecting potable campsite hookups and following hookup best practices further reduces risk year-round.
Recommended sanitization frequency and schedule
Most RV manufacturers and sanitation experts recommend sanitizing the water heater and potable system at least every 3–6 months, with more frequent treatment after extended storage, illness in the household, or when filling from unknown water sources.
A practical schedule pairs deep sanitization with seasonal maintenance: quarterly for frequent users, immediately after suspected contamination, and before long trips or hosting vulnerable individuals.
Winterizing and de-winterizing impacts on water quality
When temperatures drop, winterizing an RV—primarily to prevent freeze damage—alters the water heater and plumbing by introducing antifreeze, draining tanks, or bypassing the heater.
De-winterizing reverses those steps and, if done incorrectly, can leave residual antifreeze, sediment, or microbial growth that degrades water quality.
Properly flushed systems, thorough antifreeze removal, tank inspection, and sanitization after de-winterizing restore safe potable hot water.
Routine flushing and filter replacements
Flush and replace filters on a regular schedule to prevent sediment buildup, mineral scaling, and bacterial colonization that compromise hot water quality.
Routine flushing removes trapped debris and biofilm; filter changes maintain flow and cartridge integrity.
Schedule depends on water hardness and usage; document dates. Monitor pressure and clarity after service.
- Flush tank quarterly
- Replace inline filter every 6 months
- Inspect anode and heater ports
- Record service dates
Best practices for campsite water hookups and potable sources
A few simple habits greatly reduce contamination risk at campsite water hookups and preserve potable supplies for the RV’s hot water system.
Inspect and sanitize spigots, use a food-grade potable water hose, connect to municipally treated sources when possible, avoid stagnant supply tanks, employ inline sediment and carbon filters, and flush lines before filling the water heater.
Monitor campground advisories and test intermittently.
When to Replace the Water Heater or Components
When persistent leaks, rust-colored water, foul odors, or frequent heating failures occur, replacement of the water heater or tank should be considered.
Owners should weigh repair costs against replacement price and expected remaining lifespan to decide the most economical option.
Upgrading to tankless systems or units made from corrosion-resistant materials can meaningfully improve water quality and reduce maintenance.
Signs your water heater or tank needs replacement
Several clear indicators signal that an RV water heater or its components may require replacement: persistent leaks, recurring inability to maintain temperature, excessive corrosion or sediment buildup visible when the tank is opened, and frequent electrical or burner failures despite proper maintenance.
Additional signs include foul odors, rusty or discolored hot water, rapidly declining heat-up performance, and warped or damaged access panels or fittings.
Cost vs. repair considerations
How much should be invested in repairs versus replacement depends on factors like the unit’s age, extent of damage, expected remaining life, and total repair cost relative to replacement price.
If repairs approach 50–70% of a new unit’s cost or recurring failures persist, replacement is usually the more cost-effective choice.
Consider labor, parts availability, warranty status, and inspection findings; prioritize safety and long-term reliability.
Upgrades that improve water quality (tankless, better materials)
After weighing repair versus replacement, owners should consider upgrades that directly improve water quality. Options include switching to a tankless system, selecting corrosion-resistant tank materials, or installing upgraded anode rods and filtration.
Tankless units reduce stagnation and mineral buildup; stainless or lined tanks resist corrosion. Upgraded anodes extend life; inline filters and softeners lower sediment and hardness, simplifying sanitization and improving potable hot water quality.
Useful Reference Tables and Checklists
The article includes concise reference materials to support safe and effective sanitization.
A BLEACH-method checklist outlines required steps, concentrations, and contact times.
Additional tables compare sanitizer types with pros, cons, costs, and a brief troubleshooting checklist for common issues.
Sanitization checklist for BLEACH method
A concise checklist for sanitizing an RV water heater with household bleach outlines required materials, safety precautions, step-by-step actions, and verification points to guarantee effective disinfection without damaging the system. The checklist lists bleach ratio, PPE, drain/flush steps, contact time, and final test. Follow sequence and document results.
| Item | Action |
|---|---|
| Bleach ratio | 1/4 cup per gallon |
| PPE | Gloves, goggles |
| Drain | Empty tank, bypass water softener |
| Contact time | 4–6 hours |
| Verify | Flush until chlorine gone |
Comparison table of sanitizer types, pros/cons, and cost
Although different sanitizers achieve disinfection by varied chemistries and application methods, a compact comparison table helps RV owners quickly weigh efficacy, material compatibility, safety, and cost to choose the best option for their situation. Below is a concise reference:
| Sanitizer | Pros | Cons |
|---|---|---|
| Bleach | Cheap, effective | Corrosive, odor |
| Hydrogen peroxide | Non-toxic residue | Higher cost |
| Vinegar | Gentle, cheap | Less effective against pathogens |
Quick troubleshooting checklist
Consult this quick troubleshooting checklist when an RV water heater shows signs of poor performance, leaks, strange noises, or unusual odors.
Inspect fittings for leaks, verify power/gas supply, and check the thermostat and anode condition. If issues persist, consider professional service.
- Check external leaks and connections
- Confirm electrical/gas supply and breakers
- Test thermostat and heating element
- Smell and flush for contamination
Conclusion
Like sailors rinsing a salt-encrusted hull before a long voyage, sanitizing an RV water heater restores its heart to reliable service. Regular, methodical cleaning — akin to tending a trusted engine — wards off unseen contaminants, preserves performance, and protects occupants’ health. When done with the right tools, care, and timing, the simple ritual transforms stagnant, risky water into steady, safe warmth, promising many trouble-free mornings on the road and evenings beneath wide, starry skies.