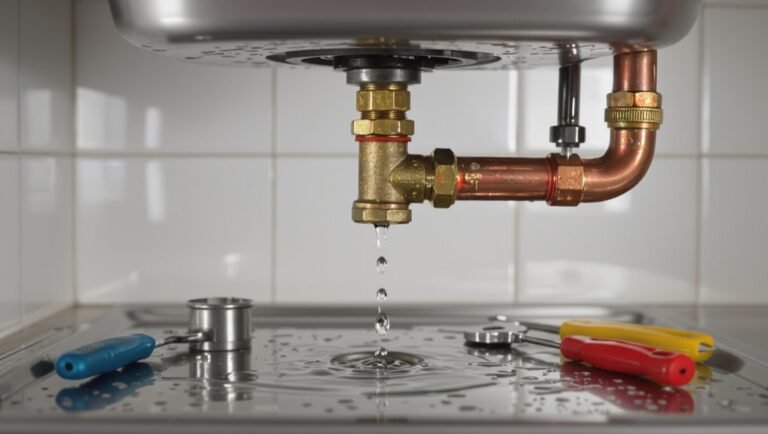
How to Repair a Freeze-Proof Faucet: Step-by-Step Fixes for Leaks, Sticking Spindles, and Broken Handles
To repair a freeze-proof faucet, start by shutting off the water supply and draining the line. Disassemble the trim to inspect the stem, seats, packing, and seals. Replace any worn parts like stems, springs, O-rings, or handles with appropriately sized replacements. Clean any mineral buildup and lubricate moving parts before reassembling. When reassembling, torque fittings evenly, restore water slowly, and check for leaks and smooth function. If there’s freeze damage, seal or replace any broken sections and insulate them. Detailed steps are provided below.
What a Freeze-Proof Faucet Is and Why It Fails
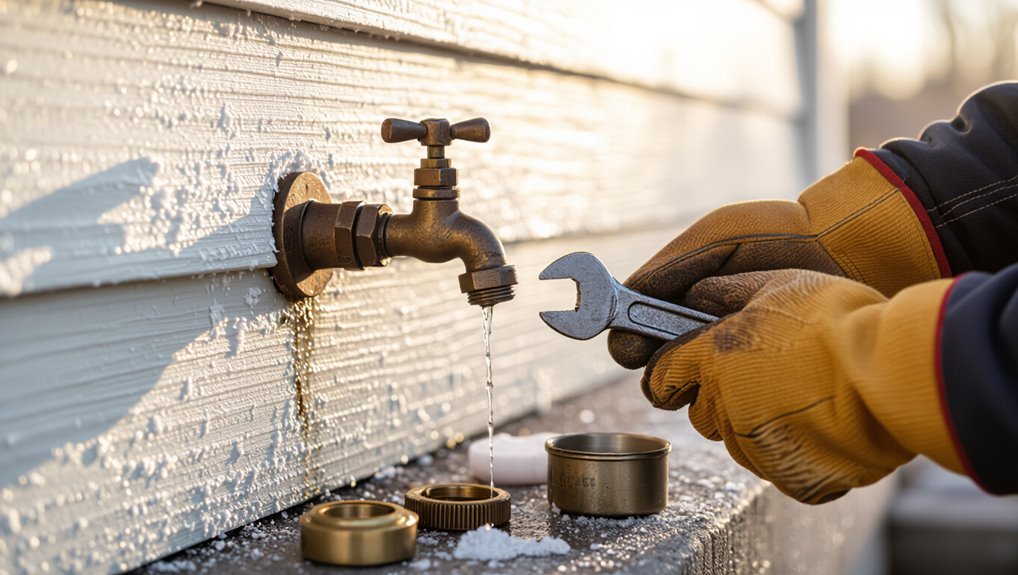
A freeze-proof faucet uses a long stem and recessed valve seat to keep the shutoff point inside the warmer interior of a building, preventing water from freezing in the exposed spout.
Common failure points include leaks at seals, a sticking or corroded spindle, and broken or stripped handles.
Visible drips, difficulty turning the handle, or a lack of water flow are clear signs the freeze-proof faucet needs repair.
How freeze-proof faucets are designed to prevent freezing
Engineers design freeze-proof faucets with a long stem and internal seat positioned well inside the heated wall cavity so the valve closes where water cannot be trapped and exposed to freezing temperatures.
This geometry, combined with insulated housings and proper pitch, guarantees residual water drains inward.
Understanding this aids homeowners seeking how to repair a freeze proof faucet by aligning replacement parts and restoring correct stem length and seating.
Common failure points: leaks, sticking spindle, broken handle
Having established how stem length, internal seating, and drainage prevent freezing, attention turns to the points where freeze-proof faucets most commonly fail: exterior leaks at the packing or body, a spindle that sticks or binds, and handles that crack or shear off.
Corrosion, worn seals, mineral buildup, and overtightening accelerate these failures.
Failure locations are predictable, enabling targeted inspection and repair.
Signs your freeze-proof faucet needs repair
How can homeowners tell when a freeze-proof faucet is failing?
Visible drips at the spout or wall, reduced water flow, difficulty turning the handle, or water pooling by the foundation indicate problems.
Frost or ice near the valve in cold weather, loose or corroded fittings, and sudden pressure changes also signal failure.
Prompt inspection prevents burst pipes and costly repairs.
Quick Assessment: Determine the Problem Fast
A quick visual inspection checks for obvious cracks, ice buildup, loose connections, and corrosion.
Simple tests—pressurizing the line, feeling for hidden leaks, and checking flow—help distinguish a surface leak from internal freezing damage.
If signs point to severe damage or uncontrolled leakage, the water should be shut off and the faucet isolated immediately.
Visual inspection checklist
Before any disassembly, inspect the faucet and surrounding plumbing for obvious signs of damage: frozen or bulging pipes, visible cracks in the spout or body, ice accumulation around the valve, and corrosion or mineral buildup on fittings.
A concise checklist guides assessment.
- Visual damage: cracks, dents, visible leaks.
- Surface deposits: scale, rust, frozen residue.
- Mounting and insulation: loose fittings, missing insulation.
How to test for leaks and internal freezing damage
Following the visual checklist, the next step is to verify whether the faucet has active leaks or internal freeze damage by applying simple, targeted tests.
Check for dripping while the supply is on and handle operated.
Inspect connections for moisture with a dry tissue.
Listen for hissing or trapped water when opening.
Tap castings for hollow sounds and feel for cold spots indicating internal ice or cracked passages.
When to shut off water and isolate the faucet
When should the water be shut off and the faucet isolated to prevent further damage? The homeowner should immediately shut the supply if visible leaks, reduced flow, frozen pipes, or pressure surges occur.
Isolate the faucet at the nearest shutoff valve or main if individual valves are absent.
Shutoff prevents flooding, limits corrosion, and enables safe inspection or repair by a qualified person.
Tools and Parts You’ll Need
A concise list of essential tools—adjustable wrench, pipe wrench, screwdrivers, pliers, tubing cutter and thread sealant—sets up the repair.
Common replacement parts such as stems, seats, springs and packing should be identified along with notes on size and material compatibility.
Basic safety gear and preparation steps, including gloves, eye protection and shutting off the water, complete the overview.
Essential tools for freeze-proof faucet repair
Several basic tools and a few specialized parts are required to repair a freeze-proof faucet safely and effectively.
A compact, accurate toolkit minimizes damage and speeds repairs. Essential items include precise wrenches and pliers, seals and lubricants, and inspection aids.
- Adjustable wrench, needle-nose pliers, basin wrench
- Silicone grease, replacement O-rings, thread seal tape
- Flashlight, inspection mirror, small pick set
Common replacement parts and compatibility tips
After gathering the toolkit and inspection aids, attention turns to the replacement parts most commonly needed for freeze-proof faucets. Compatibility hinges on model, inlet size, and spindle type.
Stock common OEM cartridges, compression seats, and handle kits; verify materials for freeze resistance and thread standards before purchase.
- Cartridge or spindle assembly
- Compression seat and spring
- Handle and retaining hardware
Safety gear and preparation steps
One set of basic safety gear and a clear workspace are prerequisites before any repair begins: eye protection, gloves rated for chemical and puncture resistance, and non-slip footwear should be worn; a drop cloth, adequate lighting, and a clean tray for small parts minimize accidents and lost components.
Additionally, shut off water supply, relieve pressure, verify stable ladder or stool, and keep a magnetic parts tray and appropriate wrenches ready.
Step-by-Step: Fixing a Leaking Freeze-Proof Faucet
Before beginning repairs, the water supply is shut off and the line drained to prevent leaks and pressure buildup.
The handle and trim are removed carefully to expose the packing, O-rings, and valve stem for inspection and replacement as needed.
Once the packing, O-rings or valve stem have been replaced, the faucet is reassembled and tested for leaks.
Shut-off and drain procedure before repair
Begin by locating and shutting off the water supply to the freeze-proof faucet to prevent flow during the repair.
Next, open the faucet to relieve residual pressure and drain remaining water. If available, close the upstream isolation valve or the main shutoff.
Collect drained water with a bucket or rag. Confirm flow has stopped before proceeding with disassembly and parts replacement.
Removing the handle and trim safely
With the water shut off, pressure relieved, and the spout drained, attention turns to removing the handle and trim to access internal components.
Using the correct screwdriver or hex key, remove the handle screw and lift the handle straight off.
Unscrew trim pieces and escutcheon carefully, supporting them to avoid scratching.
Keep small parts organized and note orientation for reassembly.
Inspecting and replacing the packing and O-rings
Inspect the packing nut, valve stem O-rings, and surrounding seals for cracks, flattening, or mineral buildup that can cause leaks.
If damaged, remove the packing nut, slide off old O-rings and packing, clean the stem and bore with vinegar or a soft brush, then install size-matched replacement rings and packing.
Tighten carefully and test for drips before reassembling trim.
Replacing the valve stem/spindle to stop leaks
Remove the handle and trim to expose the valve stem. Then assess whether the stem or spindle shows corrosion, stripped threads, or damaged seating that cannot be cured by new O-rings or packing.
If replacement is required, match part number or measure length, diameter, and thread. Shut water, extract the stem, install the new spindle with appropriate seals, and torque to manufacturer specs.
Reassembly and leak test after repair
Reassemble the faucet by reversing the disassembly steps, ensuring each component seats correctly and seals are undamaged before tightening.
Torque fasteners evenly to avoid distortion, reinstall handle and escutcheon, then restore water supply slowly.
Inspect joints and packing for drips. Cycle the valve fully, observing for intermittent leaks.
If no leaks appear, retighten minor connections; otherwise, disassemble and replace faulty seals or fittings.
Step-by-Step: Repairing a Sticking or Hard-to-Turn Spindle
The technician first inspects the spindle and seat for mineral buildup, corrosion, or any mechanical obstruction that impedes rotation.
Next steps cover cleaning and applying appropriate lubricant to the spindle and seat, with guidance on when a worn or damaged spindle should be replaced rather than refurbished.
Finally, reinstallation and careful adjustment are described to guarantee smooth, leak-free operation.
Identifying buildup, corrosion, or mechanical obstruction
When a freeze-proof faucet spindle sticks or turns with difficulty, the most likely causes are mineral deposits, corrosion on metal parts, or a foreign object lodged in the valve assembly; identifying which requires systematic inspection and simple tests.
The technician visually inspects the spindle, bonnet, and seat, probes for grit or debris, checks for pitting or greenish oxidation, and assesses tight spots by rotating the stem incrementally.
Lubrication and cleaning the spindle and seat
Begin by shutting off the water supply and draining any remaining pressure from the line so the spindle and seat can be accessed safely.
Remove handle and bonnet, then inspect for debris and mineral deposits.
Clean seat and spindle with a soft brush and vinegar solution, rinse, dry thoroughly.
Apply plumber-grade silicone grease to moving surfaces, reassemble, and test for smooth operation and leaks.
When to replace the spindle versus refurbish
Decide whether the spindle needs replacement or a refurbish by inspecting wear, damage, and performance after cleaning.
Replace if deep grooves, bent shaft, excessive corrosion, stripped threads, or persistent wobble remain.
Refurbish when surfaces are sound, minor pitting or burrs polish out, threads intact, and operation restores with new packing and lubricant.
Consider cost, parts availability, and expected service life.
Reinstalling and adjusting for smooth operation
Reinstall the spindle carefully, ensuring all cleaned parts, new packing, and lubrication are correctly positioned before testing.
Tighten retaining nuts to manufacturer torque, avoiding overtightening.
Reattach handle and operate slowly, noting resistance and leaks.
If stiffness appears, back off packing slightly; if leaks persist, tighten incrementally.
Cycle the faucet multiple times to seat components and confirm smooth, leak-free operation before finalizing.
Step-by-Step: Replacing a Broken Handle or Trim
The technician first identifies the correct handle style and sizing to guarantee compatibility with the valve stem and existing trim.
Next, the broken handle is removed and a matching replacement is installed, following manufacturer fastenings and torque recommendations.
Finally, aesthetic alignment and a secure fit are verified to prevent leaks and confirm proper operation.
Choosing the correct handle style and sizing
Selecting the correct handle style and size assures both functional compatibility and a cohesive appearance when replacing a broken handle or trim.
The technician measures stem diameter, spline count, and projection to match the cartridge. Style should complement existing fixtures and outdoor exposure; choose durable materials and finishes.
Confirm mounting type (set screw, threaded) and verify clearances to assure ergonomic operation and secure fit.
Removing the broken handle and installing a replacement
Begin by shutting off the water supply and relieving residual pressure at the faucet to prevent leaks during disassembly.
Remove any decorative caps, loosen set screws with the correct Allen or screwdriver, and pull the damaged handle straight off.
Inspect splines and spindle for wear.
Fit the replacement, align splines, tighten set screws, and cycle the handle to confirm smooth operation before restoring water.
Matching aesthetics and ensuring secure fit
Aesthetic consistency and a secure mechanical fit are both essential when replacing a broken handle or trim on a freeze-proof faucet. Mismatched finishes or loose attachments can undermine appearance and function.
Select replacement parts matching finish, style, and scale. Verify backplate alignment, thread engagement, and torque specs.
Use appropriate mounting hardware, thread sealant if required, and test for wobble and smooth operation before finalizing.
Dealing with Damage from Freezing: Advanced Repairs
Frozen faucets can crack spindles or valve bodies, and identifying such damage early—by inspecting for leaks, wobble, or irregular flow—guides whether targeted repairs or full replacement is needed.
When pipes or the faucet itself are compromised beyond repair, complete replacement is the safest long-term solution.
Short-term measures, such as shutting off water, applying heat to thaw frozen sections, and using temporary seals, can limit damage until a professional can complete permanent repairs.
Detecting and repairing cracked spindles or valve bodies
Inspecting for hairline fractures and distorted surfaces is the first step when freeze-related damage is suspected in a faucet spindle or valve body.
The technician cleans components, dries them, and uses magnification and light to reveal cracks.
Minor fractures may be brazed or epoxied with plumbing-grade materials; threaded or structural damage requires precise machining or component replacement to restore watertight function.
When pipe or faucet replacement is required
When damage from freezing exceeds the threshold for repair—severe pipe splitting, irreparably warped valve bodies, or extensive corrosion revealed during assessment—the technician proceeds with replacement to secure long-term integrity and code compliance.
Replacement involves isolating water, removing compromised sections, matching materials and pressure ratings, installing new frost-resistant fixtures or pipe, pressure testing, and documenting work to meet local codes and guarantee reliable, lasting operation.
Temporary fixes until professional help arrives
Stabilize the situation quickly by shutting off the main water supply and opening nearby faucets to relieve pressure; this minimizes further damage while awaiting a professional.
Apply temporary seals—plumber’s tape or a pipe repair clamp—to slow leaks.
Insulate exposed pipes with towels or foam, gently thaw frozen sections with warm (not hot) air, and document damage for the plumber and insurance.
Preventing Future Failures and Freezing
The section outlines practical measures to reduce the risk of future faucet failures and freeze-related damage.
It covers proper winterization of outdoor faucets, options for insulating or adding heat to vulnerable areas, and a concise routine maintenance schedule to prevent sticking and leaks.
Following these steps helps extend service life and minimize emergency repairs.
Proper winterization techniques for outdoor faucets
Many homeowners can prevent outdoor faucet failures by applying a few targeted winterization steps that remove water, insulate vulnerable components, and reduce freeze pressure.
Drain and shut off supply, open spigot to expel trapped water.
Disconnect hoses and store indoors.
Apply foam faucet covers or wrap and secure with tape for short-term protection before sustained cold sets in.
- Shutoff and drain
- Disconnect hoses
- Cover securely
Insulation and heat options for vulnerable areas
Insulation and localized heat are the most effective defenses for faucets and connecting pipes exposed to cold, focusing protection where freezing is most likely—at splices, valves, and exterior wall penetrations.
Use closed-cell foam, pipe sleeves, and insulated faucet covers.
For extreme exposure, add thermostat-controlled cable trace or low-wattage heat tape rated for outdoor plumbing.
Secure materials against moisture and UV; avoid overheating.
Routine maintenance schedule to prevent sticking and leaks
Establish a regular maintenance schedule that inspects, exercises, and services outdoor and vulnerable indoor faucets at least twice a year—ideally before the onset of cold weather and again in spring.
Include checklist items: operate valves fully to prevent sticking, check packing and washers, tighten or replace fasteners, verify insulation and shutoff valves, drain exterior lines, and document dates and actions to track wear and plan replacements.
When to Call a Professional Plumber
A homeowner should consider a professional when repairs involve safety or code compliance, such as persistent leaks, gas-proximate lines, or frozen pipes that risk bursting.
They should weigh labor and parts against replacement cost when deciding between repair and installing a new freeze-proof unit.
When calling, concise details—age and model of the faucet, visible damage, recent symptoms, and any attempted fixes—help the plumber diagnose and arrive prepared.
Safety and code issues that require professional repair
Certain hazards and code violations demand a licensed plumber rather than a DIY approach; professionals possess the training, tools, and permits needed to address them safely.
Situations requiring professional repair include contaminated potable lines, backflow prevention failures, complex frozen-pipe sections, structural wall penetrations, gas-related proximity issues, and municipal permit requirements.
Licensed plumbers guarantee compliance, safe diagnostics, and documented repairs to meet local codes and inspection standards.
Cost factors: repair vs. replacement analysis
Weighing repair versus replacement hinges on a clear comparison of immediate costs, long-term reliability, and the complexity of the fault; minimal fixes to accessible components often favor repair, while pervasive corrosion, obsolete parts, or recurring failures typically justify replacement.
| Factor | Repair | Replacement |
|---|---|---|
| Cost now | Low–moderate | High |
| Longevity | Short–medium | Long |
| Complexity | Simple | Complex |
How to describe the problem to a plumber for faster service
Summarize the issue clearly and concisely, including when the problem began, what symptoms are present (e.g., no flow, slow drip, leaks at the handle, or frozen pipe bulges), and any recent events that could be relevant such as cold snaps, previous repairs, or attempted DIY fixes.
Add faucet age, model, visible corrosion, water pressure changes, and whether indoor shutoff was used; request ETA and estimated cost.
Troubleshooting Quick Reference
A concise symptom-to-fix checklist helps identify common issues with a freeze-proof faucet and the specific repairs they require.
The guide also highlights frequent DIY mistakes—such as failing to shut off the water or misaligning the stem—that can worsen damage.
Readers are encouraged to consult the checklist before attempting repairs to save time and avoid repeat work.
Symptom-to-fix checklist
Which symptom appears when the faucet is turned on—no water, a weak stream, leaking, or stiffness—dictates the most likely causes and corresponding fixes.
A concise checklist maps symptom to remedy, required tools, and risk level so technicians decide rapidly.
- No water: frozen line or closed valve — thaw or open; check supply.
- Weak stream: clogged aerator or partially frozen feed — clean or thaw.
- Leaking/stiff: worn seat/packing or corroded spindle — replace parts.
Common mistakes to avoid during DIY repairs
The checklist above helps isolate likely causes, but common DIY errors often turn simple fixes into repeat jobs or bigger failures.
Practitioners should work methodically, verify parts fit, and stop when unsure to avoid damage or leaks.
- Skipping system shutoff and residual drain
- Using incorrect replacement parts or sizes
- Over-tightening fittings and stripping threads
Conclusion
Like an old gate frozen by winter’s breath, a freeze-proof faucet can be coaxed back to life with steady hands and the right care. Repairs undo the ice’s memory, restoring flow and purpose. Each tightened packing nut or replaced spindle is a small thaw, a promise against future hard freezes. With vigilance and timely maintenance, the faucet becomes a guarded threshold—resilient, dependable—kept from the brittle hush of damage and neglect.