How to Protect Your Water Softener From Freezing: 10 Proven Prevention Tips
To protect your water softener from freezing, it’s essential to insulate, heat, and winterize the unit effectively. Key strategies include relocating the unit indoors, adding foam or rigid insulation, and using thermostatic heat tape or a small space heater. Additionally, sealing drafts and insulating exposed pipes can prevent freezing. Ensure drain lines are clear, label bypass valves for easy access, and consider a weatherproof insulated cabinet for extra protection. Following a checklist and seeking professional winterization services can further reduce risks. The tips below detail when to apply each method for optimal protection.
How to Prevent Your Water Softener from Freezing This Winter
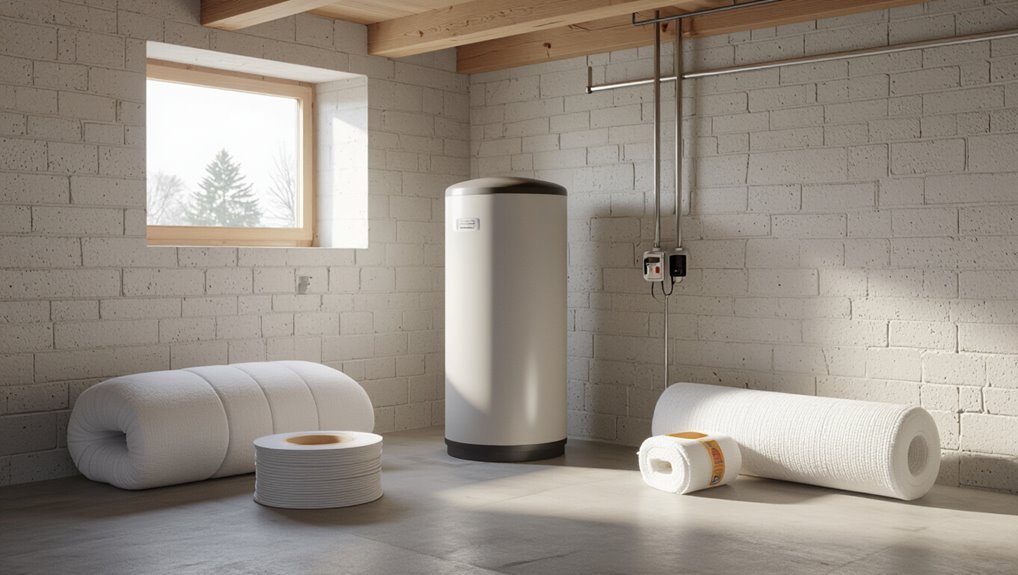
Freezing can crack valves, burst pipes, and render a water softener inoperable, so preventing low temperatures from reaching the unit is essential.
A brief checklist of direct actions—insulating exposed pipes, wrapping the tank and control head, maintaining ambient heat, and draining or bypassing the system when needed—helps reduce risk.
The following section explains each step and when to apply it.
Immediate overview why freezing matters for water softeners
Protecting a water softener from winter cold is essential because ice formation can damage valves, resin tanks, and control heads, leading to costly repairs or total replacement.
Freezing disrupts seals, cracks housings, and blocks plumbing, causing service interruptions and contamination risks.
Understanding how to protect water softener from freezing highlights vulnerability, potential expense, and the importance of timely prevention to maintain reliable water quality.
Quick checklist to protect your unit (direct action steps)
Given the risks outlined above, a concise checklist of direct actions helps owners prevent damage and keep the softener operational through cold weather.
Follow these essentials to reduce freeze risk and maintain function:
- Insulate tank, pipes, and lines with foam or heat tape.
- Maintain ambient temperature above freezing.
- Drain and winterize if unused.
- Keep salt brine topped up.
- Test valves and controls before cold snaps.
How Water Softeners Freeze Key Causes and Risk Factors
Freezing can crack resin tanks, stiffen or rupture valves, and overflow or fracture brine tanks, causing functional failure and costly repairs.
Units installed in unheated garages, crawlspaces, or outdoors face the highest risk because they are exposed to sustained low temperatures.
Owners should monitor local climate and treat prolonged drops below freezing—especially near or below 32°F (0°C)—as a trigger for protective measures.
How freezing damages resin tanks, valves, and brine tanks
When temperatures drop below freezing, the water inside a softener’s resin tank, control valve, and brine tank can expand and exert damaging pressure on plastic and seals.
Ice formation deforms tanks, cracks fittings, and warps valve components. Seals and O‑rings can rupture, causing leaks and cross‑contamination.
Brine tanks may split or overflow during thaw, leading to salt loss and system malfunction.
Common locations and installation types at highest risk (garage, crawlspace, exterior)
Although water softeners can be installed in many locations, certain spots expose them to far greater freeze risk: uninsulated garages, shallow crawlspaces, and outdoor enclosures.
Garages often lack heat and see rapid temperature swings; crawlspaces may have poor insulation and limited clearance around piping; exterior installations face direct exposure, wind chill, and moisture.
These conditions increase vulnerability of tanks, valves, and brine systems.
Climate and temperature thresholds to watch
Many climates pose varying degrees of freeze risk to water softeners, but the primary threshold to monitor is sustained ambient air temperatures at or below 32°F (0°C), especially when combined with wind, humidity, or rapid temperature swings that exacerbate heat loss.
Prolonged exposures in the mid-20s°F (-4 to -7°C) and colder greatly increase the likelihood of tank, valve, and brine-line freezing, while brief dips just below freezing often damage unprotected components if systems are already marginally insulated or idle.
Insulation quality, installation location, and inactivity determine vulnerability; operators should watch multi‑day forecasts, wind chills, and sudden cold fronts, and apply temporary heating or drain/winterize procedures when thresholds are expected to be crossed.
Preparing Your Water Softener Before Cold Weather
Before the first hard freeze, a concise inspection of the system is recommended: check and seal exposed pipes and fittings to prevent drafts.
The brine and resin tanks should be examined and insulated as needed to maintain internal temperatures.
Finally, confirm that drain lines and bypass valves are clear, properly routed, and operable for winter conditions.
Inspecting and sealing pipes and fittings
Inspect the water softener’s visible plumbing for cracks, loose joints, and signs of corrosion, because even small leaks or gaps can admit cold air and freeze.
Tighten fittings, replace deteriorated washers, and apply plumber’s tape or thread sealant to threaded connections.
Seal gaps where pipes enter walls or floors with foam or caulk.
Label vulnerable valves for quick winter checks and maintenance.
Checking and insulating the brine tank and resin tank
A careful check of both the brine tank and the resin tank helps prevent freeze damage by identifying thin insulation, cracks, or displaced covers that allow cold air to reach vulnerable components.
Inspect seals, lids, and tank walls; repair cracks and replace deteriorated insulation.
Add fitted insulating jackets or foam boards, ensuring ventilation openings remain clear, and secure covers to prevent drafts and moisture intrusion.
Verifying drain lines and bypass valves for winter readiness
Several simple checks can prevent freeze-related failures by ensuring drain lines and bypass valves are clear, secure, and functioning properly.
Inspect drain lines for cracks, clogs, or low spots that trap water; replace brittle tubing.
Verify bypass valves operate smoothly, seat fully, and are tightly sealed to prevent leaks.
Insulate exposed piping and elevate drains where freezing risk exists to maintain flow.
Ten Proven Prevention Methods
A concise set of prevention methods can greatly reduce the risk of a water softener freezing during cold spells.
Practical options range from relocating the unit to adding local heat and insulation; the most effective approach often combines several measures.
Consider these proven steps to protect the system:
- Move the unit indoors or to a heated area when possible
- Insulate tanks and exposed piping with foam or wrap
- Install heat tape or electric heating pads safely
- Add a small space heater or heat source near the unit
- Use a weatherproof enclosure or insulated cabinet
1. Move the unit indoors or to a heated area when possible
Relocate the water softener to an interior or temperature-controlled space whenever feasible to eliminate exposure to freezing conditions.
Placing the unit in a basement, garage, utility room, or heated enclosure reduces freeze risk and prevents valve, tank, and control head damage.
Prioritize locations with stable temperatures, easy access for maintenance, and suitable drainage.
Moving indoors is the most effective preventive measure.
2. Insulate tanks and exposed piping with foam or wrap
Insulate the tanks and any exposed piping with closed-cell foam sleeves, adhesive-backed insulation tape, or foil-backed wrap to reduce heat loss and prevent freeze damage.
Confirm seams are sealed and joints covered, including valves and fittings. Use materials rated for outdoor use and UV exposure when applicable.
Regularly inspect insulation for compression, gaps, or moisture and replace damaged sections promptly to maintain protection.
3. Install heat tape or electric heating pads safely
After sealing and wrapping tanks and pipes, adding a controlled heat source offers active freeze protection for vulnerable sections.
Heat tape or electric heating pads should be UL-listed, installed per manufacturer instructions, and secured to pipes or valves—not overlapping.
Use thermostat-controlled models or self-regulating tape to prevent overheating.
Protect connections and cords from moisture, route to a GFCI outlet, and inspect annually for damage.
4. Add a small space heater or heat source near the unit
Place a small, thermostatically controlled space heater or heat source near the water softener to maintain a safe ambient temperature in cold-prone areas.
Position the heater several feet away on a stable surface, keep clearance from combustible materials, and direct warmth toward pipes and the tank.
Use a unit with automatic shutoff, a timer, and grounded plug; monitor power use and inspect periodically for safe operation.
5. Use a weatherproof enclosure or insulated cabinet
Enclose the water softener in a weatherproof, insulated cabinet sized to allow access for maintenance while minimizing exposed surface area.
Install foam or rigid insulation, seal joints and service openings, and elevate the unit above potential runoff.
Include vents for moisture control, use corrosion-resistant fasteners, and plan removable panels for winter inspections.
Proper enclosure reduces heat loss and protects plumbing from wind-driven cold.
6. Maintain a minimum ambient temperature with thermostat controls
A weatherproof, insulated cabinet helps retain heat, but active temperature control provides a more reliable safeguard against freezing.
Install a thermostat-controlled heater or heat tape regulated to maintain a safe minimum ambient temperature around the softener.
Set alarms for temperature drops, use programmable controls to conserve energy, and verify sensors periodically to guarantee consistent protection during cold spells without full system shutdown.
7. Bypass and winterize the system for seasonal shutdowns
Shut down the softener and route water around it for extended cold periods by installing and using a dedicated bypass valve and following a winterization procedure.
Drain resin tanks, control heads, and supply lines per manufacturer instructions.
Remove and store electrical components indoors.
Add non-toxic antifreeze only where specified.
Label shut valves and document restart steps to guarantee safe, efficient seasonal shutdowns and restarts.
8. Keep water flowing periodically to prevent stagnation and freezing
Run water through the softener and connected lines at regular intervals during cold snaps to keep water moving and reduce the chance of ice formation.
Periodic flow prevents stagnation, lowers freezing risk in pipes, and maintains salt and resin function.
Short, controlled draws—tap, hose, or automatic timer—are effective.
Guarantee flows reach vulnerable sections and document intervals to maintain consistent winter routines.
9. Monitor with a temperature sensor and remote alerts
Install temperature sensors with remote alerts to catch dangerous drops before ice forms. Devices monitor ambient and pipe temperatures, sending notifications via phone or email when thresholds are reached.
Alerts enable prompt responses—activate heaters, circulate water, or arrange help. Choose battery-backed, weatherproof sensors and program multi-level warnings.
Regularly test connectivity and replace batteries to guarantee reliable winter protection.
10. Professional winterization and annual maintenance service
Engage a qualified plumbing or water-treatment professional for annual winterization and maintenance to secure thorough protection beyond basic homeowner measures.
A technician inspects tanks, control valves, bypasses, and drain lines; refills anti-freeze where appropriate; tests heaters and insulation; and schedules timely repairs.
Professional documentation and seasonal tune-ups reduce freeze risk, extend equipment life, and confirm warranty compliance through verified, skilled service.
Step-by-Step Winterization Process for Water Softeners
The winterization procedure begins with assembling necessary tools and materials and reviewing the softener’s manual.
Next steps cover shutting down, draining, and placing the unit on bypass, plus measures to protect the brine tank and resin bed during extended shutdowns.
Finally, instructions for safely recommissioning the softener after thawing guarantee proper function and prevent damage.
Preparing tools and materials
Gather a concise kit of tools and materials tailored for winterizing a water softener before beginning any work.
Include insulated tape, foam pipe insulation, heat cable, silicone sealant, plastic sheeting, heavy-duty zip ties, a wrench set, bucket, absorbent towels, and protective gloves.
Verify compatibility with the unit model and prepare labels for valves and lines to avoid confusion during the process.
Shutting down, draining, and bypassing the system
Begin by shutting off the softener’s feed and isolating it from the household water supply to prevent incoming water during winterization.
Drain residual water from the control valve, brine line, and tank drain ports.
Engage the bypass valve to reroute household water.
Remove and store removable hoses.
Confirm all valves are secure and labeled to simplify recommissioning after thawing.
Protecting the brine tank and resin bed during extended shutdowns
When temperatures will remain below freezing for an extended period, homeowners should prepare the brine tank and resin bed to prevent damage from ice and stagnation.
Empty and remove brine (salt and liquid), thoroughly dry the tank, and store salt separately.
Rinse and purge resin with clean, potable water, then drain as fully as possible.
Seal openings to keep pests and debris out.
Recommissioning the softener after thawing
After the brine tank and resin bed have been emptied, dried, and sealed, the softener can be brought back into service once all components are fully thawed and the surrounding plumbing is free of ice.
Inspect valves, hoses, and control head for cracks or debris.
Reconnect brine, refill salt, run a manual regeneration, check for leaks, verify proper water flow and softening performance.
Products and Materials That Work Best
Recommended insulation types and target R-values are summarized to guide material choice for tanks and plumbing.
The relative merits of heat tape versus heating pads are compared, noting installation complexity, power consumption, and safety considerations.
Attention is also given to smart thermostats and wireless temperature sensors that enable automated, remote monitoring and control.
Recommended insulation types and R-values
Effective protection of a water softener hinges on selecting insulation materials with suitable R‑values and moisture resistance.
Closed‑cell foam, rigid polyiso boards, and high‑density fiberglass with vapor barriers perform well. Aim for R‑6 to R‑10 for moderate climates, R‑10 to R‑15 for colder areas.
Seal gaps and protect against condensation. Durable, water‑resistant coverings extend lifespan and effectiveness.
Heat tape vs. heating pads pros and cons
When temperatures approach freezing, choosing between heat tape and heating pads requires weighing their distinct benefits and limitations. Heat tape offers targeted, wrap-around warmth but needs careful installation; pads provide surface warmth and simpler attachment but cover less pipe length. Consider durability, power source, and safety.
| Option | Strength | Concern |
|---|---|---|
| Heat tape | Precise | Overheat risk |
| Pad | Simple | Limited reach |
| Both | Prevent freeze | Power dependent |
Smart thermostats and wireless temperature sensors to consider
After weighing heat tape and heating pads for localized freeze protection, attention often turns to smart thermostats and wireless temperature sensors that monitor ambient and equipment temperatures across a property.
Recommended options include Wi‑Fi thermostats with remote alerts, battery‑powered sensors for basements and garages, and mesh sensor systems that report low‑temperature events.
Integration with smart home hubs enables automated heating responses and notification chains.
Common Mistakes and Problems to Avoid
Common mistakes that compromise winter protection include improper use of heat tape and associated electrical hazards, along with failure to insulate fittings and valves.
Neglecting the brine tank and drain lines also leaves vulnerable points that can freeze and cause damage.
When signs of freezing or leaks appear, delaying professional assessment can turn a repairable issue into a costly failure.
Improper use of heat tape and electrical hazards
Using heat tape improperly can create serious electrical and fire hazards around a water softener.
Users may overlap tape, use nonapproved types, or leave connections exposed to moisture.
Incorrect installation, lack of thermostat control, and damaged insulation increase shock and ignition risk.
Electricity should be handled by qualified personnel and only heat tape rated for plumbing, following manufacturer and code requirements.
Failing to insulate fittings and valves
When fittings and valves are left uninsulated, they become the weak points where freezing most often begins, compromising the entire softener line.
Exposed joints, unions, and shutoff valves lose heat rapidly, causing localized ice blockages and ruptures.
Regularly apply proper pipe insulation, foam covers, or heat-wraps rated for plumbing components, and inspect seals to prevent leaks that worsen freeze damage.
Overlooking the brine tank and drain lines
After addressing exposed fittings and valves, attention must turn to the brine tank and drain lines, which are often ignored yet vulnerable to freezing and blockages.
Neglect can cause salt bridging, clogged drains, and cracked tanks. Regular inspections, insulating the tank, keeping the brine level appropriate, and clearing drain lines prevent operational failures and costly repairs caused by ice formation or accumulated debris.
Delaying professional help when damage is suspected
Ignore calls for professional help at one’s peril; delaying service after signs of damage can turn a repairable issue into a catastrophic failure.
Homeowners who postpone assessment risk frozen valves, cracked tanks, and worsening leaks.
Prompt inspection preserves warranty coverage, limits water damage, and reduces repair costs.
Seek certified technicians immediately when unusual noises, reduced softening, or visible cracks appear to prevent escalation.
Signs Your Water Softener Has Frozen or Been Damaged
Visible damage such as cracks, leaks, or a bulging tank can indicate freeze-related failure.
Functional signs include loss of soft water, reduced flow, or new grinding or knocking noises from the unit.
If severe leaks occur, flow drops sharply, or the unit makes alarming noises, the water should be shut off and a technician contacted immediately.
Physical signs to inspect (cracks, leaks, bulging)
Several clear physical indicators can reveal that a water softener has frozen or sustained cold-related damage.
Inspect the tank and fittings for hairline or jagged cracks in plastic or fiberglass, swollen or bulging housings, and frost-rimmed seams.
Check valves, pipes, and brine tanks for visible leaks, mineral-stained wet areas, or warped components indicating structural compromise from ice expansion.
Performance indicators (no soft water, low flow, unusual noises)
Listen for and note changes in operation: a frozen or cold-damaged water softener often stops delivering soft water, produces reduced flow, or emits atypical noises during regeneration and service cycles.
Other indicators include longer regeneration times, sputtering taps, intermittent pressure drops, or gritty/hard-feeling water.
These performance changes signal internal ice, valve misalignment, or resin channeling requiring inspection and possible repair.
When to shut off water and call a technician
If a water softener shows sudden loss of softening, persistent low pressure, continuous leaking, odd grinding or clunking during cycles, or water that is warm or contains ice near the unit, the homeowner should shut off the water and contact a qualified technician immediately.
These signs indicate likely freeze damage to valves, tanks, or piping that can worsen quickly and contaminate plumbing if left running.
A technician will assess, drain, repair or replace damaged components and advise on thawing, pressurization checks, and preventive insulation or heat solutions to prevent recurrence.
Cost, Time, and Effort Estimates for Winter Protection
Typical do-it-yourself winterization of a water softener generally requires inexpensive materials (insulation wrap, heat tape, and sealant) and can be completed in one to two hours.
Hiring a professional typically costs more but often includes inspection, secure installation of heating elements, and warranty-backed labor.
Preventing freeze damage can yield significant long-term savings by avoiding costly repairs, replacement parts, and water damage remediation.
Typical DIY material costs and time required
A basic winterization kit for a residential water softener—insulation wrap, pipe foam, a thermostatic heat tape, and a small thermometer—typically costs between $40 and $120, depending on quality and local prices.
It can be installed in one to three hours by a homeowner with basic tools.
Additional items like weatherproofing tape or foam insulation board add $10–$50 and 30–90 minutes.
Professional service costs and what’s included
Many homeowners opt for professional winterization services for water softeners to guarantee reliable protection and avoid DIY mistakes. Such services generally range from $100 to $350 depending on region, unit complexity, and included materials.
Technicians typically inspect insulation, install heat tape or blankets, drain vulnerable lines, test valves, and provide a service report. Appointments usually take one to two hours and include labor and basic materials.
Long-term savings by preventing freeze damage
Because freeze damage often leads to costly repairs or full unit replacement, investing in winter protection for a water softener yields measurable long-term savings.
Preventive measures—insulation, heat tape, indoor relocation, periodic maintenance—typically cost a fraction of repair or replacement.
Annual time and expense for upkeep are minimal; avoided downtime, parts and labor, and extended equipment lifespan compound into clear cost-effectiveness over years.
Real-World Scenarios and When to Use Each Method
The section compares practical protection strategies for different climates and situations.
It outlines the most suitable approach for mild cold climates, the more robust measures needed in severe freeze-prone locations, and quick temporary fixes for unexpected cold snaps.
Readers will be guided on choosing methods based on risk level, cost, and urgency.
Best approach for mild cold climates
In mild cold climates—where temperatures occasionally dip near freezing but prolonged subzero stretches are uncommon—the most practical protection strategies balance simple insulation, passive heat retention, and occasional active measures.
Recommended actions include foam jackets, pipe wrap, insulating blankets, sealing drafts, relocating the unit indoors or into an insulated closet, and installing a thermostatic heater or smart outlet for intermittent heating during cold snaps.
Best approach for severe freeze-prone locations
Many severe freeze-prone locations—where temperatures regularly fall well below freezing for extended periods—require robust, layered protection strategies that combine insulation, heat sources, and system relocation or enclosure.
Recommended measures include placing the softener indoors or inside a heated insulated cabinet, installing thermostatically controlled heat tape or small electric heaters, improving surrounding insulation, and routing supply lines below frost depth to prevent persistent freezing and costly damage.
Temporary solutions for unexpected cold snaps
Several quick, temporary measures can protect a water softener during an unexpected cold snap without major installation work:
Wrap the unit and exposed pipes with trusted-rated insulation blankets or foam.
Apply heat tape to vulnerable sections.
Keep ambient heat by opening nearby cabinet doors and running a slow trickle of water.
Relocate portable space heaters a safe distance away to maintain above-freeze temperatures.
Maintenance Checklist for Year-Round Protection
A concise maintenance checklist keeps a water softener resilient through seasonal temperature swings and unexpected freezes.
Recommended actions include routine monthly and seasonal tasks, defined annual inspections and service items, and a simple system for tracking and logging temperature and maintenance actions.
Key checklist elements to evaluate:
- Check insulation and heat tape monthly
- Inspect brine tank and valves each season
- Schedule annual professional service for valves and controls
- Log ambient temperatures and any freeze warnings weekly
- Record all maintenance actions and parts replaced for year-round reference
Monthly and seasonal tasks
Establishing a routine of monthly and seasonal checks helps prevent freeze damage and keeps the water softener operating efficiently throughout the year.
Monthly tasks include inspecting insulation, verifying heater/tape function, clearing debris around the unit, and checking for cold drafts.
Seasonal tasks focus on reinforcing insulation before cold spells, testing bypass valves, and preparing portable heat sources to maintain safe operating temperatures during prolonged freezes.
Annual inspections and service items
Annually, a focused inspection and service routine guarantees the water softener remains protected from freeze damage and performs reliably year-round.
A technician should check insulation integrity, heater or heat-trace operation, control valve seals, and drain lines for blockages.
Replace worn gaskets, inspect brine tank condition, test bypass valves, and confirm proper winterization components.
Document any repairs and parts replaced for accountability.
Tracking and logging temperature and maintenance actions
Following the annual inspection and documented repairs, ongoing tracking of temperatures and maintenance actions creates a clear record for preventing freeze damage and verifying system readiness.
Logs should note daily or weekly temperature readings, service dates, performed tasks, and any anomalies. Timestamped entries enable trend analysis, alert thresholds, and compliance checks.
Digital logs with alerts improve responsiveness and support informed decisions for winter preparedness.
Resources and Further Reading
For further guidance, readers are directed to manufacturer guidelines and warranty documents to confirm specific freeze-prevention requirements and any conditions that affect coverage.
Trusted professional services, such as certified plumbers and water-treatment specialists, can be located through industry associations, local contractors’ reviews, and manufacturer service locators.
Product guides and buying resources are recommended for comparing insulation, bypass valves, and freeze-protection accessories before purchase.
Manufacturer guidelines and warranty considerations
Manufacturer guidelines and warranty terms provide the baseline requirements for protecting a water softener from freeze damage and for maintaining coverage.
Owners should follow installation, insulation, and winterization instructions precisely, record any maintenance, and use approved parts.
Deviations or DIY modifications can void warranties.
Review claim procedures and retention periods, and keep receipts and photos to support any future warranty requests.
Trusted professional services and where to find them
Where can homeowners find qualified technicians to inspect, winterize, or repair a water softener before cold weather sets in?
Local licensed plumbing companies, certified water-treatment specialists, and HVAC firms often provide winterization services.
Verify credentials, read reviews, request written estimates, and confirm insurance.
Trade associations, municipal utility referrals, and online directories with verified ratings are reliable sources for locating experienced professionals.
Product guides and buying resources
Several concise product guides and buying resources help homeowners compare water softeners, accessories, and winterization supplies before purchasing.
Objective reviews, specification charts, and seasonal checklists clarify performance, capacity, insulation options, and maintenance needs. Trusted sites and manufacturer pages offer installation notes and warranty details.
- Comparison reviews
- Specification and capacity charts
- Insulation and winter kit guides
- Installation notes
- Warranty and service resources
Conclusion
Like a bundled traveler braving a blizzard, a properly prepared water softener weathers winter with far less risk and stress. By understanding freeze causes, applying insulation, heat, drainage, or relocation methods, and following a simple winterization routine, homeowners substantially reduce damage and service costs. Routine inspections and timely action preserve system reliability and extend lifespan, ensuring softened water service resumes quickly when temperatures rise and preventing costly emergency repairs.