How to Repair a Cracked Toilet Seat: Step-by-Step Fixes for Every Material
If you have a cracked toilet seat, the repair process depends on the crack’s size, location, and material. For small surface cracks in plastic or duroplast, you can clean the area, abrade it, and use cyanoacrylate gel or two-part epoxy to fill the crack. After that, sand it smooth and refinish as needed. However, for deep or structural splits, you’ll need backing plates, fiberglass patches, or wood splints along with structural epoxy and clamping. Keep in mind that temporary tape or sealant is only a short-term fix. Below, you’ll find detailed step-by-step techniques, necessary tools, and guidance on when it might be best to replace the toilet seat altogether.
How to Know When a Cracked Toilet Seat Needs Repair or Replacement
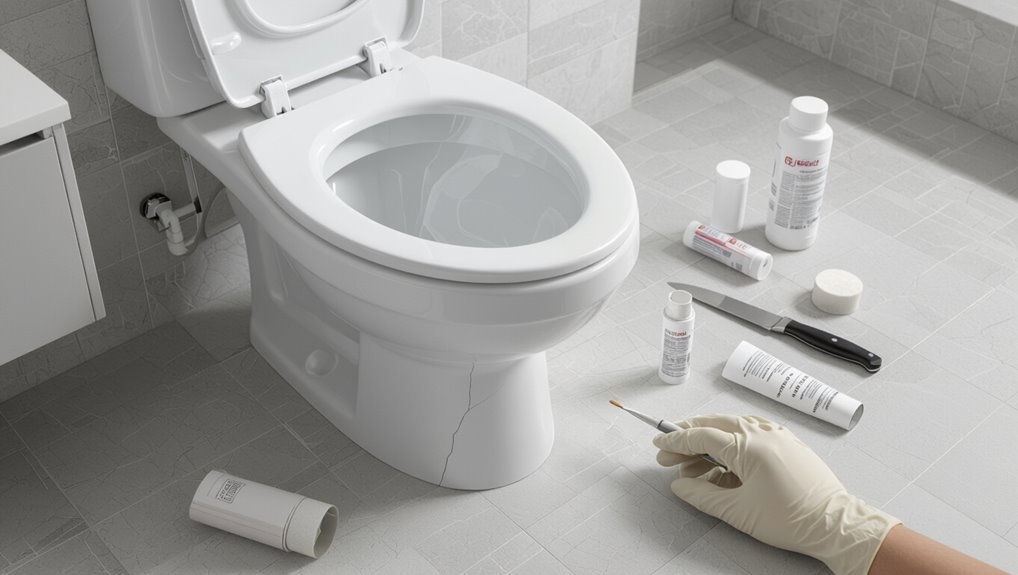
A cracked toilet seat should be evaluated for repairability by noting crack size, location, and whether it affects structural integrity or the hinge area.
The potential risks — sudden breakage, hygiene concerns from exposed crevices, and damage to mounting hardware or the bowl — inform whether immediate replacement is safer.
A brief inspection of the seat surface, underside, and mounting bolts will reveal whether a simple patch or full replacement is warranted.
Signs a crack is repairable versus warranting replacement
When should a cracked toilet seat be repaired instead of replaced? Observable criteria guide the decision: hairline surface cracks, stable hinges, and intact structural support favor DIY fixes—learn how to repair a cracked toilet seat with epoxy or plastic welding.
Deep splits, spreading cracks, molded-core damage, or compromised mounting indicate replacement. Consider seat material, age, and cost before proceeding.
Risks of using a cracked toilet seat (safety, hygiene, further damage)
Having established which cracks can be safely repaired, attention must turn to the risks posed by continuing to use a damaged seat.
Cracks compromise structural integrity, increasing collapse risk and potential injury. Gaps harbor bacteria and are harder to clean, raising hygiene concerns.
Small fractures can propagate, damaging hinges or bowl surfaces, turning a minor repair into a full replacement necessity.
How to inspect the seat and mounting hardware
Begin by visually scanning the seat and mounting hardware for visible cracks, stress lines, loose fasteners, or warped plastic that indicate compromised strength.
Check hinges, bolts, and bumpers for corrosion, looseness, or stripped threads.
Apply light pressure to identify hidden splits or flex.
Note movement between seat and bowl; any persistent wobble or material fragmentation warrants repair or replacement.
Overview of Toilet Seat Materials and How They Affect Repairs
Toilet seat material strongly influences both the types of cracks that occur and the appropriate repair methods.
Thermoplastic and duroplast plastics are common and often amenable to adhesive or filler repairs, while solid and molded wood require special wood fillers or replacement when structural integrity is lost.
Soft-close, padded, metal-reinforced, and other specialty seats have unique mechanisms or layers that may limit DIY fixes and sometimes necessitate part-specific replacement.
Plastic (thermoplastic, duroplast) characteristics and repairability
Durability governs how different plastics perform and how easily they can be repaired: thermoplastics (like polypropylene and ABS) soften with heat and can be welded or glued effectively, while duroplasts (thermosetting resins such as molded phenolic) resist melting and typically require specialized adhesives or replacement when cracked.
Thermoplastics permit DIY heat welding or solvent bonding; duroplasts need epoxy formulations or seat replacement for reliable, lasting repairs.
Wood and molded wood characteristics and repairability
Wooden and molded-wood seats—typically made from solid hardwoods, medium-density fiberboard (MDF), or compressed wood/resin blends—offer a warm, sturdy option but behave differently when damaged.
Solid wood can often be sanded, glued, and refinished; MDF and compressed blends absorb moisture, delaminate, or crumble, often requiring replacement.
Repairs need wood glue, clamps, filler, and sealing to restore strength and moisture resistance.
Soft-close and padded seats special considerations
Consider how mechanisms and cushioning change repair approaches: soft-close hinges contain dampers and springs that require careful disassembly and lubrication or replacement rather than simple gluing.
Meanwhile, padded seats incorporate foam or vinyl layers that can trap moisture and complicate adhesive bonds.
Repairs prioritize hinge integrity and sealed seams; use compatible adhesives, avoid overloading foam, and consider full replacement when internal components or padding are compromised.
Metal-reinforced and specialty materials
Many toilet seats combine metal reinforcement or specialty composites to improve strength, stability, or aesthetic appeal.
Repairs require matching materials: metal frames resist simple adhesives, needing epoxy formulated for metal or mechanical fasteners.
Fiberglass, carbon-fiber, and molded composites bond with specific epoxies or plastic welds.
Finish-matching and galvanic corrosion concerns dictate sealants and compatible hardware to guarantee longevity and safety.
Tools and Materials You’ll Need for Common Repairs
For common toilet seat repairs, a concise set of tools and appropriate materials makes the job straightforward.
Useful items include:
- Basic toolkit for minor fixes (screwdriver, pliers, utility knife).
- Adhesives, fillers, and sealants selected by seat material (plastic, wood, or resin).
- Replacement parts versus repair kits guidance for when cracks are beyond simple fixes.
The following sections explain selection and use so readers can choose repair or replacement efficiently.
Basic toolkit for minor fixes
A compact set of tools and a few basic materials will handle most minor toilet-seat repairs.
A screwdriver set (flat and Phillips), adjustable wrench, utility knife, fine-grit sandpaper, cleaning cloths, rubbing alcohol, masking tape, small brush, and replacement mounting bolts or rubber bumpers suffice.
A flashlight and safety gloves complete the minimal kit for quick, safe adjustments and light surface prep.
Adhesives, fillers, and sealants per material
Different toilet-seat materials demand specific adhesives, fillers, and sealants to guarantee a durable, discreet repair.
For plastic (thermoplastic/polypropylene), use epoxy or plastic-weld adhesives and two-part filler.
For wood or MDF, select wood glue, grain-matching filler, and waterproof polyurethane sealant.
For molded resin or vinyl-coated seats, choose flexible epoxy or silicone-compatible adhesive and clear silicone sealant for joints and surface gaps.
When to use replacement parts versus repair kits
Decide between replacement parts and repair kits by evaluating damage severity, part availability, and the user’s skill level; minor cracks, loose hinges, or worn bumpers are often addressed with kits that include adhesives, fillers, and fasteners.
In contrast, extensive structural failure, irreparable mounting points, or obsolete components typically require full replacement parts to restore safety and function.
Choose kits for quick, inexpensive fixes; replace for durability.
Step-by-Step Repair for Small Surface Cracks (Plastic and Duroplast)
The section outlines a compact repair sequence for small surface cracks in plastic and duroplast seats, beginning with safe removal, thorough cleaning, and complete drying.
It then covers filling hairline cracks with plastic weld or epoxy, followed by sanding, smoothing, and color-matching to blend the repair.
Finally, it describes reattaching the seat and testing fasteners for secure stability.
Preparing the seat: removal, cleaning, and drying
Begin by removing the toilet seat to gain full access to the cracked area and to prevent contaminating tools or repair materials.
Detach hinges and lift off seat and lid.
Wipe away debris with a soft brush.
Clean thoroughly with mild detergent or isopropyl alcohol, avoiding harsh abrasives.
Rinse and blot dry with a lint-free cloth.
Allow full air-dry before repair.
Filling hairline cracks with plastic welds or epoxy
For hairline cracks in plastic or duroplast toilet seats, a precise, low-volume filler such as a plastic weld or two-part epoxy provides the strongest, least visible repair.
The following steps outline surface preparation, application, and curing to restore integrity without altering seat geometry.
Lightly abrade crack edges, clean with solvent, apply mixed weld/epoxy into the fissure with a syringe or toothpick, remove excess, and allow full cure per manufacturer before reuse.
Sanding, smoothing, and color-matching techniques
After the weld or epoxy has fully cured, attention shifts to sanding and smoothing to blend the repair with the surrounding surface.
Begin with 240–320 grit, progress to 400–600 grit for a fine finish, then polish with a microfiber.
Match color using acrylic paint or color-matched touch-up kits; apply thin layers, cure between coats, and finish with a satin or gloss clear coat to match seat sheen.
Reattaching the seat and testing for stability
Reattach the seat by aligning the hinges and hardware, then secure the bolts or nuts finger-tight before final torqueing.
Once tightened, test for lateral and vertical movement by applying moderate pressure forward, backward, and side-to-side.
Confirm no wobble and that the seat closes evenly.
If movement persists, retighten, replace worn washers or hinge components, and retest until stable and secure.
Step-by-Step Repair for Deep or Structural Cracks (Plastic and Wood)
The next section outlines how to evaluate internal damage and reinforce weakened areas before repair.
It covers using backing plates, fiberglass patches, or wood splints with structural epoxy and proper clamping.
Finally, it explains finishing steps and simple load-testing to confirm strength.
Assessing internal damage and reinforcing weak areas
Begin by inspecting the cracked area from both top and underside to determine whether the damage is superficial or extends into the seat’s core; for plastic seats this means checking for hairline fractures that propagate through the thickness, and for wood seats it means probing for splintering, delamination, or soft spots.
Document locations, measure crack depth, and mark weak zones. Stabilize edges with clamps before reinforcing.
Using backing plates, fiberglass patches, or wood splints
With weakened areas identified and edges stabilized, attention shifts to reinforcing the seat using backing plates, fiberglass patches, or wood splints depending on material and damage severity.
For plastic, apply a rigid backing plate beneath the crack to distribute load.
For molded seats, lay fiberglass cloth with resin over the underside.
For wood, fit slim splints across the fracture, secure with screws or adhesive for structural support.
Applying structural epoxy and clamping methods
Prepare to bond and stabilize the seat by applying a high-strength structural epoxy and using controlled clamping to align and compress the repair until the adhesive cures.
Mix epoxy per instructions, force into the crack and any backing plates or splints, remove excess, then position clamps or straps to maintain alignment and consistent pressure.
Allow full cure time before unclamping.
Finishing touches and load-testing
After the epoxy has cured and clamps are removed, inspect the bond line and surrounding surfaces for excess adhesive, gaps, or unevenness that could affect function or comfort.
File or sand cured epoxy flush, clean debris, and apply matching paint or sealant if needed.
Refit hardware, torque evenly, then perform gradual load-testing: sit gently, then normal use, checking for movement, creaks, or new gaps before regular use.
Repairing Cracks on Soft-Close and Hinged Mechanisms
Attention to the soft-close and hinged hardware is essential when cracks appear near attachment points.
The section explains how to access concealed hinges and remove the seat safely, addresses common stress-crack repairs around hinge areas, and outlines when to replace hinge inserts or upgrade to stronger fasteners.
Practical tips focus on preventing recurrence by correcting alignment and using robust mounting hardware.
Accessing concealed hinges and removing the seat safely
Begin by locating the hinge type: soft‑close hinges usually have a visible pivot cover or small release tab, while concealed hinges sit beneath a cap or molded cover at the rear of the seat.
Wear gloves and eye protection. Pry off caps gently with a flat screwdriver. Depress release tabs or unclip hinge pins.
Lift the seat straight up to disengage; set hardware aside for inspection.
Fixes for hinge-related stress cracks
With the seat removed and hinge hardware set aside, inspection should focus on stress cracks around pivot points and mounting ears on soft‑close and concealed‑hinge seats.
Clean surfaces, sand feathered edges, then apply a compatible adhesive or epoxy rated for plastics or wood.
Reinforce thin areas with fiberglass cloth or plastic patch strips.
Reassemble carefully, testing movement and avoiding overtightening.
Replacing hinge inserts and upgrading to stronger fasteners
Replace worn hinge inserts and upgrade fasteners to restore strength where stress cracks have weakened mounting points.
The technician removes the seat, inspects inserts and bolt holes, then fits OEM or reinforced nylon inserts.
Stainless steel or brass bolts with rubber washers replace corroded hardware.
After torqueing to manufacturer specs, the seat is tested for secure, gap-free alignment; soft-close function is verified.
Temporary Fixes and Quick Patches for Short-Term Use
For short-term use, inexpensive options such as strong waterproof tape, silicone sealant, or purpose-made waterproof patches can stabilize small cracks and prevent splintering.
Instructions should stress cleaning the area, applying the material smoothly, and limiting weight on the seat until a proper replacement is installed.
Temporary fixes are inappropriate for large structural failures, compromised hinges, or seats used by heavy individuals, in which case immediate replacement is recommended.
Tape, silicone, and waterproof patch options
When a cracked toilet seat needs a quick, temporary fix, tape, silicone, and waterproof patches offer fast, low-cost repairs that restore basic function until a permanent replacement is possible.
Apply heavy-duty waterproof tape across the crack for immediate support. Use bathroom-grade silicone to seal gaps and prevent moisture.
Self-adhesive PVC or vinyl toilet patches add durability. Inspect regularly and replace promptly.
How to make a safe temporary repair until replacement
After using tape, silicone, or a waterproof patch to restore basic function, attention should turn to making that repair as safe and reliable as possible for short-term use.
Inspect stability, smooth sharp edges with fine sandpaper, secure edges with overlapping tape or additional adhesive, and test load cautiously.
Place a warning note for household members and schedule replacement promptly to avoid extended reliance on the temporary fix.
When temporary fixes are inappropriate
Although temporary patches can restore short-term function, some damage makes such fixes unsafe or unsuitable.
When cracks compromise structural integrity, deform seat shape, expose sharp edges, or affect mounting points, a temporary repair risks collapse or injury.
Hygienic concerns from bacteria-trapping gaps and persistent instability also warrant immediate replacement.
Professionals should assess severe fractures rather than rely on quick patches.
Replacing a Toilet Seat: When and How
When a cracked toilet seat is beyond safe or sanitary repair, the discussion turns to full replacement and selecting the correct seat size and material to match the bowl and usage needs.
The process covers step-by-step removal of the old seat, proper alignment and fastening of the new one, and simple checks to guarantee stability.
Finally, the trade-offs between a straightforward DIY swap and hiring a professional are considered to weigh time, tools, and confidence.
Choosing the correct replacement seat size and material
Selecting the correct replacement seat requires matching both the toilet’s bowl shape and the homeowner’s priorities for durability and comfort.
Measurements include hinge spacing, overall length, and bowl width. Consider materials—plastic, wood, or cushioned—and finishes for staining resistance. Choices balance longevity, cost, and feel.
- Measure hinge spacing accurately.
- Match round or elongated bowl.
- Pick material by wear needs.
Step-by-step removal of old seat and installation of new seat
Begin by shutting off any nearby water sources and clearing the area around the toilet to provide unobstructed access; this prepares the workspace and prevents accidental damage.
Remove hinge caps, unscrew bolts, and lift off the old seat. Clean mounting holes and rim.
Position the new seat, align hinges, insert bolts, and tighten securely.
Test fit and adjust for stability before use.
Comparing DIY replacement versus professional help
Many homeowners can replace a cracked toilet seat themselves with basic tools and a few minutes of careful work, but evaluating factors like the seat’s complexity, the condition of the mounting hardware, and personal comfort with simple repairs helps determine whether to DIY or hire a professional.
| DIY Advantages | Professional Advantages |
|---|---|
| Low cost | Expertise |
| Fast | Guaranteed work |
| Control | Complex fixes |
| Satisfaction | Liability coverage |
| Basic tools only | Time-saving |
Cost, Time, and Effort Comparison: Repair vs Replace
Repairing a cracked toilet seat typically costs less upfront than replacing it, but varies with materials and parts. Time and skill requirements range from quick DIY fixes to longer jobs needing basic tools, while long-term durability and warranty differ markedly between patch repairs and full replacements. The table below summarizes typical ranges and considerations for quick comparison.
| Aspect | Typical Range / Note |
|---|---|
| Repair cost | $5–$30 (adhesives, filler, small hardware) |
| Replacement cost | $20–$150+ (basic to premium seats) |
| Time required | 15 min–2 hours (repair) vs 10–45 min (replace) |
| Skill level | Low–moderate (repair) vs low (replace) |
Typical cost ranges for common repairs
A few straightforward fixes for a cracked toilet seat—such as tightening hinges, replacing bolts, or applying epoxy—typically cost between $5 and $40 in parts and take 15–45 minutes for a homeowner;
more extensive repairs like replacing the hinge assembly or a molded seat can run $25–75 and require basic tools and 30–60 minutes.
Professional labor adds $50–100 if hired for installation.
Average time and skill required
After outlining typical costs for quick fixes and replacements, the next consideration is how time and skill affect the decision to repair versus replace.
Simple adhesive or epoxy repairs typically require 15–45 minutes and basic DIY ability.
Sanding, reinforcement, or hinge work can take 1–2 hours and moderate skill.
Full replacement often needs 30–90 minutes and minimal technical experience.
Long-term durability and warranty considerations
Durability often dictates whether a cracked toilet seat is a temporary nuisance or a recurring expense. Repairs patched with epoxy or adhesive may restore function quickly but typically offer limited long-term strength.
In contrast, reinforced fixes or full replacements provide more reliable longevity. Warranties often cover manufacturing defects only; DIY repairs usually void coverage, so replacement under warranty or manufacturer-backed parts yields better assurance and predictable lifespan.
Preventing Future Cracks and Extending Seat Lifespan
To prevent future cracks and extend a toilet seat’s lifespan, attention to proper installation and correct bolt torque is essential to avoid uneven stress.
Material-specific maintenance—such as gentle cleaning for wood and avoiding harsh chemicals on plastic—helps preserve integrity.
Simple behavioral changes, like avoiding standing on the seat and lifting it gently, reduce repeated stress and prolong service life.
Proper installation and torque settings for bolts
Carefully aligning the seat and evenly tightening the mounting bolts prevents stress concentrations that lead to cracks.
Install rubber washers, hand-thread bolts, then use a torque-limited screwdriver or wrench. Recommended torque varies by material—typically 2–4 Nm for plastic seats, slightly higher for wood or duroplast—avoiding over-tightening.
Recheck after use; loose bolts cause movement and uneven loading.
Maintenance tips by material type
Different materials respond to wear and maintenance in distinct ways, so recommendations should match the seat’s composition.
For plastic seats, use mild cleaners, avoid solvents, and inspect mounting points.
For wood, apply appropriate sealant and dry thoroughly after cleaning.
For molded resin or padded seats, follow manufacturer cleaners, check hinges for corrosion, and address small chips promptly to prevent moisture intrusion.
Behavioral habits to reduce stress on seats
Many small daily habits greatly reduce stress on a toilet seat and extend its lifespan. Users should sit gently, avoid standing or leaning on the lid, and keep heavy items off the seat.
Close the lid slowly to prevent slams. Regularly tighten hinges and replace worn hardware.
Encourage household members to follow these practices to minimize cracks and prolong seat durability.
Common Mistakes to Avoid When Repairing or Replacing a Seat
Common errors during seat repair include using an adhesive or filler that is incompatible with the seat material, which can weaken the bond or cause staining.
Over-tightening mounting bolts may create new cracks or warp the seat.
Failing to inspect hinge components can leave hidden damage unaddressed and lead to premature failure.
Using the wrong adhesive or filler for the material
Choose an adhesive or filler that matches the toilet seat’s material and finish, because using the wrong product can cause poor bonding, discoloration, or surface damage.
Selecting incompatible epoxies, glues, or putties risks chemical reaction, weakened repairs, and visible stains.
Test adhesives on an inconspicuous area, follow manufacturer recommendations, and prefer products labeled for plastic, wood, or resin toilet seats to guarantee durable, invisible repairs.
Over-tightening bolts and causing new cracks
After selecting the correct adhesive or filler, attention must turn to fasteners: overtightening the seat bolts can concentrate stress and create new cracks in plastic, resin, or wood seats.
The installer should hand-tighten bolts until snug, then back off slightly or use a torque-limited driver.
Use rubber washers and even pressure to distribute load, preventing split lines and premature failure.
Ignoring hidden hinge damage
A cracked hinge can be as consequential as a split seat itself, yet installers often overlook corrosion, stripped threads, or internal breaks when focusing only on visible damage.
Hidden hinge failure undermines repairs, causes wobble, and can fracture a newly fixed seat.
Inspect hinges thoroughly, remove covers, test fastener integrity, and replace corroded or damaged hardware rather than masking the problem with temporary fixes.
Quick Troubleshooting Guide for Persistent Problems
When problems persist after a repair, a concise checklist helps identify likely causes and next steps.
Common follow-up items include:
- Wobbling after repair: diagnostic steps to isolate loose bolts or hinge wear.
- Cracks reappearing: causes and remedies such as material fatigue or inadequate adhesive.
- Mismatched color or texture: options for blending, repainting, or replacing the seat.
Wobbling after repair diagnostic steps
Begin by inspecting the mounting points and hardware for obvious looseness, stripped threads, or missing components that commonly cause wobble.
Verify bolt tightness, replace damaged anchors, and confirm seat and bowl surfaces align.
Check hinge integrity and spacer condition.
Test with moderate pressure to locate movement sources.
If wobble persists, document findings before attempting replacement or consulting manufacturer guidance.
Cracks reappearing causes and remedies
If cracks keep reappearing despite repairs, persistent causes usually fall into three categories: material failure, incorrect installation, or environmental stress.
Inspect for hairline defects, brittle plastic, or repeated overloads. Confirm bolts, washers, and torque match manufacturer specs.
Replace degraded seats or use stronger materials.
Address temperature extremes, chemical exposure, and user habits to prevent recurrence.
Dealing with mismatched color or texture after repair
How can a repaired toilet seat look noticeably different from the original?
Color or texture mismatches stem from filler, paint, or finish differences, sun fading, or underlying material variance.
Solutions: sand and recoat with matching primer and paint, use color-matched epoxy or vinyl repair kits, or replace the seat.
Test finishes on a scrap area and allow full cure before regular use.
Appendix: Recommended Repair Products and Replacement Seat Brands
The appendix lists specific products and brands useful for repairing or replacing a cracked toilet seat.
Suggested items include:
- Top-rated adhesives and epoxy for plastics and wood
- Best replacement seats by category: budget, comfort, durability
- Notes on compatibility and where to buy
These recommendations aim to make selection and sourcing straightforward.
Top-rated adhesives and epoxy for plastics and wood
Several reliable adhesives and epoxies are well-suited for repairing cracked toilet seats made from common materials like molded plastic, thermoset resins, and wood; selection depends on substrate, gap size, and finish.
Recommended options include two-part marine epoxy for structural fills, cyanoacrylate gel with activator for hairline cracks, polyester or vinylester fillers for thermosets, and waterproof wood glue or epoxy for wooden seats.
Best replacement seats by category (budget, comfort, durability)
For readers deciding between replacement toilet seats, clear categories—budget, comfort, and durability—help match priorities to products:
budget seats prioritize low cost and basic functionality,
comfort seats emphasize ergonomic shapes and softer materials,
and durable seats focus on robust construction and long-lasting finishes.
Recommended picks: economy molded plastic, padded ergonomic vinyl, high-density polypropylene, stainless-steel hinges, slow-close mechanisms, and antimicrobial finishes.
Conclusion
Like a weathered bridge mended by careful hands, a repaired toilet seat restores passage between comfort and function. Small cracks, like fissures in a path, yield to modest repairs; deep breaks demand full rebuilding. Choosing the right materials and methods is akin to selecting tools for a needed reconstruction—each decision preserves safety and dignity. With prudent care and timely replacement when required, the seat endures, steady as a renewed crossing.