How to Fix a Leak in Galvanized Pipe: Step-by-Step Repairs for Homeowners
To fix a leak in a galvanized pipe, first shut off the water supply, drain the line, and assess the damage. For small pinhole leaks, you can use temporary solutions like epoxy putty, repair tape, or a rubber patch secured with a hose clamp. For a more permanent fix, cut out the damaged section and replace it with threaded fittings or a slip coupling. If the corrosion is extensive, it’s best to call a plumber. Always wear safety gear and document the repair process. Additionally, further guidelines will cover complete replacements, associated costs, and preventive measures.
What to Expect When Repairing a Leaking Galvanized Pipe
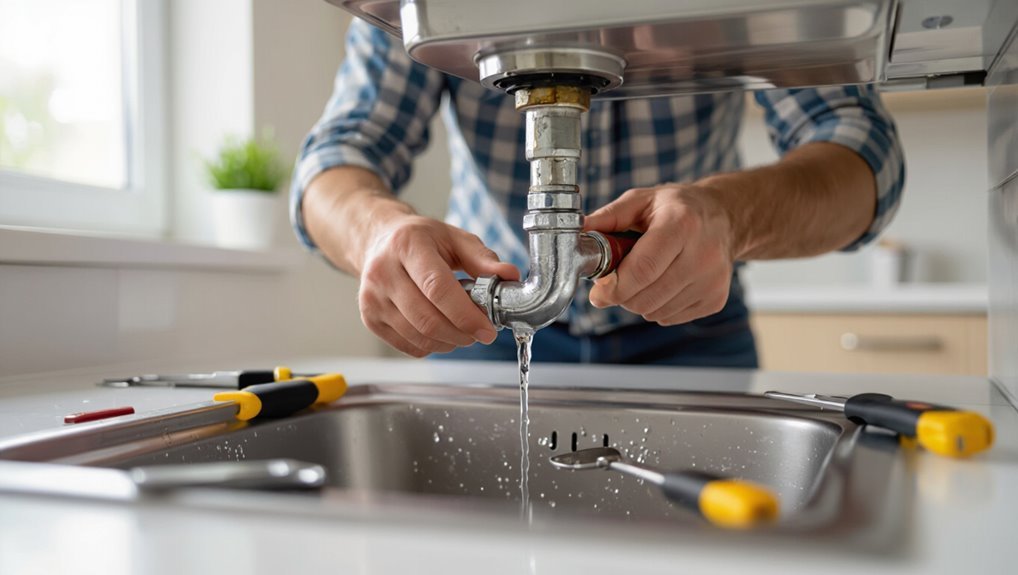
Repairs of leaking galvanized pipe often stem from corrosion, loose fittings, or physical damage, and identifying the root cause guides the fix.
Typical signs include damp spots, reduced water pressure, and visible rust or mineral buildup, with pressure testing or visual inspection used to confirm the source.
Small, accessible leaks may be suitable for DIY patching, but extensive corrosion, leaks at joints, or hidden damage usually require a professional plumber.
Common causes of leaks in galvanized piping
Understanding why galvanized pipes leak helps set realistic expectations for repair.
Corrosion from internal rusting and zinc coating breakdown is primary; mineral buildup causes pressure and erosion at joints.
Mechanical stress, vibration, and freeze‑thaw cycles produce cracks.
Poor installation, aged threaded connections, and corrosive water chemistry accelerate failure.
Recognizing causes informs how to fix leak in galvanized pipe and choose appropriate repair or replacement.
Typical signs of a leak and how to confirm the source
When a galvanized pipe begins to leak, visible clues and subtle signs both point to the problem: damp spots or rust stains on walls and ceilings, dripping sounds behind fixtures, reduced water pressure, and unexplained damp odors in enclosed areas.
Confirmation requires isolating sections, inspecting joints and seams, drying surfaces, then observing for fresh moisture; using a moisture meter or food coloring tests helps pinpoint active leaks.
When to call a professional vs. DIY suitability
How serious is the leak and how complex the piping determines whether a homeowner should tackle the job or call a professional.
Small pinhole leaks, accessible sections, and basic thread repairs suit confident DIYers with proper tools.
Major corrosion, hidden lines, sewage contamination, pressure issues, or structural risks warrant licensed plumbers.
Cost, warranty, and local codes also influence the decision to hire professional help.
Safety and Preparation Before Starting Repairs
Before beginning any repair on a galvanized pipe, the writer outlines the essential safety gear and precautions alongside a concise tools and materials checklist.
They explain how to shut off the water supply, relieve system pressure safely, and secure surrounding areas and fixtures to prevent collateral damage.
This preparatory guidance guarantees the work proceeds methodically and minimizes risk to people and property.
Required safety gear and precautions
Don appropriate personal protective equipment and isolate the work area to reduce risk: safety goggles to protect against flying debris and chemicals, chemical-resistant gloves for handling cleaners and sealants, a respirator if working in confined or poorly ventilated spaces, and sturdy footwear to prevent slips.
Confirm water and power are shut off, ventilate the area, use adequate lighting, keep bystanders away, and follow manufacturer safety instructions.
Tools and materials checklist
With safety measures in place and the work area isolated, a clear list of tools and materials helps confirm the repair proceeds smoothly.
A concise checklist prevents delays and assures correct parts are on hand before work begins.
- Pipe cutter or hacksaw, emery cloth, and wire brush
- Replacement fittings, coupling, or patch kit plus appropriate sealant
- Adjustable wrench, plumber’s tape, rags, and bucket
How to shut off water and relieve pressure safely
One clear step is to locate and fully close the building’s main shutoff valve to stop water flow to the affected section.
Next, open nearby faucets and the highest and lowest fixtures to drain residual water.
Relieve trapped pressure by loosening a hose bib or using an assigned bleed/pressure-relief valve.
Verify no flow with a water meter or by checking faucets before beginning repairs.
Protecting surrounding areas and fixtures
After shutting off the main valve and draining lines, the work area should be prepared to prevent water damage and protect fixtures.
Remove nearby linens and electronics, cover floors and appliances with waterproof tarps, and shield sinks and counters with plastic.
Turn off nearby electrical circuits if water exposure is possible.
Use buckets and absorbent towels to contain residual drips and keep pathways clear for tools.
Quick Temporary Fixes to Stop Active Leaks
For immediate control of an active leak, common temporary solutions include wrapping the joint with pipe repair tape or molding epoxy putty over the breach to harden into a seal.
Small pinhole leaks can also be restrained by placing a rubber patch over the hole and securing it with a hose clamp or pipe repair clamp.
These fixes are meant as short-term measures—acceptable for emergency stops or until professional repairs can be made—and their longevity typically ranges from days to months depending on pressure, corrosion, and application quality.
Using pipe repair tape and epoxy putty
Temporarily stopping an active leak in a galvanized pipe can often be achieved quickly with pipe repair tape or epoxy putty.
The pipe must be cleaned and dried; corrosion scale removed where possible.
For tape, wrap tightly overlapping, extending beyond the leak.
For epoxy putty, knead to uniform color, press onto the defect, and allow full cure before restoring pressure.
Clamping with rubber and hose clamp
Clamp a piece of rubber over the leak and secure it with a hose clamp to create a fast, effective stopgap on galvanized pipe leaks.
Clean and dry the area, cut rubber from an old hose or rubber sheet, center over the breach, then tighten a stainless steel hose clamp firmly.
Monitor for seepage and replace with a permanent repair promptly.
When temporary repairs are acceptable and how long they last
When is a quick temporary fix acceptable, and how long can it be expected to hold?
Temporary fixes suit emergencies: stopping active leaks until permanent repair or replacement.
Expect durations from hours to several months depending on leak size, water pressure, material condition, and repair quality.
Use them only to prevent damage, shut off supply when possible, and schedule professional replacement promptly.
Permanent Repair Options for Galvanized Pipe Leaks
Permanent repairs for galvanized pipe leaks range from replacing a short section with threaded fittings to using purpose-made couplings or slip repair couplings for confined spots.
The choice between soldered or brazed joints and mechanical connections depends on pipe material, access, and long-term reliability.
Full replacement of runs becomes necessary when corrosion is widespread or when repeated repairs are impractical.
Replacing a short section of pipe with threaded fittings
Remove the damaged segment and install threaded fittings to replace a short length of galvanized pipe when corrosion, cracks, or multiple small leaks make patching impractical.
Cut out the bad section, prepare pipe ends, apply thread sealant or tape, and thread on galvanized or compatible fittings and a replacement nipple.
Tighten securely, check alignment, and pressure-test for leaks before restoring service.
Using coupling or slip repair coupling
Use a coupling or a slip repair coupling to join existing galvanized pipe ends or to encase a short damaged section without cutting out fittings.
Select correct diameter and material compatible with galvanized pipe. Clean threads and pipe, apply approved thread sealant or tape, and tighten to manufacturer torque.
Slip couplings slide over damage for a permanent, pressure-rated repair when threads or space prevent standard coupling installation.
Soldered or brazed repairs vs. mechanical connections
Although soldering and brazing can create leak-free joints on steel-based galvanized pipe, they require different heat, preparation, and skill levels compared with mechanical connections.
Brazing needs higher temperature and flux removal; soldering demands clean surfaces and proper filler alloy.
Mechanical fittings (couplings, compression, push-fit) offer quicker, lower-skill installation and easier future service.
Choice depends on access, durability, and available tools.
Replacing entire runs: when it’s necessary
When soldering, brazing, or installing mechanical fittings repeatedly fail to provide reliable service, full-run replacement becomes the prudent choice.
Entire-run replacement is warranted for widespread corrosion, multiple leaks, diminished flow, or when galvanized pipe reaches end of useful life.
It eliminates hidden failures, restores capacity, and enables modern materials (copper, PEX, CPVC).
Consider cost, access, and code requirements before proceeding.
Step-by-Step Guide: Cutting Out and Replacing a Damaged Section
The procedure begins with locating and clearly marking the failed section so removal can be precise.
Next, proper cutting tools and safe techniques are used to remove the damaged pipe, followed by cleaning and preparing the exposed ends to remove corrosion.
Finally, appropriate new fittings and pipe sections—installed with either threaded or compression methods—are secured and the repair is pressure-tested to confirm a leak-free connection.
Locating and marking the failed section
Before cutting, pinpoint the exact failed section by inspecting for visible corrosion, seepage stains, and dampness while surrounding fixtures are dry.
Confirm leak location by feeling for cold or wet spots and by drying the area then observing recurrence.
Measure and mark pipe ends to remove, allowing for fittings and overlap.
Label orientation and nearby connections to guarantee correct replacement alignment.
How to cut galvanized pipe safely (tools and technique)
Once the failed section is marked and orientation noted, attention shifts to cutting the galvanized pipe with the right tools and a safety-first technique.
Recommended tools include a pipe cutter for clean cuts, a hacksaw with a fine-tooth blade, or a reciprocating saw for confined spaces.
Wear eye protection, gloves, and dust mask; secure pipe in a vise; cut slowly, keeping strokes steady to avoid burrs.
Preparing pipe ends and removing corrosion
Prepare the pipe ends by removing any remaining threads, burrs, and loose galvanic scale so fittings will seat and seals will hold.
Next, use a wire brush or rotary tool to clean to bright metal, then degrease with solvent.
Measure and mark square cuts, deburr edges with a file or reamer, and inspect for pitting; replace sections if corrosion compromises wall thickness.
Installing new fittings and pipe sections (threaded and compression methods)
Cut out the damaged section and dry-fit the new components to confirm alignment and proper thread engagement before final assembly.
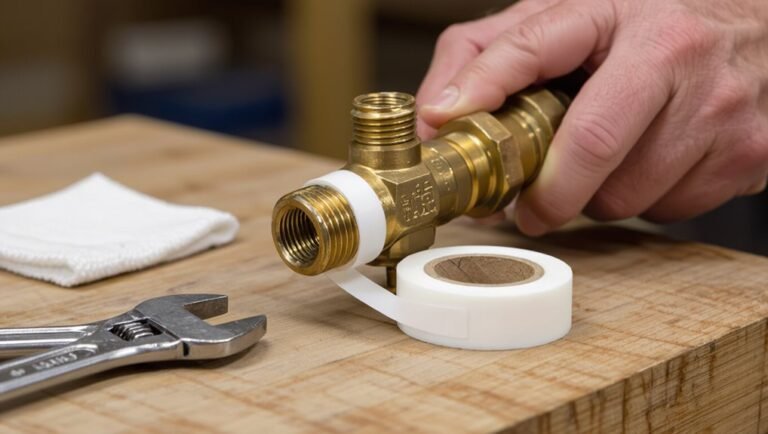
For threaded joints, apply pipe thread sealant or PTFE tape on male threads, hand-tighten, then wrench-tighten one to two turns.
For compression fittings, slide ferrule and nut, seat the ferrule, and tighten per manufacturer torque.
Recheck alignment and clearance before finishing.
Pressure-testing the repaired section
After the new fittings and pipe section are hand- and wrench-tightened and alignment verified, pressure-testing confirms the repair holds under working conditions.
Isolate the segment, slowly pressurize with water or air to recommended system pressure, monitor gauges for 10–15 minutes, and inspect all joints for seepage.
Depressurize gradually, recheck fittings, and document results before restoring full service.
Converting from Galvanized to Modern Materials
When replacing galvanized pipe, the homeowner should weigh the pros and cons of copper, PEX, and CPVC—considering corrosion resistance, flexibility, installation ease, and compatibility with existing lines.
Typical conversion methods and fittings include threaded adapters, dielectric unions, and push-fit or crimp connections for shifting between metals and plastics.
Cost, expected lifespan, and local code requirements determine the most practical choice for a long-term repair.
Pros and cons of converting to copper, PEX, or CPVC
Homeowners considering an upgrade from galvanized pipe should weigh the relative advantages and drawbacks of copper, PEX, and CPVC to determine the best long-term choice for their system. Copper: durable, costly. PEX: flexible, fewer fittings. CPVC: affordable, rigid. Consider water quality, heat tolerance, installation complexity, and lifespan when selecting materials for replacement.
| Material | Key trait |
|---|---|
| Copper | Durable, expensive |
| PEX | Flexible, fewer joints |
| CPVC | Inexpensive, rigid |
Typical conversion methods and fittings for transition
Begin by identifying the sections of galvanized pipe to be replaced and the points where new material will tie into the existing system.
Typical conversion methods include cutting back to a clean, accessible run of pipe and using connecting fittings—such as dielectric unions, threaded adapters, sharkbite push-fit connectors, or copper-to-PEX crimp and push-fit couplers—to join galvanized to copper, PEX, or CPVC while addressing galvanic corrosion, differing diameters, and thread types.
After cutting, deburr, test fit, and secure appropriate adapters.
Cost and longevity considerations
After outlining where to cut back and which fittings will join galvanized pipe to copper, PEX, or CPVC, the next consideration is the comparative cost and expected service life of each replacement option.
Copper is pricier but durable (50+ years).
PEX offers low material and labor costs with 25–40 years expectancy.
CPVC is mid-priced, resistant to corrosion, typically lasting 25–40 years in residential use.
Corrosion, Pipe Age, and Hidden Problems to Watch For
Internal corrosion and advancing pipe age can limit repair options, since pitting and scale buildup weaken metal and may make clamps or patches ineffective.
Inspectors should check for wall thinning and hairline cracks using visual inspection, probing, or simple pressure tests before committing to a fix.
DIYers must watch for concealed deterioration, brittle fittings, and nearby corrosion that can turn a small repair into a larger replacement job.
How internal corrosion affects repair choices
Evaluating internal corrosion is central to choosing an effective repair because the extent of pitting, scale buildup, and wall thinning determines whether a patch, sleeve, or full replacement is appropriate.
Corrosion limited to localized pits often suits clamps or epoxy. Extensive scaling or widespread thinning favors replacement.
Age, previous repairs, and junction integrity influence durability expectations and cost-benefit assessments for homeowners.
Detecting pipe wall thinning and hairline cracks
Detecting wall thinning and hairline cracks requires careful inspection because these conditions often progress silently until leaks appear.
Visual checks for rust patterns, pitting, and discolored water help identify suspect areas. Use a flashlight, magnifier, and gentle tapping to find hollow sounds.
Measure wall thickness with calipers or ultrasonic testers where possible. Prioritize sections near joints, bends, and high-stress fittings.
Common complications during DIY repairs and how to handle them
Expect several complications when attempting DIY repairs on galvanized pipe: active corrosion can undermine patching materials, advanced pipe age increases brittleness and joint failure risk, and hidden issues such as internal scaling, unseen hairline fractures, or compromised fittings often surface once work begins.
Address by inspecting with borescopes, pressure-testing repaired sections, replacing severely corroded runs, using compatible fittings, and consulting a plumber for structural uncertainty.
Maintenance and Prevention After Repair
After a repair, the article recommends routine inspections of the patched area and surrounding joints to detect leaks or renewed corrosion early.
It also outlines simple water-quality measures—such as checking pH and minimizing dissolved oxygen—and treatment options that slow future galvanic and chemical corrosion.
Guidance is provided on signs and timelines that warrant professional inspection or full pipe replacement.
Inspecting repaired areas regularly
Regular inspections of repaired galvanized pipe areas help guarantee patch integrity and catch early signs of failure before they escalate.
Homeowners should visually examine fittings, joints, and surrounding surfaces for moisture, rust, or stains every few months.
Promptly address loose clamps, shrinking tape, or new corrosion.
Document findings, photograph changes, and schedule professional evaluation if leaks recur or structural concerns appear.
Water quality and corrosion prevention tips
Inspecting repaired areas should also prompt consideration of water quality, since aggressive water chemistry accelerates galvanic and uniform corrosion and can undermine repairs.
Homeowners should test pH, hardness, and chloride levels, install neutralizing or softening systems if needed, and flush lines after repairs.
Use dielectric unions between dissimilar metals and maintain sacrificial anodes or corrosion inhibitors to prolong galvanized pipe life.
When to schedule professional inspection or replacement
A homeowner’s judgment should be guided by visible symptoms and system history: schedule a professional inspection when leaks recur, water pressure drops, discolored or odorous water appears, or sections show extensive rust or thinning.
A plumber evaluates pipe integrity, recommends targeted repairs or full replacement, assesses lead or galvanic risks, estimates costs, and guarantees code compliance and long-term reliability beyond temporary homeowner fixes.
Estimated Costs, Timeframes, and When a Pro Is Cheaper
Typical DIY repairs on galvanized pipe—such as patching small pinholes or replacing short sections with coupling fittings—usually cost under $50–$200 in parts and can be completed in an hour or two by a moderately skilled homeowner.
Extensive corrosion, multiple leaks, or repeated failures often indicate that professional assessment or full repiping will be more cost-effective long term due to labor, materials, and warranty factors.
Homeowners should compare estimated DIY time and parts costs against contractor quotes when leaks are widespread, access is difficult, or water damage is already significant.
Typical DIY costs and time for common repairs
Frequently, homeowners can estimate DIY repairs on galvanized pipe by grouping fixes into quick patches, moderate replacements, and full-section swaps; each carries distinct cost and time expectations that guide whether to proceed alone or hire a pro.
Typical DIY examples:
- Quick patch: epoxy or clamp, $10–$50, 30–90 minutes.
- Moderate replace: short pipe/connector, $30–$150, 1–3 hours.
- Full-section swap: fittings and pipe, $100–$400, half to full day.
Signs that a professional service or repiping is the better financial choice
After outlining common DIY cost and time brackets, it becomes clear when spending on professional help or full repiping is the smarter financial move.
Indicators include widespread corrosion, recurring leaks, reduced water pressure, and multiple patch failures.
Professionals estimate repiping at $2,000–$8,000 and complete jobs take one to several days; long-term savings and warranty protection often outweigh repeated DIY fixes.
Troubleshooting Common Repair Failures
Temporary patches often fail because they mask corrosion, movement, or pressure issues and require reinforcement with proper clamps or sleeves.
Persistent leaks at threaded joints usually indicate damaged threads or insufficient sealant and call for rethreading, fresh tape/compound, or replacement fittings.
If leaks continue after part replacement, underlying causes such as poor alignment, hidden corrosion, or system pressure problems should be investigated.
Why temporary fixes fail and how to reinforce them
Leaks patched with tape, epoxy putty, or hose clamps often reopen because those fixes address symptoms rather than underlying causes.
Corroded metal, pinhole progression, and joint movement undermine adhesives and compression.
Temporary repairs can be reinforced by cleaning corrosion, smoothing edges, applying corrosion-inhibiting primer, and using a properly sized clamp or sleeve over a cured patch.
Monitor and plan permanent replacement when deterioration continues.
Sealing threaded joints that keep leaking
Diagnose the cause before reapplying sealant: threaded joints that continue to weep usually suffer from damaged threads, inadequate thread compound, mismatched thread types, or movement-induced loosening.
Inspect threads, clean corrosion, and replace or re-cut damaged sections.
Use appropriate PTFE tape or pipe dope rated for galvanized steel, wrap tape correctly, torque fittings to spec, and secure pipes to minimize vibration and settlement.
Handling persistent leaks after replacement
When a recently replaced section of galvanized pipe continues to leak, systematic troubleshooting is required to identify overlooked failures such as improper fittings, hidden corrosion, incompatible materials, or installation errors.
Inspect joints, fittings, and surrounding pipe for hairline cracks, pinhole corrosion, or poor seals.
Verify material compatibility, correct thread use, and adequate support.
Pressure-test the run, isolate segments, and replace any defective components with proper techniques.
Resources and Checklists for Homeowners
A concise set of printable step-by-step checklists helps homeowners follow safe, consistent procedures when repairing galvanized pipe leaks.
An accompanying shopping list of suggested parts and tools guarantees the right materials are on hand before work begins.
Clear instructions for documenting repairs — including dates, parts used, receipts, and photos — support warranty claims and add value for future resale.
Printable step-by-step repair checklist
Begin by gathering essential tools and materials—pipe cutter, wire brush, emery cloth, corrosion-inhibiting primer, pipe repair clamp or epoxy kit, thread sealant tape, replacement fittings, and safety gear—so the repair can proceed without interruptions.
A concise printable checklist outlines steps, safety, verification, and cleanup for efficient execution.
- Isolate water and drain system
- Prepare pipe and apply repair
- Test, monitor, and document completion
Suggested parts and tools shopping list
Essential items for a galvanized pipe repair are organized into categories—safety, preparation, cutting and joining, sealing, and testing—so homeowners can shop efficiently and avoid repeat trips.
Recommended parts and tools include gloves, cutting tools, fittings, sealants, and pressure-test gear. Verify sizes and thread types before purchase.
- PPE, sandpaper, pipe cutter
- Galvanized fittings, replacement pipe, coupling
- Thread sealant, pipe dope, pressure gauge
How to document repairs for warranty or resale purposes
After completing the repair and assembling the purchased parts, homeowners should compile clear documentation that supports warranty claims and enhances resale value.
Include dated photos before, during, and after repair; receipts and part numbers; manufacturer warranties; contractor licenses or certifications if used; a concise repair summary with methods and materials; and contact information.
Store copies digitally and in hard copy for prospective buyers or insurers.
Conclusion
The leaking galvanized pipe, mended by hand, becomes more than metal and sealant; it is a repaired bridge over rushing uncertainty. Each tightened joint and soldered seam stands as a small, steady dam against intrusion, symbolizing care that halts slow decay. Homeowners who learn these repairs transform vulnerability into stewardship, turning drips into lessons and pipes into quiet proofs that attention, skill, and patience can reroute ruin toward continued shelter and trust.