How to Restart Water Heater: Step-by-Step Guide for Gas & Electric Models
To restart your water heater, first determine if it’s a gas or electric model. For both types, ensure safety by turning off power or gas, and shutting off the water supply. Inspect for any leaks, unusual odors, or damaged wiring. For gas models, follow the manufacturer’s instructions to relight the pilot light and check the burner. For electric models, reset the high-limit switch and circuit breakers, and test the heating elements if necessary. After restarting, monitor for leaks, odors, and confirm the water reaches the desired temperature. Follow detailed step-by-step procedures, troubleshooting tips, and safety precautions for a successful restart.
How to Restart a Water Heater: Quick Overview
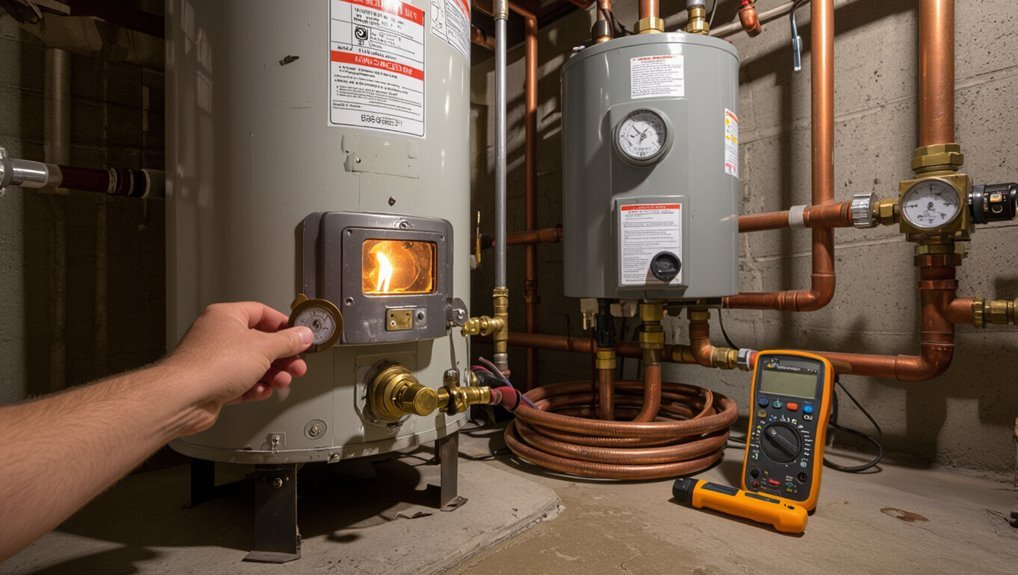
A brief restart may be needed when the heater trips after a power outage, produces no hot water, or shows error indicators.
Before attempting a restart, power and gas should be shut off and the area checked for leaks, corrosion, or burnt wiring.
Following basic safety steps and manufacturer instructions reduces the risk of injury or appliance damage.
When and why you might need to restart your water heater
When should a water heater be restarted, and what signs indicate it’s necessary? A restart is warranted after power failure, pilot outage, recent repair, or persistent temperature fluctuations.
Other indicators include strange noises, no hot water, or error codes. Knowing how to restart a water heater helps restore service quickly, prevent sediment issues, and confirm faults before scheduling professional diagnosis.
Safety first essential precautions before restarting
Because restarting a water heater involves electricity, gas, and hot water hazards, safety checks must come first to protect people and property.
Verify power or gas supply is off, confirm no gas odor, ventilate the area, and shut off the water supply.
Inspect valves, wiring, and pilot components for damage.
Wear protective gear, keep ignition sources away, and consult a professional if unsure.
Identify Your Water Heater Type and Components
Before attempting a restart, the reader should confirm whether the unit is gas or electric, since each type uses different controls and safety steps.
For gas heaters, locate the pilot, gas valve, thermostat, and burner access; for electric models, identify the breaker, access panels, heating elements, and thermostat.
Knowing these components ahead of time streamlines troubleshooting and reduces risk.
Differences between gas and electric water heaters
Although both heat water for household use, gas and electric water heaters differ in heat source, components, and operation: gas units rely on a burner, flue, and pilot or ignition system, while electric models use one or two immersion heating elements and thermostats.
These distinctions affect installation, efficiency, maintenance, and safety considerations when identifying the appliance. Gas units require venting and fuel lines; electric units need sufficient electrical capacity and separate element access.
Key parts to locate on gas models (pilot, gas valve, thermostat, burner access)
On a gas water heater, several visible controls and access points identify its key components: the pilot assembly and ignition control, the gas shutoff valve, the thermostat or temperature dial, and the burner access panel with its combustion chamber and flue connection.
The pilot is near the burner; the gas valve often sits on the control knob; the thermostat is usually labeled; the access panel lifts for burner inspection.
Key parts to locate on electric models (breaker, access panels, heating elements, thermostat)
An electric water heater’s key components are typically visible behind metal access panels and at the electrical panel: the circuit breaker that supplies power, one or two thermostats and their temperature dials mounted on the tank, and the removable access covers that hide the upper and lower heating elements.
Locate the breaker, remove panels safely, note thermostat settings, and identify element terminals for testing or replacement.
Tools and Materials You May Need
A concise set of tools and safety gear helps guarantee a safe, efficient restart of a water heater.
The list below highlights common items typically needed for electrical checks, minor adjustments, and personal protection. Selecting the right tools beforehand reduces delays and risk.
- Multimeter for voltage and continuity testing
- Screwdrivers (flathead and Phillips) and an adjustable wrench
- Flashlight or work light for clear visibility in tight spaces
- Safety gloves and safety glasses for personal protection
Basic tools (multimeter, screwdriver, flashlight, adjustable wrench)
Essential tools for restarting a water heater include a multimeter for verifying electrical power and continuity, a flat- or Phillips-head screwdriver for access panels and terminal screws, a flashlight to illuminate cramped, dim basements or closets, and an adjustable wrench for loosening or tightening plumbing connections.
These tools enable safe diagnosis, secure electrical checks, and proper handling of fittings when performing restarts or minor adjustments.
Safety gear (gloves, safety glasses, work light)
Protective gear protects the technician from common hazards when restarting a water heater.
Gloves prevent burns and cuts when handling hot components or sharp edges. Safety glasses shield eyes from splashes, debris, or sudden steam release. A reliable work light guarantees clear visibility in cramped, dim utility spaces.
Choosing durable, insulated gloves and impact-rated eyewear reduces risk during inspection and restart.
Prepare the Unit Before Restarting
Before restarting, power or gas to the water heater should be turned off according to safety procedures.
The water supply may need to be shut off and system pressure relieved if the model requires it.
A quick inspection for leaks, corrosion, or visible damage helps identify issues that must be addressed first.
Turn off power or gas supply safely
Shut off electrical power or the gas supply to the water heater before any work begins to eliminate the risk of electrocution, fire, or gas leaks.
For electric units, switch off the breaker at the panel and verify power is off with a noncontact tester.
For gas units, turn the gas valve to “off” and confirm the pilot is extinguished; follow local codes for gas handling.
Shut off water supply and relieve pressure if required
Close the cold-water supply valve to isolate the tank and open a nearby hot faucet to release pressure; if the unit has a separate drain valve and the system is under high pressure, briefly open the drain into a bucket or hose to relieve remaining water and reduce risk when servicing.
Verify faucets run until flow slows, then close the faucet. Confirm valves operate smoothly before proceeding.
Check for leaks, corrosion, or obvious damage
Inspect the tank, connections, and surrounding area for leaks, corrosion, dents, or other visible damage that could compromise safe operation.
Note any dripping, rust flakes, bulges, or loose fittings.
Check the T&P valve, inlet/outlet pipes, and gas line/wiring routes.
If defects are found, do not restart; isolate the unit and contact a qualified technician for repair or replacement before proceeding.
Step-by-Step Restart for Gas Water Heaters
Before restarting a gas water heater, the technician confirms the gas supply is off and the area is well ventilated.
They then follow a clear sequence: relight the pilot light using manufacturer instructions, reset the gas control and thermostat, and observe burner ignition and stable operation.
If the pilot will not light, the burner fails to sustain, or there are signs of gas odor or combustion issues, a professional should be contacted.
Confirm gas is off and the area is ventilated
Make certain all gas supplies are shut off and the surrounding space is well ventilated before proceeding.
Verify the gas valve is fully closed and confirm no odor of gas. Open windows and doors, and use fans if needed to disperse lingering fumes.
Keep ignition sources and electrical switches inactive. If a persistent smell exists, evacuate the area and contact the gas utility or emergency services immediately.
Relighting the pilot light detailed steps
One clear set of steps guides relighting the pilot on a gas water heater to restore safe operation.
The procedure: guarantee gas remains off briefly, open access panel, turn control to “pilot,” depress and hold the pilot button while igniting with a long lighter or built‑in igniter, continue holding for 30–60 seconds after flame stabilizes, release slowly, then set control to “on” and monitor.
Resetting the gas control and thermostat settings
After relighting the pilot, reset the gas control and thermostat to guarantee the burner operates at the correct temperature and safety settings.
Set the thermostat to the manufacturer-recommended temperature (typically 120°F).
Return the gas control from “Pilot” to “On.”
Confirm safety features like the high-limit reset are not tripped; if tripped, follow manufacturer instructions to reset.
Recheck tightness of control knobs.
Verifying burner ignition and stable operation
Confirm burner ignition and stable operation by observing the pilot flame, main burner light, and system indicators immediately after setting the gas control to “On.”
The pilot should produce a steady, blue flame that envelops the thermocouple; when the thermostat calls for heat the main burner should ignite promptly with an even blue flame and no excessive yellowing or soot.
Monitor for consistent cycling.
When to call a professional for gas units
When should a homeowner stop troubleshooting and contact a licensed technician?
If pilot light or ignition repeatedly fails, smells of gas, there is visible corrosion, unusual noises, persistent leaks, or the thermostat and gas valve appear faulty, a professional should be called.
Also seek help for suspected flue blockages, carbon monoxide alarms, or if safe ignition steps were followed without resolution.
Step-by-Step Restart for Electric Water Heaters
For electric water heaters, the restart process begins with confirming that power is shut off at the breaker before any work is done.
The procedure typically includes resetting the high-limit (reset) button and thermostats, inspecting and resetting the breaker or replacing blown fuses, and using a multimeter to test heating elements and thermostat continuity.
Once checks are complete and any faults addressed, power can be re‑energized and the unit monitored for proper initial operation.
Confirm electrical power is off at the breaker
Before any inspection or work on an electric water heater resumes, the circuit supplying the unit must be switched off at the breaker to eliminate the risk of electrocution and protect internal components from damage due to unexpected energizing.
Verify by turning the breaker fully off, lock or tag it if possible, and test with a noncontact voltage tester at the heater’s terminals to confirm absence of power.
Resetting the high-limit (reset) button and thermostats
Proceed to reset the water heater’s high-limit button and verify thermostat settings to restore safe operation.
After confirming power is off, press the red reset button on the upper thermostat until it clicks.
Inspect both thermostats for proper mounting and wiring.
Set temperatures to manufacturer-recommended levels (typically 120°F).
Restore power only after ensuring controls are secure and free of visible damage.
Checking and resetting circuit breaker or replacing blown fuses
With the high-limit reset and thermostats checked, attention shifts to the home’s electrical protection that serves the water heater.
Inspect the main panel for a tripped breaker or blown fuse dedicated to the heater.
Turn the breaker fully off, wait a few seconds, then back on; replace blown fuses with identical rating.
If trips repeat, leave power off and consult a qualified electrician.
Using a multimeter to test elements and thermostats
Using a multimeter provides a quick, reliable way to verify whether an electric water heater’s heating elements and thermostats are functioning or have failed.
After disconnecting power and accessing panels, measure element continuity and resistance against manufacturer specs; test thermostats for continuity at set temperatures and between terminals.
Record readings, compare to expected values, and replace any component showing open circuits or out-of-range resistance.
Re-energizing the unit and monitoring initial operation
Restore power to the tank only after confirming all access panels are secured, wiring is correctly reconnected, and the thermostat and element replacements meet specifications.
Then re-engage the circuit breaker or reconnect the fused disconnect to energize the unit.
Observe startup: listen for unusual noises, check for tripped breakers, verify indicator lights and thermostat response, and monitor for leaks.
Record temperature rise and recheck electrical connections if performance is abnormal.
Troubleshooting Common Restart Problems
When a water heater restart does not produce expected results, common mechanical, electrical, and fuel-related issues should be checked systematically. The following list highlights the most frequent failures and the practical checks or fixes a homeowner can attempt before calling a technician. Clear identification of symptoms—no heat, ignition trouble, electrical trips, noises, leaks, or uneven temperatures—speeds diagnosis and resolution.
- Confirm no hot water after restart: check power/gas supply, thermostat settings, and heating elements or thermocouple.
- For gas units where the pilot won’t stay lit or won’t ignite: inspect the pilot assembly, thermocouple, and gas valve; shut off and call a pro if gas smell is present.
- If a breaker is tripped or repeatedly resets on electric models: inspect the breaker, wiring, high-limit switch, and heating elements for shorts or ground faults.
- Investigate strange noises, smells, leaks, insufficient hot water, or temperature fluctuations by checking sediment build-up, pressure relief valve, tank integrity, and thermostat calibration.
No hot water after restart possible causes and fixes
Check common failure points systematically: if a water heater produces no hot water after a restart, electrical or gas supply, thermostat and heating elements, pilot light or ignition, sediment buildup, or a tripped safety device are the most likely culprits.
Verify power or gas is on, reset breakers/thermostats, test elements or thermocouple, flush sediment, and inspect high-limit switches.
Call a qualified technician if uncertainty remains.
Pilot won’t stay lit or won’t ignite (gas)
A pilot that won’t stay lit or won’t ignite prevents a gas water heater from producing hot water and typically points to issues with the gas supply, pilot assembly, thermocouple/thermopile, or ignition system.
Check that the gas valve is open, inspect and clean the pilot orifice and burner, verify thermocouple/thermopile alignment and replacement if faulty, and test the igniter or pilot button for proper operation.
Tripped breaker or repeated resets (electric)
Multiple causes can make an electric water heater trip its breaker or require frequent manual resets, interrupting hot water supply and signaling electrical faults.
Common reasons include a failed heating element shorting to ground, a bad high‑limit/thermal cutoff, loose or corroded wiring, or an undersized/aged breaker.
Recommend isolating power, inspecting elements and connections, testing continuity, and replacing faulty components or calling a licensed electrician.
Strange noises, smells, or leaks after restart
After addressing electrical trips and resets, unusual noises, odors, or leaks that appear once the unit is back online often indicate mechanical or thermal problems rather than purely electrical faults.
Rumbling or popping suggests sediment buildup; hissing or burning smells point to gas leaks or overheating—shut off fuel immediately.
Visible dripping or corrosion requires valve, tank, or pipe inspection and prompt professional repair to prevent damage or hazards.
Insufficient hot water or temperature fluctuations
Check for basic causes when hot water runs out quickly or temperatures swing unpredictably; these symptoms commonly stem from thermostat missettings, a failing heating element or burner, sediment insulation in the tank, or demand exceeding capacity.
Inspect thermostat settings, test elements or thermocouples, flush sediment, and verify dip tube integrity.
For undersized units, stagger usage or consider a larger tank or tankless upgrade.
Comparison of Gas vs Electric Restart Risks and Considerations
When comparing gas and electric water heater restarts, attention centers on different safety risks, common failure causes by model, and the relative cost and complexity of repairs. The following quick table highlights key contrasts to guide troubleshooting and decision-making. Readers can use these points to determine whether a simple reset suffices or professional service is warranted.
| Topic | Gas Heaters | Electric Heaters |
|---|---|---|
| Safety Risks | Combustion, gas leaks, CO | Electrical shock, element overheating |
| Typical Restart Failures | Pilot outage, thermocouple, gas valve | Tripped breaker, failed element, high-limit switch |
| Repair Complexity | Often requires certified technician | Usually simpler DIY or electrician |
| Cost Consideration | Higher due to gas-line/safety work | Generally lower parts/labor cost |
Safety risks by fuel type
Although both gas and electric water heaters serve the same basic function, each fuel type introduces distinct safety risks during restart procedures that affect ventilation, ignition control, and electrical isolation.
Gas units risk gas leaks, improper venting, and pilot/ignition malfunctions causing fire or carbon monoxide.
Electric units pose shock and burned element hazards if power isn’t isolated.
Both require proper verification before restarting.
Typical causes of restart failure by model
Compare gas and electric water heaters by noting that model-specific design differences—such as pilot assemblies, thermocouples, and venting paths on gas units versus thermostats, heating elements, and wiring layouts on electric units—drive the most common restart failures.
Gas units often fail from ignition, gas valve, or venting issues; electric units typically fail due to tripped breakers, burned elements, or faulty thermostats and loose connections.
Cost and complexity of repairs for gas vs electric
Repair costs and complexity differ markedly between gas and electric water heaters because their fuel delivery, ignition or heating systems, and safety components require distinct trades, parts, and diagnostic steps.
Gas units often need plumber or gas technician work—venting, thermocouple, pilot assembly—raising labor and permitting costs.
Electric models usually involve simpler element or thermostat replacement but may require electrician service for wiring, breakers, or high-capacity elements.
Maintenance Steps to Reduce Future Restarts
Preventive maintenance can greatly reduce the need to restart a water heater by addressing common failure points before they escalate.
Routine tasks such as inspecting the tank, replacing sacrificial anode rods, verifying the pressure relief valve, and arranging periodic professional service keep the system reliable and efficient.
Homeowners who follow a simple maintenance schedule minimize emergency restarts and extend equipment life.
- Regular inspections and flushing the tank
- Replacing anode rods
- Checking the pressure relief valve
- Scheduling professional tune-ups
Regular inspections and flushing the tank
Establishing a routine of regular inspections and annual tank flushing greatly reduces the likelihood of sudden water heater failures by removing sediment, checking for corrosion, and verifying component function.
Technicians or homeowners should drain a portion of the tank to clear sludge, inspect fittings and insulation for leaks or wear, document findings, and schedule corrective actions promptly to maintain efficiency and extend service life.
Replacing anode rods, checking pressure relief valve
Inspect the anode rod and the temperature-and-pressure (T&P) relief valve at least annually to reduce corrosion-related failures and unsafe pressure buildup.
Replacing a depleted anode and verifying the T&P valve’s operation are simple maintenance steps that significantly decrease the likelihood of unexpected restarts.
Replace a heavily corroded anode, test the T&P by lifting its lever briefly, and replace a leaking or nonresetting valve.
Scheduling professional tune-ups
Schedule a professional tune-up at least once every 12 months to catch developing issues before they force an unexpected restart.
A qualified technician inspects burners, thermocouples, elements, wiring, vents and controls, tests safety devices, flushes sediment if needed, and verifies correct pressure and temperature settings.
Routine service extends appliance life, improves efficiency, prevents costly failures, and documents maintenance for warranty compliance.
Signs You Should Replace Rather Than Restart
Age, persistent efficiency loss, and repeated failures signal when replacement is wiser than restarting a water heater.
A clear cost comparison between ongoing repairs and a new unit helps determine the financially sound option.
When repair bills approach or exceed replacement cost and performance keeps declining, replacement should be prioritized.
Age, efficiency loss, repeated failures
When a water heater approaches the end of its expected service life, diminished performance and recurring breakdowns are clear indicators that replacement is wiser than repeated restarts.
Persistent issues like rusty water, inadequate hot supply, or frequent pilot outages signal internal wear, sediment buildup, or failing components that simple resets cannot resolve.
Repeated failures, rising energy use, and longer recovery times indicate irreversible decline requiring replacement.
Cost comparison: repair vs replacement
Although repairing a malfunctioning water heater can be less expensive upfront, a clear cost-comparison should account for long-term expenses: multiple part replacements, rising energy bills from declining efficiency, and labor for recurring service visits can quickly exceed the price of a new unit with a warranty and modern efficiency.
Calculate cumulative repair costs, projected energy savings, and downtime; replace when repair approaches 50–60% of replacement or reliability and safety are compromised.
Quick Safety Checklist After Restart
After restarting the water heater, the first priority is to confirm there is no gas odor and that vents and exhaust pathways are clear.
Next, electrical connections and circuit breaker stability should be checked to guarantee safe power delivery.
Finally, monitor the unit for leaks and normal operation over the first 24 hours to catch any emerging issues.
Confirming no gas smell and proper ventilation
If a water heater has just been restarted, the immediate priority is to verify there is no gas odor and that venting components are clear and functioning.
Inspect the area for sulfur or rotten-egg smells, check fittings and connections for leaks, guarantee the flue and vent pipe are unobstructed, and confirm combustion air openings are unobstructed.
Evacuate and call a professional if odor persists.
Checking electrical connections and breaker stability
With ventilation and gas safety confirmed, attention turns to the electrical side: verify that all visible wiring is intact, that terminal connections at the heater are tight and free of corrosion, and that the circuit breaker supplying the unit shows no signs of overheating, charring, or frequent trips.
If any issue is found—loose wires, burned insulation, tripped breaker—power should remain off and a qualified electrician consulted.
Monitoring for leaks and normal operation for first 24 hours
Begin monitoring the water heater immediately upon restart, observing the unit and surrounding area closely for the first 24 hours to catch leaks, unusual noises, or abnormal behavior.
Inspect fittings, valves, and drain pan hourly for visible water. Verify pressure and temperature remain stable.
Note any gas odors, hissing, or frequent cycling; shut off the unit and contact a professional if anomalies occur or persistent leaks appear.
Resources and When to Contact a Licensed Technician
If the heater emits gas smells, persistent leaks, humming electrical faults, or fails to light after attempts, a licensed technician should be called immediately.
Homeowners are advised to note exact symptoms, recent actions taken, error codes or pilot status, and timing of occurrences to help the technician diagnose the issue quickly.
Contact information for local licensed plumbers or gas-fitters and advice on shutting off power and gas should be kept handy for emergencies.
Emergency situations requiring immediate professional help
Certain situations demand immediate professional attention to prevent injury, property damage, or code violations; recognizing these red flags guarantees timely contact with a licensed technician.
Immediate help is required for gas odors, active leaks flooding floors, visible electrical arcing or sparking, pilot light failure with persistent gas smell, significant corrosion or tank rupture signs, and malfunctioning pressure-relief valves releasing water or steam.
How to describe the problem to a technician for faster diagnosis
After identifying red-flag conditions that require immediate service, homeowners should prepare a clear, concise description of the problem to expedite diagnosis when contacting a technician.
Include model, age, recent maintenance, exact symptoms (no hot water, leaks, noises), when issue began, error codes or pilot light status, water pressure and temperature behavior, and any troubleshooting steps already attempted.
Conclusion
To sum up, the guide enables a homeowner to restart gas or electric water heaters safely and confidently. Like a sailor trusting both sextant and smartphone, the reader blends old instincts with modern procedures to minimize risk and prolong service life. If simple restarts and routine maintenance fail, the article advises seeking a licensed technician. Ultimately, informed caution preserves comfort, prevents damage, and keeps hot water reliably available for daily life.