How to Repair a Boiler: Step-by-Step Guide for Common Faults and Safety Tips
Boiler Repair Guide: Quick Steps for Common Issues
This guide provides clear instructions for repairing common boiler faults. Before you begin, prioritize safety: isolate power and gas, shut off the water supply, vent any pressure, and wear appropriate personal protective equipment (PPE). Start with basic diagnostics—check the pressure, ignition, pump operation, look for leaks, inspect the condensate pipe, and note any error codes displayed.
Common fixes include thawing a frozen condensate pipe, repressurizing the system, bleeding radiators, replacing faulty valves or sensors, and testing for leaks or carbon monoxide. For gas-related issues, persistent faults, or PCB/electrical problems, it’s crucial to seek professional assistance. Continue reading for detailed procedures and guidance on necessary parts.
How to Repair a Boiler Safely and Effectively
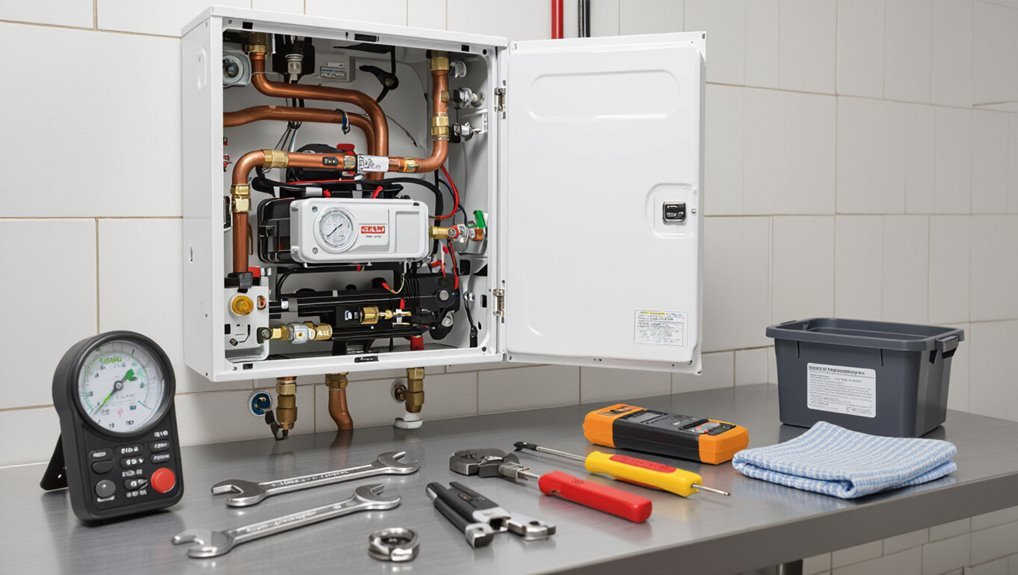
The section outlines common boiler faults and clear criteria for when a professional should be called, followed by a concise checklist of required tools, replacement parts, and personal protective equipment.
It then summarizes essential safety precautions to confirm before any repair begins, such as isolating power and gas and ensuring the system is depressurized.
Readers are guided to assess risk and defer to certified technicians for anything beyond basic maintenance.
Quick overview of common boiler faults and when to call a professional
Although many boiler issues start with simple, identifiable symptoms, some faults quickly indicate the need for professional intervention.
Common problems include no heat, strange noises, leaks, low pressure, and pilot failure.
Basic troubleshooting can show whether how to repair a boiler steps are possible safely, but persistent faults, gas smells, repeated breakdowns, or electrical concerns require a certified engineer.
Required tools, parts, and safety equipment checklist
Several essential tools, spare parts, and safety items are required before attempting boiler repairs to confirm efficiency and minimize risk.
A concise checklist verifies readiness and avoids delays. Typical items include:
- Adjustable wrench, pipe wrench, and screwdriver set
- Multimeter and pressure gauge
- Replacement seals, thermostats, and fuses
- Safety goggles, gloves, and a respirator for confined spaces
Basic safety precautions before starting any boiler repair
With tools, parts, and protective gear confirmed, attention shifts to safety steps that must be followed before any repair begins.
The technician isolates power and fuel, shuts water supply, vents residual pressure, and confirms cold surfaces. A permit or notification is obtained if required.
Proper lighting and ventilation are guaranteed, combustible materials removed, and a fire extinguisher is accessible before work starts.
Understanding Boiler Types and Components
The section outlines common domestic boiler types—combi, system, and heat-only—and how their designs affect repair approaches.
It then identifies key components (burner, heat exchanger, pump, expansion vessel, pressure relief valve, thermostat) and summarizes each part’s role in operation and failure modes.
Finally, it explains how to read typical boiler displays and error codes to diagnose faults efficiently.
Typical domestic boiler types (combi, system, heat-only)
Domestic boilers fall into three common configurations—combi, system, and heat-only—each designed to meet different household heating and hot-water needs. The combi supplies instant hot water; system uses a cylinder for multiple outlets; heat-only suits older setups with separate tanks. Choice depends on property size, hot-water demand, and pipework constraints.
| Type | Water source | Typical property |
|---|---|---|
| Combi | Instant | Small/medium |
| System | Cylinder | Medium/large |
| Heat-only | Tanks | Older houses |
Key boiler components and their function (burner, heat exchanger, pump, expansion vessel, pressure relief valve, thermostat)
A boiler is a compact system of interdependent parts that convert fuel into controlled heat and distribute it through a building; understanding each component clarifies how faults develop and where repairs should focus.
The burner ignites fuel, the heat exchanger transfers heat to water, the pump circulates flow, the expansion vessel accommodates pressure changes, the pressure relief valve prevents overpressure, and the thermostat controls temperature.
How to read and interpret boiler error codes and displays
How can a technician quickly decode a boiler’s display to pinpoint faults and prioritize repairs?
The technician consults the manufacturer code chart, noting numeric/alphanumeric codes, LED patterns, and status icons.
Interpretation links codes to subsystems: ignition, pressure, flow, sensor faults.
Documented reset procedures and safety interlocks guide next steps.
Log codes, timestamps, and actions for diagnostics and warranty records.
Diagnosing the Problem: Step-by-Step Troubleshooting Process
The technician begins by preparing the boiler for diagnosis: isolating electrical and gas supplies, ensuring safe venting, and performing a visual inspection.
He then checks boiler pressure and interprets readings, evaluates ignition and flame behavior, and looks for leaks or other water-related faults.
Finally, circulation is tested by examining the central heating pump and checking for blockages or flow problems.
Preparing the boiler for diagnosis (isolate power and gas, venting, visual inspection)
Before any diagnostic work begins, the boiler must be safely prepared: power and gas supplies are isolated, flues and vents are checked for clear passage, and a careful external visual inspection is completed to identify obvious damage or leaks.
Protective gear is worn, condensate and drain routes are verified, labels note disconnected circuits, and photographs document conditions before further testing or service.
Checking boiler pressure and interpreting readings
With power and gas isolated and the exterior condition documented, attention shifts to the boiler’s internal operating pressure, a key indicator of system health.
The technician reads the pressure gauge or digital display, compares values to manufacturer specifications (typically 1–1.5 bar cold, 1.5–2.5 bar hot), notes fluctuations, checks expansion vessel and pressure relief components, and logs anomalies for targeted repairs.
Assessing ignition and flame issues
When ignition fails or the flame behaves erratically, a systematic assessment isolates electrical, fuel, and combustion causes by observing ignition sequence, spark or glow status, flame presence and quality, error codes, and safety interlocks.
The technician documents each step—attempted ignition, control board responses, gas valve action, electrode condition, and flame sensing signal—to pinpoint faults and decide whether cleaning, adjustment, component replacement, or further testing is required.
Visual flame characteristics, sequencing anomalies, and sensor voltages guide targeted repairs.
Identifying leaks and water-related faults
Having ruled out ignition and flame defects, the technician turns attention to leaks and water-related faults, a common source of performance loss and safety hazards.
They inspect visible pipework, valves, and condensate drains for corrosion, drips, or pooling.
Pressure readings are checked for drops; expansion vessel integrity and relief valve operation are verified.
Any wet insulation or sludge prompts further investigation and targeted repairs.
Testing the central heating pump and circulation issues
Begin by isolating the central heating pump to assess circulation: check that the boiler is cool and power isolated.
Then listen for unusual noise, feel the pump casing for vibration or temperature anomalies, and confirm rotor movement by gently turning the shaft (after removing any cover) if safe to do so.
Inspect pipework for airlocks, bleed radiators, verify flow and return temperatures, and test pressure differential across the pump.
Evaluating thermostat, controls, and programmer faults
Assess the boiler’s controls systematically by isolating thermostat, programmer, and sensor functions to pinpoint whether fault lies in user settings, wiring, or component failure.
Check display errors and reset history, confirm correct time, mode and temperature settings, verify batteries and wiring continuity, and test sensor readings against actual temperatures.
Replace faulty modules or reprogram schedules only after confirming diagnosis.
Detecting frozen condensate pipe and clearing safely
If boiler controls and sensors are confirmed functional but the unit still fails to run or produces a cold appliance fault, attention should turn to the condensate pipe, which can freeze in cold weather and block safe drainage.
Inspect external pipework for ice, sagging or kinks.
Thaw frozen sections with warm (not boiling) water, a hairdryer or heat pack.
Restore insulation and check condensate flow; reset boiler.
When electrical faults or PCB failures are suspected
When electrical faults or a failed printed circuit board (PCB) are suspected, the technician shifts focus from mechanical and fluid checks to systematic electrical diagnostics to isolate the fault.
They safely isolate power, inspect wiring, connectors, fuses, and earth continuity.
Voltage and component tests follow with a multimeter.
Fault codes and PCB visual damage guide replacement decisions; only certified personnel handle live PCB repair or replacement.
Step-by-Step Repairs for Common Faults
The following section outlines practical, step-by-step repairs for frequent boiler faults, including safe methods to repressurize a boiler and to replace a faulty pressure relief valve with attention to safety precautions.
It also covers bleeding radiators to remove trapped air, diagnosing and fixing ignition failures (pilot light, spark, and gas supply checks), and restoring or replacing a blocked condensate trap and pipe.
Each procedure is presented with clear actions, necessary tools, and safety checks to guide a competent DIYer or to inform a discussion with a qualified technician.
How to repressurize a boiler safely
Begin by confirming the boiler is cold and isolated from the mains electricity and gas supply before attempting any work; this guarantees safety and prevents damage.
Check the pressure gauge (usually 1–1.5 bar cold).
Locate the filling loop, open valves slowly until pressure reaches specification, then close.
Bleed radiators if needed, recheck pressure, and restart the boiler following manufacturer instructions.
Replacing a faulty pressure relief valve (instructions and safety)
Replace the pressure relief valve only after isolating the boiler from gas and electricity, allowing it to cool, and draining enough water to reduce system pressure to zero.
The technician should wear protective gloves, verify no residual pressure, close isolation valves, remove the old valve, install a compatible replacement with correct sealing, torque to manufacturer specs, restore water, check for leaks, and test proper operation.
Bleeding radiators and removing trapped air from the system
Loosen a radiator bleed valve to release trapped air and restore even heating throughout the system.
Using a radiator key and a cloth, open the valve briefly until consistent water appears.
Work from lowest to highest radiators, check boiler pressure, top up via the filling loop if needed, then recheck pressure and test heating.
Repeat until circulation is smooth and noise-free.
Fixing ignition failures (pilot light, spark, gas supply checks)
After restoring proper circulation and confirming stable boiler pressure, attention shifts to ignition failures, which are a common cause of a boiler not firing.
Technicians check pilot light presence, reset electronic ignition, inspect spark electrode for wear or carbon, verify gas valve operation and supply pressure, and test flame detection sensors.
If components fail, replace parts per manufacturer specifications and retest for safe ignition.
Repairing or replacing the condensate trap and pipe
Begin by isolating the condensate system: shut off boiler power, close the condensate drain valve if present, and verify the condensate pump (if fitted) is disabled to prevent accidental discharge.
Inspect trap and pipe for blockages, freezing, cracks or corrosion. Remove and clean or replace the trap and short pipe sections with compatible, correctly sloped pipework.
Reassemble, test for leaks and restore power.
Replacing a failed pump or pump components
With the condensate system secured and inspected, attention shifts to the pump assembly when circulation or drainage issues persist.
Isolate electrical supply and close valves, drain system if needed. Remove pump, noting pipe orientation and seals.
Inspect impeller, shaft, motor bearings, and check for blockages or leaks.
Replace faulty components or entire unit, reinstall seals, restore valves, purge air and test under normal operating conditions.
Replacing thermostats, programmers, and sensors
Diagnose thermostat, programmer, and sensor faults methodically before replacing parts to guarantee the issue is isolated and the new components will solve it.
Isolate power, document wiring, and verify fault codes. Test continuity and signal voltages, then remove and fit compatible replacements.
Secure connections, restore power, program settings, and run system checks. Confirm stable temperature control and proper schedule operation.
Addressing small leaks: seals, joints, and flanges
Addressing small leaks around seals, joints, and flanges requires a systematic approach that isolates the leak source, verifies pressure and temperature conditions, and selects the appropriate repair method.
The technician drains and depressurizes the section, inspects gasket integrity, retightens bolts to specified torque, replaces degraded seals or flange gaskets, and applies approved sealants.
After reassembly, pressure-test and monitor for recurrence before returning to service.
When and how to replace a PCB or electrical components safely
When replacing a PCB or other electrical components, the technician follows a strict safety and verification sequence to prevent damage and guarantee reliable operation: isolate power, discharge capacitors, document wiring, and photograph connections.
Test for fault codes and confirm component compatibility.
Replace using anti-static precautions, secure mounting, correct torque, and proper connectors.
Reapply power, run diagnostics, and verify safe operation before leaving site.
Tests and Post-Repair Checks
After repairs are completed, the technician conducts leak and pressure stability tests to confirm the integrity of the system.
Flue and combustion safety checks, including CO measurement and ventilation assessment, are performed alongside system balancing and radiator heat-up verification.
Final electrical and gas safety verifications are completed before returning the boiler to service.
Leak testing and pressure stability checks
Begin by pressurizing the repaired boiler and connected system to the manufacturer’s recommended test pressure.
Then monitor all joints, valves, and fittings for visible leaks and audible hissing.
Record pressure readings and observe stability over a specified dwell period.
Check expansion vessel and pressure relief operation.
Address any drop or leak immediately, tighten or replace components, then repeat testing until pressure remains constant.
Flue and combustion safety checks (CO risk and ventilation)
While verifying system integrity, attention must shift to the flue and combustion safety to guarantee no carbon monoxide (CO) risk and adequate ventilation.
This involves visually inspecting the flueway and terminals, confirming correct flue draft and sealing, and checking combustion air paths for obstruction.
Measure CO levels at appliance and room, verify termination clearances, confirm fan and condensate disposal function, and document findings and corrective actions.
System balancing and radiator heat-up verification
With flue and combustion safety confirmed, the focus moves to system balancing and radiator heat-up verification to guarantee even heat distribution and proper operation.
Technicians bleed radiators, check TRV and lockshield positions, and adjust flow rates to eliminate cold spots.
Temperature differentials across the system are measured, pump speeds reviewed, and any persistent imbalances investigated before concluding post-repair testing.
Final electrical and gas safety verifications
A final suite of electrical and gas safety verifications confirms that all repairs have restored the boiler to safe, code-compliant operation.
A qualified technician performs insulation resistance, earth continuity and polarity checks, verifies burner ignition and flame stability, measures gas pressure and leak-tests connections, confirms appliance ventilation and carbon monoxide levels, and documents test results.
Any anomalies mandate corrective action before leaving the site.
Parts, Costs, and When to Replace the Boiler
Common repair items such as pumps, thermostats, and valves typically have modest parts costs and require one to three hours of labor, while more complex jobs like heat exchanger replacement can take a day and cost substantially more.
If repair expenses approach or exceed half the value of a modern replacement, failures are recurrent, or the unit is past its expected service life, repair may no longer be economical. In those cases a full boiler replacement should be considered, balancing upfront cost against improved efficiency, reliability, and warranty coverage.
Typical parts cost and labor time for common repairs
Several frequent boiler repairs have predictable parts and labor ranges that help homeowners weigh repair versus replacement. Typical items: thermostat, pump, valve, or heat exchanger vary widely. Estimated parts and hours guide decisions; labor rates differ by region.
| Repair | Parts ($) | Labor (hrs) |
|---|---|---|
| Pump | 100–300 | 1–2 |
| Valve | 50–150 | 0.5–1.5 |
| Heat exchanger | 400–1200 | 3–6 |
Signs a repair is no longer economical
Recognize when repair costs approach or exceed a substantial portion of a replacement: repairs totaling more than 50–60% of a new boiler’s price, repeated failures within a short period, or the need for major components such as the heat exchanger typically indicate replacement is more economical.
Age over 10–15 years, rising fuel bills, scarcity of parts, and frequent emergency visits further reduce repair value; tally costs versus expected remaining life.
When to consider full boiler replacement vs repair
Once repair costs approach a large fraction of a new unit and age or repeated failures cast doubt on future reliability, owners should compare component-level fixes to full replacement.
Consider remaining lifespan, warranty status, energy efficiency gains, and total lifecycle cost. Include labor, parts, and disposal fees.
Prioritize replacement when recurring repairs exceed 40–60% of a new boiler’s cost or efficiency improvements justify investment.
Preventive Maintenance and Long-Term Care
Preventive maintenance and long-term care keep a boiler safe and efficient, beginning with simple homeowner tasks such as checking pressure, bleeding radiators, and inspecting for leaks.
Regular professional service—typically annual for most systems, or more frequently for older or high-use units—addresses combustion, controls, and safety checks.
Attention to water treatment, corrosion prevention, and periodic system flushing prolongs component life and reduces repair needs.
Routine maintenance tasks homeowners can do
Perform simple annual and seasonal checks to keep a home boiler operating efficiently and to spot minor issues before they become costly repairs.
- Inspect for leaks, corrosion, and drips around valves and joints.
- Check pressure gauge and top up if below recommended range.
- Bleed radiators to remove trapped air and restore heat circulation.
- Keep vents, flues, and combustion areas clear of debris and obstructions.
Recommended professional service schedules
A scheduled service plan provides the most reliable way to preserve boiler safety, efficiency, and lifespan.
Technicians should inspect boilers annually; older units or high-use systems merit biannual checks.
Professional visits include safety controls, combustion analysis, pressure and leak checks, and parts wear assessment.
Documented service records support warranty compliance and help plan component replacement before failure, reducing emergency repairs and downtime.
Water treatment, corrosion prevention, and system flushing
Maintain water chemistry and periodic flushing to prevent corrosion, scale, and biological growth that degrade boiler efficiency and shorten component life.
Implement corrosion inhibitors, softening or deaeration, and pH stabilization per manufacturer specifications.
Schedule routine blowdown and system flushing to remove sediment and deposits.
Inspect heat exchangers, traps, and condensate lines for deterioration.
Document treatment, test results, and corrective actions for ongoing preventive maintenance.
Safety, Legal and Compliance Considerations
Safety, legal and compliance considerations are essential when repairing a boiler, beginning with adherence to gas safety regulations and the requirement to use Gas Safe–registered engineers for gas work.
Electrical isolation procedures and reliable carbon monoxide detection must be observed to protect occupants and meet statutory obligations.
All work should be documented, with warranties and repair records retained to demonstrate compliance and support future servicing.
Gas safety regulations and using Gas Safe registered engineers
Although boiler work may seem straightforward, strict gas safety regulations govern who is qualified to install, service, or repair gas appliances and must be followed to prevent risk and legal penalties.
Only Gas Safe registered engineers should undertake gas-related tasks. Records, certificates and compliance with local codes are essential.
Homeowners must verify registration, request written reports, and refuse unregistered contractors to guarantee safety and legal protection.
Electrical safety and isolation procedures
Before any electrical work on a boiler begins, the power supply must be isolated and locked off to prevent accidental energisation and comply with legal requirements.
Only qualified electricians should test, repair, or rewire components.
Verify isolation with a suitable voltage tester, apply lockout/tagout, and document actions.
Restore power only after safe completion, inspection, and confirmation that protective devices and earthing are intact.
Carbon monoxide detection and legal obligations
Install and maintain carbon monoxide (CO) detectors near boilers and in adjacent living spaces to promptly alert occupants to dangerous levels of the odorless, colorless gas.
Compliance requires adherence to local building codes, landlord and employer duties, and regular testing.
Technicians must verify detector presence and operation during service visits, report deficiencies, and advise immediate evacuation and emergency services if CO is detected above legal thresholds.
Documentation, warranties, and recording repairs
One clear record of all boiler inspections, repairs, parts replaced, and safety tests is essential for meeting legal obligations, preserving warranty coverage, and supporting future maintenance decisions.
Documentation should include dates, technician details, fault diagnosis, actions taken, and serial numbers.
Retain invoices, manufacturer instructions, and warranty terms.
Accurate records demonstrate compliance, speed up warranty claims, and inform safe, cost‑effective future servicing.
Troubleshooting Scenarios and Real-World Examples
The section presents three common troubleshooting scenarios with clear, stepwise resolutions: a boiler that repeatedly loses pressure, a unit producing heating but no hot water, and intermittent lockouts.
Each case outlines diagnostic steps, likely root causes, and practical fixes prioritized by safety and ease of verification.
Readers are guided to recognize symptoms, test components methodically, and decide when professional intervention is required.
Scenario: Boiler losing pressure repeatedly stepwise resolution
When a boiler repeatedly loses pressure, technicians should follow a stepwise diagnostic process that isolates common causes—system leaks, faulty pressure relief valves, expansion vessel failure, or filling loop issues—and verifies each with targeted tests and measurements to restore reliable operation.
Inspect visible pipework, radiators and joints for leaks, test PRV discharge, measure expansion vessel precharge, check filling loop integrity, and pressure-test isolated zones before repair.
Scenario: No hot water but heating works diagnostic steps
After resolving pressure-related faults, attention often shifts to mixed-function failures where heating operates but domestic hot water is absent.
The technician checks diverter valve operation, motorised valve actuation, and flow sensor continuity.
Cylinder thermostat and immersion elements are tested, hot water bypasses inspected, and boiler fault codes reviewed.
Replace faulty valves or sensors, bleed radiators if needed, and retest system performance.
Scenario: Boiler locking out intermittently root causes and fixes
Diagnose intermittent boiler lockouts by methodically isolating causes that recur under varying conditions rather than assuming a single fault.
Inspect flame stability, gas supply pressure, and electrode/ignition leads for wear or corrosion.
Check condensate drainage, pressure fluctuations, and flow switches.
Review error logs and timing patterns.
Replace marginal components, secure connections, clean sensors, and confirm correct venting.
Test under varied load to verify resolution.
Resources and Parts Sourcing
The section outlines where to obtain genuine spare parts and acceptable compatible alternatives, emphasizing manufacturer part numbers and authorized suppliers.
It also highlights key manuals, manufacturer guides, and diagnostic apps that streamline identification and troubleshooting.
Guidance on selecting a reliable engineer or service company is provided, focusing on certification, insurance, and verified customer reviews.
How to source genuine spare parts and compatible replacements
Sourcing genuine spare parts begins with identifying the boiler model and part numbers stamped on the unit or listed in the manual.
Then cross-reference those identifiers with the manufacturer’s parts catalog or official website.
Purchase through authorized dealers or OEM channels to guarantee authenticity.
Check part revision numbers, verify warranty coverage, and retain receipts.
For compatible alternatives, confirm specifications and approvals before fitting.
Useful manuals, manufacturer guides, and diagnostic apps
After identifying part numbers and vendor sources, attention turns to the documentation and tools that support correct installation and troubleshooting.
Manufacturer manuals, exploded diagrams, and service bulletins provide model-specific procedures; verified diagnostic apps speed fault finding.
Recommended resources include:
- Official manufacturer service manual and parts list
- Model-specific wiring and piping diagrams
- Firmware and software update notes
- Trusted diagnostic app with error-code lookup
How to choose a reliable engineer or service company
How should one evaluate an engineer or service company to guarantee reliable boiler repairs? A detached checklist emphasizes credentials, transparency, and proven performance. Consider:
- Valid gas safe/industry certifications and insurance
- Clear written estimates, warranties, and parts sourcing
- Verifiable references and recent reviews
- Local presence, response times, and aftercare policies
Choose technicians who document work and provide original or approved spare parts.
Conclusion
This guide equips readers with essential knowledge to diagnose, repair, and maintain boilers safely, covering common faults, post-repair checks, and legal considerations. By following structured troubleshooting steps and prioritizing safety, technicians and informed homeowners can reduce downtime and extend system life. Could anyone afford to neglect routine maintenance when prevention is far cheaper than emergency repair? With proper parts sourcing, documentation, and adherence to regulations, long-term reliability and peace of mind become achievable.