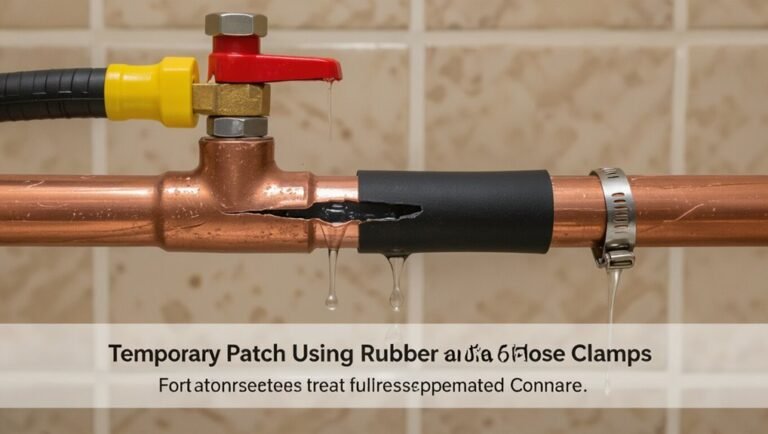
How to Keep Pipes From Freezing Under a Mobile Home: Proven Prevention & Fixes
To prevent pipes from freezing under a mobile home, it’s essential to insulate exposed plumbing and maintain a stable indoor temperature. Key prevention methods include sealing skirting vents, adding insulation to the skirting, using closed-cell foam or fiberglass wrap on pipes, and installing approved heat tape or low-watt heaters. Keep your thermostat set above 55°F and drain any exterior lines. Regular inspections and seasonal maintenance will further minimize the risk of freezing. For practical checks and emergency actions, continue reading for detailed guidance.
Why Pipes Under Mobile Homes Freeze and Why It Matters
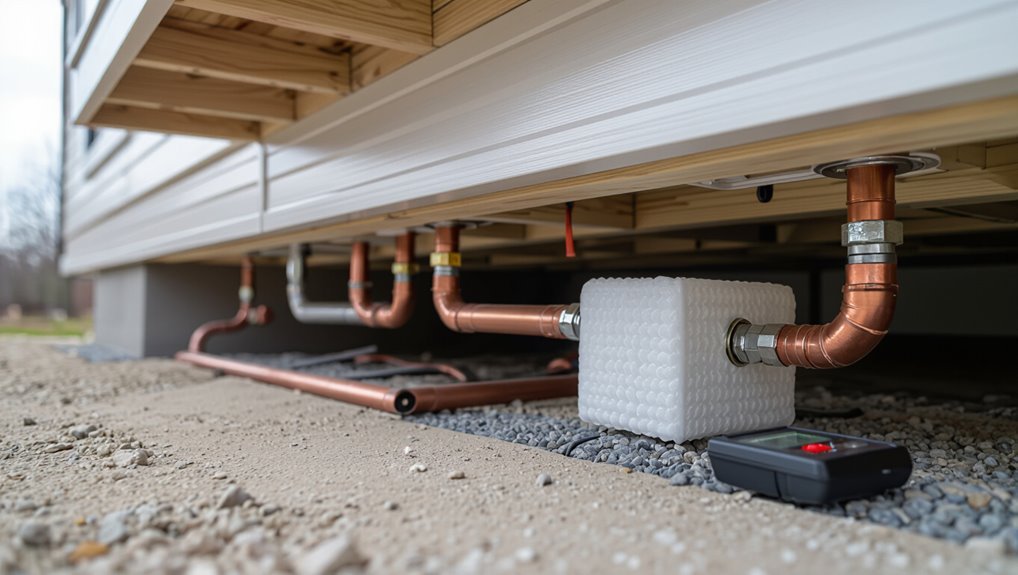
Cold temperatures cause water in under-home plumbing to freeze and expand, stressing pipes and joints.
Pipes located along exterior walls, in uninsulated crawlspaces, and near skirting vents are particularly vulnerable in mobile homes.
Frozen or burst pipes can lead to costly repairs, extensive water damage, and mold growth if not addressed promptly.
How cold affects pipes in mobile homes
Even a modest drop below freezing can cause water inside exposed plumbing under a mobile home to freeze, expand, and create pressure that ruptures pipes or fittings.
Cold also makes materials brittle, joints leak, and insulation less effective.
Understanding heat loss paths informs how to keep pipes from freezing under mobile home, prioritize targeted insulation, maintain minimal heat, and monitor vulnerable systems to prevent costly damage.
Common locations of vulnerable pipes under mobile homes
Under a mobile home, several predictable locations concentrate exposed or poorly insulated plumbing, making them the most vulnerable to freezing.
Common spots include perimeter crawl spaces, under skirting where airflow is cold, near exterior walls and plumbing exits, beneath sinks and toilets with minimal insulation, and along unheated service runs to water heaters or outdoor faucets.
Regular inspection targets these areas.
Consequences of frozen or burst pipes (repair costs, water damage, mold)
Many frozen pipes simply stop delivering water, but when they rupture the consequences escalate quickly: repair bills for pipe replacement and labor can range from a few hundred to several thousand dollars depending on access and extent of damage.
Secondary impacts include extensive water damage to flooring, insulation, and wall structures, plus elevated mold risk requiring remediation, potential HVAC or electrical repairs, and temporary displacement.
Quick Prevention Checklist to Keep Pipes from Freezing
Before a hard freeze, a concise checklist helps guarantee under-home pipes are protected with a few minimum actions.
Essential items to have on hand include pipe insulation, heat tape, a safe space heater, and reliable thermostat controls.
Following these steps reduces the risk of bursts and costly repairs.
Minimum actions to take before a freeze
Prepare a concise checklist of essential, time-sensitive actions to reduce the risk of frozen pipes beneath a mobile home:
- Shut off exterior water sources.
- Drain and winterize outdoor hoses.
- Open cabinet doors to expose plumbing.
- Set indoor thermostat no lower than 55°F (13°C).
- Inspect skirting vents and block drafts.
- Locate and label shutoff valves.
- Notify occupants of emergency procedures.
Items to have on hand (insulation, heat tape, space heaters, thermostat controls)
A simple kit of targeted supplies can dramatically lower the risk of frozen pipes under a mobile home.
Essential items include insulation and reliable heat tape, plus small space heaters and thermostat controls to maintain temperatures.
Also keep basic repair tools and pipe clamps ready for emergencies.
- Pipe insulation sleeves
- Electricity-rated heat tape
- Thermostat-controlled space heater
- Programmable thermostat
- Pipe repair kit
Inspecting and Preparing the Crawl Space and Underbelly
A careful inspection of the crawl space and underbelly is the first step to preventing frozen pipes, beginning with safe access procedures such as using proper lighting, protective gear, and stable entry points.
The inspector looks for air leaks and common cold-air entry points around skirting, vents, plumbing chases, and access hatches.
Simultaneously, they assess the condition of insulation and any vapor barrier to determine whether repairs, added insulation, or sealing are needed.
How to safely access and inspect under the home
Begin by locating safe access points and evaluating ground conditions before entering the crawl space; this guarantees inspection proceeds without surprise hazards.
Wear protective gear—gloves, goggles, respirator, knee pads—and use a headlamp plus portable light.
Check for standing water, vermin, sharp objects, and unstable supports.
Keep a phone nearby, work with a partner if possible, and document pipe locations and damage for repair.
Identifying air leaks and common entry points for cold air
How can cold air gain access beneath a mobile home? Inspectors note common entry points: gaps in skirting, torn underbelly fabric, vent openings, utility penetrations (pipes, cables), seams around support piers, and missing or damaged access doors.
Wind-driven drafts travel along exposed framing and through attic-like cavities. Identifying and sealing these leaks with appropriate materials reduces convective cooling and protects plumbing.
Assessing existing insulation and vapor barrier condition
Following identification and sealing of obvious air leaks, attention turns to the insulation and vapor barrier that directly protect under-home plumbing.
Inspectors should check insulation for compression, dampness, gaps and displaced batts; measure R-value if unknown.
Verify vapor barrier integrity—tears, soil contact, and rotting.
Document defects, prioritize repairs, and plan targeted replacement or supplemental insulation to restore continuous thermal and moisture protection.
Insulation Solutions for Pipes and Underside of Mobile Homes
This section outlines practical insulation options for preventing frozen pipes and heat loss beneath a mobile home.
It covers suitable pipe insulation types and materials, methods for insulating the subfloor and underbelly, and the use of insulated skirts around the perimeter.
Guidance on sealing remaining gaps and best practices for a continuous thermal barrier is also provided.
Types of pipe insulation and recommended materials
Effective pipe insulation combines appropriate materials with correct installation to prevent freezing and heat loss beneath a mobile home.
Recommended options include closed-cell foam pipe sleeves for water lines, fiberglass wrap for irregular shapes, and polyethylene foam for drain pipes.
Heat tape or self-regulating cable supplements insulation.
Use moisture-resistant, UV-stable materials, seal seams with weatherproof tape, and choose insulation thickness based on pipe diameter and local climate.
Insulating the subfloor and underbelly of the home
A well-sealed and insulated subfloor and underbelly form the first line of defense against pipe freezing beneath a mobile home, reducing heat loss, blocking drafts, and preventing moisture intrusion that can degrade insulation performance.
Contractors or owners should secure continuous insulation panels or batts, seal seams and penetrations with tape or spray foam, and install vapor barriers to maintain thermal integrity and protect plumbing.
Installing an insulated skirt around the perimeter
Once the subfloor and underbelly are insulated and sealed, attention turns to enclosing the crawlspace with an insulated skirt that traps warmer air and blocks cold drafts along the perimeter.
The skirt, made of rigid foam panels or insulated fabric, attaches to the foundation and extends to ground level. It reduces airflow, stabilizes under-home temperatures, and protects pipes from exposure to freezing conditions.
Best practices for sealing gaps after insulation
Several targeted sealing steps confirm insulating materials perform as designed and prevent warm air loss or cold drafts from reaching pipes and the subfloor.
After insulation, all seams, joints, and gaps around piers, vents, and utility penetrations are sealed with foam sealant or caulk rated for exterior use.
Weatherstrips, flashing, and adhesive-backed tape reinforce seals; periodic inspection and touch-up confirm long-term effectiveness.
Heat and Temperature Management Strategies
The section considers practical heat and temperature tactics to keep under‑home piping above freezing.
It reviews safe installation and use of heat tape and heating cables, options for controlled space heating in the crawl space, and the role of thermostats and smart controls in maintaining minimum temperatures.
Guidance on when to employ a trickle or steady faucet flow to prevent pipe freeze is also included.
Using heat tape and heating cables safely
Install heat tape and heating cables with care, following manufacturer instructions and local codes to reduce freeze risk without creating electrical hazards.
Inspect for damage, replace frayed sections, and use only approved thermostatic or self-regulating types on water lines.
Secure cables with manufacturer-recommended fasteners, avoid overlapping, keep connections dry and elevated, and plug into GFCI-protected circuits for safe, reliable operation.
Controlled space heating options for the crawl space
After addressing heat tape and cable safety, attention shifts to controlled space heating for the crawl space as a broader strategy to keep pipes above freezing.
Options include insulated ducted electric heaters, low-wattage thermostatically controlled radiant panels, and sealed gas unit heaters with proper venting.
Portable oil-filled radiators can supplement.
All installations require clearances, moisture control, and code-compliant electrical or fuel connections.
Thermostat settings and smart controls to prevent freezing
Optimize thermostat settings and integrate smart controls to maintain crawl space air and pipe temperatures just above freezing while minimizing energy use.
Set a minimum hold around 40–45°F (4–7°C) with programmable setbacks for milder periods.
Use remote sensors near critical pipes, enable alerts for rapid drops, and employ geofencing or adaptive schedules to balance protection and efficiency without constant manual adjustment.
When to use trickle or steady faucet flow
Maintaining a modest thermostat setback helps keep crawl space temperatures steady, but when outdoor extremes threaten pipe freeze, controlled faucet flow becomes a simple mechanical backup.
A steady, slow drip keeps moving water and pressure, suitable for prolonged cold. Short-term, lighter trickles conserve water while preventing freeze during brief deep chills.
Choose based on duration, severity, and water availability.
Plumbing Modifications and Re-routing Options
Practical plumbing modifications can reduce freeze risk by raising or relocating exposed pipes higher off the ground and by installing insulated pipe boxes or enclosures around vulnerable runs.
Adding shut-off valves and drainbacks for susceptible lines allows sections to be isolated and emptied before extreme cold.
Homeowners should weigh cost versus benefit when choosing temporary insulating fixes or investing in permanent rerouting.
Raising or relocating exposed pipes higher off the ground
Raising or relocating exposed pipes higher off the ground reduces their exposure to frigid soil and pooled water, lowering the risk of freezing and burst fittings.
Professionals recommend securing lines to joists or installing new routes inside conditioned crawlspaces, maintaining gentle slopes for drainage, and using durable supports and vibration-free clamps.
Proper permits and winter-ready routing minimize future repairs and liability.
Installing insulated pipe boxes or enclosures
Install insulated pipe boxes or enclosures around vulnerable runs to create a controlled microclimate that reduces heat loss and prevents freezing.
Prefabricated or custom boxes fitted with foam insulation, weatherstripping, and sealed access panels keep pipes warmer and block drafts.
Include reflective barriers for radiant heat, guarantee ventilation to avoid moisture buildup, and secure boxes to resist wind and rodent intrusion.
Adding shut-off valves and drainage to vulnerable lines
Add shut-off valves and drainage points to vulnerable lines to limit water exposure and allow quick winterizing when temperatures drop.
Install accessible isolation valves at branch takeoffs and low-point bleeds to depressurize and drain sections.
Frost-prone runs benefit from hose bib shutoffs with internal drains.
Label valves, test operation before freeze season, and route drained discharge away from foundations and walkways.
Cost vs. benefit: temporary fixes vs. permanent rerouting
Weighing temporary fixes against permanent rerouting hinges on comparing upfront costs, long-term savings, disruption, and risk tolerance. Temporary measures (insulation, heat tape) cost less initially but require maintenance and risk failure. Permanent rerouting raises installation cost and disruption yet reduces recurring risk and maintenance. Choose based on budget, expected occupancy, and local climate severity.
| Option | Upfront Cost | Long-term Impact |
|---|---|---|
| Insulation/heat tape | Low | Moderate maintenance |
| Temporary drainage | Low | Seasonal effort |
| Rerouting under home | High | Low ongoing risk |
Emergency Steps When Pipes Are Freezing or Already Frozen
When pipes under a mobile home begin to freeze or show signs of failure, immediate, safe actions can reduce damage and restore flow.
The passage will outline how to gently thaw lines, recognize a rupture and shut off the main water, and implement temporary containment to limit flooding.
It will also describe when a licensed plumber should be contacted to handle repairs or replacement.
Safe immediate actions to thaw a frozen pipe
Act quickly to reduce the risk of a burst pipe by locating the frozen section and shutting off the water supply to that line or the main if the exact location is unknown.
Apply gentle heat: use a hair dryer, heat lamp, or warm towels; never use open flame.
Open faucets to relieve pressure, monitor for leaks, and call a plumber if thawing fails or damage appears.
Signs of a burst pipe and emergency shut-off procedure
How can a homeowner tell if a frozen pipe has already burst?
Visible water pooling, steadily dropping water pressure, discolored water, or damp spots on ceilings, walls, and floors indicate a rupture.
Immediately locate and close the main water shut-off valve, then open faucets to drain remaining water.
Turn off electrical circuits near leaks and call a plumber.
Document damage for insurance.
Temporary containment and minimizing water damage
Begin by isolating the affected area to limit water spread: turn off the main water supply, open nearby faucets to relieve pressure, and shut power to any circuits serving soaked zones to prevent electrical hazards.
Contain leaks with buckets and towels, use plastic sheeting to protect belongings, mop and ventilate to reduce moisture, and deploy fans and dehumidifiers.
Document damage with photos for insurance.
When to call a professional plumber
Call a professional plumber promptly when simple remedies fail or conditions suggest imminent pipe failure: persistent freezing despite applied heat, visible cracking or bulging in pipes, rapidly dropping water pressure, sewage backup, or when leaks continue after thawing.
A plumber assesses damage, locates hidden fractures, performs safe repairs or replacements, and advises on insulation, rerouting, or system upgrades to prevent recurrence.
Seasonal Maintenance Plan and Timeline
A concise seasonal maintenance plan frames tasks before, during, and after cold months to protect under-home plumbing.
The fall pre-winter checklist and timeline prioritize insulation, sealing gaps, and winterizing exterior fixtures.
Mid-winter monitoring routines and a post-winter inspection schedule identify issues early and guide necessary repairs.
Fall pre-winter checklist and timeline
An organized fall checklist and timeline help guarantee mobile-home plumbing is winter-ready by sequencing inspections, repairs, and preventive actions in the weeks before freezing temperatures arrive.
Prioritize tasks: inspect undercarriage, seal gaps, insulate exposed pipes, service heat tape, clean gutters, test exterior faucets, and schedule professional repairs.
Assign dates, gather materials, and complete work at least two weeks before anticipated freezes.
Mid-winter monitoring routine
Vigilance becomes the mobile homeowner’s primary defense once cold weather sets in, with a concise mid-winter monitoring routine that concentrates on regular checks and quick responses to signs of trouble.
Inspect skirting, vents, and crawlspace warmth twice weekly, verify insulation integrity, guarantee heat tape and thermostats function, run taps briefly to keep flow, and document anomalies for immediate corrective action.
Post-winter inspection and repairs
Once mid-winter checks confirm systems held or exposed issues were addressed, attention shifts to a structured post-winter inspection and repair plan.
Inspect insulation, vapor barriers, and heat tape; check pipe joints, vents, and crawlspace drainage.
Document damage, prioritize repairs, replace compromised insulation, and tighten or reseal fittings.
Schedule professional plumbing or foundation services for unresolved issues and record actions for next season.
Cost Estimates, Tools, and Materials Needed
A brief comparison of typical costs highlights the difference between DIY prevention and hiring a professional for more extensive repairs.
A concise list of essential tools and materials—insulation, heat tape, pipe sleeves, sealants, and basic hand tools—frames what homeowners must obtain.
A simple skill-level guide clarifies which tasks are appropriate for most owners and which should be left to licensed contractors.
Typical costs for DIY vs. professional prevention and repairs
When planning prevention or repairs for pipes under a mobile home, cost considerations split into DIY expenditures—materials and basic tools—and professional fees that cover labor, expertise, and warranty.
DIY typically costs $50–$400 depending on insulation, heat tape, and sealing.
Professional prevention or repair ranges $200–$1,200+, influenced by access difficulty, diagnostic time, replacement parts, and service minimums.
Essential tools and materials list
Because underfloor pipe protection combines weatherproofing, heat, and sealing, a concise kit of tools and materials streamlines both DIY prevention and professional assessments.
Essential items include insulation, heat tape, and sealing compounds. Estimate costs vary by brand and length; budget for fasteners and basic tools.
Typical kit:
- Pipe insulation sleeves
- Self-regulating heat tape
- Silicone sealant and caulk
- Foam board panels
- Zip ties and clamps
DIY skill level guide: what homeowners can safely do
If a homeowner has basic handyman experience and comfort with simple electrical tasks, they can complete most underfloor freeze-prevention jobs—such as fitting pipe insulation, installing self-regulating heat tape, and sealing entry points—while more complex work like running new electrical circuits, modifying gas lines, or repairing corroded piping should be left to licensed professionals.
Estimated costs: $50–$300.
Required tools: utility knife, drill, multimeter, caulk gun.
Materials: insulation, heat tape, sealant.
Common Mistakes and Pitfalls to Avoid
Many homeowners underestimate the need for proper insulation or select materials that are ill-suited for cold conditions.
Others create fire and shock risks by using inappropriate heating devices or making unsafe electrical modifications.
Leaving vents and skirting gaps unchecked can negate other precautions by allowing cold air to reach the undercarriage.
Insufficient insulation or improper materials
A frequent cause of frozen pipes under mobile homes is insufficient insulation or the use of materials not rated for cold environments; these oversights leave vulnerable plumbing exposed to drafts and thermal loss.
Builders or DIYers sometimes choose thin wrap, non‑insulating supports, or PVC varieties prone to brittleness. Properly selected foam, pipe sleeves, and sealed vapor barriers reduce conduction, prevent moisture accumulation, and extend pipe resilience.
Unsafe use of heating devices and electrical hazards
Avoid placing space heaters, heat lamps, or unapproved torches near insulation, wiring, or wooden supports under a mobile home, as doing so greatly increases the risk of fire, scorch damage, and electrical overloads.
Users should avoid daisy-chaining extension cords, overloading circuits, or using unlisted heaters.
Professional, code-compliant electrical upgrades and thermostat-controlled, certified heating solutions reduce fire and electrocution hazards.
Ignoring vents and skirting gaps that let cold in
Failing to seal vents and skirting gaps lets cold air sweep beneath the home, undermining insulation and chilling water lines despite other precautions.
Overlooked openings create drafts that lower underfloor temperatures, increasing freeze risk.
Regularly inspect and seal gaps, install insulated skirting or removable panels, and use vent covers designed for cold months to maintain stable underhome temperatures and protect plumbing.
Case Examples and Before/After Scenarios
The section presents concise before-and-after examples illustrating practical outcomes.
One short case shows how inexpensive insulation and heat tape stopped recurrent freezing.
Meanwhile, a longer case describes an extensive retrofit that removed freeze risk entirely.
Each example concludes with clear lessons and transferable tactics for other mobile-home owners.
Short case: low-cost fixes that prevented freezing
Several brief, practical examples illustrate how modest investments stopped pipes from freezing beneath mobile homes.
One owner added foam pipe insulation and a thermal curtain, eliminating recurring freezes.
Another repaired skirting gaps and installed a low-wattage heat cable, preventing rupture.
A third combined door sweeps and wind-blocking panels, reducing cold drafts and freeze incidents.
Each case showed quick payback and minimal disruption.
Long case: major retrofit to eliminate freeze risk
One thorough retrofit recounted here transformed a repeatedly frozen underfloor plumbing system into a reliably frost-proof installation by combining structural, insulation, and heat-management upgrades.
Crawlspace walls were sealed, vents replaced with insulated access panels, and ducted warm air routed beneath the floor.
Pipes were re-routed and enclosed in insulated chaseways with heat tape on critical runs. The result eliminated freeze incidents.
Lessons learned and transferable tactics
Lessons from that extensive retrofit illustrate practical tactics that other homeowners and contractors can adapt to reduce freeze risk.
Case examples show sealing skirting gaps, adding foam board and pipe insulation, rerouting vulnerable lines, and installing thermostatically controlled heat tape.
Before/after scenarios quantify temperature stability and reduced burst incidents.
Clear documentation and incremental testing enabled cost-effective replication across varied site conditions.
Resources, Standards, and Professional Help
Relevant building codes and manufacturer recommendations provide the baseline for acceptable materials and clearances when protecting under-home plumbing.
Homeowners should be directed to certified mobile-home plumbers and insulation contractors, with guidance on verifying licenses, insurance, and experience.
Authoritative installation guides and product specifications should be cited or linked so readers can confirm proper methods and compatible components.
Applicable building codes and manufacturer recommendations
Building codes and manufacturer guidelines establish the baseline requirements for protecting water lines beneath a mobile home, covering insulation R-values, clearances from heat sources, pipe routing, and approved heat-tracing methods.
Local codes, HUD standards for manufactured housing, and product-specific instructions dictate materials, fastening, and installation tolerances.
Compliance guarantees warranty validity, safety, and effectiveness; installers should document referenced codes and follow manufacturer-specified components.
How to find qualified mobile-home plumbers and insulation contractors
Where can owners turn when specialized work is required beneath a mobile home?
Seek licensed plumbers and insulation contractors experienced with manufactured housing. Verify licenses, insurance, and references; request examples of past mobile-home projects.
Consult state mobile-home associations, local building departments, and consumer-review sites. Obtain written estimates, scope details, and warranty terms.
Prioritize contractors familiar with crawlspace access, code compliance, and manufacturer requirements.
Links to installation guides and product specifications
A concise collection of manufacturer installation guides, product specification sheets, and applicable code references helps owners and contractors confirm correct materials and methods for preventing frozen pipes under a mobile home.
Essential links and documents outline correct insulation R-values, heat-trace installation, pipe wrap procedures, and compliance checks.
- Heat tape manufacturer guide
- Pipe insulation spec sheet
- Vapor barrier installation manual
- Local plumbing code summary
- Approved fasteners and supports
Conclusion
Preventing frozen pipes under mobile homes preserves comfort, avoids costly repairs, and protects occupants’ safety. Regular inspection, effective insulation, and simple heat strategies reduce risk. For example, a Northern homeowner who added foam board underbelly insulation, wrapped exposed lines with heat tape, and kept a small crawl-space heater running through winter prevented repeated freeze damage and avoided a $6,000 plumbing replacement. Proactive measures reliably beat emergency fixes in both expense and disruption.