How to Dry Out a House After a Pipe Burst: Step-by-Step Emergency Drying Guide
How to Dry Out a House After a Pipe Burst: A Step-by-Step Guide
If a pipe bursts in your home, act quickly to minimize damage. First, shut off the main water supply and power to affected areas. Document the damage for insurance purposes and evacuate if necessary. Remove any standing water using pumps or wet/dry vacuums. Discard any saturated porous materials like carpets and drywall. Increase airflow by using fans and air movers, and run dehumidifiers to extract moisture. Monitor humidity levels with meters and hygrometers. Cut out wet drywall and insulation to prevent mold growth. Always wear protective gear, and consider calling professionals for significant structural, electrical, or mold issues. Detailed steps follow for effective drying.
What to Do Immediately After a Pipe Burst
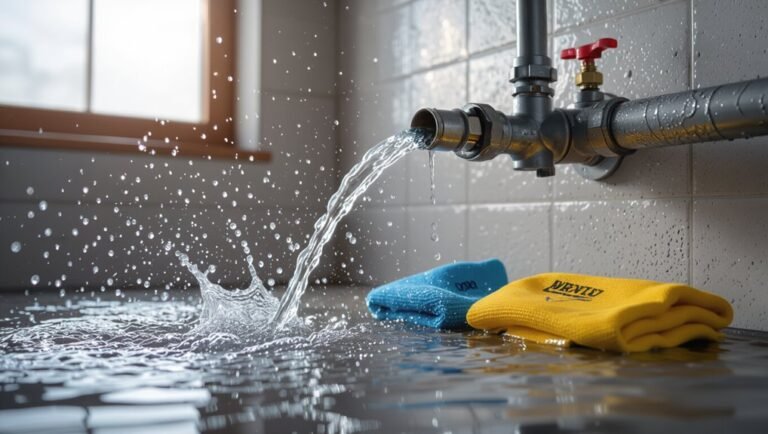
First, the homeowner should shut off the water supply and electricity if it can be done safely to limit further damage.
Next, occupants and pets must be evacuated to a safe location while photos and notes are taken to document the loss for insurance.
Finally, contact an emergency plumber or the utility company immediately if the leak is large, involves gas, or cannot be controlled.
Shut Off Water Supply and Electricity Safely
Immediately after a pipe bursts, the priority is to stop further water flow and eliminate electrical hazards by shutting off the main water valve and, if safe, cutting power to affected areas. The responder follows checklist steps for how to dry out a house after pipe burst, noting locations of valves, breakers, and using insulated tools.
| Action | Note |
|---|---|
| Locate main valve | Basement or exterior |
| Turn off breaker | Label affected zone |
| Use insulated tool | Prevent shock |
| Call utility if unsure | Professional help |
| Document steps | Photos for claim |
Evacuate People and Protect Pets
Several occupants should be moved to a safe, dry area away from the leak while one person secures exits and gathers pets.
Others check for injured individuals and assist mobility-impaired residents.
Pets are placed in carriers or leashed and kept calm; litter, food, and comfort items follow.
Avoid re-entering compromised rooms.
Coordinate briefly on who will stay in contact and monitor conditions.
Document Damage for Insurance (Photos and Notes)
After occupants and pets are secured, attention should turn to documenting the damage for insurance purposes.
The responder photographs all affected rooms, close-ups of damaged materials, and serial numbers on appliances. They record date, time, and observable causes, list damaged items with estimated values, and preserve soaked receipts.
Notes are concise, factual, and uploaded to cloud storage for insurer access and claim filing.
When to Call an Emergency Plumber or Utility Company
If water is flowing freely, electrical hazards are present, or the main shutoff cannot stop the leak, contact an emergency plumber and the utility company at once; otherwise, schedule a professional visit but still notify the utility if service lines, gas, or meters are involved.
Immediate calls are warranted for uncontrolled leaks, gas odor, sewer backup, or structural compromise.
Keep records of responders and actions taken.
Quick Assessment: Determine Scope and Severity
A swift assessment identifies the leak’s source and whether it is a steady plumbing break, a slow seep, or contaminated water.
It estimates which rooms, walls, floors, and belongings are wet and gauges the approximate water volume while noting any visible structural or electrical hazards.
Based on these observations, priorities are set for which rooms and materials require immediate drying or professional attention.
Identifying Source and Type of Leak
When evaluating a burst pipe, begin by quickly locating the leak and noting its source, flow rate, and affected areas to gauge immediate risk.
Inspect visible piping, fittings, joints, and nearby fixtures to classify as pinhole, joint, slab, or appliance failure.
Check water color and pressure patterns to distinguish supply versus return lines.
Photograph and mark the origin for repair teams.
Estimating Affected Areas and Water Volume
Several rooms and finishes should be quickly mapped to estimate how far water spread and roughly how much volume is involved.
Note visible wet materials (carpets, drywall, insulation, subfloor) and mark dampness boundaries.
Measure pooled water depth and approximate area to calculate liters/gallons.
Prioritize zones with continuous saturation.
Record observations and photos to guide drying strategy and resource allocation.
Recognizing Structural or Electrical Hazards
Having mapped wet areas and estimated volumes, attention turns to immediate hazards that can worsen damage or endanger occupants.
Inspect for sagging ceilings, bowed floors, cracked foundations and compromised load-bearing members.
Identify electrical risks: tripped breakers, exposed wiring, wet outlets and appliances.
If structural instability or live electrical exposure is suspected, evacuate and contact qualified professionals before proceeding with drying efforts.
Prioritizing Rooms and Materials to Dry First
Before mobilizing equipment, assess which rooms and materials pose the greatest risk to health, structure, and recovery cost: prioritize living spaces, mechanical rooms, and areas with porous materials that retain water (carpets, drywall, insulation), while deprioritizing nonporous surfaces and unoccupied storage.
Next, dry zones with HVAC, electrical panels, and plumbing access to prevent secondary damage; document moisture levels and plan sequential drying to protect contents.
Step-by-Step Emergency Drying Process
The emergency drying process begins with removing standing water and clearing out damaged and porous materials to prevent mold growth.
Next, increase airflow by positioning fans, opening windows and vents, and deploy dehumidifiers and air movers to extract moisture efficiently.
Finally, apply controlled heat where safe and manage temperature to speed evaporation without causing further damage.
Remove Standing Water
Begin by evaluating the extent and source of standing water to prioritize safe removal routes and prevent further damage.
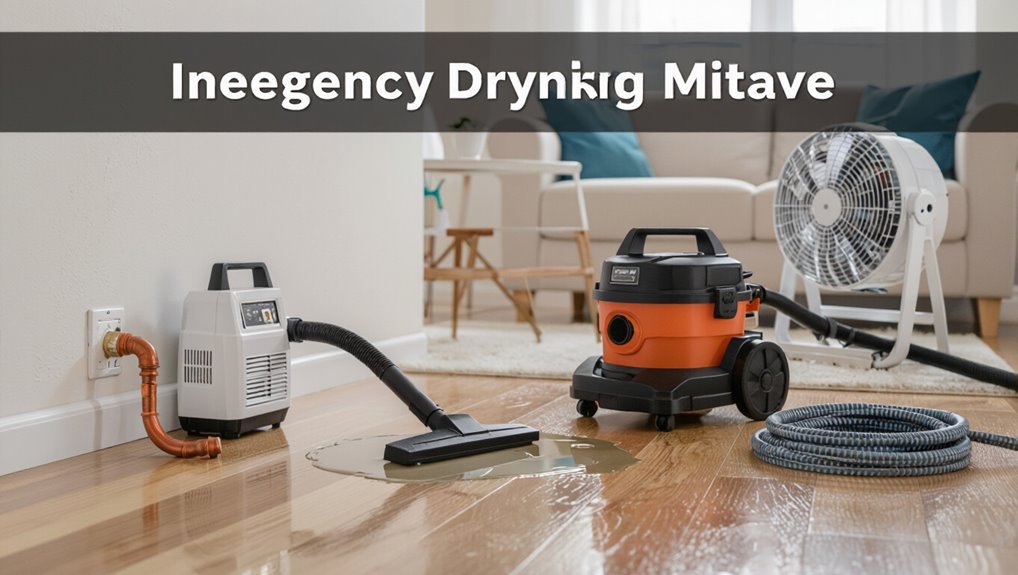
Technicians then remove water systematically, avoiding contaminated zones and electrical hazards. Use pumps, wet/dry vacuums, buckets, and mops to reduce levels rapidly. Guarantee proper drainage and document progress.
- Assess safety risks
- Isolate electricity
- Choose appropriate equipment
- Pump from lowest points
- Monitor drainage locations
Remove Damaged Belongings and Porous Materials
Remove waterlogged items and porous materials promptly to limit mold growth and structural deterioration.
The household is assessed; decisions prioritize safety and salvageability. Contaminated, soaked, or irreparably warped possessions are removed and documented for insurance.
- Discard wet drywall and insulation
- Remove soaked carpeting and padding
- Pull out upholstered furniture
- Isolate water-damaged clothing
- Box salvageable hard items for cleaning
Increase Airflow and Ventilation (Fans, Windows, Vents)
Increase airflow and ventilation immediately to accelerate evaporation and lower humidity throughout affected rooms.
Open windows and exterior doors when outdoor air is drier, create cross-ventilation, and keep interior doors open to promote circulation.
Position portable box or window fans to exhaust moist air outside.
Clear vents and HVAC grilles, and temporarily disable recirculation to prevent spreading dampness to other zones.
Use Dehumidifiers and Air Movers Effectively
Deploy dehumidifiers and air movers in a coordinated sequence to extract moisture efficiently and prevent secondary damage.
Position air movers to direct airflow across wet surfaces and toward dehumidifier intake points. Use low-velocity placement for ceilings and high-velocity near floors.
Monitor moisture levels and adjust equipment density by room size and wetness.
Empty reservoirs and maintain filters per manufacturer instructions.
Heat Application: Safe Use of Heaters and Temperature Control
When power and ventilation permit, controlled application of heat accelerates evaporation and shortens drying time while minimizing mold risk; portable electric heaters and safe gas units should be used per manufacturer instructions, keeping flammable materials distant.
Maintain moderate, even temperatures to prevent material stress. Monitor for overheating, circuit load, and adequate airflow.
Prioritize safety: carbon monoxide detectors and clear egress.
Monitoring Moisture Levels and Progress (Tools and Targets)
Although drying actions are underway, systematic monitoring of moisture levels is essential to verify progress and guide adjustments; technicians should establish baseline readings, target endpoints, and a measurement schedule before relying on visual cues alone. Use moisture meters, hygrometers, and data loggers; record readings, compare to targets, and adjust dehumidification.
| Tool | Typical Target | Measurement Frequency |
|---|---|---|
| Moisture meter | Material-specific dry % | |
| Hygrometer | 30–50% RH | Hourly–Daily |
Detailed Drying Techniques by Material
The following section outlines specific drying methods tailored to common materials affected by a pipe burst.
It covers carpets and rugs, hardwood and laminate floors, drywall and insulation, furniture including upholstery and mattresses, and safe handling of electronics and appliances.
Each material receives focused guidance on assessment, moisture removal, and when professional restoration is recommended.
Drying Carpets and Rugs
Carpet and rug fibers respond differently to water intrusion, so drying approaches must be chosen by material, construction, and backing type; natural fibers (wool, cotton, jute) tolerate less heat and require gentle air circulation and controlled humidity, while synthetics (nylon, polyester, olefin) can withstand stronger airflow and slightly higher temperatures for faster drying.
| Material | Drying Method |
|---|---|
| Wool | Low heat, dehumidify |
| Jute | Gentle air, remove padding |
| Nylon | High airflow, fans |
| Olefin | Warm air, quick cycles |
| Cotton | Moderate heat, monitor mildew |
Drying Hardwood and Laminate Floors
Evaluating and addressing moisture in hardwood and laminate floors requires methods tailored to each material’s construction and finish.
For hardwood, remove standing water, increase airflow with fans and dehumidifiers, lift boards if cupping occurs, and monitor moisture content to prevent warping.
For laminate, remove moisture quickly, avoid saturation, prop planks for airflow if edges swell, and replace severely damaged sections to restore floor integrity.
Drying Drywall and Insulation
Evaluating and drying drywall and insulation after a pipe burst requires materials-specific techniques to prevent mold, structural damage, and ongoing moisture issues.
Inspect for saturation depth; cut out drywall beyond visible wetting to expose studs. Remove and replace soaked batt insulation; salvage closed-cell foam when dry.
Use dehumidifiers, axial fans, moisture meters, and record readings. Discard heavily contaminated materials promptly to limit mold spread.
Drying Furniture, Upholstery, and Mattresses
After addressing drywall and insulation, attention shifts to furnishings, which often retain moisture and harbor contaminants if not handled correctly.
Remove cushions, open seams, and prop upholstery for airflow. Vacuum dried surfaces, mist with antimicrobial solution, and use fans and dehumidifiers.
For mattresses, stand upright, air outside if possible, and replace if saturation or contamination persisted; document damage for claims.
Drying Electronics and Appliances Safely
Begin with caution: power must be cut and devices unplugged before any handling, and affected electronics and appliances should be treated as potentially hazardous until inspected.
Inspect exterior for corrosion; blot moisture with lint-free cloths. Remove batteries, memory cards, and detachable components.
Air-dry in a warm, ventilated area or use desiccants; avoid heat sources.
Consult technicians for refrigerators, HVAC, and high-voltage equipment.
Mold Prevention and Remediation Steps
A clear timeline for mold growth and immediate preventive actions helps prioritize drying and cleanup within the critical 24–48 hour window.
Practical steps for cleaning and disinfecting affected surfaces reduce health risks and contain spread.
Guidance on signs that require professional mold remediation informs when to stop DIY efforts and call specialists.
Timeline for Mold Growth and Immediate Prevention
Urgency governs the response once water has soaked building materials: mold spores can begin to germinate within 24–48 hours under damp, warm conditions, so immediate steps are critical to limit growth and damage. The responder documents timeline, removes standing water, increases airflow and dehumidification, and isolates wet areas to prevent spread.
| Timeframe | Risk | Immediate Action |
|---|---|---|
| 0–24h | Low→rising | Extract water |
| 24–48h | High | Dry, ventilate |
| 48+h | Established | Contain, assess |
Cleaning and Disinfecting Affected Surfaces
When visible dampness or contamination remains after extraction and drying, responders should clean and disinfect surfaces promptly to interrupt mold colonization and remove contaminants.
Use detergent and water for nonporous areas, then apply an EPA-registered disinfectant per label.
Remove and discard heavily contaminated porous materials.
Ventilate during treatment, wear appropriate PPE, and document cleaned areas and products used for follow-up monitoring and verification.
When to Hire Professional Mold Remediation
Consider professional mold remediation if visible mold covers more than about 10 square feet, if mold returns after DIY cleaning, or if occupants experience persistent respiratory symptoms following drying and disinfection.
A certified remediator assesses contamination, contains affected areas, removes contaminated materials, and applies appropriate antimicrobial treatments.
Hire professionals for HVAC involvement, extensive water damage, structural concerns, immunocompromised residents, or uncertain source control.
When to Call Professionals
When visible or hidden damage is extensive, odors persist, or mold appears, a homeowner should consider contacting water damage restoration services.
Professionals will assess the loss, deploy industrial drying and dehumidification equipment, remove compromised materials, and document the process for records.
The homeowner should be prepared to discuss cost estimates, expected timelines, and insurance coordination to determine coverage and next steps.
Signs You Need Water Damage Restoration Services
How can a homeowner tell when a situation has escalated beyond DIY cleanup?
Persistent standing water, soaked structural elements, or water migrating into walls, ceilings, or insulation indicate professional help.
Foul odors, visible mold within 24–48 hours, electrical system exposure, or compromised HVAC/utility components also require restoration services.
Insurance claims, widespread damage, or health concerns are further triggers for calling certified technicians.
What Professional Technicians Will Do (Equipment and Process)
If signs indicate the situation exceeds a homeowner’s ability—persistent standing water, soaked framing, visible mold, exposed electricals—licensed water‑damage professionals will assess hazards, document conditions for insurance, and implement a structured remediation plan.
They mobilize extractors, high‑capacity air movers, dehumidifiers, moisture meters, infrared cameras, and air scrubbers, perform controlled demolition where needed, monitor drying progress, and provide final clearance testing before restoration.
Expected Costs and Insurance Coordination
Many homeowners face a choice between DIY cleanup and hiring professionals after a pipe burst, and that decision hinges on expected costs and insurance coverage.
Professionals typically charge based on water category, affected area, and equipment—ranging from temporary mitigation fees to full restoration.
Homeowners should document damage, contact insurers promptly, verify coverage limits and deductibles, and hire licensed contractors when claims exceed DIY scope.
Insurance Claims and Documentation Guidance
After a pipe burst, the homeowner should promptly gather the policy number, date of loss, photos, and any estimates or receipts insurers typically require.
An itemized damage list—organized by room, description, replacement value, and supporting documentation—will streamline the claim.
Clear, timely communication with adjusters and contractors, including keeping records of calls and agreements, helps prevent disputes and speeds recovery.
What Information Insurers Will Require
When preparing an insurance claim for water damage from a burst pipe, homeowners must gather specific documentation to establish the loss, scope of damage, and mitigation efforts.
Required items typically include policy details, incident date/time, photos/videos, repair and mitigation receipts, contractor estimates, inventory proof of damaged property, and plumber or emergency service reports.
Contact and claim reference information should also be recorded.
How to Prepare an Itemized Damage List
With documentation and receipts assembled, the next step is creating an itemized damage list to clearly quantify losses for the insurer.
The document should be precise, dated, and organized by room and category. Include descriptions, quantities, estimated replacement costs, and supporting photos for each entry.
- Room/location
- Item description
- Quantity
- Estimated cost
- Photo reference
Tips for Communicating with Adjusters and Contractors
Start by establishing clear lines of communication and documented expectations with both the insurer’s adjuster and any hired contractors.
Record names, contact details, dates, and summaries of conversations.
Share the itemized damage list, photos, and receipts promptly.
Request written estimates, scope-of-work, and timelines.
Confirm authorization procedures and payment terms.
Keep copies of all correspondence and update records after inspections or repairs.
Common Mistakes to Avoid During Emergency Drying
Failing to act methodically during emergency drying often turns a solvable water problem into a long-term disaster.
The guide highlights frequent errors and concise corrections to preserve structure and health.
- Ignoring hidden moisture in cavities
- Skipping moisture readings and documentation
- Using inadequate or mispositioned drying equipment
- Delaying mold mitigation steps
- Overlooking electrical and structural safety checks
Preventing Future Pipe Bursts and Water Damage
Preventing future pipe bursts focuses on practical steps that reduce freezing, corrosion, and unnoticed leaks.
Recommended measures include winterizing pipes, scheduling routine maintenance, installing shutoff valves and leak detectors or smart sensors, and upgrading plumbing and insulation where needed.
Together these actions lower risk and simplify rapid response if a problem begins.
Winterizing Pipes and Routine Maintenance
A few straightforward winterizing steps and a regular maintenance schedule greatly reduce the risk of burst pipes and subsequent water damage.
Insulate vulnerable pipes, drain exterior lines, maintain consistent indoor temperatures, and seal gaps allowing cold air.
Schedule seasonal inspections, check for corrosion or leaks, and test outdoor faucets.
Document maintenance and address issues promptly to prevent emergencies and costly repairs.
Installing Shutoff Valves, Leak Detectors, and Smart Sensors
Installing shutoff valves, leak detectors, and smart sensors provides layered protection that isolates failures quickly and alerts occupants before damage escalates.
Automatic main and zone shutoffs stop flow when sensors detect leaks or abnormal pressure. Floor, appliance, and hidden-space detectors monitor moisture; smart sensors send real-time alerts to phones and integrate with home systems.
Professional installation and periodic testing guarantee reliable operation.
Upgrading Plumbing and Insulation to Reduce Risk
Several targeted upgrades to plumbing and insulation greatly reduce the likelihood of pipe bursts and subsequent water damage.
Recommendations include replacing aging metal pipes with PEX or copper, insulating vulnerable runs in attics, basements, and exterior walls, and adding heat tape where freeze risk exists.
Routine pressure checks and professional inspections guarantee joints and valves remain secure, lowering future failure risk and repair costs.
Checklist: 24-Hour Emergency Drying Action Plan
Begin by securing the scene and stopping the water source. Then move quickly through a focused checklist that prioritizes safety, moisture removal, and documentation within the first 24 hours.
Personnel should follow a tight sequence: evacuate power, remove standing water, ventilate, dry structural elements, and log conditions.
- Turn off electricity
- Pump or bail water
- Open windows, run fans
- Remove wet materials
- Photograph damage and timestamps
Resources and Recommended Tools
Gather the right resources and tools before full-scale drying begins to guarantee efficiency, safety, and thorough moisture removal.
The team compiles essential equipment, protective gear, and monitoring devices to streamline recovery and limit secondary damage.
- Industrial dehumidifier
- High-capacity fans/air movers
- Moisture meters and infrared thermometer
- HEPA air scrubber and PPE
- Wet/dry vacuum and extraction wands
Conclusion
After a pipe burst, swift, organized action can limit damage and long-term risk. The guide outlined immediate priorities—safety, shutting off water, evaluating damage—followed by targeted drying methods, mold prevention, and common pitfalls to avoid. Could decisive early steps be the difference between a minor repair and extensive loss? With preparedness, correct techniques, and timely professional help when needed, homeowners can greatly reduce costs and health hazards while restoring their property effectively.