How to Tell If Your Oil Furnace Pump Is Bad: 8 Signs and DIY Tests
If you suspect your oil furnace pump is bad, look for these key signs: a drop in fuel pressure, ignition failure, or smoke and strong fuel odors during combustion. Other indicators include noisy operation, sputtering, clicking sounds, unusual vibrations, visible leaks, and a complete loss of heat. To assess the issue, perform DIY checks such as a visual inspection, listening for abnormal sounds, feeling for vibrations, bleeding the fuel line, and using a pressure gauge. Always ensure that power and fuel are turned off before conducting any tests. While some minor fixes may be possible, this guide will delve into detailed tests, interpretations, and advice on when to consult a professional.
How to Tell If Your Oil Furnace Pump Is Bad: Quick Overview
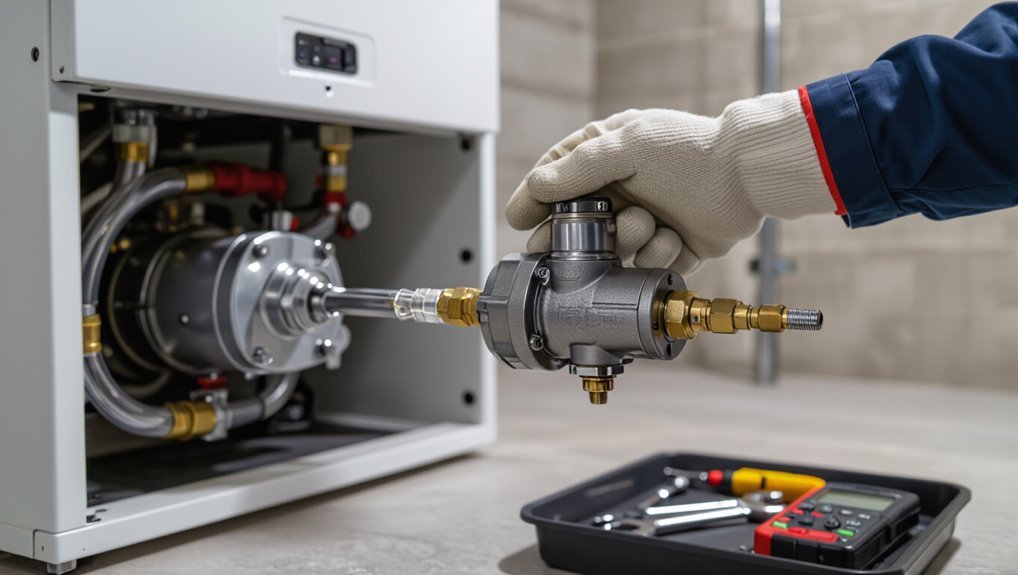
The clearest sign of a failing oil furnace pump is consistent loss of fuel pressure or repeated ignition failures despite a full tank and a clean filter.
If the system shows smoke, strong fuel smell, rapid cycling, or total loss of heat, a qualified technician should be contacted immediately.
Routine noisy operation or intermittent sputtering warrants inspection but is less urgent than the hazardous conditions above.
One-sentence summary of the most reliable indicator
Listen for a consistent clicking or sputtering from the burner assembly while the furnace runs—this intermittent noise combined with weak or no flame is the single most reliable indicator that the oil pump may be failing.
When diagnosing how to tell if oil furnace pump is bad, prioritize audible burner issues paired with poor flame performance before inspecting filters or fuel lines.
When to call a professional immediately
When should a technician be summoned immediately?
Immediate professional service is required if there is fuel leakage, burning smells, smoke, sparks, or visible fire.
Also call if the pump fails after basic checks, generates unusual vibrations, or causes repeated shutdowns/tripping of safety controls.
These signs indicate safety hazards or complex failures beyond DIY diagnosis and repair, necessitating certified intervention.
What an Oil Furnace Pump Does and Why It Matters
An oil furnace fuel system includes a tank, filter, fuel line, pump, and burner, with the pump supplying pressurized oil to the nozzle for atomization.
The pump’s interaction with the fuel line and burner determines proper flow rate and pressure, directly affecting ignition and combustion quality.
Common pump types—gear, vane, and rotary—tend to fail from wear, leakage, or loss of prime, each producing distinct symptoms.
Basic components of an oil furnace fuel system
A reliable oil furnace depends on a simple network of parts that deliver, regulate, and combust fuel; at its heart the pump moves oil from the tank to the burner at a steady pressure and flow.
Key components include the storage tank, supply line, fuel filter, pump, pressure regulator, check valve, fuel shutoff, and burner nozzle.
Each part guarantees clean, controlled delivery to combustion.
How the pump interacts with the burner and fuel line
Because consistent pressure and precise flow determine combustion quality, the pump serves as the critical link between the fuel line and the burner.
It draws oil from the tank, forcing it through filters and valves, and delivering it to the nozzle at the exact pressure required for proper atomization.
It also maintains steady flow during ignition, supports proper spray pattern, and prevents air ingress that would disrupt combustion.
Common pump types and their typical failure modes
Different pump designs—gear, rotary vane, and piston—dominate residential oil furnaces, each with distinct operating principles and predictable failure patterns:
- Gear: wear and scoring cause pressure loss and leaks; noisy when tolerances widen.
- Rotary vane: vane breakage or seizure leads to flow reduction and irregular pulses.
- Piston: packing and valve failures produce intermittent flow, hard starts, and oil drips.
8 Clear Signs Your Oil Furnace Pump Might Be Bad
Signs of a failing oil furnace pump often appear as operational problems that directly affect fuel delivery and burner performance.
Common indicators include no fuel flow or failure to ignite, sputtering or irregular burner operation, and unusual noises such as knocking, grinding, or whining.
Visible fuel leaks at the pump or fittings and reduced or uneven heating round out the primary symptoms to watch for.
No fuel delivery or furnace won’t ignite
When an oil furnace refuses to ignite or shows no fuel delivery, the pump is one of the first components to suspect: it should draw oil from the tank, pressurize the line, and send a steady flow to the burner.
Any interruption in that chain commonly results in a dark, silent furnace.
Diagnosing includes checking for pressure loss, audible pump failure, blocked suction, or air leaks in fuel lines before replacing the pump.
Sputtering or irregular burner operation
Several times each minute a sputtering burner or erratic flame pattern indicates the pump is failing to maintain steady fuel pressure and flow.
Intermittent flames, popping, or yellow tips suggest inconsistent delivery or air entering the line. The issue may stem from worn pump vanes, a clogged filter, or a leaking seal.
Verify fuel pressure and inspect filters before replacing the pump.
Unusual noises from the pump (knocking, grinding, whining)
Following sputtering or erratic burner behavior, owners should also listen for unusual noises from the pump—knocking, grinding, or high-pitched whining often indicates mechanical wear or internal bearing and gear failure.
Persistent or worsening sounds during start-up or steady operation suggest impending seizure or imbalance.
Technicians should inspect pump mounting, coupling, and internal components; replace worn parts or the pump to prevent failure.
Visible fuel leaks around the pump or fittings
Visible fuel stains or droplets around the pump housing and fittings are among the clearest indicators of a failing oil furnace pump.
Persistent wetness, pooled oil, or fresh odor indicate seal, gasket, or fitting failure.
Inspect connections, hose clamps, and the pump body for cracks or loosened fittings.
Address leaks immediately to prevent fire hazards, component damage, and fuel waste.
Reduced heating performance or uneven heating
Reduced or uneven heat output often signals a malfunctioning oil furnace pump, since inconsistent fuel delivery directly affects burner performance and flame stability.
Homeowners may notice cold spots, longer warm-up times, or weaker heat despite thermostat demand.
Inspecting pump flow, filter condition, and suction lines can reveal restrictions or wear.
Persistent uneven heating warrants professional pump testing or replacement to restore reliable combustion and distribution.
Excessive cycling or hard starts
Listen for rapid on-off cycles or reluctant starts—these behaviors often indicate an oil pump struggling to maintain proper pressure or steady fuel flow.
Excessive cycling shortens burner life, increases wear, and raises fuel consumption. Hard starts may signal leaking seals, worn gears, or clogged filters causing delayed combustion.
Recommend checking fuel lines, filter condition, and pump mounting; consult a technician if issues persist.
Strong fuel smell near the furnace
Excessive cycling and hard starts can also be accompanied by a noticeable fuel odor near the furnace, which often points to leaks or pressure faults in the oil pump system.
A persistent smell suggests seepage at pump seals, fittings, or the fuel line. Immediate inspection is advised; trapped vapors increase fire and health risks.
Professional repair or seal replacement often resolves the issue.
Low oil pressure or frequent air in line
Signs of low oil pressure or frequent air in the line often manifest as sputtering burners, weak flame, or repeated loss of ignition, indicating the pump may be failing to maintain steady fuel delivery.
Other indicators include cycling fuel priming, visible air bubbles in the sight glass, pressure gauge fluctuation, and uneven heating.
These symptoms warrant pump inspection, filter check, and line bleed to confirm diagnosis.
DIY Tests to Diagnose a Bad Oil Furnace Pump (Safety First)
Before attempting any checks, the reader should follow basic safety steps such as shutting power and fuel supply and wearing gloves and eye protection.
A brief list of tools and materials—wrenches, screwdrivers, a container for fuel, and a rag—prepares them for three simple tests.
They can then perform a visual leak inspection, listen for unusual sounds and feel for abnormal vibration, and carefully bleed the fuel line to remove air.
Safety precautions before testing
One essential step is to shut off power and fuel supply to the furnace and verify both are isolated before any inspection or testing begins.
Wear safety glasses and gloves, guarantee adequate ventilation, and keep a fire extinguisher nearby.
Avoid open flames, sparks, and smoking. Confirm familiarity with emergency shutoffs and never work alone; have a phone accessible for emergencies.
Tools and materials you’ll need
A compact kit of tools and supplies streamlines diagnosis and reduces trips to the hardware store: a multimeter (for voltage and continuity), an oil pressure gauge or manometer compatible with furnace fittings, a screwdriver set and adjustable wrench, fuel line adapters and sealing tape, replacement filters and a hand primer, plus clean rags and a drip tray to catch oil.
- Multimeter, pressure gauge, hand primer
- Screwdrivers, adjustable wrench, adapters
- Replacement filters, sealing tape, rags
Test 1 Visual inspection and leak check
Visual inspection begins the diagnostic process: the technician examines the pump, fuel lines, fittings, and surrounding area for signs of oil leaks, corrosion, loose connections, or damaged hoses.
They note wet spots, crusted oil, or dark stains, tighten visible fittings, and replace deteriorated hoses.
Any persistent seepage indicates seal or gasket failure and warrants component repair or professional service.
Test 2 Listening test and vibration check
Although quieter pumps can still function, unusual noises and abnormal vibrations are reliable indicators of mechanical problems. Technicians listen for grinding, rattling, or whining and observe the pump housing and mount for excessive movement.
The homeowner can safely power the unit briefly, note sound patterns, and gently feel accessible casing for vibration. Persistent irregularities suggest worn bearings, misalignment, or impending failure requiring professional service.
Test 3 Bleeding the fuel line to check for air
After checking for abnormal noises and vibration, the next step is to confirm the fuel line is free of air, since air pockets can mimic pump failure by causing sputtering or loss of pressure.
Close valves, loosen the bleeder screw at the pump or filter, and run the burner until a steady stream of fuel without bubbles appears.
Retighten, check for leaks, and restart.
Test 4 Checking pump pressure with a gauge
Attach a pressure gauge to the pump’s test port to measure discharge and vacuum readings, because accurate pressure data distinguishes a weak or clogged pump from other issues.
Record static vacuum, running discharge pressure, and compare to manufacturer specs. Low discharge, high vacuum, or erratic readings indicate internal wear, restricted inlet, or inlet strainer blockage.
Shut power and fuel before connecting or disconnecting the gauge.
Test 5 Fuel flow test at the burner
A simple fuel flow test at the burner verifies whether adequate oil is reaching the nozzle and helps distinguish pump problems from downstream blockages or nozzle/line issues.
With power off and safety gear on, the technician momentarily opens the nozzle line into a container while cycling the burner.
Consistent, steady spray indicates pump OK; sputter, weak flow, or air indicates pump, line, or filter faults needing repair.
How to Interpret Test Results and Is the Pump Actually the Problem
Interpreting test results requires comparing readings to known symptoms to separate true pump failure from issues like a clogged filter, nozzle problems, or low tank supply.
Determining whether low pressure warrants pump replacement or a repair hinges on the magnitude of the pressure drop, evidence of internal leakage, and whether cleaning or part replacement restores normal pressure.
Common false positives—such as transient air in the line or a restricted suction—can be ruled out by repeating tests after addressing filters, fittings, and fuel supply.
Distinguishing pump failure from clogged filter, nozzle, or tank issues
How can one tell whether a suspected oil pump fault is truly the culprit or a symptom of a clogged filter, nozzle, or tank contamination?
Inspect upstream components first: replace filter, clean or swap nozzle, and check tank for water/debris.
Repeat pressure and flow tests.
If issues persist after clearing blockages, pump failure is likely; if readings normalize, problem was upstream contamination or restriction.
When low pressure means pump replacement vs. repair
Begin by comparing measured pressure and flow against the pump’s specifications and the system’s expected operating range: if pressure readings are consistently below spec under known-good upstream conditions (clean filter, clear nozzle, drained tank) and the pump fails to regain pressure after adjustment or priming, replacement is typically indicated;
conversely, if low pressure occurs intermittently, improves after seal, coupling, or gasket checks, or normalizes with minor component repairs, then servicing the pump—replacing wear parts, rebuilding the head, or correcting installation issues—may suffice.
Evaluate test consistency, leakage, bearing noise, and output stability to decide between rebuild or replacement.
Common false positives and how to rule them out
After comparing measured pressure and flow to pump specifications and checking for consistent failures that indicate replacement, technicians must also guard against common false positives that can misidentify the pump as the culprit.
- Clogged filter or nozzle reducing flow — inspect and replace, then retest.
- Air in lines or poor bleed procedures — purge and observe stability.
- Faulty pressure gauge or wiring — verify with known-good meter before condemning pump.
Basic Temporary Fixes You Can Try Safely
Before calling a technician, the homeowner can try a few safe, temporary fixes such as bleeding air from the fuel lines, tightening fittings, and replacing simple seals to stop leaks.
Replacing clogged fuel filters and cleaning strainers can restore proper flow and help confirm whether the pump itself is at fault.
These measures are suitable for short-term troubleshooting and minor issues, but professional repair or replacement is required for persistent problems, internal pump damage, or suspected safety hazards.
Properly bleeding air from the system
Properly bleeding air from an oil furnace pump can restore pressure and improve flow when air pockets cause sputtering or loss of heat.
The process involves shutting power, opening the bleed screw, running the pump until steady fuel with no bubbles appears, then tightening the screw and restarting.
Monitor for leaks and repeat briefly if air returns; seek professional service if problems persist.
Tightening fittings and replacing simple seals
Tightening fittings and replacing simple seals can stop small leaks and reduce air ingress that undermines pump performance.
The technician inspects joints, snugging loose connectors and replacing O-rings or compression washers with correct sizes.
Use thread sealant where appropriate, avoid overtightening, and verify no fuel smell.
These temporary measures may restore pressure and delay professional repair but are not long-term solutions.
Replacing fuel filters and cleaning strainers
Changing the fuel filter and cleaning the strainer are straightforward steps that often restore flow and prevent pump strain.
The technician drains low-pressure lines, replaces the cartridge with the correct micron rating, and inspects the strainer screen for debris.
After reinstalling components and bleeding air, the system is tested for steady pressure and consistent combustion.
Routine filter changes reduce clog-related failure.
When temporary fixes are acceptable and when they are not
Although quick fixes can restore service temporarily, they should be chosen only when the issue is minor, the risk of fuel leaks or fire is low, and a qualified technician will follow up promptly.
Temporary measures include tightening fittings, replacing a clogged filter, or bleeding air from lines.
Do not attempt temporary repairs for cracked tanks, persistent leaks, electrical faults, or pump failures—call a professional immediately.
Replacement, Repair, and When to Call a Technician
When symptoms persist after basic temporary fixes, the decision between repair and replacement hinges on fault type, pump age, and cost-effectiveness.
Typical signs that favor replacement include seized motors, cracked housings, or repeated failures, while worn seals, clogged nozzles, or simple electrical faults may be repairable.
Owners should expect parts like gaskets, nozzles, or a replacement pump and to budget for labor when obtaining estimates.
Before authorizing work, the owner should tell the technician the observed symptoms, tests already performed, and any error codes.
Additionally, they should ask for a written estimate, parts list, warranty details, and a clear explanation of alternatives.
Typical repair vs. replacement signs
Assess whether repair or replacement is warranted by evaluating the pump’s symptoms, age, and cost to restore reliable operation; clear indicators for repair include isolated failures (leaking seals, clogged nozzles, or a seized shaft) that are inexpensive or straightforward to fix.
In contrast, repeated leaks, extensive corrosion, motor burnout, or failure in multiple components typically point to replacement.
Consider service history, warranty status, and safety risks when deciding.
Estimated costs and parts to expect
Costs for addressing a failing oil furnace pump vary widely depending on whether a repair or full replacement is needed, the make and model, and local labor rates. Typical parts: pump, nozzle, filter, gasket, and labor. Expect repair $150–$400; replacement $400–$1,200. Call a technician for persistent leaks, metal fatigue, or when safety controls fail.
| Item | Typical cost |
|---|---|
| Pump | $200–$800 |
| Nozzle | $10–$40 |
| Filter | $5–$30 |
| Gasket | $5–$25 |
| Labor | $100–$400 |
What to tell your service technician (symptoms, tests you ran)
After reviewing expected parts and price ranges, homeowners should prepare a concise report for the service technician describing observed symptoms, the tests already performed, and any recent changes to the system.
Include when the issue began, frequency, noises, odors, error lights, results of fuel-line, filter and priming tests, and whether power or thermostat behavior was altered.
Note any recent maintenance or fuel delivery.
Questions to ask before authorizing work
When deciding whether to authorize work on an oil furnace pump, homeowners should prioritize clear answers about what the technician will do, why it’s needed, and how it will affect system performance and safety.
Ask for diagnosis details, written estimates, parts vs. labor breakdown, warranty terms, expected lifespan after repair, alternatives (repair vs. replace), timeline, and safety certifications.
Clarify post‑service testing and cleanup.
Preventive Maintenance to Extend Pump Life
A concise preventive maintenance plan can greatly extend an oil furnace pump’s service life by addressing common wear factors.
A regular inspection checklist, timely filter changes and service intervals, and proper oil storage and tank upkeep are key components to monitor.
Following these practices reduces the likelihood of pump failure and costly repairs.
Regular inspection checklist
Regular inspections follow a simple, consistent checklist that targets the pump’s electrical, mechanical, and fluid-handling components to catch wear or faults early.
Inspect wiring and terminals for corrosion, listen for abnormal noises, check for leaks and proper pressure, and verify mounting and coupling security. Record findings and corrective actions.
- Electrical connections and motor function
- Mechanical seals, bearings, couplings
- Fuel lines, filters, and leak points
Recommended service intervals and filter changes
Effective preventive maintenance hinges on a predictable schedule for servicing and filter replacement to minimize wear and prevent contamination-related failures.
Technicians typically recommend an annual professional tune-up and oil burner service, with fuel and line filters inspected at each visit.
Replace primary filters yearly and secondary filters every 6–12 months depending on fuel quality and runtime.
Document intervals and adjust for heavy use.
Best practices for oil storage and tank maintenance
Following recommended service intervals and timely filter changes, attention should turn to oil storage and tank upkeep to prevent contaminants and water that accelerate pump wear.
Inspect tanks annually for corrosion, leaks, and condensation. Maintain proper fill levels to reduce air intrusion, use desiccant breathers or water-absorbing filters, drain accumulated water, and treat fuel with stabilizers.
Promptly repair or replace compromised tanks.
Troubleshooting Flowchart and Quick Reference Checklist
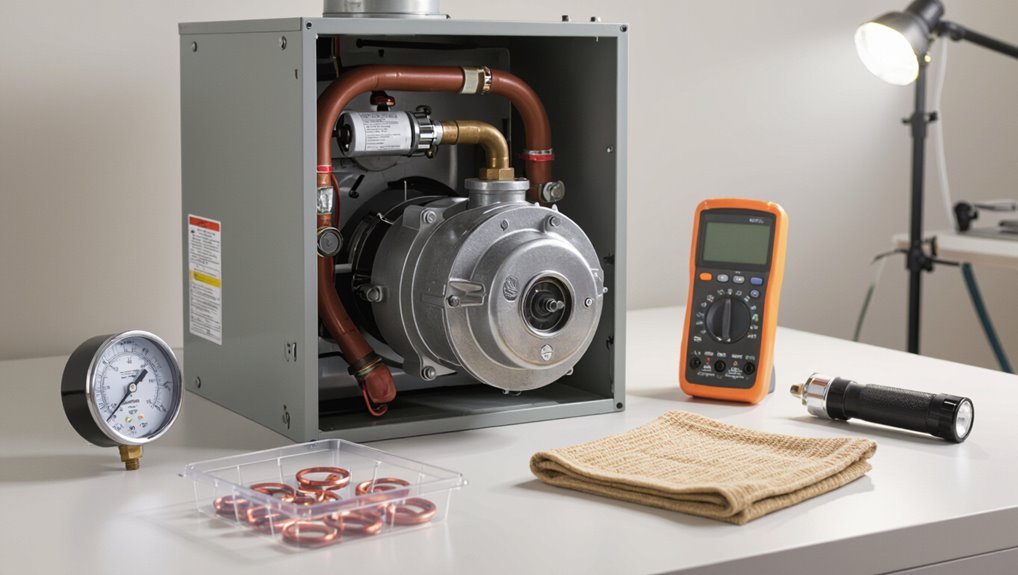
A concise troubleshooting flowchart guides homeowners through a step-by-step decision process to isolate pump issues.
Alongside the flowchart, a printable checklist summarizes visible signs, simple tests, and recommended next actions.
Together they streamline diagnosis and help determine whether professional service is needed.
Step-by-step decision flow for homeowners
Where should a homeowner begin when an oil furnace pump shows signs of trouble?
Follow a clear decision flow: verify power and thermostat, listen for unusual sounds, inspect filters and oil supply, perform basic leak and pressure checks, and consult error codes.
If issues persist or tests indicate pump failure, schedule professional service.
Prioritize safety: shut power and fuel before advanced checks.
Printable checklist of signs, tests, and next actions
Checklist and flowchart tools give homeowners a compact, stepwise reference to spot oil furnace pump problems and decide next actions.
A printable checklist summarizes symptoms, quick tests, safety steps, and recommended responses for DIY or pro service. Clear icons and short prompts reduce error and speed decisions.
- Signs: noises, leaks, weak pressure
- Tests: shutoff, pressure, filter check
- Actions: reset, replace filter, call technician
Conclusion
In the quiet hum of the furnace, the pump’s plight speaks louder than pipes: attention now averts winter’s chill. Readers are reminded that recognizing the eight signs, running safe DIY tests, and knowing when to call a pro can spare comfort and cost. Small temporary fixes may buy time, but timely replacement and regular maintenance preserve efficiency. Like a heartbeat to a body, a healthy pump keeps the whole system alive—tend it well.