How to Remove a Cistern Lid With a Single Push Button: Step-By-Step Fix for Modern Toilets
To remove a modern cistern lid with a single push-button, follow these steps: First, shut off the water supply and flush the toilet to empty the tank. Next, wear gloves and safety glasses, and keep a towel handy. Depress the button assembly to release the latch, and check for any hidden clips or screws. Carefully lift the lid straight up with even pressure. If it feels stuck, inspect for mineral buildup or snap-fit tabs, and gently pry at the release points. For additional guidance on variations and troubleshooting, refer to the following sections.
Quick solution to remove a cistern lid with a single push button
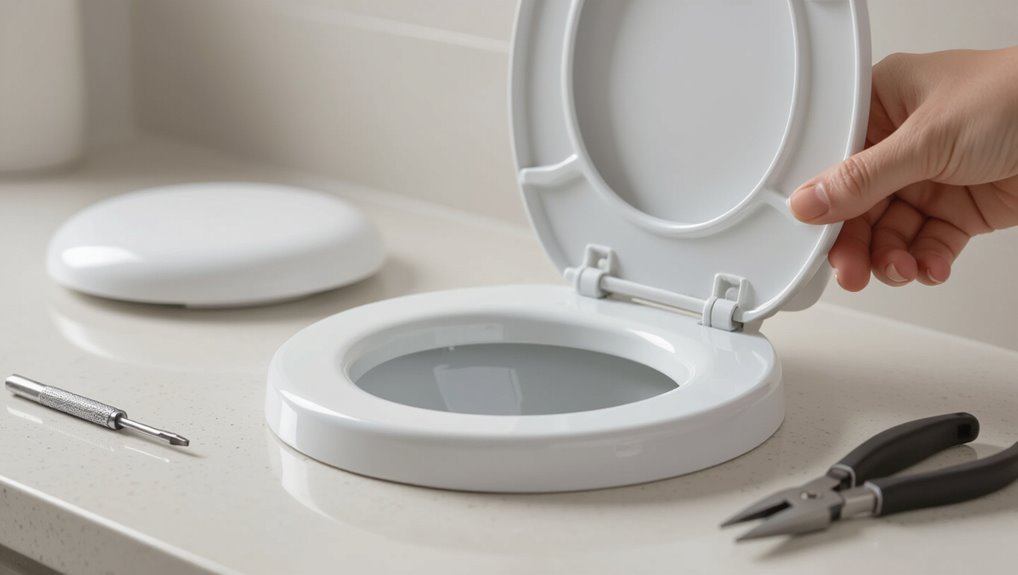
A single push-button mechanism allows safe lid removal by pressing the release and lifting straight up, avoiding force that could crack the ceramic.
This method typically takes under a minute and suits users of basic DIY skill. It is rated low difficulty with minimal risk when performed as described.
One-sentence summary of the safest removal method
Pressing the single push button near the cistern’s hinge releases the lid smoothly and safely, allowing it to be lifted off without forcing or prying.
The recommended method for how to remove cistern lid with single push button: steady one-handed press, support the shell with the other hand, lift vertically once disengaged, set aside on a padded surface, and reverse steps to replace, avoiding twisting or abrupt motions to prevent damage.
Required time and difficulty level
Typically under two minutes from start to finish, the quick-release single push button method is very fast and suits users with basic dexterity: it requires only locating the button, steadying the lid with one hand, pressing once, and lifting the lid vertically.
So total time depends mainly on familiarity and whether the cistern area is cluttered.
Difficulty rates as very easy; occasional stiffness or fouled seals may add effort.
Tools and safety precautions before you start
Before beginning, a concise list of tools and materials—such as a soft cloth, adjustable wrench, and replacement parts—should be gathered.
The writer recommends basic personal protective measures and clear toilet shutdown steps, including turning off the water supply and draining the cistern.
If corrosion, complex fittings, or uncertainty are present, a qualified plumber should be contacted.
Tools and materials needed
When preparing to remove a cistern lid, assemble basic tools—screwdriver or socket set for fasteners, a soft cloth or rubber mat to protect the lid, and adjustable pliers—and include safety items such as gloves, safety glasses, and a dust mask if debris is expected.
Also have a small container for screws, a flashlight, and a towel for spills.
- Screwdriver/socket set
- Soft cloth/rubber mat
- Adjustable pliers
Personal protective measures and toilet shutdown steps
A few simple precautions and a systematic shutdown make lid removal safer and cleaner:
The worker dons gloves and eye protection, clears the area, and places towels to catch drips.
Shut off the cistern inlet valve, flush to empty most water, and hold the button mechanism to release residual water.
Confirm no electrical exposure and keep tools within reach before proceeding.
When to call a professional
Need help? A professional should be contacted if the push-button mechanism resists removal, internal components are corroded or broken, seals leak persistently, or visible cracks exist in the cistern.
Also call a pro when unsure about shutoff valves, water pressure anomalies, or if prior attempts caused damage.
Professionals prevent further harm and guarantee compliant, safe repairs.
Understand modern single push-button cistern designs
Modern single push-button cisterns use a range of mechanisms—from simple plunger assemblies to cam-operated systems—and lids may be secured with screws, hidden clips, or snap-fit edges.
The presence of a dual-flush button often changes the internal linkage and can require different access or partial disassembly of the actuator before the lid can be lifted.
Inspect visually and by gentle probing to locate concealed clips, recessed screws beneath caps, or flexible snap-fit tabs before attempting removal.
Common push-button mechanisms and lid attachment types
Inspecting single push-button cisterns reveals a small set of common mechanisms and lid attachment methods that determine how the lid is removed and reinstalled. Typical mechanisms include spring clips, twist locks, and snap-fit posts; attachment types are rim rests, keyed slots, and adhesive pads. Table summarizes.
| Mechanism | Attachment | Removal tip |
|---|---|---|
| Spring clip | Rim rest | Lift slightly |
| Twist lock | Keyed slot | Rotate to release |
How dual-flush vs single-flush buttons affect lid removal
In comparing dual‑flush and single‑flush push‑button cisterns, the button assembly layout and mounting method often dictate how the lid is released: dual‑flush units typically have two adjacent buttons or a split rocker with a shared mounting plate that may clip into the lid or the flush valve.
In contrast, single‑flush designs usually use a single central plunger with simpler clip or twist fittings.
The difference changes access needed and removal sequence.
Identifying hidden clips, screws, and snap-fit connections
After noting how button layouts influence access, attention turns to the often-concealed fastenings that secure single push-button cistern lids.
Technicians inspect rim edges for snap-fit tabs, probe under the button panel for screws, and check rear flanges for hidden clips.
Identification uses gentle prying, flashlight inspection, and reference to manufacturer markings to prevent damage and guarantee correct disengagement.
Step-by-step procedure to remove the cistern lid safely
The procedure begins with turning off the water supply and flushing to empty the cistern.
The observer then checks the push-button assembly and the lid edge, releases the button by the appropriate method, and locates any retaining clips or screws beneath it.
Finally, the lid is lifted evenly with proper hand placement to avoid stress or damage.
Step 1 Turn off water and flush to empty the cistern
Shut off the water supply at the valve behind or beneath the toilet to stop flow into the cistern; then flush to drain as much water as possible.
Verify the tank is empty by holding the lever until no more water exits.
Place towels around the base to catch spills.
Wear gloves and proceed only when the cistern feels light and dry to the touch.
Step 2 Inspect the button assembly and surrounding lid edge
Once the cistern is empty and dry, attention turns to the button assembly and the edge where the lid meets the tank.
The inspector examines the button cap for clips, gaps, or visible fasteners, notes any silicone seals or debris along the rim, and checks for cracks or uneven seating.
Photographs or notes document findings before proceeding.
Step 3 Release the push-button assembly (twist, pull, or depress) without damaging it
Begin by identifying how the push-button is secured—twist, pull, or depress—then select the corresponding release method to avoid bending clips or cracking plastic.
Apply steady, even force: rotate gently if threaded, pull straight upward if press-fit, or depress and lift if spring-loaded.
Support the surrounding lid to prevent flex.
Stop if resistance feels wrong and reassess alignment before proceeding.
Step 4 Locate and disengage retaining clips or screws under the button area
Locate the area beneath the push-button and inspect for retaining clips or screws securing the lid.
The technician identifies clip types—plastic tabs, metal brackets, or small screws—and selects appropriate tools: flat screwdriver, trim tool, or small Phillips.
Clips are gently pried outward; screws are carefully loosened and removed.
All fasteners are set aside in order to prevent loss and to guarantee correct reassembly.
Step 5 Lift the lid evenly using correct hand placement
Using both hands, the technician positions palms flat on opposite sides of the cistern lid near its center to distribute weight evenly and prevent tipping.
With fingers wrapped slightly over the edges, they lift steadily, keeping the lid level and close to the body.
Small adjustments correct balance; any resistance prompts a brief pause to reassess grip and check for remaining fasteners before continuing.
Step 6 Set the lid aside and protect it during repairs
Place the removed cistern lid on a stable, cushioned surface to prevent chips, cracks, or scratches while work proceeds.
The lid should rest face down on soft cloth or foam, away from foot traffic and tools. Mark its orientation if necessary.
Cover with a clean cloth to keep dust out and guarantee ready access for reinstallation once repairs finish.
Variations and alternative removal techniques
Different cistern designs call for varied removal methods, from unscrewing visible bolts to unfastening snap-fit lids and stubborn clips.
Top-mounted chrome or plastic covers often hide fixing points and may require gentle prying or removal of decorative caps.
When the button assembly is stuck, simple workarounds like releasing tension, accessing the mechanism from below, or temporarily disengaging the actuator can allow lid removal without damage.
Removing lids with visible screws or bolts
When lids are secured with visible screws or bolts, removal typically follows a straightforward sequence: identify the fastener type, select the correct driver or socket, and loosen each fastener in a cross-pattern to prevent binding.
Support the lid, fully remove fasteners, and lift straight up. Inspect threads and hinges for corrosion; clean or replace damaged hardware before reassembly to guarantee proper seating and prevent leaks.
Dealing with snap-fit lids and stubborn clips
Tackle snap-fit lids and stubborn clips by first mapping their engagement points—tabs, living hinges, and undercuts—so force is applied where the plastic flexes rather than where it snaps.
Use thin flat tools to pry at clips’ base, levering gently while supporting the lid.
Work sequentially along each clip, freeing one side before the other, and avoid twisting that stresses molded joints.
Accessing lids with top-mounted chrome or plastic covers
Many cisterns hide a chrome or plastic top cover that must be removed before the actual lid can be accessed; these covers are often clipped, magnetized, or seated on a small flange and require a different approach than plain snap-fit lids.
Technique varies: pry gently at edge with a thin plastic tool, lift center if magnetic, or depress retention tabs. Support edges to avoid scratching.
Quick fixes when the button assembly is stuck
If the flush button assembly refuses to move, try simple diagnostics and noninvasive remedies before disassembling the cistern.
Inspect for grime, mineral buildup or visible corrosion; clean with vinegar or mild descaler.
Gently wiggle the button while depressing; apply lubricant sparingly to plastic pivots.
Check securing clips or retaining rings for misalignment.
If still stuck, consult manufacturer guidance or a plumber.
Common problems and how to troubleshoot them
Common issues encountered when removing a cistern lid include a lid that refuses to move due to mineral buildup or hardened sealant, a button assembly that breaks during removal, internal components shifting or falling into the tank, and lids that are cracked or otherwise damaged.
Immediate troubleshooting steps cover careful prying with appropriate tools, securing or retrieving loose parts to prevent further damage, and temporary fixes to seal or support a cracked lid.
The following section outlines specific causes, quick remedies, and when to opt for a permanent repair or replacement.
Lid won’t budge stuck on mineral deposits or sealant
When a cistern lid refuses to lift because of hardened mineral deposits or aged sealant, trouble is usually localized to the rim where water and air meet, causing the materials to bond tightly to porcelain or plastic.
Apply a mild vinegar soak via cloth or spray to soften deposits; allow dwell time, gently pry with plastic tools, and repeat.
Avoid metal tools to prevent chipping.
Button assembly breaks during removal immediate steps
Encountering a snapped or dislodged flush button during removal requires immediate assessment of damage and stabilization to prevent further component loss.
Inspect visible plastic and metal fragments, note retained spring or clip positions, and avoid pushing debris inward.
Stop and gather tools: needle-nose pliers, small flashlight, and container for parts.
Photograph arrangement for reassembly and proceed cautiously or seek replacement assembly.
Internal parts shift or fall into the cistern
A sudden shift or dropped component inside the cistern can halt repairs and lead to leaks or blockages if not addressed promptly.
Inspect visually, drain water, then retrieve loose parts with long-nose pliers or a magnetic tool. Note positions before removal to verify correct reassembly.
Secure float, valves, and clips; replace bent or corroded connectors. Test operation and check for leaks.
Cracked or damaged lid temporary and permanent solutions
Cracked or damaged cistern lids demand prompt attention to prevent water loss, injury, or further deterioration; temporary fixes include waterproof tape, silicone sealant, or supportive brackets to stabilize fragments and prevent sharp edges.
For permanent repair, replace the lid with a manufacturer-matched unit or a universal replacement, ensuring proper fit and weight support.
Dispose of fractured lids safely to avoid injury.
Reinstalling the lid and testing after maintenance
The lid should be re-seated carefully, ensuring the flush button assembly is correctly aligned with its mount.
Any clips or screws removed earlier must be reattached securely to prevent movement.
After restoring the water supply, observe for leaks and confirm the flush operates smoothly.
Re-seating the lid and aligning the button assembly
Carefully lower the lid into the cistern, ensuring it sits flush with the rim and the button assembly aligns with its mounting slot; misalignment can prevent button travel or cause leaks.
Once seated, verify the actuator stem engages the button smoothly and that the seal sits evenly around the opening.
Depress the button gently to confirm unobstructed movement and observe for any immediate water seepage before finalizing.
Reattaching clips or screws securely
Secure the lid by reattaching clips or tightening screws so it remains watertight and stable during use.
The technician aligns fasteners, engages clips until they click, and threads screws evenly to prevent warping.
Avoid overtightening which can crack plastic.
After securing, confirm button operation is unobstructed and lid sits flush, ensuring durable fit and preventing rattles or misalignment during normal use.
Turning water back on and checking for leaks and proper flush action
Turn the shutoff valve back on slowly while observing the cistern and its connections for any signs of leaking.
Once filled, press the push button to confirm full and partial flush cycles function correctly.
Inspect seals, inlet, and outlet joints for moisture during multiple fills.
Tighten fittings if needed, replace the lid, and verify stable operation with no drips or abnormal sounds.
Maintenance tips to prevent future removal issues
Routine cleaning and periodic descaling help prevent mineral buildup that can seize the lid or button mechanism.
Applying a suitable lubricant to moving parts and using gentle handling techniques reduces wear and eases future removal.
The button assembly and lid should be replaced when corrosion, cracks, or persistent stiffness are observed.
Regular cleaning and descaling routines
Establishing a regular cleaning and descaling schedule keeps a cistern lid and its surrounding components accessible and functional, reducing the chance of stubborn mineral buildup or corrosion that can make future removal difficult.
- Use mild descaler monthly to dissolve lime without damaging plastics or seals.
- Rinse thoroughly to remove residues that attract deposits.
- Inspect seals and surfaces during cleaning to catch early deterioration and address it promptly.
Lubrication and gentle handling best practices
Apply light, targeted lubrication to moving parts and contact points while handling the cistern lid with steady, even pressure to prevent warping or seal damage.
Use a silicone-based grease safe for rubber and plastics. Wipe away excess to avoid attracting debris.
Lift and replace the lid along its natural guides, avoiding twisting. Inspect seals and button interfaces for wear during each maintenance check.
When to replace the button assembly or lid
Monitor for diminished responsiveness, visible cracks, persistent leaks, or repeated difficulty removing the lid—these are clear indicators the button assembly or lid should be replaced.
Replace when tactile feedback weakens, springs deform, or plastic warps.
Choose compatible replacements, inspect mounting clips and seals, and document part numbers.
Timely replacement prevents malfunctions, water damage, and frequent service calls, preserving flush reliability and lid integrity.
Tools and replacement parts checklist for common repairs
Before starting any cistern repair, gather a compact toolkit and the specific replacement parts likely to be needed for common issues: adjustable wrench, slip-joint pliers, flat and Phillips screwdrivers, a basin wrench or long-handled pliers for tight spaces, a utility knife, plumbers’ grease, Teflon tape, and a flashlight.
- Replacement flush valve, fill valve, and seal kit
- Button assembly and retaining clips
- Overflow tube and tank-to-bowl gasket
Conclusion
The quiet, modern cistern—sleek button poised like a rendezvous—yields to a careful, practiced hand; the simple push that once summoned water now grants access to inner workings. Clean porcelain contrasts with hidden plastic gears and stubborn limescale, revealing both domestic calm and mechanical complexity. With tools set and steps followed, the lid returns, the button clicks, and routine is restored: ordinary surfaces masking small, intricate lives kept reliably in motion.