How to Build a Durable Catch Basin: Step-by-Step Guide for Homeowners
To build a durable catch basin that effectively collects surface runoff and protects your foundation, follow these essential steps:
- Assess Site Conditions: Check site grades and verify the location of utilities and required permits.
- Select Materials: Choose corrosion-resistant materials to ensure longevity.
- Determine Size: Size the basin according to expected water flows.
- Excavate the Area: Dig down to stable subgrade.
- Prepare Bedding: Install compacted gravel bedding to support the basin.
- Install the Basin: Set a prefabricated or cast catch basin in place.
- Connect Piping: Attach inlet and outlet pipes, ensuring they are sloped correctly for drainage.
- Backfill and Compact: Fill around the basin and compact the soil.
- Regular Maintenance: Keep the basin clear and functioning properly.
This guide includes detailed construction steps, materials needed, estimated costs, and troubleshooting tips to help you successfully build your catch basin.
What a Catch Basin Is and Why Durability Matters for Homeowners
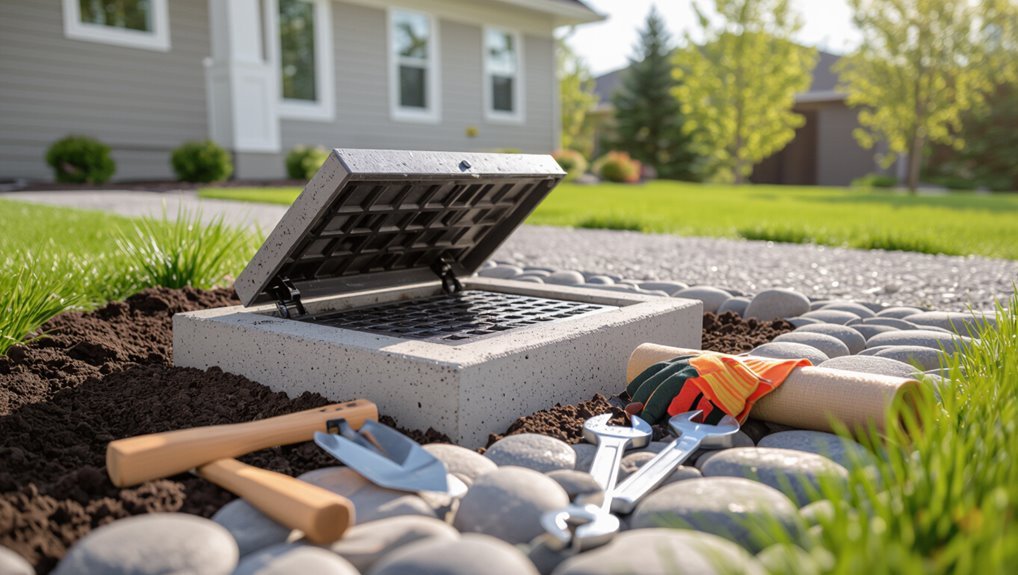
A catch basin is a recessed drainage structure that collects surface runoff around homes to direct water into storm or sanitary systems. It is commonly used at low spots, driveways, and near foundations.
If built poorly, a catch basin can fail to control erosion, allow water to back up and flood basements, and cause costly landscape or structural damage.
Durability depends on appropriate materials, sound structural design and load rating, and regular maintenance to guarantee long-term performance.
Purpose and common uses of catch basins in residential drainage
Functionality in landscaping and home maintenance often hinges on effective water management, and catch basins serve as key components in directing surface runoff away from foundations and low-lying areas.
They collect debris, protect drains, and support yard grading, driveway drainage, and downspout connections.
Homeowners studying how to build a catch basin prioritize placement, sediment control, and access for routine cleaning to guarantee long-term performance.
Risks of a poorly built catch basin (erosion, basement flooding, property damage)
Poorly constructed catch basins can quickly turn routine runoff into costly problems, including accelerated erosion, basement flooding, and structural damage to property.
Neglected or improperly sited basins allow concentrated flow to undermine soil, wash away landscaping, overwhelm foundations, and damage driveways or sidewalks.
Blockages and leaks exacerbate standing water, mold risk, and expensive repairs, reducing property value and increasing long-term maintenance burdens.
Key durability factors (materials, design, load rating, maintenance)
Lessons from failures—erosion, flooding, and structural damage—highlight why durability should guide every choice about a catch basin.
Selection of corrosion‑resistant materials, proper geometric design for flow and debris capture, and accurate load rating for anticipated traffic prevent collapse.
Routine inspection, sediment removal, and joint sealing extend service life.
Prioritizing these factors minimizes repair costs and reduces drainage failures.
Planning Your Catch Basin Project
Before breaking ground, the homeowner should assess drainage needs and site conditions and verify local codes, permits, and utility locations.
They must calculate basin size, capacity, and ideal placement to handle expected flows.
Finally, a realistic budget and timeline should be estimated to guide materials, labor, and inspection scheduling.
Assessing drainage needs and site conditions
Evaluate the site’s drainage needs by mapping water sources, flow paths, and low spots to determine where runoff concentrates and how much volume must be managed.
Inspect soil type, slope, and compaction to estimate infiltration. Note vegetation, existing drains, and hardscape that alter flow.
Record seasonal variations and peak storm intensity.
Use measurements to size the basin, outlet, and required rock or pipe materials.
Local codes, permits, and utility checks
Why check local codes and utilities first? Homeowners must verify zoning, stormwater regulations, and permit requirements to avoid fines and guarantee compliance.
Contact utility locators before excavation to mark water, gas, sewer, and electrical lines.
Obtain required permits, follow setback and runoff rules, and retain documentation.
Early coordination with authorities prevents delays, unsafe digging, and costly project revisions.
Determining basin size, capacity, and placement
Sizing a catch basin requires balancing expected runoff volume, peak flow rate, and site constraints so the structure can collect and convey stormwater without overflow or excessive maintenance.
Calculate drainage area, use local rainfall intensity and runoff coefficients to estimate peak flow, then select basin volume and grate capacity accordingly.
Position basins at low points, near downspouts or paved slopes, and allow access for cleaning.
Estimating budget and timeline
A realistic budget and timeline align materials, labor, permitting, and contingencies with the project’s scope so stakeholders can decide feasibility early.
The estimator lists required materials, equipment rental, excavation and installation labor, permit fees, and disposal.
Include contingency (10–20%) and seasonal scheduling factors.
Produce a phased schedule with milestones, lead times for special materials, and a final cost summary to support decisions and bidding.
Materials and Tools Required
The section outlines types of catch basin materials—concrete, plastic, and precast units—comparing expected longevity and maintenance needs.
It specifies recommended pipes, grates, and fittings chosen for corrosion resistance and load capacity.
A concise tools and safety checklist covers excavation gear, joining tools, PPE, and inspection equipment.
Comparison of common basin materials and their longevity
When selecting a catch basin, material choice directly affects durability, maintenance frequency, and long-term cost; common options include precast concrete, plastic (HDPE or polypropylene), and cast iron, each offering distinct performance profiles. Concrete: long life, heavy, low cost. Plastic: lightweight, corrosion-resistant, moderate lifespan. Cast iron: very durable, expensive, heavy maintenance.
| Material | Lifespan | Pros/Cons |
|---|---|---|
| Concrete | 50+ yrs | Durable, heavy |
| Plastic | 20–40 yrs | Corrosion-resistant |
| Cast iron | 70+ yrs | Very durable, costly |
Recommended pipes, grates, and fittings for durability
Select pipes, grates, and fittings that match site loads, soil conditions, and expected maintenance intervals to guarantee the catch basin system remains functional and durable.
Use PVC or HDPE for corrosion resistance and ease of installation; concrete or HDPE outlet pipes where heavy loads occur.
Choose ductile iron or galvanised steel grates for vehicular areas, plastic or stainless for landscaped zones.
Include neoprene seals and stainless fasteners.
Tools and safety equipment checklist
Several essential tools and safety items are required before excavation and assembly begin: a concise checklist guarantees efficiency and compliance.
Necessary items include sturdy gloves, eye protection, and a hard hat; plus hand tools, shovels, level, tape measure, wheelbarrow, concrete mixer or bucket, PVC cutter, and drainage fittings.
Emergency kit and high-visibility vest complete the set.
- Protective gear
- Excavation tools
- Assembly tools and fittings
Step-by-Step Construction Process
The construction process begins with preparing the site: marking the layout, excavating to grade, and shaping slopes for proper runoff.
Next come the base layers—compacting subgrade, spreading gravel, and placing bedding—followed by assembling or casting the basin and connecting inlet and outlet pipes to guarantee unobstructed flow.
The sequence finishes with backfilling, systematic compaction, and final grading to restore surface continuity and drainage.
Preparing the site: marking, excavation, and slope grading
Before digging begins, the site is surveyed and marked to define the catch basin footprint, inlet/outlet locations, and any adjacent utilities or grade controls.
Excavation proceeds to the specified depth, preserving stable sidewalls and removing organic material.
Slopes are graded to guarantee positive drainage toward the inlet, maintaining specified grades and shift angles, while stockpiled spoil is kept clear of the work area.
Installing base layers: compaction, gravel, and bedding
Once excavation is complete and grades verified, crews compact the subgrade and install layered base materials to provide stable support and proper drainage for the catch basin.
They place and compact 4–6 inches of crushed stone, add a geotextile separator if required, then spread a 2–3 inch bedding layer of coarse sand or fine gravel.
Each layer is compacted and checked for level.
Assembling and setting the basin (precast vs. poured-in-place)
Crews now assemble and set the catch basin using either precast units or a poured-in-place structure, choosing the method that best fits site constraints, load requirements, and available equipment.
For precast, units are lowered, aligned, leveled, and sealed on compacted bedding.
For poured-in-place, forms are built, reinforcement placed, concrete poured and vibrated, then cured and forms removed; adjustments guarantee plumb, grade, and stability.
Connecting inlet and outlet pipes and ensuring proper flow
After the basin is set and verified plumb and level, the next step is to connect inlet and outlet pipes and guarantee unobstructed flow.
Cut pipe to proper depth, deburr edges, and dry-fit connections. Use appropriate couplers, seals, or flexible boots for watertight joints.
Slope inlet toward outlet (typically 1–2%); install debris grate or sediment trap and test by running water to confirm clear drainage.
Backfilling, compaction, and final grading
Begin backfilling by placing select fill material in uniform lifts around the basin, maintaining natural bedding against the structure to prevent voids and misalignment.
Compact each lift to specified density using appropriate equipment, protect the basin from excessive vibration, and verify pipe alignment.
Restore surrounding soil profile, grade surface to direct runoff toward the inlet, and seed or mulch disturbed areas to prevent erosion.
Installing the grate, top ring, and load-bearing surfaces
Install the grate, top ring, and load-bearing surfaces by first confirming that the basin rim is level and clean. Then, set the cast-iron or composite top ring into place with a uniform bedding of mortar or elastomeric sealant as specified.
Align grate seating, torque fasteners to manufacturer torque, check for smooth flush connections to surrounding pavement, and verify load rating and drainage before reopening.
Structural and Waterproofing Details to Maximize Longevity
The section outlines key structural and waterproofing measures that extend a catch basin’s service life.
It compares reinforcement options such as rebar, wire mesh, and concrete strength, and explains how to seal joints to prevent infiltration.
It also addresses strategies to protect the structure from freeze‑thaw cycles and soil movement.
Reinforcement options (rebar, wire mesh, concrete strength)
Consider reinforcement choices—rebar, welded wire mesh, and appropriate concrete strength—as integral to a catch basin’s durability and watertightness.
Typical practice places #3–#4 rebar grids spaced 12–18 inches, supplemented by 6×6 W2.9/W2.9 welded wire mesh for thin sections.
Specify 4000–5000 psi concrete for structural loads.
Guarantee proper cover, concrete consolidation, and corrosion protection for long service life.
Sealing joints and preventing infiltration
Prioritize rigorous joint detailing and waterproofing to prevent soil and groundwater infiltration that undermines structural integrity and accelerates corrosion.
Specify flexible sealants compatible with concrete and pipe materials, install full-depth gasketed joints or hydrophilic waterstops at seams, and apply a continuous exterior waterproof membrane.
Guarantee proper substrate preparation, priming, and cured sealant inspection to maintain long-term watertight performance.
Protecting against freeze-thaw and soil movement
Many catch basins experience cyclic stresses from freeze‑thaw cycles and soil movement, so designs must combine resilient materials, robust detailing, and proactive drainage to prevent cracking, joint failure, and uplift.
Proper insulation, flexible joint materials, and air gaps reduce thermal stress. Adequate subdrainage, geotextile separation, and compaction control settlement.
Apply exterior waterproofing membranes and allow for movement with compression seals and slip planes.
Common Problems During Construction and How to Avoid Them
Common construction errors—such as incorrect slope or undersized basins—can produce persistent drainage problems.
Insufficient compaction, misaligned or clog-prone pipe layouts, and poor material choices are frequent contributors to settling, blockages, and premature failure.
Addressing these issues early through proper design, installation techniques, and material selection reduces the need for costly repairs.
Improper slope or sizing causing poor drainage
Incorrect slope or improperly sized inlets and outlets are frequent causes of a catch basin failing to move water efficiently. If the basin sits too flat, backs up, or cannot handle peak flows, sediment and debris will accumulate and surface flooding can occur.
Proper design requires calculating expected runoff, providing a consistent fall to the outlet, and matching inlet/outlet areas to peak discharge to prevent backup.
Inadequate compaction leading to settling
Failing to compact backfill and bedding materials properly is a leading cause of basin settling that compromises alignment, drainage grade, and structural integrity.
Loose soil and uneven compaction create voids that allow subsidence under loads and seasonal moisture changes.
Use appropriate lift thicknesses, moisture-conditioned fill, and mechanical compaction equipment, and verify uniform density with spot tests to prevent differential settlement and maintain long-term performance.
Pipe misalignment and clog-prone configurations
Align pipes precisely and configure flow paths to minimize misalignment and clog risks, because even small angular offsets, uneven elevations, or abrupt changes create pockets where debris accumulates and hydraulic performance degrades.
Inspect alignments before backfill, maintain consistent slope, use gentle bends, and provide accessible cleanouts.
Secure connections with proper couplings and supports to prevent sagging, separation, and future blockages.
Material selection mistakes that shorten lifespan
Choose durable, compatible materials from the outset to prevent premature failure of a catch basin. Using inappropriate pipe types, thin-walled boxes, or mismatched fittings introduces corrosion, joint leaks, and load-related cracking.
Inspect chemical compatibility, load rating, and UV resistance. Prefer concrete or high-density polyethylene with certified seals.
Avoid mixed-metal assemblies, undersized pipes, and nonstructural lids. Specify maintenance-friendly components to extend service life.
Maintenance Plan to Keep the Basin Durable
A concise maintenance plan outlines a routine inspection checklist and schedule to spot issues early.
It should specify regular cleaning for debris, silt, and grease, criteria for repairing versus replacing components, and winterizing or seasonal care steps.
Clear responsibilities and timelines guarantee the basin remains durable and functional.
Routine inspection checklist and schedule
When should inspections occur and what should they cover to guarantee long-term performance? A homeowner should follow a concise schedule and checklist to detect issues early.
- Monthly visual check: look for cracks, joint separation, and surface settlement.
- Quarterly operational test: confirm grates, flow paths, and access lids function.
- Annual structural review: inspect inlet/outlet alignment, wall integrity, and surrounding grading.
Cleaning debris, silt, and grease buildup
Remove accumulated debris, silt, and grease regularly to prevent clogging and structural damage.
Crews or homeowners should skim surface debris, vacuum or shovel settled silt, and flush sediments with low-pressure water.
Use biodegradable degreasers for oil buildup and a stiff brush for stubborn residue.
Collect and dispose of waste per local regulations.
Record cleaning dates and observed issues for maintenance tracking.
When to repair vs. when to replace components
After regular cleaning identifies wear, blockages, or damaged parts, maintenance teams must decide whether targeted repairs will restore function or full component replacement is warranted.
Repair is suitable for minor cracks, sealed joints, and replaceable grates.
Replace corroded frames, collapsed walls, or persistent infiltration.
Decisions weigh safety, long-term cost, availability of parts, and expected lifespan to guarantee basin integrity.
Winterizing and seasonal care tips
Prepare a seasonal plan that addresses cold-weather risks and routine care to preserve basin function through freeze–thaw cycles.
Inspect grates, seals, and inlets before frost, clearing debris and repairing cracks. Add insulation or protective covers where needed, and guarantee proper drainage slope to prevent standing water.
In spring, evaluate for winter damage, remove accumulated sediment, and schedule necessary repairs promptly to maintain durability.
Upgrades and Alternatives for Enhanced Performance
Consideration of upgrades and alternatives can markedly improve basin performance and longevity.
Options include adding sediment traps, catch baskets, or sumps to capture debris, integrating permeable pavement and bioswales to reduce runoff, and implementing retrofit solutions for existing basins.
Each measure should be evaluated for site-specific effectiveness, cost, and maintenance requirements.
Adding sediment traps, catch baskets, or sumps
Enhancing a catch basin with sediment traps, catch baskets, or a sump increases its capacity to capture solids and slows flow to promote settling, reducing downstream clogging and maintenance frequency.
Install a removable basket for easy debris removal; position a sump or forebay to collect heavy sediments; use baffles or inlet filters to reduce turbulence.
Regular inspection prevents overflow and preserves hydraulic performance.
Permeable pavement and bioswale integration
Several site-scale strategies combine permeable pavement and bioswales to reduce runoff volume, improve water quality, and extend catch basin life.
Permeable surfaces encourage infiltration, decreasing peak flows to basins. Bioswales provide filtration, pollutant removal, and temporary storage.
Coordinated grading, underdrains, and maintenance access optimize performance. Together they lower maintenance frequency, reduce sediment loads, and enhance resilience of drainage systems.
Retrofit options for existing basins
Evaluating existing catch basins for retrofit potential reveals clear pathways to improve hydraulic capacity, pollutant removal, and durability without full replacement.
Retrofit options include installed sediment traps, high-capacity grates, internal baffles, and flow control devices to reduce scour.
Adding filter cartridges, vegetated inserts, or sump extensions enhances treatment.
Corrosion coatings, concrete patching, and adjustable outlets extend service life and performance.
Cost Breakdown and Long-Term Value Considerations
Typical upfront costs for catch basins vary by material and installation method, from low-cost prefabricated units to higher-priced custom concrete systems.
Lifecycle expenses including routine maintenance, occasional repairs, and eventual replacement can surpass initial outlays if not planned for.
A more durable design often lowers insurance premiums and reduces long-term damage and repair costs.
Typical cost ranges by material and installation method
Cost varies widely depending on materials and installation methods, with basic pre-cast plastic basins and DIY shallow installs at the low end and reinforced concrete or custom-engineered systems with professional excavation at the high end.
Typical ranges:
- plastic DIY $100–$400
- polymer concrete $400–$1,200
- precast concrete $800–$2,500
- cast-in-place reinforced concrete $2,000–$6,000 plus labor and permitting.
Lifecycle costs: maintenance, repairs, and replacements
Consideration of a catch basin’s lifecycle costs extends beyond initial purchase and installation to include predictable maintenance, intermittent repairs, and eventual replacement, all of which affect long-term value.
Owners should budget routine clearing, sediment removal, and minor part replacements; plan for periodic concrete or cast repairs; and estimate replacement intervals.
Comparing lifecycle totals across materials and designs informs cost-effective choices over decades.
How durable design reduces insurance and damage costs
Designing catch basins for durability reduces both direct repair expenses and indirect costs such as higher insurance premiums or liability claims by minimizing failure modes that lead to property damage or environmental fines.
Durable materials, proper installation, and redundant safeguards lower incident frequency, shrinking claim likelihood and premium adjustments.
Long-term savings from fewer repairs, reduced downtime, and preserved property value justify slightly higher upfront investment through measurable total cost of ownership benefits.
Real-World Examples and Installation Scenarios
The section presents practical installation scenarios to illustrate how design choices change with context.
Examples include a compact residential yard with step-by-step highlights, a driveway- or road-adjacent basin engineered for vehicle loads, and solutions for sloped properties and hillside drainage.
Each case notes key considerations for sizing, materials, and maintenance.
Small yard residential installation: step highlights
In small residential yards, a catch basin installation typically follows a compact, practical sequence: site assessment to identify runoff paths and utility conflicts; sizing the basin to the expected flow; marking and excavating a shallow pit to match the basin dimensions; setting the basin on a level, compacted stone base; connecting inlet and outlet piping with proper slope; backfilling with bedding material and compacting in layers; and finishing the surface to match landscaping or hardscape.
Compact equipment, simple trenching, sediment trap installation, routine testing for flow and alignment, and minimal disturbance to plants complete the procedure.
Driveway or road-adjacent basin for vehicle loads
Installers working near driveways or roads must account for vehicle loads, pavement type, and maintenance access when selecting and placing a catch basin.
They choose reinforced grates, heavy-duty boxes, and deeper footings to resist axle loads. Placement aligns with pavement grading to prevent ponding, and access covers remain flush with surfacing.
Regular inspection schedules address sediment buildup and potential pavement-edge undermining.
Sloped properties and hillside drainage solutions
How can a catch basin be adapted to steep terrain without causing erosion or destabilizing slopes? Recommendations include terraced or stepped basins, anchored retaining structures, energy-dissipating outlet aprons, and buried permeable trenches to reduce flow concentration.
Proper grading directs runoff to multiple inlets. Geotextile reinforcement and vegetation stabilize soil. Regular inspection prevents undercutting; professional geotechnical input is advised for severe slopes.
Troubleshooting Guide for Post-Installation Issues
The guide outlines diagnostic steps for standing water or slow drainage, including inspection of inlet and outlet lines and flow testing.
It then addresses cracks, settling, or shifting with suggested temporary patches and long-term remediation such as underpinning or replacement.
Finally, it covers clog and odor removal techniques and preventive maintenance to minimize recurrence.
Standing water or slow drainage: diagnostic steps
Why is water pooling despite a newly installed catch basin?
Inspect inlet grates for debris, verify outlet pipe orientation and slope, and check for blockages with a snake or hose.
Confirm surrounding soil compaction and grading toward the basin.
Test flow by running water and observe retention time.
Measure basin elevation relative to downstream grade to identify improper installation or discharge restrictions.
Cracks, settling, or shifting: temporary fixes and permanent solutions
Address visible cracks, settling, or lateral shifting promptly to prevent further structural damage and drainage failure.
Temporarily seal hairline cracks with hydraulic cement and recompact adjacent soil to stabilize minor settlement.
For significant movement, excavate, assess undermining, rebuild base with compacted aggregate, replace damaged concrete sections or install reinforced walls.
Consult a structural or drainage professional for complex repairs and to prevent recurrence.
Clogs and odors: removal methods and prevention
Inspecting for clogs and odors quickly isolates common causes—debris, sediment buildup, trapped organic matter, or venting issues—so remediation can restore flow and eliminate smells.
Technicians or homeowners should remove surface debris, hand‑vac sediment, and flush with water. Use enzyme cleaners for organic residue, avoid caustic chemicals, and install a removable grate, sediment trap, and vented riser.
Schedule periodic inspections to prevent recurrence.
Quick Reference Checklists
Three concise checklists streamline the catch basin project: a pre-construction checklist to confirm permits, site layout, and materials; a construction day checklist to verify excavation, pipe connections, and safety measures; and an annual maintenance checklist to schedule inspections, cleanouts, and repairs.
Each checklist is presented as a quick-reference tool for crews and inspectors. This format reduces errors and keeps responsibilities clear.
Pre-construction checklist
A concise pre-construction checklist guarantees all site conditions, materials, permits, and safety measures are confirmed before excavation begins; it lists required utilities locates, soil and groundwater assessments, equipment needs, traffic and erosion controls, and verification of pipe and grate specifications so the installation proceeds without delays or rework.
- Confirm permits, utility locates, and access.
- Complete soil, groundwater, and load checks.
- Arrange materials, machinery, traffic and erosion controls.
Construction day checklist
On construction day, crews follow a focused checklist to verify site readiness, worker safety, material availability, and staging before any excavation or assembly begins.
They confirm permits, utility markings, and erosion controls; guarantee PPE, first aid, and traffic controls; and verify concrete, pipe, and grate deliveries.
Quick checks include:
- Verify utilities and permits.
- Confirm PPE and safety plans.
- Inspect materials and staging.
Annual maintenance checklist
Following the construction day checklist, responsibility shifts from installation tasks to long-term performance monitoring and upkeep.
Annual inspection guarantees functionality and prevents deterioration.
Suggested quick reference checklist:
- Clear debris, sediment, and vegetation; verify free-flowing inlet/outlet.
- Inspect for cracks, joint separation, and signs of erosion; record findings.
- Test flow after heavy rain, schedule repairs or professional cleaning as needed.
Conclusion
A homeowner recalled a small backyard creek that once rerouted a storm’s fury, carving a new path overnight—proof that water finds weakness. Building a durable catch basin is like planting a stubborn oak: proper roots, solid materials and regular care prevent upheaval. Studies show well-built basins reduce basement flooding by up to 80%, underscoring that thoughtful planning and quality work transform a temporary fix into decades of reliable protection.