How to Remove a Steel Bathtub: Step-by-Step Guide for DIY and Pros
To remove a steel bathtub, you need to follow a series of steps: disconnect the plumbing, cut through any caulk, and take off the trim and hardware. Next, detach the fasteners and use chisels and pry bars to break the adhesive or mortar holding the tub in place. For heavy tubs, you may need to segment them with a reciprocating saw and carefully leverage the pieces out. After removal, inspect and repair the subfloor and plumbing, and arrange for proper disposal or recycling. Remember to wear personal protective equipment (PPE), cap the pipes, and call a professional if you encounter complex plumbing or structural issues. Below are more detailed steps to guide you through the process.
Overview of Removing a Steel Bathtub: What to Expect
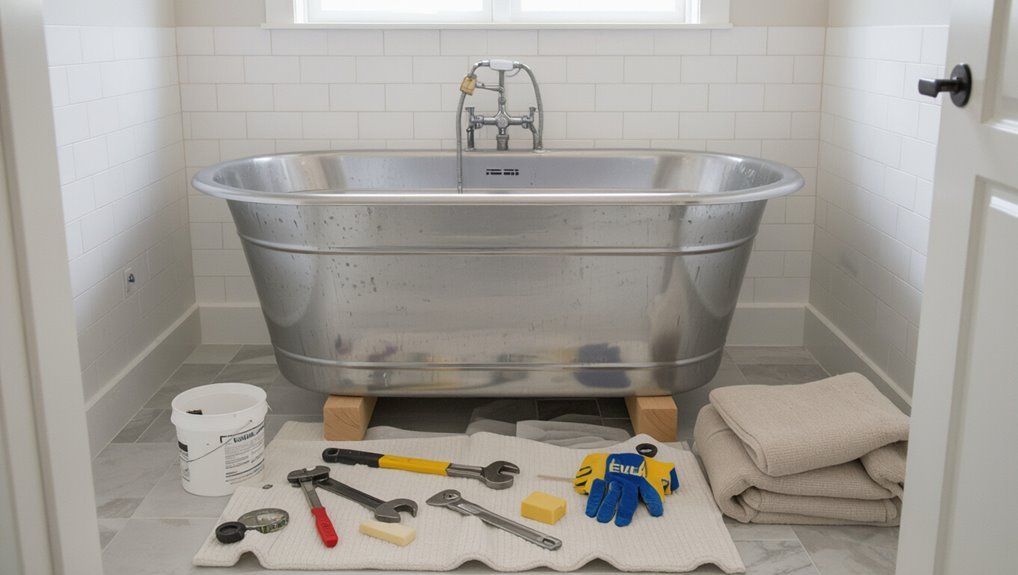
Removing a steel bathtub typically involves disconnecting plumbing, cutting or detaching the tub from surrounding framing and tile, and hauling the heavy fixture away. Most DIY jobs take a weekend, while professional removals can be completed in a few hours.
Homeowners should consider DIY only if they have carpentry and plumbing experience and the physical strength to maneuver the tub; otherwise, hiring a licensed contractor is advisable.
Necessary items include basic hand tools, pry bars, a reciprocating saw, pipe wrenches, work gloves, eye protection, dust masks, and a plan for disposal or recycling.
Quick summary of the process and time required
Start by estimating the scope: removing a steel bathtub typically involves cutting fixtures, disconnecting plumbing, breaking any surrounding tiles or flange, and levering the tub out of its alcove.
A concise plan for how to remove a steel bathtub spans 4–8 hours for a solo DIYer or 2–4 hours with an assistant and proper tools; debris removal adds extra time.
When to DIY vs. hire a professional
Several factors determine whether a homeowner should tackle a steel bathtub removal or hire a professional.
Consider structural complexity, plumbing and wall damage risk, access constraints, physical ability, and disposal logistics.
DIY suits simple removals with basic demolition and clear access.
Hire a pro for compromised subflooring, complicated plumbing, load-bearing alterations, confined spaces, or when code compliance and permits are involved.
Tools, materials, and safety equipment checklist
Once a decision has been made about DIY versus hiring a pro, the next step is assembling the right tools, materials, and personal protective equipment to handle a steel tub removal safely and efficiently.
Essential items include cutting tools, pry bars, fastener drivers, and disposal gear. Checklists focus on PPE, structural supports, plumbing caps, and hauling solutions.
- Safety gear
- Cutting tools
- Support materials
- Disposal supplies
Assessing Your Bathroom and Bathtub Before Removal
Before beginning removal, the installer identifies the tub type, mounting method, and surrounding materials to determine cutting or detachment needs.
They check plumbing, the drain connection, and any structural supports to plan safe disconnection and avoid water damage.
Access points and nearby fixtures are evaluated to guarantee there is room to maneuver the tub out without harming walls or finishes.
Identifying tub type, mounting method, and surrounding materials
Although the exact approach will vary, a clear assessment of the tub type, mounting method, and surrounding materials is essential prior to any removal work.
Determine if the tub is steel, cast iron, or acrylic-clad, note rim or apron mounting, and inspect surrounding walls, tile, backer board, and floor finishes.
Identify adhesives, mortar, or fasteners to plan safe disassembly and debris management.
Checking plumbing, drain, and structural considerations
After identifying the tub type, mounting method, and surrounding materials, attention should shift to the plumbing, drain, and structural elements that will affect removal.
Inspect supply lines, shutoffs, and flexible connections for accessibility and corrosion.
Locate the trap and drain flange; note whether cutting or disconnecting is required.
Check subfloor condition, framing, and load-bearing walls for rot, moisture damage, or reinforcement needs before proceeding.
Evaluating access points and neighboring fixtures
When evaluating access points and neighboring fixtures, the remover should map clear pathways for extracting the tub and bringing in tools or replacement materials, noting door widths, hallway turns, and stair access. They should measure clearance, identify obstacles like cabinets, toilets, and vanity, protect adjacent finishes, plan temporary fixture removal if needed, and confirm safe disposal routes and staging areas for demolition debris.
Preparing the Work Area
Before beginning removal, the water supply and any connected utilities should be shut off and disconnected to prevent leaks and electrical hazards.
Floors, walls, and remaining fixtures need protection with drop cloths and rigid floor guards to avoid damage during demolition.
The bathroom should be cleared of personal items and a disposal plan established for the tub and debris.
Shutting off water and disconnecting utilities
Shut off the main water supply and close any localized valves serving the tub to prevent leaks and flooding during removal.
Drain remaining lines and open nearby faucets to release pressure.
Turn off electricity to bathroom circuits at the breaker if removing or disconnecting electrical fixtures.
Detach supply lines, trim excess piping as needed, and cap or plug shutoffs to guarantee safe, dry utility isolation before demolition.
Protecting floors, walls, and fixtures
With utilities isolated and fixtures detached, the work area should be prepared to prevent damage from debris, tools, and heavy equipment.
Lay rigid protection over floors—plywood over thick rosin paper or contractor board—secure with low-residue tape.
Cover walls and remaining fixtures with drop cloths or rigid panels.
Keep pathways clear and place vibration-absorbing pads under heavy equipment to minimize impact.
Clearing the bathroom and creating a disposal plan
Clear the room of all movable items—towels, toiletries, mats, and any furniture—to create unobstructed access and reduce contamination risk.
Then seal vents and doors to limit dust spread.
Measure the tub and doorways, arrange disposal method (haul to landfill, recycling, or metal salvage), secure permits if required, and rent suitable transport or dumpster.
Notify neighbors of removal schedule.
Step-by-Step Removal Procedure
The removal procedure begins with disassembling visible fixtures: trim, faucet hardware, and the overflow plate are removed first.
Next, plumbing is disconnected—drain and P-trap are detached and supply lines isolated—before cutting through caulking and removing surround materials.
Finally, the tub is freed from mortar, adhesives, and any framing that secures it for safe extraction.
Remove trim, faucet hardware, and overflow plate
Begin by shutting off the water supply and opening the faucet to relieve pressure; this prevents leaks while removing hardware.
Remove escutcheons, handles, spouts, and trim screws with appropriate screwdrivers or Allen keys. Protect finishes with cloth while prying.
Unscrew the overflow plate and detach connected linkage or stop lever; label and bag fasteners and small parts for reinstallation or disposal.
Disconnect the drain and P-trap
Disconnects the drain assembly and P-trap next, working from the tub tailpiece down to the waste line to prevent spills and free the fixture for removal.
Caps or plugs remaining pipes, places a bucket beneath the trap, loosens slip nuts with channel locks, and removes the P-trap.
Unscrews the drain flange and disconnects tailpiece from overflow if present, inspecting seals and clearing debris.
Detach supply lines and isolate plumbing connections
Before working on the bathtub’s water supply, the homeowner should shut off both the hot and cold water at the main or local shutoff valves and relieve pressure by opening nearby faucets.
Then cap or plug supply lines, mark orientation, and loosen fittings with appropriate wrenches.
Secure loose pipes, note valve locations for reinstallation, and remove any flexible connectors to fully isolate plumbing before bathtub extraction.
Cut through caulking and remove surround materials
With the water lines capped and fittings secured, attention turns to separating the tub from surrounding materials. A utility knife slices through old caulk along edges and fixtures.
Remove escutcheons, trim, and wall panels carefully, prying with a putty knife to avoid undue damage.
Collect fasteners and scrap for disposal, exposing the tub flange and clear workspace for the next phase.
Freeing the tub from mortar, adhesives, and framing
Strike the mortar and adhesive bonds systematically, working from access points toward the tub to prevent sudden shifts.
Pry thinset and residual caulk with a flat chisel and hammer, softening stubborn glue with a recommended solvent.
Detach any wood framing nails or screws, noting support positions.
Clear debris frequently to inspect for hidden fasteners and to maintain a safe, unobstructed workspace throughout removal.
Techniques for removing a heavy steel tub (leveraging, cutting, and segmenting)
Begin removal by evaluating available clearance, weight, and attachment points to determine whether the tub can be levered out intact or must be cut into sections.
If leverable, use fulcrum bars and pry carefully at reinforced areas.
If not, mark cut lines, relieve plumbing, and segment with reciprocating saw and metal blade.
Deburr edges and retain fasteners for reassembly or disposal.
Lifting and transporting the tub safely
Lift using a coordinated team and proper equipment to prevent injury and property damage.
Workers measure doorways, clear pathways, and plan rests. Use lifting straps, appliance dollies, and protective pads; balance weight and keep loads close to the body.
Secure the tub to the dolly, use ramps for steps, and communicate continuously.
Place on a vehicle with padding and tie-downs for transport.
Special Cases and Alternative Methods
Special situations require adjusted techniques, such as tubs bedded in mortar or encased in tile or alcove surrounds.
Undermount and drop-in steel tubs present different attachment points and access challenges that affect removal strategy.
Power tools like a reciprocating saw, angle grinder, or torch are sometimes necessary but should be chosen and used with attention to surrounding materials and safety.
Removing a tub set in mortar or concrete base
When a steel bathtub is bedded in mortar or encased in a concrete base, removal requires breaking the bond between the tub and the surrounding material while protecting adjacent finishes and plumbing.
Use masonry chisels, rotary hammer with chisel bit, or small demo saw to score and chip away material.
Undercut edges, free drain area, support tub weight, and remove debris carefully to avoid cracks in nearby surfaces.
Dealing with tile encasement or alcove surround
How should one approach a steel bathtub that is encased in tile or fitted into an alcove surround? The process requires careful tile removal, cutting grout, and detaching trim to expose the tub flange.
Protect surrounding finishes, score caulk, and check for hidden fasteners.
Remove tiles selectively to create access panels, then unbolt or pry the tub free, avoiding damage to adjacent walls and plumbing.
Removing an undermount or drop-in steel tub
Remove the undermount or drop-in steel tub by first evaluating its mounting method and surrounding support structure.
Disconnect plumbing, remove trim, and detach any clips, brackets, or hidden fasteners.
Support the flange and counter or deck while loosening anchor points.
Lift carefully with assistance to avoid damaging countertops or framing.
Inspect and repair substructure and finish surfaces before installing replacement fixtures.
When to use a reciprocating saw, angle grinder, or torch
After the undermount or drop-in tub is freed from its fasteners and plumbing, some installers resort to cutting tools for constrained spaces or severely corroded steel.
Reciprocating saws cut through flange and thin walls quickly; angle grinders remove thicker edges and reshape openings; oxy-acetylene or plasma torches handle heavily rusted or welded sections.
Choose tools for access, metal thickness, and safety precautions.
Post-Removal Tasks
After the tub is removed, the subfloor and framing should be inspected and any damage repaired to guarantee a stable base for the replacement.
Plumbing and the drain rough‑in need to be cleaned, measured, and adjusted or replaced as required to match the new tub’s specifications.
The old tub and debris must be cleaned up and disposed of according to local regulations, with salvage or recycling considered where possible.
Inspecting and repairing subfloor or framing damage
Survey the exposed area thoroughly to identify water damage, rot, mold, or structural compromises in the subfloor and surrounding framing.
Document affected joists, sheathing, and support blocks. Remove deteriorated material, cut back to sound wood, and install replacement blocking or plywood of matching thickness.
Treat adjacent areas with anti-fungal primer. Fasten repairs with appropriate screws and joist hangers, then recheck for level and stability.
Preparing plumbing and drain rough-in for new tub
Begin by evaluating the existing supply lines and drain stub-out to determine alignment, height, and condition relative to the new tub’s specifications.
Shift or extend copper, PEX, or CPVC as needed, maintaining proper slope and secure supports.
Reposition the trap and waste arm for correct outlet location.
Pressure-test water and drain assemblies before installing the replacement tub.
Cleaning and disposing of the old tub and debris
Clear the work area of tools and loose materials, then assess the removed steel tub and surrounding debris for hazardous residues, sharp edges, and salvageable components.
Clean and decontaminate surfaces, bag insulation and small debris, and prepare the tub for transport or recycling.
Follow local disposal regulations and document material types.
- Separate recyclables
- Contain hazards
- Label waste
- Coordinate pickup
Common Problems and How to Solve Them
Common problems during steel bathtub removal include seized or corroded bolts, unexpected plumbing issues, the tub’s heavy weight and handling hazards, and the risk of damaging surrounding tile and walls.
Each issue requires specific precautions and tools, from penetrating oil and proper lifting equipment to shutting off water and protecting adjacent surfaces.
The following sections outline practical solutions and safety measures for these common challenges.
Stuck or corroded bolts and fasteners
Stuck or corroded bolts and fasteners are a frequent obstacle when removing a steel bathtub, especially in older installations where moisture and mineral buildup accelerate rust and thread seizure.
Penetrating oil, heat application, and careful impact from an appropriate wrench often free fasteners.
Where corrosion prevents removal, cutting or drilling followed by flange or stud replacement restores secure mounting without stressing surrounding framing or fixtures.
Unexpected plumbing complications
After overcoming corroded fasteners, attention often shifts to the plumbing hidden behind the tub, where unexpected issues can halt removal and damage surrounding work.
Common complications include brittle drain traps, deteriorated supply lines, soldered or glued joints, and hidden leaks.
Inspect before disconnecting, shut off water, cap lines, use proper fittings or replacements, and call a plumber if corrosion or complex rerouting is found.
Heavy tub weight and handling hazards
Plan for the tub’s mass and awkward shape before attempting removal: steel tubs are heavy, often weighing 100–200 pounds or more, with a rim and curved profile that concentrate weight and make grips insecure.
Use two or more strong helpers, proper lifting techniques, and lifting straps or a dolly.
Anticipate pinch points, sharp edges, and sudden shifts; wear gloves, eye protection, and steel-toe boots.
Preventing damage to surrounding tile and walls
Once helpers and lifting gear are in place, attention should shift to protecting adjacent tile and drywall from gouges, chips, and broken grout as the tub is moved out.
Apply foam padding and rigid boards along edges, tape protective sheeting to walls, remove loose grout, and use edge guards on the tub.
Work slowly, communicate, and inspect for early contact to prevent repair needs.
Safety Tips and Best Practices
Before beginning removal, the guide emphasizes using proper personal protective equipment and safe lifting techniques to prevent injury.
It also notes the importance of isolating electrical and gas services and ensuring adequate ventilation when cutting or working in confined spaces.
Finally, it outlines responsible disposal and recycling options for steel tubs to comply with regulations and minimize environmental impact.
Personal protective equipment and lifting techniques
Personal protective equipment and proper lifting techniques are essential to prevent injuries and property damage when removing a steel bathtub.
Workers should wear cut-resistant gloves, safety goggles, steel-toe boots, and back support belts as needed.
Use lifting straps, dollies, and at least two strong helpers for awkward loads.
Bend at the knees, keep loads close, communicate clearly, and clear pathways before moving the tub.
Electrical, gas, and ventilation precautions
After addressing protective gear and lifting techniques, attention should shift to electrical, gas, and ventilation hazards that can create fire, explosion, or inhalation risks during bathtub removal.
Verify power to nearby outlets and lighting is off, cap or shut faucets and gas lines, and ventilate the work area.
Use explosion-proof lighting if vapor presence is suspected and monitor air for dust and fumes.
Proper disposal and recycling options for steel tubs
Many municipalities and scrap yards accept steel bathtubs for recycling, but proper disposal requires verifying local regulations, removing non-metal fixtures, and preparing the tub for transport to prevent contamination or injury.
Options include municipal bulky waste, metal recyclers, donation if intact, or hazardous waste for fittings.
Steps:
- Clean and detach non-metal parts.
- Check local rules.
- Arrange transport.
- Obtain receipt.
Estimated Costs and Timeframes
A concise comparison of costs highlights typical DIY expenses—tools, disposal fees, and any patching materials—versus professional removal quotes that include labor and disposal.
Time estimates vary accordingly: a straightforward removal can take a single day for an experienced DIYer or crew, while complex jobs with tile, tight access, or structural work may require several days.
Readers should weigh material costs and expected timelines when deciding between DIY and hiring a pro.
Typical DIY cost breakdown vs. professional removal
Removing a steel bathtub can range from a relatively low-cost weekend project to a several-hundred-dollar professional service, depending on tools, labor, disposal, and unexpected repairs.
DIY costs typically include rental tools, pry bars, tarps, disposal fees, and permits—often $50–$300.
Professional removal bundles labor, hauling, and site cleanup—commonly $300–$800.
Hidden repairs or structural work increase both estimates.
Time estimates for simple vs. complex removals
Several factors determine how long a steel bathtub removal will take, ranging from a half-day for straightforward jobs to a full day or more for complex ones.
Simple removals involve minimal demolition, accessible plumbing, and no structural work, often finishing in 4–6 hours.
Complex jobs requiring tile demolition, routing plumbing, or hauling constraints can extend to 8–12+ hours and may need additional crew.
When to Hire a Professional and What to Ask
If the removal involves structural work, extensive plumbing, heavy deterioration, or safety hazards, a contractor should be contacted.
Prospective contractors should be asked about licensing, insurance, experience with steel tubs, timeline, and a detailed written estimate.
Compare quotes for scope, warranty, permits included, and any disposal or repair charges before deciding.
Signs you should call a contractor
Recognize the moments when a DIY approach risks costlier damage: extensive rust compromising the tub’s structural integrity, hidden plumbing problems revealed during removal, significant framing or subfloor repairs, or complications with load-bearing walls and built-in fixtures.
Call a contractor when permits, structural reinforcement, asbestos or lead concerns, complex rerouting of plumbing or electrical, or lack of proper tools and experience make safe, code-compliant work unlikely.
Questions to ask potential contractors and quotes comparison
What should be asked before hiring a contractor for a steel bathtub removal and replacement? Questions include licensing, insurance, timeline, disposal, and guarantees. Compare three quotes on scope, materials, and labor. Verify references and warranty terms. Use the table below to summarize key quote differences.
| Item | Quote A | Quote B |
|---|---|---|
| Scope | Demo+install | Demo only |
Preparing for Installation of a New Tub or Shower
After the old tub is removed, the contractor or homeowner should inspect and adjust rough-in plumbing and framing to guarantee proper drain, waste, and vent alignments.
Selection of a replacement should be based on measured opening, preferred material and finish, and the installation method required (drop-in, alcove, or shower pan).
If installation cannot proceed immediately, a temporary water diversion plan and sealed subfloor protection should be put in place.
Rough-in checks and adjustments after removal
Inspect the exposed framing, drain assembly, supply lines, and subfloor immediately after the steel tub is removed to identify structural damage, water intrusion, or incorrect plumbing locations that could affect the new installation.
Verify drain height and location, confirm supply shutoffs and spacing, check framing for rot or gaps, level the subfloor, and note required offsets or reinforcements before proceeding with new tub or shower preparation.
Choosing a replacement: size, material, and installation needs
Selecting a replacement tub or shower begins with clear decisions about size, material, and how it will be installed, since each choice affects fit, durability, and plumbing or framing work.
Measure rough opening and drain location, compare acrylic, fiberglass, cast iron, or steel for weight and resilience, and decide alcove, freestanding, or shower stall based on structural support and access for installers.
Temporary solutions if installation is delayed
Plan for short-term functionality and protection when a new tub or shower installation is delayed. A temporary shower curtain, portable showerhead, and rubber mat maintain basic use while preventing water damage.
Seal exposed plumbing with caps and waterproof tape. Use a sturdy plywood platform for stability if floor access is compromised.
Ventilate the area and schedule installation promptly to avoid mold and further deterioration.
Conclusion
After all the sweat, sparks and triumphant curses, the steel tub lies defeated — gloriously heavy, suspiciously intact, and remarkably familiar in its new role as a yard ornament. The homeowner, now an accidental demolition expert, reflects that every bolt removed taught patience, and every swear word taught humility. Ironically, the hardest part wasn’t the metal but the decision to start. At least the plumbing will be easier to blame this time.