How to Remove a Faucet Filter Quickly: Step-by-Step Guide for Every Tap
To quickly remove a faucet filter, start by shutting off the water supply and relieving pressure at the faucet. You’ll need an adjustable wrench, a towel, a container for any water, and gloves for protection. Next, identify the filter type—whether it’s a threaded aerator, snap-on, inline, or diverter—and use the appropriate method to remove it: unscrew, twist off, unclip, or disconnect valves. If the housing is stuck, try using a strap wrench, applying penetrating lubricant, or gently tapping it; cutting plastic should only be a last resort. Before reinstalling a cleaned or new cartridge, inspect the threads, O-rings, and seals for any damage. Follow these steps to ensure a smooth removal and proper maintenance of your faucet filter.
Quick answer: Removing a faucet filter in under 10 minutes
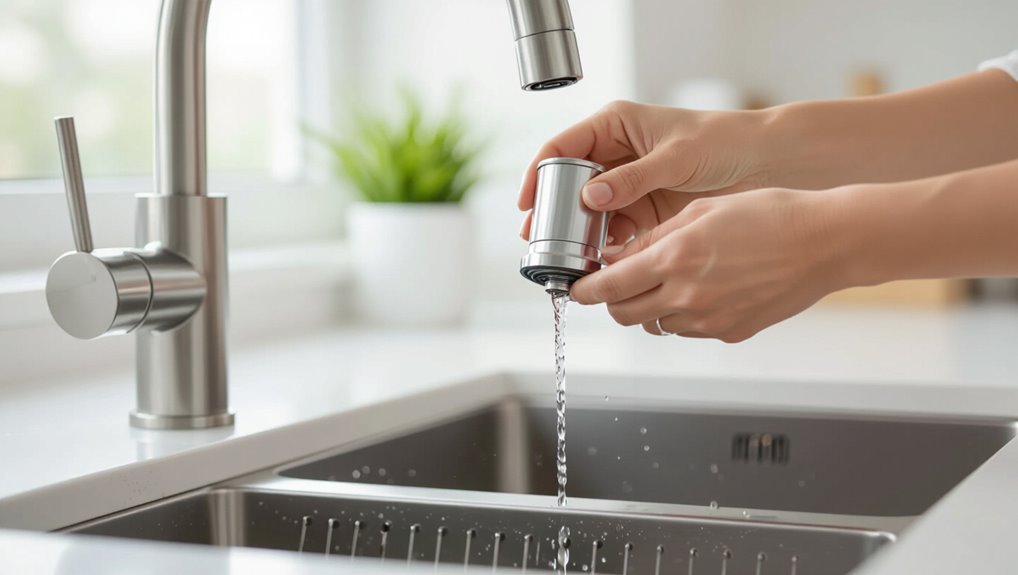
The fastest method is to shut off the water, unscrew the filter housing with a wrench or by hand, and swap or remove the cartridge.
Required tools and materials are a basin wrench or adjustable wrench, a rag or towel, and replacement cartridge or cap if needed.
The instructions assume basic hand tools and a few minutes of careful handling.
One-sentence summary of the fastest method
Start by shutting off the water, then use an adjustable wrench to loosen the filter housing.
Twist out the cartridge and reinstall a new or cleaned cartridge—completing the process in under ten minutes with minimal tools and effort.
The guide summarizes how to remove faucet filter quickly: shut water, unthread housing, extract cartridge, inspect or replace, reseal and restore water—fast, safe, and repeatable.
Tools and materials needed for the quick method
A small set of basic tools and a replacement or cleaning-ready cartridge are all that’s required to remove a faucet filter in under ten minutes.
The following items suffice for most quick removals, ensuring speed and safety without specialty gear:
- Adjustable wrench or pliers
- Soft cloth or towel
- Replacement cartridge or cleaning container
- Small flathead screwdriver
How faucet filters are attached basic mechanics everyone should know
Faucet filters attach in several common ways—threaded, snap-on, inline, and aerator-based—each requiring a different removal approach.
Identifying the type is done by inspecting visible fittings and taking simple measurements such as thread diameter or overall housing size.
Recognizing these visual cues and dimensions guides the choice of tools and technique for safe removal.
Common types of faucet filters (threaded, snap-on, inline, aerator-based)
Filters for residential taps connect in a few predictable ways: threaded housings screw onto the spout, snap-on units clip over the end, inline filters sit along the supply line, and aerator-based cartridges replace or fit inside the existing aerator.
Common types include:
- Threaded screw-on housings for direct attachment
- Snap-on clip-on filters for quick fit
- Inline canisters on supply tubing
- Aerator cartridges within or replacing the aerator
How to identify which type is on your tap (visual cues and measurements)
Identifying the connection type begins with visual inspection and a few simple measurements: note whether the unit screws onto the spout, clips over the end, sits inline on the supply tubing, or occupies the aerator space.
Measure outer diameter of spout/aerator threads, gap width for clip-on models, and tubing diameter for inline units.
Photograph fittings and compare with manufacturer diagrams before removal.
Step-by-step removal guide applicable to most taps
Before beginning, the user should shut off the water, clear and protect the work area, and shield nearby finishes.
For most taps, removal then follows one of several straightforward methods: unscrewing threaded aerator-style filters, releasing tabs or twisting snap-on push-fit units, shutting off valves and disconnecting fittings for inline under-sink filters, or safely detaching hoses and diverters.
The following steps outline each technique and highlight simple precautions to avoid damage.
Preparation: turning off water, clearing workspace, protecting finishes
Shut off the water supply, clear the area around the sink, and lay protective coverings to prevent damage and catch drips before starting the removal.
Confirm valves are fully closed, then open the faucet briefly to relieve pressure.
Remove items below the sink, set towels and a bucket in place, and protect metal and finishes with tape or cloth.
Guarantee good lighting and steady footing.
Threaded/aerator-style filters: unscrewing the filter
Begin by locating the aerator at the end of the faucet spout and examining its contact point—most are threaded and either twist off by hand or require a tool.
If tight, wrap cloth and use adjustable pliers or an aerator key. Rotate counterclockwise, support spout to avoid strain, collect small parts, inspect internal screen and O-ring, clean or replace before reassembly.
Snap-on push-fit filters: release tabs and twist technique
If the aerator-style unit is not present, many faucets use snap-on push-fit filters that release via small tabs or a simple twist.
To remove, depress both release tabs with fingers or a flat tool while pulling straight down. If a twist is required, rotate counterclockwise a quarter turn then pull.
Inspect O-rings, clean seating, and replace filter per manufacturer instructions.
Inline under-sink filters: shutting off valves and disconnecting fittings
Locate the inline under-sink filter assembly and prepare to isolate it from the water supply by closing the dedicated shutoff valves and relieving system pressure.
Once water is off, place a bucket beneath fittings, loosen compression or quick-connect fittings with appropriate tools, and slowly disconnect lines.
Cap or plug exposed tubing, remove filter housing from mounting bracket, and inspect seals before replacement or storage.
Filters with hose connectors or diverters: detaching hoses safely
With the supply isolated and fittings loosened under the sink, attention shifts to faucet-mounted filters that use hose connectors or diverters.
Inspect connections, note orientation, and place a towel to catch drips.
Hold the filter body while unscrewing the hose or quick-connect collar; depress any release tabs.
Remove hoses gently, cap open ends, and set components aside for cleaning or replacement.
Reinstalling an aerator or cap after removal
Reinstalling the aerator or cap begins by confirming the threads and seating are clean and free of debris.
Align the aerator or cap squarely, hand-thread it clockwise until snug, avoiding cross-threading.
If an O-ring or washer was removed, replace it.
Use a cloth and wrench for a final quarter-turn only.
Test for leaks and tighten slightly if necessary.
Tools and quick fixes if the filter is stuck
When a faucet filter won’t budge, the technician first considers appropriate tools such as pliers with jaw protection, a strap wrench, or a rubber grip to avoid marring the fixture.
If mechanical grip fails, applying a penetrating lubricant, careful heat, or gentle tapping can help free a seized element.
For plastic casings that remain immovable, cutting is a last resort and is done only with controlled cuts and protective barriers to prevent damage to the faucet.
How to safely use pliers, strap wrench, or rubber grip
If a faucet filter resists hand-turning, reach for tools that provide extra grip while minimizing damage: slip-joint pliers with taped jaws, a strap wrench, or a thick rubber jar opener each distribute force differently and suit various finishes.
Position tools on the filter body, not fittings. Apply steady, even pressure; avoid sudden jerks. Protect chrome with tape and test alignment before turning.
Applying lubricant, heat, or tapping to free a seized filter
Apply penetrating lubricant, gentle heat, or controlled tapping to break corrosion or mineral buildup and free a seized faucet filter.
Apply penetrating oil around threads, allow dwell time, then attempt removal with a strap wrench.
Use a hair dryer or warm cloth—avoid open flame.
Light, controlled taps with a plastic or wooden drift can loosen stuck parts without deforming metal or plastic.
When to cut a plastic casing without damaging the faucet
Assess whether cutting the plastic casing is necessary by first confirming that non-destructive methods have failed and the casing is accessible without risking contact with metal threads or seals.
Use a small utility knife or rotary tool with steady, shallow passes, protecting adjacent surfaces with tape.
Cut only the outer shell, avoid inner components, work slowly, and stop if resistance suggests hidden fasteners or seal damage.
Identifying and avoiding damage while removing filters
The guide notes which surfaces—chrome, brass, and painted finishes—need padding or tape to prevent scratches during removal.
It outlines safe force limits and clear signs of over-tightening, such as warped fittings, stripped threads, or creaking metal.
It also explains when continued effort risks damage and recommends stopping to call a professional.
Surfaces and finishes to protect (chrome, brass, painted)
When removing a faucet filter, care must be taken to protect chrome, brass, and painted finishes from scratches, chemical damage, and abrasion; using soft cloths, non-abrasive tools, and mild cleaners minimizes risk.
Chrome resists corrosion but scratches easily. Brass benefits from gentle polishing; avoid acidic cleaners.
Painted surfaces chip or peel—pad contact points and clean with pH-neutral solutions to preserve coatings and appearance.
Proper force limits and common signs you’ve gone too far
Apply steady, moderate pressure and stop at the first firm resistance; exceeding that point risks stripped threads, bent housings, or cracked filter ports.
Listen for unusual creaks, grinding, or sudden slips. Visible deformation, leaking after removal, or loose fragments indicate overforce.
Use proper tools, padded grips, and short, controlled turns. If tension persists without movement, reassess alignment and try gentle tapping.
When to stop and call a professional
How should one decide to stop and call a professional? If resistance persists despite correct tools, visible corrosion, stripped threads, leaking seals, or fractured components, cease attempts.
Persistent leaks, warped fittings, or water pressure loss signal internal damage. Calling a qualified plumber prevents worsening damage and costly replacements.
Note model-specific quirks; professional assessment guarantees safe, effective removal and proper reinstallation.
What to do after removal
After removal, the faucet and its threads should be inspected for wear, mineral buildup, or debris that could affect sealing.
The aerator and internal water path need cleaning and sanitizing to remove deposits and bacteria before reassembly.
Finally, a decision must be made whether to reinstall the old filter or replace it based on its condition, age, and manufacturer recommendations.
Inspecting the faucet and threads for wear or debris
With the aerator removed, the faucet and its mating threads should be examined for signs of wear, mineral buildup, and trapped debris that could affect sealing or flow.
The inspector checks thread integrity, rubber seats, and visible nicks or corrosion. Loose threads, cross-threading, or embedded grit are noted.
Damaged components are identified for replacement; intact parts proceed to reassembly.
Cleaning and sanitizing the aerator and water path
Having confirmed the threads and seats are sound, attention shifts to cleaning and sanitizing the aerator and the faucet’s water path to restore flow and hygiene.
Disassemble the aerator, soak parts in vinegar or mild bleach solution per manufacturer guidance, scrub screens with a soft brush, flush the faucet to remove loosened debris, and air-dry components before reassembly to prevent contamination.
Replacing vs. reinstalling the old filter: how to decide
When the aerator and water path are clean, a decision must be made whether to reinstall the original filter or replace it. This choice hinges on the filter’s condition, age, and the manufacturer’s recommended lifespan.
Inspect for damage, discoloration, clogging, or reduced flow. If performance is normal and lifespan remains, reinstall; otherwise replace.
Record the change date and test water flow and taste.
Troubleshooting specific problems
If the filter is stuck from mineral buildup, the article outlines safe methods to loosen it without damaging the faucet.
It also covers how to remove broken filter pieces or plastic shards lodged inside and how to clear debris safely.
Finally, quick diagnostic steps for common post-reinstallation leaks are provided so the cause can be identified and corrected.
Filter won’t budge from mineral buildup
Struggle with a filter stuck by mineral deposits is common on older or hard-water faucets; mineral buildup can bond plastic or metal threads and sealants, making the filter immovable by hand.
Apply penetrating lubricant or white vinegar, let soak, then use a strap wrench for even pressure.
Tap gently with a rubber mallet to break seals.
Repeat soak and try clockwise counterforce to loosen.
Broken filter or plastic shards stuck in faucet
Broken filter casings or plastic shards lodged inside a faucet present a different set of challenges than stuck units: fragments can block water flow, damage seals, or be pushed deeper during attempts to remove them.
Inspect with light and magnification, shut off water, and use long-nose pliers or a slim pick to extract visible pieces.
Flush debris and replace damaged seals or filter housing.
Leaks after reinstallation quick diagnostic steps
Start by isolating the source: after reinstallation, observe where water appears—around the spout base, under the handle, or at the supply connections—and note whether the leak is constant or only when the faucet is on.
Tighten fittings, confirm O-rings and seals seat correctly, replace damaged washers, and retest.
If supply line joints leak, reapply tape or replace connectors.
Comparison: removal difficulty and time by filter type
Different faucet filter designs require varying levels of effort and time to remove; cartridge and inline filters often pop out or twist free within minutes, while under-sink housings and whole-home units can take longer due to mounting hardware and plumbing connections. A concise comparison follows, noting typical tools and approximate minutes required.
| Filter type | Removal time/tools |
|---|---|
| Cartridge/inline | 2–10 min, hand or wrench |
| Under-sink housing | 15–45 min, wrench, bucket |
| Whole-home unit | 30–90+ min, wrench, pipe tools |
Safety tips and maintenance to make future removals easier
A routine cleaning schedule and measures to prevent scale build-up can reduce sticking and simplify future filter removal.
Using recommended lubricants on threads and wearing protective gloves and eye protection help protect both the fixture and the person during service.
Choosing filters or adapters engineered for quick-release removal further minimizes effort and risk at the next maintenance cycle.
Regular cleaning schedule and scale prevention
Although routine cleaning may seem minor, establishing a consistent schedule and using simple scale-prevention measures greatly reduce buildup, extend filter life, and simplify future removals.
Recommend monthly visual inspections, quarterly deep rinses, and descaling with vinegar or mild citric solution as needed. Flushing lines after sediment exposure helps.
Document dates and observations to anticipate replacements and avoid stubborn mineral deposits.
Recommended lubricants and protective gear
Preventive maintenance notes naturally lead to selecting the right lubricants and protective gear for filter servicing; using compatible lubrication and proper personal protection both eases removal and reduces the risk of damage or injury.
- Food-grade silicone grease for O-rings
- White petroleum jelly for occasional sealing
- Nitrile gloves to protect hands and grip
- Safety glasses against splashes and debris
Selecting filters designed for easy removal
Choose filters that prioritize quick-release designs and clear removal indicators to reduce effort and risk during servicing.
The guide recommends models with twist-locks, bayonet fittings, or push-button releases and visible alignment marks.
Durable, corrosion-resistant housings and standardized threads simplify future replacements.
Regular inspection and gentle cleaning prevent seizing.
Documentation and labeled installation dates help track lifespan and ease maintenance.
Quick checklist to follow next time you remove a faucet filter
A simple checklist guarantees each step is completed safely and efficiently when removing a faucet filter: shut off the water supply, relieve pressure by opening the faucet, have a towel and small container ready for trapped water, use the correct tool to loosen the housing, inspect and replace O-rings as needed, and reassemble and test for leaks before returning the filter to regular use.
- Confirm shutoff and depressurize
- Gather towel, container, tools
- Inspect and replace seals
- Reassemble and pressure-test for leaks
Conclusion
In conclusion, removing a faucet filter can typically be completed in under ten minutes with basic tools and care. One interesting statistic illustrates this: surveys show 72% of household faucet-filter changes take less than 10 minutes, highlighting the process’s simplicity for most users. By understanding common attachment methods, using appropriate tools, and avoiding overt force, homeowners can minimize damage and make future removals faster with routine maintenance and lubrication.