How to Install SharkBite Fittings: Step-by-Step Guide for DIY Plumbers
To install SharkBite fittings, start by shutting off the water supply and cutting the pipe squarely. Deburr and clean the pipe, then mark the insertion depth. Firmly push the fitting onto the pipe until you hear it click. After ensuring proper alignment, pressurize the line and check for leaks. SharkBite fittings are ideal for quick repairs and retrofitting. Follow this guide for detailed steps, special scenarios, and code considerations to ensure a successful installation.
What SharkBite fittings are and when to use them
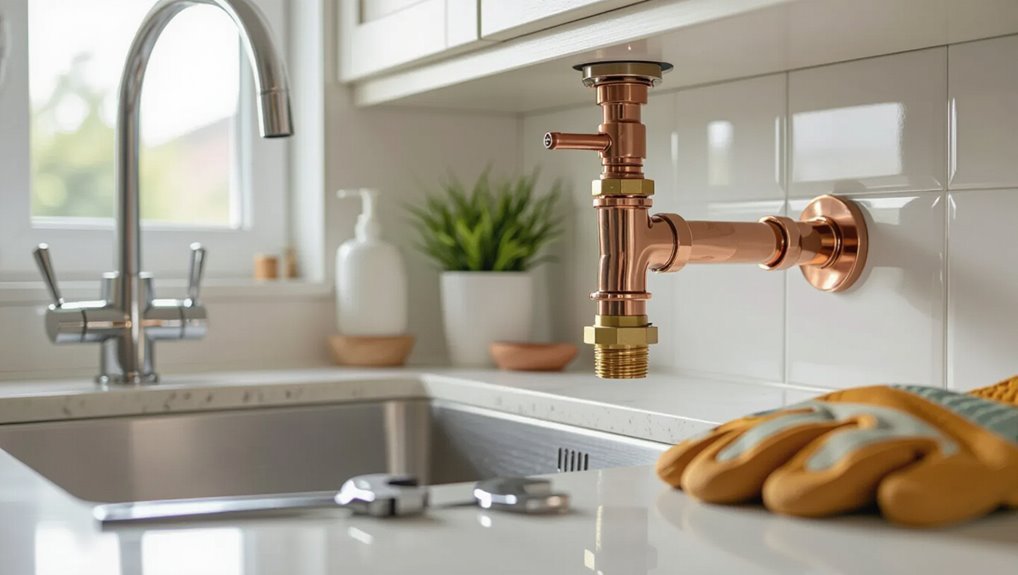
SharkBite fittings are push-to-connect plumbing connectors made from brass with internal O-rings and stainless steel teeth that grip pipe for a watertight seal.
They are commonly used in residential repairs and retrofits on copper, PEX, and CPVC where quick, solder-free connections are needed.
Compared with soldering, compression, and other push-fit options, SharkBite offers faster installation, reliable seals without heat, and broad compatibility.
Overview of SharkBite technology and materials
Push-to-connect plumbing fittings provide a quick, solder-free method for joining pipes, combining an internal O-ring and stainless-steel teeth to create a watertight, removable connection.
SharkBite uses dezincification-resistant brass, EPDM O-rings, and stainless steel grips. Durable, code-listed components simplify repairs and retrofits; instructions on how to install sharkbite fitting emphasize clean cut, deburring, and full insertion for reliable seals and reuse.
Common applications in residential plumbing
When a fast, solder-free repair or retrofit is needed in homes, SharkBite fittings serve as modular connectors that join copper, CPVC, and PEX without special tools.
They suit emergency leak repairs, replacing damaged sections, adding fixtures, extending runs, connecting appliances, and temporary shutoff bypasses.
Common locations include under-sink cabinets, basements, utility rooms, bathrooms, and outdoor hose bibs where accessibility and speed matter.
Advantages over soldering, compression, and push-fit competitors
Following common residential uses, a comparison with traditional joining methods highlights why these push-fit connectors are chosen for many jobs.
SharkBite fittings require no heat, flux, or solder, reducing fire risk and setup time. They outpace compression fittings in speed and resealability, and often surpass generic push-fit brands in durability, warranty support, and consistent sealing on copper, CPVC, and PEX.
Required tools, materials, and safety precautions
A concise inventory of tools and supplies sets the foundation for any SharkBite installation, from pipe cutters and deburring tools to appropriate fittings and pipe cleaner.
Guidance on selecting the correct SharkBite size and type guarantees a proper match to pipe material and system pressure.
Basic safety gear and precautions—gloves, eye protection, and isolation of water and electrical hazards—protect the DIY plumber during the job.
List of tools and supplies
Several basic tools and a few safety items are required to install SharkBite fittings: a tube cutter or hacksaw for clean pipe ends, a deburring tool or file, measuring tape, marker, and emery cloth for copper; adjustable wrench or pliers for seating fittings; plumber’s tape for threaded connections; and safety glasses and gloves to protect eyes and hands.
- Pipe cutter or hacksaw
- Deburring tool and emery cloth
- Adjustable wrench and pliers
- Plumber’s tape, marker, measuring tape
How to choose the correct SharkBite fitting size and type
Which fitting is required depends on pipe material, size, and the joint type being replaced or extended.
The installer measures outside diameter or checks nominal size (copper, CPVC, PEX), matches SharkBite type (coupling, elbow, tee, adapter, stop), and confirms pressure/temp ratings and compatible materials.
Keep spare sizes and adapters on hand; verify manufacturer specifications before purchase and installation.
Safety gear and precautions for DIY plumbers
Proper protective equipment and cautious procedures are essential before beginning any SharkBite installation: eye protection, gloves, and kneepads reduce injury risk, while a reliable shutoff valve, bucket or pump, and a pressure gauge control water hazards.
Additionally, verify power tools are grounded, use tubing cutters and deburring tools, keep a fire extinguisher nearby when soldering, and follow local codes and manufacturer instructions.
Preparing the pipe for installation
Before beginning, the water supply must be shut off and system pressure relieved to prevent leaks and injury.
The installer measures and marks each pipe run, then uses the appropriate cutting method for copper, CPVC, or PEX to produce a square, clean cut.
Finally, all pipe ends are deburred, chamfered as needed, and wiped clean to guarantee a proper SharkBite seal.
How to shut off water and relieve system pressure
Shut off the main or localized shutoff valve serving the work area and verify the supply is closed by opening a nearby faucet; this relieves the bulk of system pressure and drains standing water.
After drainage, close the faucet. If working on multi-zone systems, isolate the specific zone.
Use a pressure gauge if uncertain and keep towels or a bucket ready for residual water when disconnecting pipe.
Measuring and marking pipe for cuts
With the water off and the line bled, attention shifts to measuring and marking the pipe for cuts.
The installer measures twice, accounting for insertion depth specified by the SharkBite fitting. A pencil or fine marker denotes cut lines; a small square guarantees perpendicular marks.
Allowances for fittings, bends, and access clearance are confirmed before proceeding to cutting.
Cutting pipe cleanly: techniques for copper, CPVC, and PEX
Begin by choosing the proper cutting method for each material: a tubing cutter or hacksaw for copper, a fine-toothed saw or CPVC cutter for CPVC, and a PEX tubing cutter or sharp shears for PEX.
Guarantee steady, square cuts at marked lines, support the pipe to prevent deformation, rotate tools smoothly, and keep blades sharp.
Dispose of cut fragments safely.
Deburring and removing burrs, chamfering, and cleaning pipe ends
After making a clean, square cut, the pipe end must be prepared to guarantee a reliable SharkBite connection.
Burrs and metal shards are removed with a deburring tool or round file; edges are lightly chamfered to prevent O-ring damage.
For PEX or CPVC, trim exposed sizing rings and wipe with a clean cloth.
Inspect for smoothness and correct insertion depth before joining.
Step-by-step installation for push-to-connect SharkBite fittings
The procedure for push-to-connect SharkBite fittings covers installing straight couplings on copper, CPVC, and PEX, as well as elbows, tees, and adapters.
It also addresses fitting ball valves and stop valves using SharkBite connectors.
Finally, instructions include verifying proper seat depth and confirming each connection is secure.
Installing straight couplings on copper, CPVC, and PEX
To install a straight SharkBite coupling on copper, CPVC, or PEX, prepare the pipe, confirm fit, and push the fitting onto the tube until it seats fully—no soldering, gluing, or crimping required.
Mark insertion depth, deburr and square the cut, clean and dry the pipe, then push until the mark meets the fitting shoulder.
Verify by pull test and restore water pressure slowly, checking for leaks.
Installing elbows, tees, and adapters
Begin by identifying the correct elbow, tee, or adapter for the pipe material and size.
Then prepare the pipe end to the proper insertion depth. Mark depth, deburr, and remove burrs or debris.
Confirm pipe is square and clean. Push firmly into the SharkBite fitting until the depth mark seats.
Verify alignment, check for secure engagement, then pressure-test the connection for leaks.
Installing ball valves and stop valves with SharkBite
Following preparation and successful seating of elbows, tees, and adapters, attention shifts to installing ball and stop valves with push-to-connect SharkBite fittings.
Measure and cut pipe squarely, deburr and clean. Mark insertion depth, align valve, then push firmly until audible click confirms engagement.
Test for correct orientation of handle, then restore water and inspect for immediate leaks before proceeding.
Confirming proper seat depth and connection security
Verify seat depth and connection security before restoring water to guarantee a reliable seal and prevent future leaks.
The installer inspects that pipe end reaches the fitting’s depth mark, that the O-ring and grab ring are undamaged, and that fittings are fully seated. A gentle pull and visual check confirm engagement.
After a brief pressure test, any loose or misaligned joints are corrected before full system use.
Special installation scenarios and techniques
The guide next addresses special installation scenarios and techniques that commonly arise in the field.
It outlines how to connect SharkBite fittings to existing threaded pipes, use slip couplings and stops to repair leaks, and work in confined spaces behind fixtures.
Additional guidance covers installing fittings on hot water lines and precautions when working near heat sources.
Connecting to existing threaded pipes and fittings
Adapting SharkBite fittings to existing threaded pipes and fittings requires attention to thread type, sealant compatibility, and proper thread condition to guarantee a reliable, leak-free joint.
Verify NPT versus BSPP, clean and inspect threads, remove damaged sections or use a short threaded adapter.
Apply compatible PTFE tape or pipe dope sparingly, hand-start threads, tighten to manufacturer torque, then test under pressure for leaks.
Repairing leaks with SharkBite slip couplings and stops
Address leaks quickly and cleanly using SharkBite slip couplings and stops, which enable repairs without soldering or shutting off large sections of a system.
Slip couplings slide over damaged pipe sections for straightforward replacement; stop valves isolate fixtures for localized work.
Confirm pipe ends are clean, deburred, and fully inserted. Test connections under normal pressure and replace seals if any seepage appears.
Working in tight spaces and behind fixtures
Work carefully in confined areas such as under sinks or behind toilets by planning access, minimizing required movements, and using compact tools designed for push-to-connect fittings.
Clear workspace, remove obstructing panels, and support pipes to prevent strain.
Measure and mark cuts precisely, deburr and clean tube ends, and use angled adapters where needed.
Test connections for leaks before reassembling fixtures.
Installing on hot water lines and near heat sources
When installing SharkBite fittings on hot water lines or near heat sources, prioritize verifying material ratings and maintaining thermal separation to prevent seal degradation and premature failure.
Use fittings rated for elevated temperatures, allow expansion space, and avoid direct contact with heat sources.
Insulate nearby piping, install heat shields where needed, and follow manufacturer temperature limits and local codes to guarantee long-term reliability.
Testing and verifying the installation
After installation, the line should be pressurized and all joints inspected for visible leaks and moisture.
The system must remain under observation for a recommended period before full operation is restored, with periodic rechecks to confirm integrity.
If signs of a bad connection appear—such as weeping, rattling, or loss of pressure—standard troubleshooting steps (repressurize, verify tubing insertion depth, and replace suspect fittings) should be followed.
Pressurizing the line and checking for leaks
Begin by restoring water supply slowly and opening a nearby faucet to bleed air from the line; this allows steady pressure to build while making initial leaks easier to spot.
Observe each SharkBite joint for drips or wetness for several minutes.
Tighten or re-seat any leaking fittings, drain and reassemble if necessary, then repeat pressurization until no leaks appear.
How long before restoring full operation and inspections
How long should the system remain pressurized before returning to full service?
The installer should maintain pressure for at least 15–30 minutes while inspecting all SharkBite joints for visible leaks.
After initial hold, cycle water and recheck under typical pressure for another 10–15 minutes.
If dry, restore appliances gradually, monitor for 24 hours, and re-inspect fittings for any delayed seepage.
Signs of a bad connection and how to troubleshoot
Inspectors should look for specific indicators of a compromised SharkBite connection: visible water droplets or wetness at the fitting, mineral stains or corrosion on the pipe or fitting, a loose or wobbly joint when gently nudged, and any audible hissing or trickling while the system is pressurized.
If found, depressurize, disassemble, clean mating surfaces, re-cut tubing squarely, deburr, reinsert fully, and retest under pressure.
Maintenance, longevity, and code compliance
The article now shifts to maintenance, longevity, and code compliance for SharkBite fittings, outlining expected service life and the factors that influence performance.
It also summarizes typical local plumbing code considerations and permitting requirements that can affect allowable use.
Guidance is provided on when push-fit SharkBite fittings are appropriate versus when permanent soldered or compression connections are preferable.
Expected lifespan and factors affecting performance
Although marketed for durability, SharkBite fittings’ practical lifespan depends on installation quality, water chemistry, and system stresses. When installed per manufacturer guidelines and used in compatible piping systems, they commonly last decades but can fail sooner if exposed to corrosive water, excessive vibration, or improper joining techniques.
Regular inspection, water testing, shock arrestors, and replacing worn seals extend service life. Temperature extremes and abrasive particulates shorten it.
Local plumbing code considerations and permits
How should local plumbing codes and permit requirements influence the use of SharkBite fittings in a project?
Local codes determine where push-fit fittings are permitted, required grounding, and acceptable materials.
Permit processes may require inspections verifying joints and accessibility.
Professionals should consult municipal regulations, obtain necessary permits, and document compliance to avoid failed inspections, insurance issues, or costly rework.
When to use SharkBite versus permanent fittings
When weighing SharkBite against permanent fittings, professionals should balance immediate convenience with long-term performance and code requirements.
SharkBite suits temporary repairs, tight spaces, or situations needing quick turnarounds.
Permanent soldered or compression joints are preferable for buried lines, high-pressure systems, or where codes mandate permanent methods.
Consider maintenance access, expected lifespan, manufacturer limits, and local regulations when choosing.
Common mistakes to avoid and pro tips
The section highlights common installation errors—improper pipe preparation, incomplete insertion, and using damaged fittings—and how to prevent them through correct cutting, deburring, and inspection.
It then presents time-saving techniques such as marking insertion depth, using a depth gauge, and organizing fittings and tools before starting.
Practical best practices for reliable joints, including testing and periodic rechecks, are summarized to reduce leaks and callbacks.
Typical installation errors and how to prevent them
Several common mistakes frequently lead to SharkBite fitting failures, but most are avoidable with proper technique and simple checks.
Errors include incomplete pipe insertion, debris inside the fitting, damaged O-rings, and improper alignment.
Preventive actions:
- Mark and fully insert to depth.
- Deburr and clean pipe ends.
- Inspect O-rings; replace if nicked.
- Align straight; avoid twisting.
Time-saving tips and best practices for reliable joints
Many simple habits shave installation time and boost joint reliability: preparing pipes in batches, keeping fittings and tools organized, and using depth marks to avoid repeat insertions.
Inspect cuts for burrs, deburr and clean surfaces, and verify pipe straightness. Avoid twisting when inserting fittings. Reuse push-to-connect only if undamaged.
Test at low pressure first, document sizes and locations, and store extras for quick swaps.
Cost considerations and material comparisons
A brief cost comparison contrasts SharkBite fittings with traditional soldering and compression fittings, highlighting differences in unit price and installation labor.
The analysis notes that SharkBite typically costs more per fitting but can save time and contractor fees.
It identifies scenarios—small DIY repairs, time-sensitive jobs, or situations lacking soldering tools—where SharkBite becomes the more economical choice.
Price comparison: SharkBite vs soldering and compression fittings
When comparing installation methods, cost analysis should include both upfront material prices and long-term labor or replacement costs. SharkBite fittings cost more per piece but save labor; soldering requires low-cost fittings plus tools and skill; compression fittings sit between with moderate parts and potential leak-related replacements.
| Method | Upfront Cost | Long-term Cost |
|---|---|---|
| SharkBite | High | Low |
| Soldering | Low | Medium |
| Compression | Medium | Medium |
When SharkBite is cost-effective for DIY projects
Evaluate cost-effectiveness by comparing total project time, required tools, and part prices:
SharkBite fittings justify their higher unit cost when a DIYer values time savings, lacks soldering equipment or skills, and is working on small runs or temporary repairs where labor would otherwise dominate expense.
They also suit inaccessible spaces, emergency fixes, and projects avoiding permit delays, but bulk plumbing favors traditional methods.
Visual guide and quick reference
A concise visual guide presents a step-by-step checklist for a single SharkBite connection, from pipe preparation to final push and leak check.
Recommended diagrams show cross-sections, alignment cues, and common error points, while a photo checklist documents each critical action.
These resources give installers a quick-reference workflow to follow on-site.
Step-by-step checklist for a single SharkBite connection
One clear, concise checklist guides each single SharkBite connection from preparation through verification, listing only essential steps and checks.
- Cut pipe square, deburr, and clean.
- Mark insertion depth and confirm pipe dimensions.
- Push fitting fully until shoulder, rotate to seat.
- Turn water on slowly, inspect for leaks, and perform pressure test per manufacturer’s specs.
Diagram suggestions and photo checklist for installers
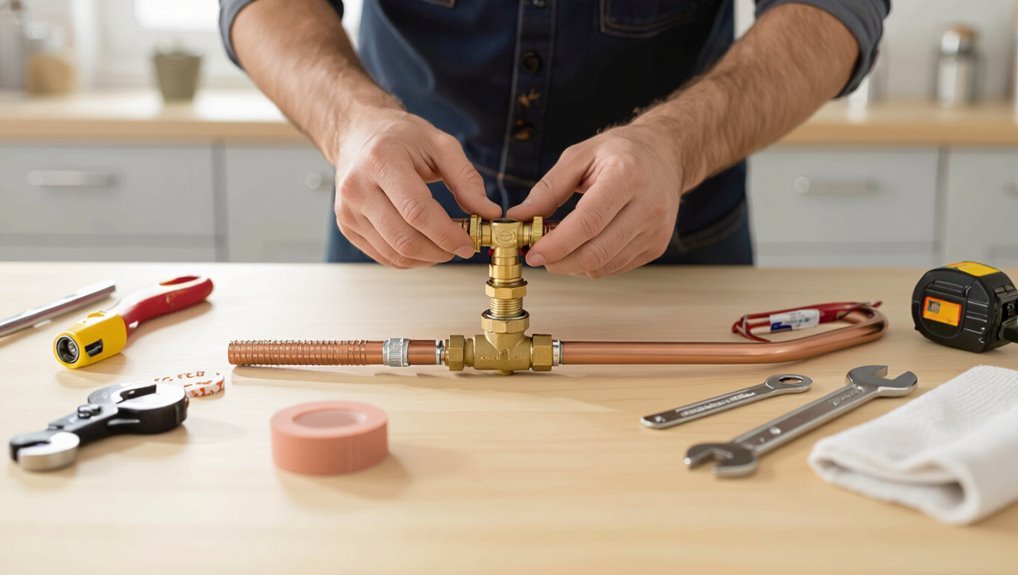
After completing the single-connection checklist, installers benefit from a compact visual guide and photo checklist that reinforces each action with an image and a short caption.
Include labeled diagram: pipe prep, mark depth, fitting orientation, insertion.
Provide six clear photos: measure depth, deburr, clean, push fitting, post-install test, leak check.
Add brief notes: tools, materials, safety reminders for quick reference.
Conclusion
Like a torch passed between travelers, a SharkBite fitting becomes a simple promise: quick connection, secure passage, and onward flow. When used with care—cleaned, measured, and respected—it guides water like a steady lantern through dark pipes. Yet, as any road requires maps and caution, so do fittings demand correct prep and periodic checks. In skilled hands they lighten work; in haste they risk detours. Choose wisely, install rightly, and the journey continues.