How to Run Water Lines in a Crawl Space: Step-by-Step Guide for DIYers and Pros
To run water lines in a crawl space, you’ll need to follow a systematic approach that includes planning, selecting materials, and ensuring compliance with local codes. Start by mapping your route, obtaining necessary permits, and choosing between PEX, CPVC, or copper pipes. Clear the crawl space of debris, install a vapor barrier, and wear appropriate PPE. After measuring and cutting your pipes, join them securely, provide adequate support, insulate where necessary, and pressure-test the system. Finally, seal any penetrations and document your work. For detailed step-by-step instructions, troubleshooting advice, and guidance on when to hire a professional, continue reading.
Overview of Running Water Lines in a Crawl Space
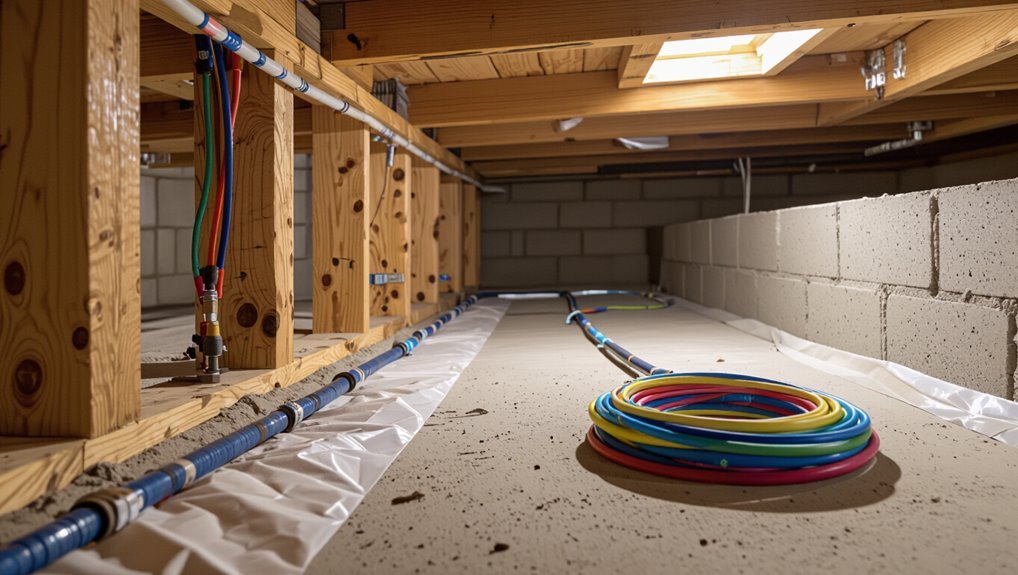
This guide explains how a competent DIYer or hired plumber can plan and run water lines through a crawl space, outlining tools, materials, and when professional help is recommended.
It summarizes the basic steps—planning the route, cutting and joining pipe, insulating and testing—plus typical time and cost ranges for common jobs.
It also highlights legal and safety factors such as local permit and code requirements, required inspections, and situations that should trigger calling a licensed professional.
What this guide covers and who it’s for
Because crawl-space plumbing projects vary by house age, climate, and existing foundation conditions, the guide focuses on practical, code-aware methods for running water lines in typical residential crawl spaces.
It outlines required tools, materials, common layouts, insulation and freeze protection, fastening and support, basic pressure testing, permit considerations, and when to call a pro.
Designed for competent DIYers and entry-level plumbers.
Quick summary of the process and expected time and cost
Run a straightforward crawl-space water-line job in a few focused stages:
- plan the route and obtain permits,
- clear and light the crawl space,
- lay and support piping with proper insulation and freeze protection,
- pressure-test the system, and
- connect to the house supply and fixtures.
Typical DIY time: one to three weekends depending on access.
Materials range $150–$700; pros usually charge $500–$2,500.
Key legal and safety considerations (permits, codes, when to call a pro)
Several jurisdictions require permits and inspections for installing or altering water lines in a crawl space. Compliance with local plumbing codes, backflow prevention rules, and minimum clearance and insulation standards is essential to avoid fines and failed inspections.
Homeowners should verify permit requirements, follow code-prescribed materials and supports, maintain frost protection, and call a licensed plumber for complex reroutes, leaks, gas-line proximity, or when inspections are mandated.
Essential Basics Before You Start
Before beginning, the writer outlines suitable piping options for crawl spaces—PEX, CPVC, and copper—and the pros and cons of each.
A concise tools and materials checklist is provided alongside a note on common crawl space layouts and how joists, piers, and insulation influence routing decisions.
Finally, the section flags the need to consult local plumbing codes and frost-protection measures that may dictate depth, insulation, or heat-tracing requirements.
Types of water supply piping suitable for crawl spaces (PEX, CPVC, copper)
When choosing piping for a crawl space, the three common options—PEX, CPVC, and copper—each offer distinct advantages and trade-offs in durability, flexibility, cost, and freeze resistance.
PEX is flexible, simpler to route, and forgiving of minor freezing.
CPVC is rigid, affordable, and chemical-resistant.
Copper is durable, corrosion-resistant, and pricier.
- PEX: flexible, freeze-tolerant
- CPVC: economical, rigid
- Copper: long-lasting, costly
Choose based on access, budget, and climate.
Tools and materials checklist
After selecting between PEX, CPVC, or copper based on access, budget, and climate, a clear list of tools and materials sets the groundwork for a safe, efficient crawl-space installation.
Essential items include pipe, fittings, fasteners, insulation, and safety gear. Verify local code requirements before purchasing.
- PEX/CPVC/copper pipe plus fittings
- Tubing cutter and crimp tools
- Pipe insulation and supports
- Safety gear and vapor barrier
Common crawl space configurations and how they affect routing
Crawl spaces vary widely—conditioned versus unconditioned, shallow versus deep, and continuous versus segmented—and each layout dictates different piping strategies.
In shallow, accessible spaces, run main trunks along joists; deep or tall crawl spaces allow freestanding runs with easier insulation.
Segmented layouts require strategic routing through access bays or underfoot bridges. Obstructions, venting, and ductwork determine clearances, supports, and service access.
Understanding local plumbing code requirements and frost protection
Which local codes apply and how they treat frost protection are the two priorities before any pipe is run through a crawl space.
The article recommends checking municipal plumbing codes, permit requirements, minimum insulation R-values, allowable pipe types and burial depths, and required heat tracing or setback rules.
Compliance avoids fines, failed inspections, and freeze damage; document approvals before starting work.
Planning Your Water Line Route
The planner should map an efficient, code-compliant route that minimizes bends and keeps runs accessible.
They must select proper pipe diameters based on required flow and pressure, and note the location of existing utilities, fixtures, and shutoff valves.
Potential obstacles and practical access points should be identified to guarantee installability and future maintenance.
How to map an efficient and code-compliant route
When planning a water line route in a crawl space, the installer should first evaluate existing structural elements, mechanical systems, and soil or vapor conditions to identify the most direct, accessible, and code-compliant path between connection points.
Then document clear routing on plans, avoid crossing HVAC ducts or electrical runs, maintain required clearances, provide accessible shutoffs and isolation valves, and note freeze protection and support locations.
Sizing supply lines and choosing pipe diameter
Properly sizing supply lines requires balancing fixture demand, allowable pressure loss, and future expansion to guarantee adequate flow without unnecessary cost.
Calculate peak demand using fixture unit values, then select pipe diameter to limit head loss per code tables or manufacturer charts.
Consider run length, fittings, and pump or pressure conditions.
Upsize main trunks for simultaneous use; downsize branch lines accordingly.
Locating existing utilities, fixtures, and shutoff valves
After determining pipe sizes and routes based on demand and pressure loss, attention shifts to mapping what already occupies the crawl space.
Inspect and record locations of electrical conduits, HVAC ducts, gas lines, sewer stacks, existing water feeds, fixtures, and accessible shutoff valves.
Note pipe materials, elevations, support points, and clearances.
Mark positions on a sketch for coordination and safe routing.
Identifying obstacles and selecting access points
A clear survey of the crawl space identifies physical and mechanical obstacles—support piers, insulation batts, ductwork, wiring runs, masonry footings, and soil pockets—that will dictate feasible water line paths and access points.
The planner marks obstruction-free routes, prioritizes shortest, protected runs, chooses access panels near valves or fixtures, and accounts for slope, freeze protection, and future serviceability while minimizing disturbance to structure and systems.
Preparatory Steps in the Crawl Space
Before beginning work, the crawl space should be cleared of debris and arranged to allow safe, efficient access to the planned route.
The installer must use appropriate personal protective equipment, set up temporary lighting and supports, and address moisture issues with ventilation or vapor barriers as needed.
These preparatory steps reduce hazards and protect the piping installation.
Preparing the crawl space: clearing debris and improving access
Clearing the crawl space of debris and improving access establishes a safe, workable environment for running water lines.
Remove loose trash, old insulation, and obstructive materials; bag and dispose properly.
Trim encroaching vegetation at openings and create a clear path to work areas.
Level uneven soil, relocate stored items, and install temporary lighting and stable plywood walkways to facilitate movement and equipment placement.
Personal protective equipment and safety setup
With the crawl space cleared and access improved, attention turns to personal protective equipment and a safety setup that shields workers from common hazards.
Workers should wear N95 or P100 respirators, eye protection, knee pads, gloves, and waterproof boots.
Confirm adequate lighting, a stable crawl board, a spotter or buddy system, and an accessible first-aid kit.
Test tools and secure electrical connections before entry.
Moisture control, vapor barriers, and ventilation concerns
Because excess moisture accelerates wood rot, mold growth, and pipe corrosion, effective moisture control is essential in any crawl space project.
Inspect for leaks, grade drainage away from the foundation, and repair plumbing before work begins.
Install a continuous polyethylene vapor barrier, seal seams and penetrations, and consider a dehumidifier or passive ventilation strategy to maintain relative humidity below 60%.
Temporary support and lighting
Before work begins, establish secure temporary supports and reliable lighting to protect both the structure and the crew.
Use adjustable jack posts or bracing under any compromised joists, and distribute loads evenly.
Install LED task lights with grounded cords and outlet protection, avoiding trip hazards.
Position lighting for shadow-free visibility along planned run paths.
Inspect supports and lights daily, replacing damaged components promptly.
Installing Water Lines Step-by-Step
Before installing new lines, the water supply is shut off and existing piping is drained to prevent spills and pressure.
The installer measures and cuts PEX or alternative pipe with the proper tools, then joins sections using the appropriate method for the material—crimp, clamp, push‑fit, or solder.
Pipes are routed around joists, beams, and insulation and secured with straps or hangers at manufacturer‑recommended spacing to avoid compression and support long runs.
Shutting off water and draining existing lines
Shut off the main supply valve and relieve pressure in the system to prepare for work in the crawl space.
Open all faucets and exterior hose bibs to drain lines, then close indoors.
Locate and open low-point drain valves or remove a small section of pipe to expedite draining.
Collect discharged water in buckets, verify flow has stopped, and use a wet vacuum for residual pockets.
Cutting and fitting PEX (or chosen material) tools and techniques
Gather the right tools and plan each connection carefully: cutting and fitting PEX (or other chosen piping) requires a quality PEX cutter or tubing cutter, deburring tool, measuring tape, marker, appropriate fittings (crimp, clamp, or press), a go/no-go gauge or ring, and a heat source or expansion tool if using expansion-style PEX.
Measure twice, cut squarely, deburr edges, verify fit, and orient tubing to minimize stress and bends.
Joining methods: crimp, clamp, push-fit, solder (material-specific)
With tubing cut, squared, and deburred, the next step is selecting and executing the appropriate joining method for the material and application. Choices depend on pipe type, accessibility, and code.
- Crimp: PEX with copper rings and crimp tool; reliable, common.
- Clamp: Stainless steel cinch for PEX; quick and adjustable.
- Push-fit: Tool-free, works with copper, PEX, CPVC.
- Solder: Copper joints; requires flux, heat, and care.
Securing and supporting pipes: straps, hangers, spacing
Properly securing and supporting water lines prevents sagging, movement, and stress at joints, and guarantees code compliance and long-term reliability.
Use appropriate straps and hangers for pipe material, spacing supports per code (shorter spans for soft tubing), and avoid overtightening.
Insulate clips where metal meets plastic to prevent abrasion.
Anchor at changes in direction and near fixtures to minimize vibration and strain.
Routing around joists, beams, and insulation without compressing lines
Plan the route so water lines pass clear of joists, beams, and insulation rather than squeezing through tight spaces; maintain the pipe’s neutral alignment, allow for thermal expansion, and preserve insulation loft to prevent cold spots.
Use hangers or blocking to keep set distances from structural members, route around fasteners and wiring, and provide gentle bends; avoid compression against insulation or framing that can restrict flow or damage piping.
Installing shutoff valves, manifolds, and fixture branches
Begin installing shutoff valves, manifolds, and branch lines once the main runs are secured and tested for leaks.
Mount valves and manifolds on accessible framing, level and fasten securely.
Cut and deburr branch tubing, use correct fittings and joinery, then route branches to fixtures with gentle bends.
Label lines, test each branch under pressure, and correct any leaks before closing access.
Insulating lines and protecting against freezing or abrasion
Seal and shield water lines in the crawl space with insulation and protective measures to prevent freezing and abrasion.
Foam pipe insulation or closed‑cell polyethylene wraps are applied to all exposed hot and cold runs.
Heat tape may be used where freezing risk is highest, following manufacturer instructions.
Secure insulation with tape or zip ties, protect against sharp edges with conduit or padding, and inspect seasonally.
Pressure Testing and Commissioning
Before restoring service, a pressure test verifies the integrity of the new lines using a calibrated gauge, test pump or air compressor, and industry-standard pressures (typically 50–100 psi for household systems) held for a prescribed duration.
The procedure includes a methodical inspection for leaks—watching fittings, joints, and connections—and guidance for common repairs such as tightening, re-soldering, or replacing faulty fittings.
Once the system passes, water service is restored and the lines are purged of air by opening fixtures in a controlled sequence until a steady, air-free flow is achieved.
How to perform a pressure test safely (equipment, psi, duration)
A pressure test verifies the integrity of newly installed water lines by subjecting the system to a controlled, elevated pressure and monitoring for drops.
Required equipment: pressure gauge, pump (manual or compressor), isolation plugs, and a venting valve.
Pressurize to manufacturer or code-specified psi (commonly 50–100 psi), hold for 15–30 minutes, observe gauge, then depressurize slowly and document results.
Checking for leaks and repairing common leak types
Inspect the pressurized system methodically for pressure loss and visible wetness, targeting joints, fittings, valves, and connections between materials.
Isolate sections to locate slow leaks; use soapy water for trapped-air bubbles and tissue for pinholes.
Replace defective fittings, tighten connections, reseat or reapply appropriate sealant or tape, and cut out corroded or cracked pipe sections for repair with compatible couplings and proper support.
Restoring water service and purging air from lines
With leaks addressed and defective sections repaired, water service can be restored and the system prepared for pressure testing and commissioning.
The main valve is opened slowly while fixtures remain closed. A pressure gauge and test cap verify design pressure; observe for drop indicating leaks.
To purge air, open highest and lowest fixtures sequentially until steady water flow appears, then recheck pressure and tighten fittings.
Finishing and Maintenance
After pressure testing and commissioning, attention turns to finishing and ongoing maintenance of the crawl space water lines.
All penetrations should be sealed and openings rodent-proofed. The installed layout clearly marked and documented for future access, and a routine inspection checklist established.
Seasonal tasks—insulation checks, freeze protection, and valve operation tests—should be scheduled and recorded.
Sealing crawl space penetrations and rodent proofing
A thorough seal of all crawl space penetrations prevents moisture intrusion and denies rodents easy access to the home’s interior.
Contractors should seal pipe, conduit, and vent openings with appropriate foam, caulk, or metal flashing.
Install stainless steel mesh around larger gaps and door sweeps at access points.
Maintain regular inspections, replace degraded seals, and eliminate debris or vegetation that attracts pests.
Marking and documenting the water line layout for future access
Clear, accurate marking and documentation of a crawl space water line layout guarantees future repairs, alterations, and inspections proceed quickly and safely.
Diagrams should show pipe routes, valve locations, materials, sizes, elevations and access points.
Use durable labels, color-coded tape and a laminated map stored near the access hatch and with homeowner records.
Update records after any modifications and note dates and responsible installers.
Routine inspection checklist and seasonal maintenance tips
Because crawl spaces are hidden and prone to moisture and pest issues, a concise routine inspection checklist helps confirm water lines remain functional and damage-free.
Inspections focus on leaks, insulation, supports, and drainage; seasonal tasks prevent freeze, corrosion, and infestation. Follow a brief checklist and schedule spring and fall maintenance to catch problems early.
- Check for leaks and damp spots
- Verify pipe insulation integrity
- Confirm secure supports and hangers
- Clear drains and pest entry points
Troubleshooting Common Problems
Troubleshooting common crawl space plumbing issues begins with systematic diagnosis of low pressure and slow flow to isolate supply, valve, or obstruction causes.
Attention then shifts to locating and repairing leaks in concealed or hard-to-reach sections, and evaluating damage from frozen or burst pipes to determine immediate stabilization steps.
Finally, a clear decision framework—weighing extent of corrosion, material compatibility, and long-term reliability—guides whether to patch a section or replace it outright.
Diagnosing low pressure and slow flows
Any persistent drop in faucet pressure or a steady trickle where a strong flow is expected signals the need for systematic diagnosis; start by comparing affected fixtures, noting when low pressure occurs and whether it is hot, cold, or both.
Check supply shutoffs, meter and main valve positions, inspect visible pipes for obstructions or kinked PEX, and test flow at the pressure regulator and incoming municipal supply.
Fixing leaks in hidden or hard-to-reach sections
Locate and isolate the leak before attempting repairs: identify the general area by listening for dripping, feeling for dampness, and checking for stains or mold on crawl-space surfaces.
Then shut off the nearest supply valve and dry the area to confirm the source.
Use flexible access tools, mirror/inspection camera, and temporary clamps or rubber patches.
Replace damaged sections with properly sized fittings and secure supports.
Addressing frozen or burst pipes in crawl spaces
After repairing visible leaks, attention should turn to damage from freezing: crawl-space pipes are vulnerable to ice expansion and sudden bursts when temperatures drop.
Inspect for bulges, frost, or damp insulation.
Thaw frozen lines safely with warm air or heat tape, monitor for hidden leaks, shut off water if a burst is suspected, and document damaged areas for prompt professional repair.
When to patch vs. replace a section of pipe
Deciding whether to patch or replace a section of crawl-space pipe hinges on the extent of damage, pipe material, and the long-term risk of failure: small pinhole leaks or isolated corrosion can often be repaired with clamps, epoxy, or a short splice, whereas widespread corrosion, multiple cracks, significant deformation from freezing, or damage near joints typically warrant full replacement of the affected run.
Assess accessibility, cost, and expected service life.
Cost Estimates and When to Hire a Professional
A concise cost overview helps homeowners compare typical DIY expenses — fittings, PEX or CPVC, insulation, and tools — across small, medium, and whole-house runs.
Clear indicators that the project exceeds DIY scope include complex rerouting, code-required permits, poor access, or potential structural or gas-line conflicts, which should prompt hiring a licensed plumber.
When seeking professional help, homeowners should request written bids, confirm licensing and insurance, ask about warranty and timeline, and compare at least three contractors.
Typical DIY cost breakdown by material and project size
Typical DIY water-line projects for crawl spaces vary widely in cost depending on materials, pipe length, and complexity. A concise material and size breakdown helps budget planning:
| Material | Small (10–30 ft) | Medium (30–80 ft) |
|---|---|---|
| PEX | $40–$120 | $120–$320 |
| CPVC | $60–$180 | $180–$480 |
| Copper | $120–$360 | $360–$960 |
Signs the job exceeds DIY scope and choosing a licensed plumber
Costs above can help homeowners gauge whether a crawl-space water-line project remains a DIY weekend task or will require professional help.
Signs to hire include complex rerouting, gas or electrical proximity, poor access, structural concerns, permit requirements, and unfamiliar code.
Choosing a licensed plumber guarantees insurance, local code knowledge, proper permits, and reliable warranties; verify license, insurance, references, and written estimates before hiring.
Questions to ask and bids to collect from contractors
When should a homeowner start collecting bids and what key questions should be on the checklist? Homeowners should seek bids once scope, permits, and materials are defined.
Ask about licensing, insurance, timeline, warranty, change orders and references. Compare at least three written estimates and contract terms before hiring.
- License and insurance confirmation
- Detailed scope and line-item pricing
- Start/completion dates and contingencies
- Warranty and permit responsibility
Safety, Code, and Warranty Considerations
Before beginning work in a crawl space, the author notes that adherence to local plumbing codes and manufacturer installation instructions is essential to avoid common violations such as improper pipe support, incorrect burial depth, or unapproved materials.
Warranties can be voided by noncompliant installations, so matching product requirements and documenting workmanship are important.
Homeowners should also consider liability and insurance implications of DIY plumbing versus hiring a licensed professional.
Common code violations to avoid
Identify and correct common code violations early to prevent safety hazards, failed inspections, and voided warranties.
Inspect for improper pipe support spacing, inadequate insulation against freezing, incorrect burial depth, improper joint types or soldering, unapproved materials, and missing or inaccessible shutoffs.
Confirm separation from electrical wiring, proper slope for drainage, and compliance with local venting and backflow prevention requirements to avoid costly rework.
Product warranties and manufacturer installation requirements
Because manufacturers tie warranty coverage to specific installation practices, adherence to their written requirements is essential to protect both safety and investment.
Read product manuals, follow approved fittings, supports, sealants, and temperature limits. Use certified installers when required, keep purchase and installation records, and register warranties.
Deviations, undocumented alterations, or nonapproved materials can void coverage and leave homeowners liable for repair costs.
Liability and insurance considerations for homeowner work
Homeowners who undertake crawl-space plumbing should recognize that personal liability and insurance outcomes hinge on compliance with building codes, permit requirements, and manufacturer instructions. Unauthorized or improperly executed work can expose them to denied claims, fines, and responsibility for damages or injuries.
Homeowners should verify policy coverage, notify insurers before major work, obtain permits, document inspections, and consider hiring licensed contractors to mitigate financial and legal risk.
Additional Resources and References
The article lists recommended tools, reputable brands, and parts suppliers for running water lines in a crawl space.
It also points to sources for local codes, permit offices, and inspection requirements.
Suggested further reading and concise video tutorials are provided for step‑by‑step guidance.
Recommended tools, brands, and parts suppliers
Several essential tools and reliable brands make installing water lines in a crawl space safer and more efficient.
Recommended items include PEX tubing, brass fittings, pipe insulation, and corrosion-resistant fasteners. Quality brands: Uponor, SharkBite, Viega, and RectorSeal.
Suppliers include big-box stores, plumbing wholesalers, and online retailers specializing in plumbing parts for professionals and DIYers.
- PEX tubing and fittings
- Crimp/expander tools
- Insulation and vapor barrier
- Corrosion-resistant fasteners
Where to find local codes, permit offices, and inspection info
Where can contractors and DIYers locate accurate local plumbing codes, permit requirements, and inspection procedures?
Consult municipal building department websites, county permit offices, and state plumbing boards for code documents and fee schedules.
Contact local inspectors or plan review divisions for clarification and scheduling.
Many jurisdictions provide downloadable forms, online permit portals, and contact directories; verify code editions and amendment notes before proceeding.
Suggested further reading and video tutorials
If readers seek deeper technical guidance or visual demonstrations, curated books, manufacturer manuals, and step‑by‑step video tutorials offer reliable, practical instruction.
Recommended resources include trade books on plumbing basics, installation guides from PEX and copper manufacturers, local code commentaries, and concise DIY video walkthroughs demonstrating crawl space access, insulation, and leak testing.
- Trade and how‑to books
- Manufacturer installation manuals
- Local code guides
- Step‑by‑step video tutorials
Conclusion
Practical instructions and cautionary notes converge: the DIYer crouches amid joists and foam, confident with plans and valves, while the professional measures twice and charges once. Simplicity—insulation, slope, secure fittings—meets complexity—codes, permits, freeze risks—so modest routes avoid future floods yet demand precise execution. Ultimately, a well-routed crawl-space water line balances thrift and expertise: small decisions now prevent large repairs later, blending hands-on grit with professional prudence.