How to Clean a Wooden Toilet Seat Safely: Step-by-Step Guide and Best Products
To clean a wooden toilet seat safely, use gloves and ensure good ventilation. Opt for pH-neutral cleaners or diluted mild solutions. Daily maintenance involves wiping with a damp microfiber cloth, while a deeper clean with a wood-safe disinfectant should be done monthly. Always dry the seat immediately to protect its finish. Avoid using bleach, abrasive materials, or prolonged soaking. Regularly check hinges and seals, and only polish or refinish when necessary. For homemade cleaning solutions, spot-test first. Detailed step-by-step instructions and product recommendations are provided below.
How to Clean a Wooden Toilet Seat Safely Quick Overview
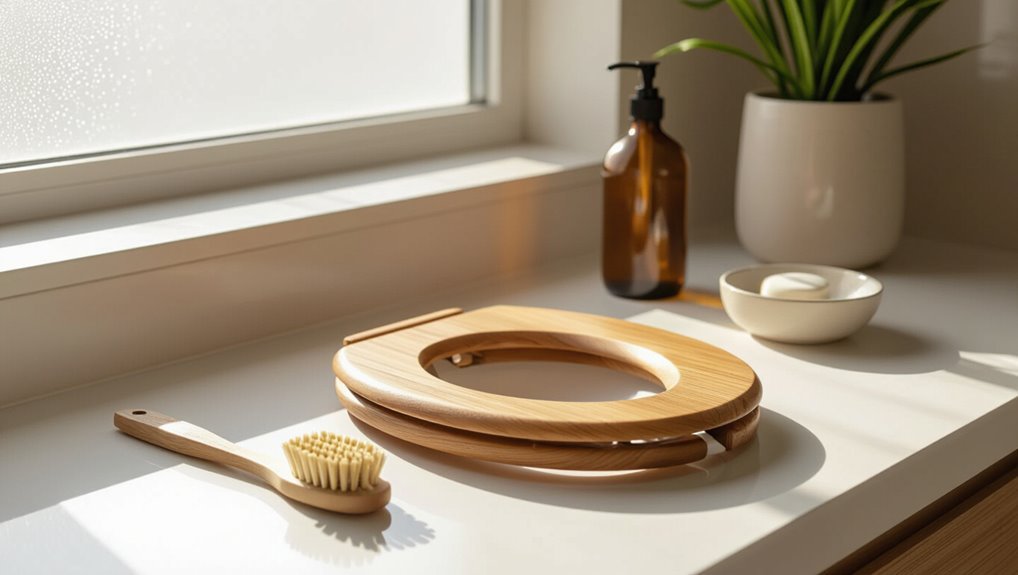
Before starting, assess immediate safety: guarantee proper ventilation, wear gloves if using chemicals, and avoid excess water to protect the wood finish.
Clean the seat regularly—light cleaning once a week and a deeper treatment monthly helps preserve sealants and hygiene.
Follow simple do’s and don’ts: do use mild cleaners and soft cloths, don’t soak the seat or use abrasive pads or bleach.
Immediate safety and care considerations
Exercise caution when preparing to clean a wooden toilet seat: protect skin with gloves, make certain the room is well-ventilated, and remove or cover nearby items that could be damaged by moisture or cleaners.
The guide emphasizes choosing mild, wood-safe cleaners, testing on an inconspicuous area, avoiding soaking, and using soft cloths.
Follow product instructions and ventilate until surfaces dry.
Recommended cleaning frequency
After addressing immediate safety and care, attention turns to how often a wooden toilet seat should be cleaned.
Routine light cleaning is recommended weekly to remove surface grime and bacteria.
Deep cleaning with a gentle, wood-safe disinfectant is advised monthly or after spills, heavy use, or illness in the household.
Frequency may increase in high-traffic homes or when moisture buildup is noticed.
Quick list of do’s and don’ts
A concise set of do’s and don’ts helps protect a wooden toilet seat’s finish and hygiene:
Follow gentle cleaners, soft cloths, and regular mild maintenance; avoid bleach, abrasive pads, and prolonged water exposure.
Recommended quick actions:
- Use pH-neutral cleaner and microfiber; dry immediately.
- Inspect seals and hinges; tighten if loose.
- Never sand or refinish without proper ventilation and product guidance.
Why You Should Use Special Care for Wooden Toilet Seats
Wooden toilet seats are constructed and finished differently from plastic or molded seats, making them more sensitive to moisture and harsh chemicals.
Using inappropriate cleaners or excessive water can cause the wood to warp, the finish to deteriorate, or the color to fade.
Consequently, targeted care and gentle methods are necessary to preserve both function and appearance.
How wood differs from plastic and molded seats
Natural materials age and react differently than plastics, so wooden toilet seats require distinct care to preserve finish and integrity.
Wood is porous, sensitive to moisture and harsh chemicals, and often sealed with varnish or lacquer.
Plastic and molded seats resist water, tolerate stronger cleaners, and flex without cracking.
Cleaning choices should match material: gentler, pH-neutral products for wood versus more robust options for plastics.
Risks of improper cleaning (warping, finish damage, discoloration)
Because wood reacts differently to moisture and chemicals than plastic, improper cleaning can quickly compromise a toilet seat’s structure and appearance.
Excess water causes swelling and warping; harsh solvents strip protective finishes, leaving raw wood vulnerable; abrasive scrubbing creates scratches that trap stains and promote discoloration.
Chemical reactions with sealants can cause blotchy fading.
Proper, gentle care preserves form, finish, and color.
Materials and Products You’ll Need
Recommended supplies include gentle household cleaners and mild solutions that won’t strip or damage wood.
A few commercial products formulated specifically for wood finishes are noted as top picks for protection and shine.
Essential tools and protective gear—nitrile or latex gloves, soft cloths, and soft-bristled brushes—help apply and remove cleaners safely.
Safe household cleaners and solutions
When selecting cleaners for a wooden toilet seat, choose mild, nonabrasive products that remove grime without stripping finish or damaging wood fibers.
Suitable household options include diluted dish soap, white vinegar solution (1:10), or a pH-neutral wood cleaner. Test in an inconspicuous spot first.
Recommended items:
- Mild dish soap and water
- Diluted white vinegar solution
- pH-neutral wood cleaner
Commercial products formulated for wood finishes (top picks)
Several commercial cleaners and finishes are formulated specifically for sealed wood and simplify maintenance of a wooden toilet seat by cleaning, conditioning, or restoring protective coatings without harming finishes.
Recommended categories address gentle cleaning, wood conditioning, and light restorative sealing.
- pH-balanced wood cleaner for sealed surfaces
- Beeswax or oil-based conditioning polish
- Water-based clear touch-up or maintenance varnish
Tools and protective gear (gloves, soft cloths, brushes)
After selecting appropriate cleaners and finish products for a sealed wood seat, gather the right tools and protective gear to apply them safely and effectively.
Use nitrile gloves to protect skin, lint-free soft cloths for gentle wiping, and a soft-bristle brush for crevices.
Work in a ventilated area and keep paper towels handy for spills.
- Nitrile gloves
- Lint-free cloths
- Soft-bristle brush
Preparation Before Cleaning
Before cleaning, the seat should be inspected to identify the finish type and any cracks or worn areas that could affect cleaning methods.
If removal is necessary, the steps for safely unfastening and lifting the seat should be followed to avoid damage.
Finally, ventilation should be guaranteed and basic personal protective equipment checked to protect the cleaner and the wood.
Inspecting the seat for finish type and damage
A brief inspection determines the seat’s finish and any damage, which guides safe cleaning choices.
The observer notes whether the seat is varnished, lacquered, painted, or raw wood. Surface scratches, chips, peeling, or soft spots indicate compromised protection.
Identifying these conditions informs detergent strength, water exposure limits, and whether refinishing or professional repair should precede cleaning to avoid worsening damage.
Removing the seat safely (when and how) step-by-step
Begin by shutting off water to the toilet and clearing the area so the person can work without obstacles or accidental splashes.
Next, lift seat lids and locate hinge caps; pry or unscrew gently. Support the seat while removing fasteners to prevent dropping.
Place hardware in a labeled container. Inspect mounting points for corrosion or damage before proceeding to cleaning or replacement.
Ventilation and personal protection checks
While guaranteeing adequate airflow, confirm that windows are open and an exhaust fan is running or portable ventilation is in place to disperse fumes from cleaners; this reduces inhalation risk and speeds drying.
Inspect and don PPE: gloves, eye protection, and a mask rated for chemical aerosols if using strong cleaners.
Ascertain skin is covered and remove jewelry to prevent contact and contamination.
Step-by-Step Cleaning Procedure
The following steps outline practical care for a wooden toilet seat, from routine maintenance to deeper treatment.
It covers a gentle daily wipe-down, a step-by-step deep-clean for stains and buildup, and safe disinfecting options with recommended concentrations that will not harm the wood.
Instructions for thorough drying and correct reattachment finish the procedure to preserve fit and finish.
Gentle daily wipe-down method
A quick daily wipe-down preserves the finish and prevents buildup without harsh chemicals.
Using a soft microfiber cloth slightly dampened with mild soapy water, the user gently wipes seat, lid, hinges, and underside.
Follow with a dry cloth to remove moisture. Address spills immediately.
Avoid abrasive pads, bleach, or soaking; regular light maintenance maintains appearance and extends the seat’s lifespan.
Deep clean for stains and buildup step-by-step
Begin by preparing the work area and gathering supplies: a soft microfiber cloth, mild dish soap, white vinegar, baking soda, a soft-bristled toothbrush, two bowls of warm water, and dry lint-free towels.
Mix soap with water; gently scrub stains. For stubborn buildup, make a paste of baking soda and water, apply, let sit 10 minutes, scrub lightly with toothbrush, rinse with vinegar solution, then dry thoroughly.
Disinfecting without damaging the wood safe options and concentrations
Choose disinfectants that are effective against common bathroom pathogens yet gentle on finished wood: diluted isopropyl alcohol (70% solution diluted to 50% with water), a 0.1% sodium hypochlorite solution (approximately 1 part household bleach at 5–6% to 49 parts water) used only for short contact and immediate rinsing, or a 0.5% hydrogen peroxide solution, applied sparingly;
test any product on an inconspicuous area first, apply with a soft cloth rather than spraying, limit contact time to under one minute for bleach and alcohol blends, and always finish by wiping with a damp cloth and drying thoroughly to prevent finish damage.
Drying and reattaching the seat properly
Allow the cleaned seat and hinges to air-dry completely on a lint-free towel, ensuring no moisture remains in hinge cavities or beneath rubber bumpers before reattachment.
Inspect for remaining debris, align hinges with mounting bolts, and lower the seat gently to seat rubber bumpers.
Tighten fasteners evenly to prevent warping, avoid overtightening, and confirm smooth, stable operation before regular use.
Dealing with Common Problems
Common problems that arise with wooden toilet seats include stubborn stains and mineral deposits, water damage with swelling or warping, and surface issues such as scratches, worn finish, and discoloration.
Each issue requires specific tools and techniques to restore appearance and function without harming the wood. The following guidance outlines safe, practical remedies and preventive measures.
Removing stubborn stains and mineral deposits
Tackle stubborn stains and mineral buildup with targeted, nonabrasive methods that protect the wood finish while loosening deposits.
Apply a paste of baking soda and water or a diluted white vinegar solution sparingly, let sit briefly, then gently rub with a soft cloth or nylon brush.
Rinse, dry thoroughly, and repeat if needed.
Avoid harsh abrasives or prolonged moisture exposure.
Treating water damage, swelling, or warping
If stains and mineral buildup persist despite careful cleaning, water damage such as swelling or warping may be present and requires a different approach.
Assess extent: minor swelling can sometimes be reduced by controlled drying and moisture barriers; severe warping or delamination necessitates replacement.
Prevent recurrence by improving ventilation, fixing leaks, and applying a suitable waterproof sealant once the seat is fully dry and stable.
Repairing scratches, worn finish, and discoloration
Address scratches, worn finish, and discoloration methodically by first evaluating their depth and extent to determine whether refinishing, spot repair, or replacement is appropriate.
Light surface scratches polish with fine abrasive pads and restore finish using matching stain or lacquer.
Deeper gouges require wood filler, sanding, and refinishing.
For widespread staining or finish failure, strip and refinish or replace the seat for long-term durability.
Product Comparison and Recommendations
A brief comparison of cleaning options highlights when a mild soap solution suffices and when a specialized wood cleaner is preferable to protect finish and grain.
The safest disinfectants for wood finishes are identified, focusing on those that disinfect without stripping varnish or causing discoloration.
Recommended brushes and cloths are matched to finish types to guarantee effective cleaning without abrasion.
Mild soap solutions vs. specialized wood cleaners
Compare mild soap solutions and specialized wood cleaners by focusing on effectiveness, safety for finishes, and ease of use. Mild soap gently removes dirt, is safe for most finishes, and is inexpensive; specialized cleaners target stains, restore sheen, and may include conditioning agents but cost more. Choose based on soil level and finish sensitivity.
| Cleaner Type | Strength | Finish Safety |
|---|---|---|
| Mild soap | Low | High |
| Specialized | Medium–High | Medium–High |
Best disinfectants safe for wood finishes
When selecting disinfectants for wooden toilet seats, effectiveness against pathogens must be balanced with ingredients that won’t strip finishes or dry the wood.
Preferred options include alcohol-based sprays (70% isopropyl), benzalkonium chloride wipes formulated for wood, and diluted hydrogen peroxide solutions. Test discreetly, apply briefly, then dry.
Avoid bleach, abrasive gels, and oil-solvent cleaners that compromise varnish.
- Alcohol-based (70%)
- Benzalkonium wipes
- Diluted H2O2
Recommended brushes and cloths for different finishes
Because cleaning tools interact differently with varnished, oiled, or raw wood, choosing the right brush or cloth guarantees effective cleaning without damaging the finish.
For varnished seats, use soft microfiber; for oiled surfaces, use lint-free cotton cloths and soft-bristle brushes; for raw wood, use gentle natural-bristle brushes and quick-drying cotton.
Avoid abrasive pads and stiff bristles.
- Varnished: soft microfiber
- Oiled: lint-free cotton + soft brush
- Raw: natural-bristle brush + cotton
Maintenance and Long-Term Care
A clear maintenance routine helps prolong a wooden toilet seat’s finish and function, so a simple schedule and checklist for cleaning, inspection, and tightening fastenings is recommended.
When finish wear or water damage appears, instructions for sanding, re-sealing or refinishing should be followed to restore protection.
If structural cracks, persistent warping, or recurring seal failure occur, replacement rather than repair is typically the safer long-term choice.
Regular maintenance schedule and checklist
Establishing a simple, consistent maintenance schedule prevents grime buildup and extends the life of a wooden toilet seat.
A concise checklist balances daily, weekly, and monthly tasks to maintain finish and hygiene without overworking the wood.
- Daily: quick wipe with a damp, mild cleaner; dry immediately.
- Weekly: inspect hinges, tighten screws, clean crevices.
- Monthly: apply recommended wood-safe polish and check for wear.
How to re-seal or refinish a wooden toilet seat
Refinish or re-seal a wooden toilet seat when the finish shows wear, water absorption, or persistent stains to restore protection and appearance.
Lightly sand to remove finish and smooth damage, clean dust, then apply a suitable water-resistant sealant or varnish in thin, even coats.
Allow proper drying between coats, lightly sand between layers if recommended, and cure fully before regular use.
When to replace the seat instead of repairing
When is repair no longer worthwhile?
The seat shows deep cracks, structural weakness, persistent warping, or exposed core that compromises safety or hygiene.
Repeated refinishing fails to restore appearance or sealant bonds.
Hardware corrosion or alignment issues that recur after adjustment signal replacement.
For frequent use or long-term moisture exposure, replacement guarantees durability, sanitation, and often better value than ongoing repairs.
Common Mistakes to Avoid
Many homeowners mistakenly reach for harsh chemicals or abrasive tools that can strip finishes and scratch the wood.
Excessive moisture and improper drying can warp or delaminate the seat.
Bleach or ammonia-based cleaners pose chemical risks to the finish and should be avoided.
Harsh chemicals and abrasive tools to avoid
Avoid using harsh chemicals or abrasive tools on a wooden toilet seat, as they can strip finishes, dull the wood, and cause cracks or swelling.
Strong bleaches, ammonia, oven cleaners, steel wool, and scouring pads are best avoided.
Instead, recommend mild soap, diluted vinegar solutions, and soft microfiber cloths.
Test any cleaner on an inconspicuous spot first.
Over-saturating the wood and improper drying
Excessive moisture is a leading cause of damage to wooden toilet seats: soaking the surface or leaving water to sit can lift the finish, swell joints, and promote mold or warping.
Users should apply cleaners sparingly with a damp cloth, wipe dry immediately, and allow thorough air drying.
Avoid prolonged exposure to humidity and don’t store in damp areas to preserve integrity.
Using bleach or ammonia-based cleaners risks explained
Just as prolonged moisture damages wood, harsh chemical cleaners can cause equally irreversible harm.
Bleach and ammonia strip finishes, dull varnish, and can swell or crack wood fibers. Fumes may degrade adhesives and harm surrounding seals.
For safety and longevity, avoid concentrated oxidizers and alkalis; instead choose pH-neutral, wood-safe cleaners and test any product on an inconspicuous area first.
Eco-Friendly and DIY Cleaning Alternatives
The section considers eco-friendly options that use natural disinfectants and stain removers safe for finished wood.
It outlines simple homemade recipes and exact ratios to clean without harming the sealant.
Practical precautions for application and rinsing are included to protect the seat’s finish.
Natural disinfectants and stain removers
Explore several effective, eco-friendly options that sanitize and lift stains from wooden toilet seats without harsh chemicals.
Natural disinfectants and stain removers rely on mild acidity, enzymatic action, and essential oils to break down soils while preserving finishes. Use tested applications sparingly and always spot-test.
- White vinegar (diluted)
- Hydrogen peroxide (low concentration)
- Tea tree or lavender oil (antimicrobial)
Homemade wood-safe cleaning recipes and ratios
Several simple, low-toxicity recipes can clean and deodorize wooden toilet seats while protecting finish and grain; each combines a mild solvent or surfactant with a disinfecting or conditioning agent at specific, easy-to-measure ratios and includes instructions for spot-testing and safe application.
- Vinegar spray: 1 part white vinegar, 3 parts water; spot-test, wipe, dry.
- Castile soap: 1 tsp soap per cup water; gentle wipe, rinse, dry.
- Oil polish: 1 tbsp mineral oil + few drops lemon; buff lightly.
Safety, Disposal, and Regulatory Notes
Guidance on safe disposal, chemical precautions, and label checks helps prevent injuries and environmental harm.
Readers are advised to treat used rags and diluted solutions as potentially hazardous waste, follow local disposal rules, and avoid mixing incompatible chemicals.
Clear first-aid steps and simple tips for verifying “wood-safe” claims on product labels should be reviewed before use.
Safe disposal of cleaning rags and used solutions
Dispose of soiled rags and leftover cleaning solutions promptly and according to local regulations to minimize chemical exposure and environmental harm.
Saturated textiles should be contained in sealed, labeled bags and disposed as household hazardous waste if required.
Small amounts of diluted, nonhazardous solutions may be rinsed down drains where permitted.
Consult municipal guidelines for specific disposal locations and accepted materials.
Chemical safety warnings and first aid tips
When using cleaners on a wooden toilet seat, keep all chemicals away from skin, eyes, and open wounds and avoid mixing products (notably bleach with ammonia or acidic cleaners) to prevent toxic gas formation; if accidental contact or inhalation occurs, follow first aid steps immediately and seek medical attention for severe symptoms.
Store chemicals locked, ventilate work areas, use PPE, rinse exposed skin with water, and contact poison control for guidance.
Product labeling tips to verify wood-safe claims
After outlining chemical precautions and first-aid responses, attention shifts to how product labels indicate compatibility with finished wood surfaces.
Labels should be scanned for explicit “safe for wood” claims, solvent type, and drying/residue details; certifications and VOC info support safe use.
Patch-testing instructions and disposal guidance confirm manufacturer responsibility.
- Verify explicit wood-safe claim.
- Check solvent/VOC details.
- Follow patch-test/disposal instructions.
Conclusion
After dutifully treating the wooden throne like fine furniture, one might marvel that a toilet seat required etiquette at all. Yet stains fade, grains glow, and hinges resume their respectful duty—proof that gentle care outperforms brute force. With proper supplies, steady hands, and occasional varnish, the humble seat endures. Ironically, spending ten minutes now saves future indignity, as if conscientious polishing could persuade wood to forget every human confession.